
Moebius 1/4105 Battlestar Galactica (2013)
-
Bill Plunk
- Posts: 1245
- Joined: Wed Sep 28, 2022 10:18 pm
Moebius 1/4105 Battlestar Galactica (2013)
As a little Christmas diversion, I used the holidays to build Moebius kit #915 1:4105 scale Battlestar Galactica. This build ended up as a Christmas Gift to a very good friend of mine who's a total BSG nut/fan. 
-
Bill Plunk
- Posts: 1245
- Joined: Wed Sep 28, 2022 10:18 pm
WIP 12-21-2013
This particular kit isn't all that complicated, roughly 60 or so parts in total. It's got some great molded-on detail on the hull and such but the fit isn't always that great and there's flash and trimming needed to get various things to play nice. I started with the main hull halves and their inserts that create the recessed bays that the flight pods retract into. Had to do a lot of dry-fit, trim, dry-fit, trim, etc. until they would line up properly and even with finger pressure and lots of liquid glue, some putty work was necessary to fill gaps that would be visible since the model only allows for the flight pods to be shown in the extended pose.

Once both of the bays were taken care of, the main hull halves were joined with the help of several rubber bands and more liquid glue.

While the hull was setting up, I assembled the four engine pods. These had a better fit vs. the hull with just some light sanding required at their join seams.

Rubber bands came off the hull and more putty and sanding work done on the lower hull join for the recessed bays.

Then the engine pods were installed into the hull. The large clear insert for the hull backs and the clear parts and engine pod exhaust shrouds were left off for now. The clear parts will get tinted blue and installed later after the hull has been painted.

The bow of the ship is a multi-part affair that assembles in layers but had no major issues along the way.

Rounding out the day's efforts, the bow was attached to the hull and the various gun batteries added topside and underside where appropriate.

As a frame of reference, the ship's length right now is about 13" so it's a good sized model to work with. Next up will be working on the flight pods as they have very large decals that go on their insides which means they have to be painted first and the decals added before they can be built. Stay tuned tomorrow for Day 2!
Once both of the bays were taken care of, the main hull halves were joined with the help of several rubber bands and more liquid glue.
While the hull was setting up, I assembled the four engine pods. These had a better fit vs. the hull with just some light sanding required at their join seams.
Rubber bands came off the hull and more putty and sanding work done on the lower hull join for the recessed bays.
Then the engine pods were installed into the hull. The large clear insert for the hull backs and the clear parts and engine pod exhaust shrouds were left off for now. The clear parts will get tinted blue and installed later after the hull has been painted.
The bow of the ship is a multi-part affair that assembles in layers but had no major issues along the way.
Rounding out the day's efforts, the bow was attached to the hull and the various gun batteries added topside and underside where appropriate.
As a frame of reference, the ship's length right now is about 13" so it's a good sized model to work with. Next up will be working on the flight pods as they have very large decals that go on their insides which means they have to be painted first and the decals added before they can be built. Stay tuned tomorrow for Day 2!
-
Bill Plunk
- Posts: 1245
- Joined: Wed Sep 28, 2022 10:18 pm
WIP 12-22-2013
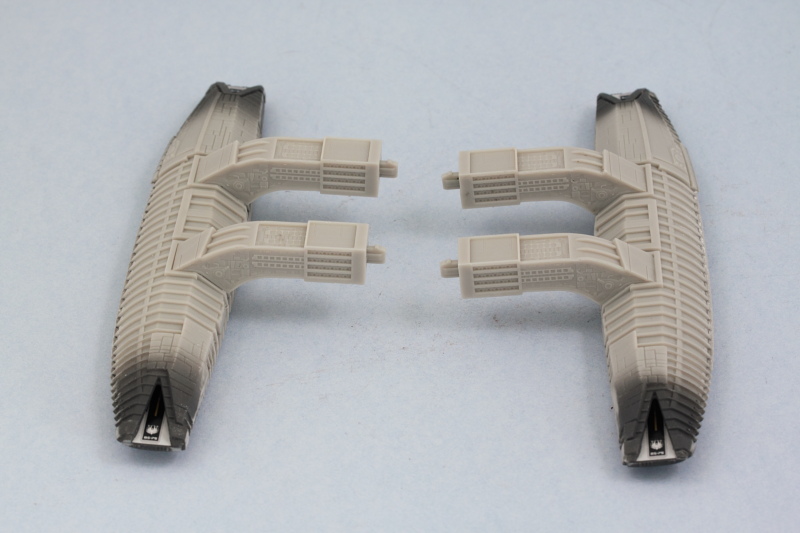
Day 2's progress to report, we have flight pods! The pods are fairly straightforward, there are inserts for the lower half that create the 'flight deck' and then the two pod halves go together.

Before you can do that though, you have to paint the insides of the pods. That was taken care of with MM enamel Gunship Gray. The kit-supplied flight deck decals were added to both pods. The decals are one long strip each and try as I might, I couldn't keep them intact with both splitting apart roughly in the middle during handling. It's not a big deal as 95% of the decals are hidden away once the pod halves are assembled.

Speaking of which, that's what came next...followed by lots of careful sanding along their join seam on both sides to get the ribs to have a seamless look. Then the pod support arms were installed.
Rounding out the day's activities, I detailed the engine exhausts for the pods as well as the two main engines in the hull. The kit provides clear parts for these areas which would look awesome if lit from within using LEDs, but that's not in the cards for me on this quick little project...but I did tint them with Tamiya Clear Blue thinned with Windex to get their 'engines on' look.

Next up will be starting in the major paintwork on the hull, so lots of time at the spray booth coming up!
Before you can do that though, you have to paint the insides of the pods. That was taken care of with MM enamel Gunship Gray. The kit-supplied flight deck decals were added to both pods. The decals are one long strip each and try as I might, I couldn't keep them intact with both splitting apart roughly in the middle during handling. It's not a big deal as 95% of the decals are hidden away once the pod halves are assembled.
Speaking of which, that's what came next...followed by lots of careful sanding along their join seam on both sides to get the ribs to have a seamless look. Then the pod support arms were installed.
Rounding out the day's activities, I detailed the engine exhausts for the pods as well as the two main engines in the hull. The kit provides clear parts for these areas which would look awesome if lit from within using LEDs, but that's not in the cards for me on this quick little project...but I did tint them with Tamiya Clear Blue thinned with Windex to get their 'engines on' look.
Next up will be starting in the major paintwork on the hull, so lots of time at the spray booth coming up!
-
Bill Plunk
- Posts: 1245
- Joined: Wed Sep 28, 2022 10:18 pm
WIP 12-23-2013
Today's efforts could best be described as 'fun with the airbrush'! Spent all day in the paint booth with just short breaks here and there. First up was an overall coat of MM enamel Gunship Gray. This is the 'gray' that Moebius recommends be used vs. the 'steel' option/scheme since it's not real clear just what colors, if any, Galactica was actually painted in. In my mind's eye and the way I see the images, it's different shades of gray, so that's what I'm going with. Blue tack putty was stuffed into the landing pod openings to mask them off for the time being. The gray was laid down with the gray tip 0.40mm nozzle on my Aztek.

Then the real fun began, laying in the lighter gray on the panels. This was done free hand using the tan tip 0.30mm nozzle on the Aztek in combination with the double-action settings. I used IJN Sky Gray because it's what I had on hand and was a close match to the lighter gray that Moebius recommended in the finishing guide. The Gunship gray served as an excellent 'pre-shade' as well as a primer so that made priming unnecessary in this case.
First the topside:

Then the underside:

Same thing for the flight pods.


Once that has a chance to dry overnight, I'll go back and do some touch-up to the slight over-spray in spots and also lay in the red striping where needed. Need to be sure the paint can tolerate masking before I do that though.
Day 3's in the books, on to Day 4!
Then the real fun began, laying in the lighter gray on the panels. This was done free hand using the tan tip 0.30mm nozzle on the Aztek in combination with the double-action settings. I used IJN Sky Gray because it's what I had on hand and was a close match to the lighter gray that Moebius recommended in the finishing guide. The Gunship gray served as an excellent 'pre-shade' as well as a primer so that made priming unnecessary in this case.
First the topside:
Then the underside:
Same thing for the flight pods.
Once that has a chance to dry overnight, I'll go back and do some touch-up to the slight over-spray in spots and also lay in the red striping where needed. Need to be sure the paint can tolerate masking before I do that though.
Day 3's in the books, on to Day 4!
-
Bill Plunk
- Posts: 1245
- Joined: Wed Sep 28, 2022 10:18 pm
WIP 12-24-2013
Made more progress on Galactica today.First up was mixing a 50/50 combination of the Gunship Gray and the IJN Sky Gray to create a middle tone between the two so I could highlight and blend the hull together. Again working with the 0.30mm tip, this time I went over the 'ribs' of the hull and all the raised detail and gave it some highlights and variations to the underlying darker gray.

Then after some fun with the masking tape, I used Insignia Red for the stripe markings on the main hull top and bottom.


The flight pods got their turn as well. When I removed the blue tack, all was good until the very last piece (isn't it always the LAST one!) that decided it had formed a really good bond with part of the flight deck decals and didn't want to let it go...so I had to paint over the matching part on the other pod so they would look the same.

Then after some fun with the masking tape, I used Insignia Red for the stripe markings on the main hull top and bottom.
The flight pods got their turn as well. When I removed the blue tack, all was good until the very last piece (isn't it always the LAST one!) that decided it had formed a really good bond with part of the flight deck decals and didn't want to let it go...so I had to paint over the matching part on the other pod so they would look the same.
-
Bill Plunk
- Posts: 1245
- Joined: Wed Sep 28, 2022 10:18 pm
WIP 12-25-2013
Merry Fracking Christmas everyone! Galactica got her engine exhausts mounted, Future coat applied, and decal markings added. The Moebius decals required a lot of patience for the Solvaset to do its job...it worked on them but verrrrry slowly. Still, end result produced the desired effect. Tomorrow will see the weathering process begin. For the engines, I applied some Testors enamel Silver (the stuff in the little square bottles) to the backside of the Clear Blue areas and that seemed to provide enough reflectivity back along with the Blue to create a good effect for those areas.


-
Bill Plunk
- Posts: 1245
- Joined: Wed Sep 28, 2022 10:18 pm
WIP 12-26-2013
Not a lot to show picture-wise but definitely required a full day's effort to complete. The 'fresh out of dock' look didn't last long as I applied a wash of MM Panzer Schwarzgrau to the light areas and a wash of MM enamel Gunmetal to the dark areas. There's a ton of raised detail on this so that took several hours to complete working on both the topside and underside.

-
Bill Plunk
- Posts: 1245
- Joined: Wed Sep 28, 2022 10:18 pm
Completion 12-27-2013
BSG crossed the finish line with an hour to spare before I had to deliver her as a gift...and I didn't even have to do a combat landing or retract the pods in the process!  Anyhoo, on to the final update. Rather than spend time masking and airbrushing different grays, I opted instead to use the wash approach and added more gray here and there, took it away there, etc. until I had a nice 'mosaic' look to the lighter surfaces. Since the underlying work was sealed with Future, I had ultimate flexibility to play around with this until I had it looking the way I wanted.

Everything got a sealing coat of Testors Lusterless Flat (I masked off the engine ports with Bluetack first) and then the flight pods were installed into position.


That left only one thing left to work on...the base! Moebius provides a turned aluminum rod and a one-piece styrene base to support Galactica. I applied a base coat of MM non-buffing Metalizer Brass, sealed that up with Future (this all was done a couple days ago so the Future could cure and was just waiting until now for completion), then applied Flat Black as a wash for the lettering and filled in the Colonial Fleet crest. Since the Brass was sealed with Future, that made clean-up easy with a pointed brush and clean thinner to get the Flat Black into all the recesses and wipe away any excess. Then more Future applied by airbrush to give it a glossy look.

Then Galactica got a trial run in the base before I disassembled her to go into a gift box and off to my buddy for his Surprise!


This is only the 2nd time I've ever built a Sci-Fi themed model, the first being a 1/72 TIE Fighter several years back. Thoroughly enjoyed it as well as the look on my friend's face when he realized I wasn't just showing him the finished build, it was his to keep! Merry Christmas everyone!
Everything got a sealing coat of Testors Lusterless Flat (I masked off the engine ports with Bluetack first) and then the flight pods were installed into position.
That left only one thing left to work on...the base! Moebius provides a turned aluminum rod and a one-piece styrene base to support Galactica. I applied a base coat of MM non-buffing Metalizer Brass, sealed that up with Future (this all was done a couple days ago so the Future could cure and was just waiting until now for completion), then applied Flat Black as a wash for the lettering and filled in the Colonial Fleet crest. Since the Brass was sealed with Future, that made clean-up easy with a pointed brush and clean thinner to get the Flat Black into all the recesses and wipe away any excess. Then more Future applied by airbrush to give it a glossy look.
Then Galactica got a trial run in the base before I disassembled her to go into a gift box and off to my buddy for his Surprise!
This is only the 2nd time I've ever built a Sci-Fi themed model, the first being a 1/72 TIE Fighter several years back. Thoroughly enjoyed it as well as the look on my friend's face when he realized I wasn't just showing him the finished build, it was his to keep!