Trumpeter 1/350 HMS Dreadnought 1907 (2014)

Bill Plunk
Posts: 1245
Joined: Wed Sep 28, 2022 10:18 pm

WIP 09-14-2014

Post by Bill Plunk »

Between needing to do some yard work and Sunday football, not a lot of bench-time was available but still managed to get in a little more progress. One of the remaining details involved the stand's plaque and the 4 screw propellers. The props are handed, so I was careful in keeping them separate and marked their little toothpick painting handles accordingly. Some Model Master Non-Buffing Metalizer Brass sprayed through the airbrush did the trick.

Image

Some Model Master Non-Buffing Metalizer Steel was applied by hand to the prop shafts and then the props themselves installed in place. Better to do it now vs. after the railings are in as it's one of those hard to handle spaces unless your a contortionist.

Image

Image

The plaque was added to the stand as well. I used a metal ruler to work out the spacing for it so it would sit evenly as Trumpeter doesn't provide any guide for that and the plaque is smaller than the molded in recess that's on the stand proper. The plaque will get some further attention to age/weather it a bit and give it a more 'brassy' feel as well.

Image

If all goes to plan, tomorrow should see the railings added.
Bill Plunk
Posts: 1245
Joined: Wed Sep 28, 2022 10:18 pm

WIP 09-15-2014

Post by Bill Plunk »

Today's efforts were all about the railings. Started with the super-deck first. The Eduard railings fit beautifully with one small exception, the short section of railing that attaches to the back portion doesn't take into account the two raised hatches that sit in that area. So that meant some trimming and adjustments to that section to get it represented properly. The fore sections of railing for the main deck were also added at this stage. Leaving off the wing turrets also paid off in terms of providing some room to maneuver so I'm glad I resisted the temptation to install them earlier.

Image

Image

It was at this stage that I decided to give the Trumpeter PE torpedo net retainer arms a try as I wasn't too sure how that was going to play out. There's no room for error, 21 are called for per side and that's exactly how many are provided. They are tiny, with only a very small mount point, so I knew they were going to be a challenge. After losing three in a row to the carpet monster, I decided to leave the rest of them on the fret and surrendered to the inevitable.

Image

Despite that minor capitulation, the rest of the day's efforts proceeded without incident and involved the rest of the railings for the aft areas. Eduard provides these as two long sections of railing per side and it's best to install the stern rails first and work your way forward vs. the other way around. The Eduard railings also don't take into account if you're using their detail set to replace things, so I had to trim a section off the starboard side rail so it would meet up properly with the flag pole access stand.

Image

Image

Now all that is left is waiting for the lifeboat cutters to arrive so I can finish that off and then add the last few remaining details like the gang ways to round things out.
Bill Plunk
Posts: 1245
Joined: Wed Sep 28, 2022 10:18 pm

WIP 09-15-2014 Cutters

Post by Bill Plunk »

I just got back from checking my mail and the extra 32 ft. lifeboat cutters that I needed had arrived. Steve at Celtic Werks did an awesome job. The original kit part is on the left and the resin casts are on the right.

Image

Image

Will be working on these so I can install them tomorrow to finish off that little piece of the puzzle!

Since the omission of the 2 cutters for the davits is common to both the 1907 and 1915 versions of the Trumpeter kit, Steve let me know that he made additional molds in the event that anyone else needing additional cutters was interested in them. Just drop him a note at info@celticwerks.net and he'll be able to turn some out for you.
Bill Plunk
Posts: 1245
Joined: Wed Sep 28, 2022 10:18 pm

WIP 09-16-2014

Post by Bill Plunk »

Today's efforts focused on getting the remaining boats finished and installed. First up, each of the cutters needed rudders, so I scratch-built some using sheet styrene and one of the left over rudders on the PE fret as a sketch stencil.

Image

Then it was time to paint them. Same drill as with the other boats, hull gray color by airbrush, then hand detailing for their interiors and trim. The middle deck cutter got the 4th whaleboat added for its 'short stack' configuration.

Image

Then the real fun began in installing the two for the davits. Originally I was going to try to replicate the canvas holding straps that help hold the boat in place but trying to accomplish that proved problematic due to the fragility of the davit parts. I ended up using lengths of EZ line to suspend them from the davit pulleys along with some strategic CA glue applied to the sterns to keep them from swaying in the breeze.

Image

Image

With all the boats in place, the wing turrets were permanently installed as well to round things out for the day.

Image

Image

Just a couple of small details left to do before I seal it up with some Future and add some weathering to the main hull.
Bill Plunk
Posts: 1245
Joined: Wed Sep 28, 2022 10:18 pm

WIP 09-17-2014

Post by Bill Plunk »

Took care of the last remaining details today to wrap up the construction phase. Trumpeter provides the leadman's platforms on either side of the hulls as simple 'planks' of PE, so I added to their detail level by cutting down some left over railings from the Eduard sets and adding them to the 'plank'. This also meant carefully cutting some gaps in the railings I installed yesterday, that was done using some fine pointed Tamiya sprue cutters. It's a small detail but one that I could address and enhance with the materials available. I also decided to leave the gangways off as those are only appropriate in a 'docked' scenario and I prefer to show Dreadnought as if she were at sea and ready for action.

Image

A small start to the weathering involved applying some black artist pastel to the tripod mast where coal soot from the fore funnel would accumulate. It was one of the notorious features of this design that stack gasses often caused problems with the unfortunate gunnery officer stationed in the fire direction platform depending on which way the wind was blowing. Definitely wouldn't envy him for sure!

Image

Also applied the Future coat and am letting that set overnight so it can be nice and cured before starting in on the hull weathering.
Bill Plunk
Posts: 1245
Joined: Wed Sep 28, 2022 10:18 pm

WIP 09-18-2014

Post by Bill Plunk »

Continued on with the weathering process in a big way today so lots of pics in this update! First up I applied an overall wash of roughly 90/10 paint/thinner using Model Master Panzer Schwarzgrau as it's a nice dark gray but not too overpowering. The wash was added to the boot stripe and light gray areas only. This allowed it to do double duty as both a filter and a wash to tie those two colors together.
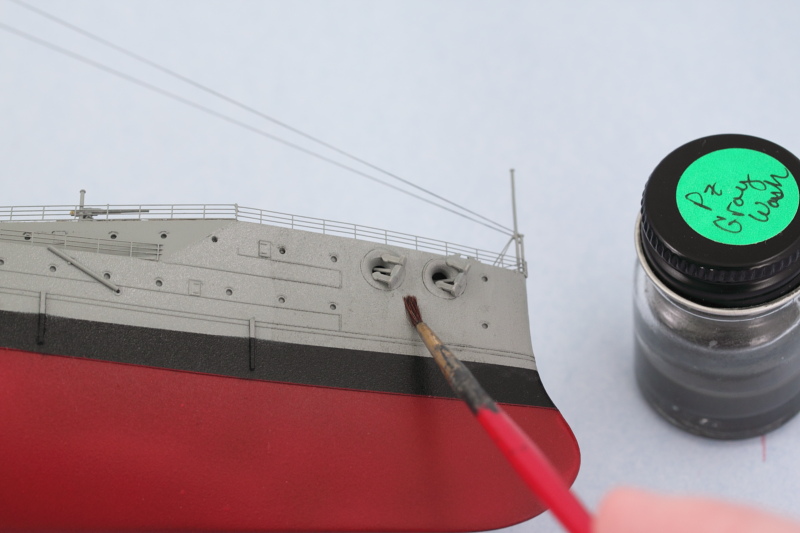
Image

Then using some clean thinner and various brushes, I adjusted the wash and used it to get the raised detail on the hull and various places to 'pop' a bit more. In some key areas, more of the Panzer Gray was added as a pin wash with a 10/0 pointed brush as needed to produce the desired result.
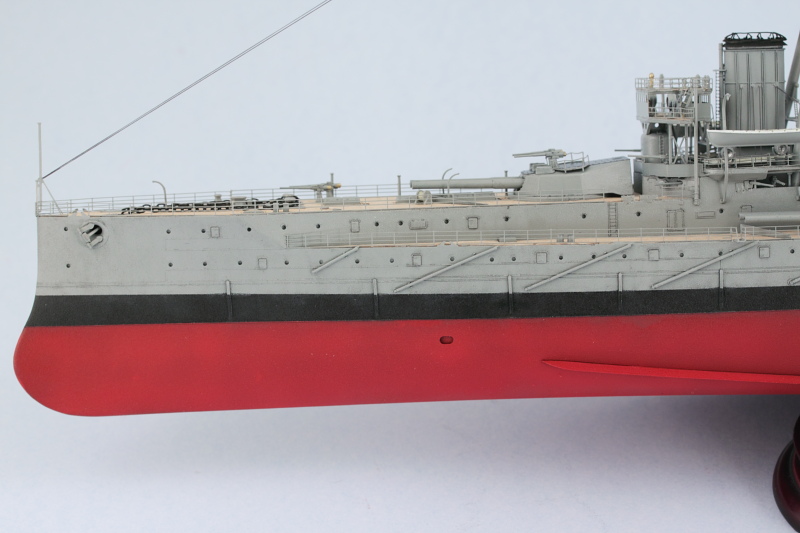
Image

For the hull red areas, I applied a 90/10 paint/thinner wash of MM enamel Burnt Umber.
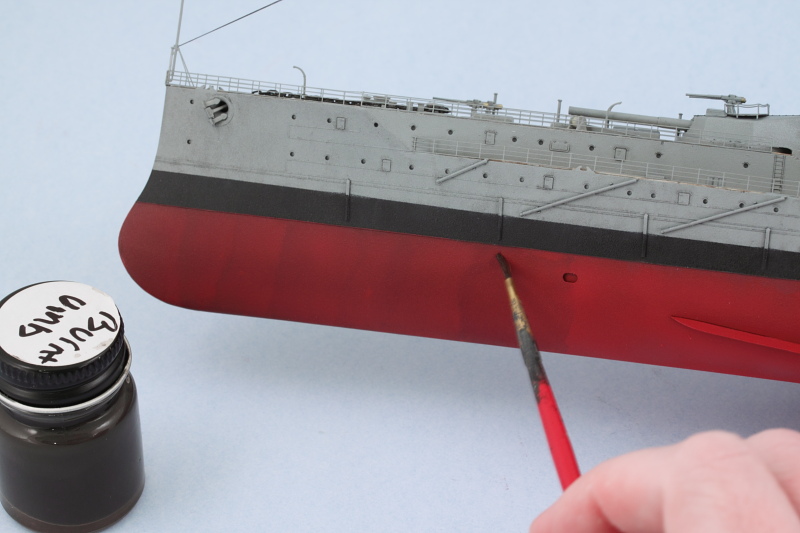
Image

Because the lower hull has complex curves as well as such a large area, I used the wash as a start point and then made additional adjustments/removal using a square tip blender brush lightly dampened with thinner. This approach allows for some nice streaking effects as well as removing the 'tide' marks that are inevitable when applying a wash over such a large area.
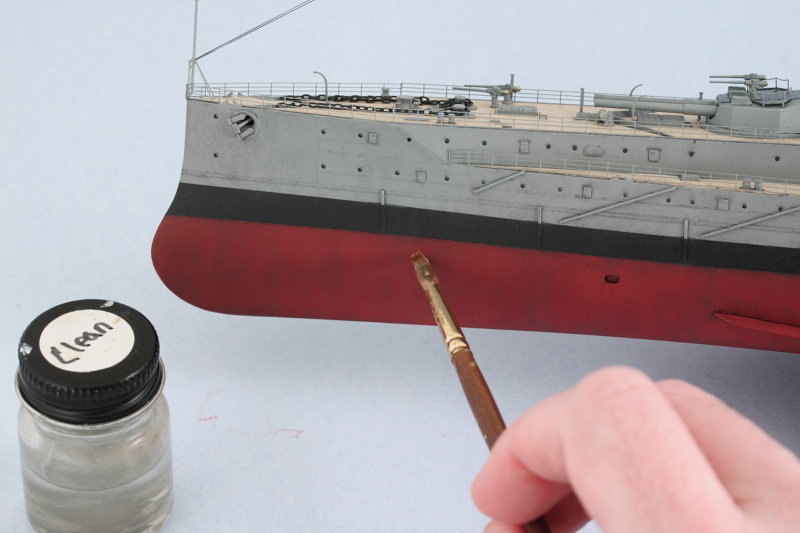
Image

It's a little tough to capture the full effect adequately but the combination of the different weathering adds a good bit of depth to the overall finish. Some residual shine is still present from the protective Future coat and will be dealt with once I'm happy with how everything looks and am ready to seal it all together with a dull coat application.
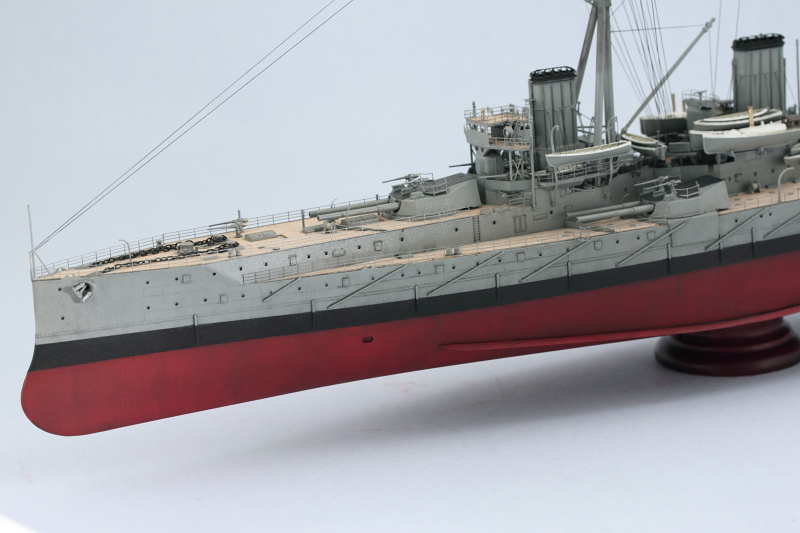
Image

The 18-inch long hull is a challenge to photograph, but here's how the big girl stands as of now.
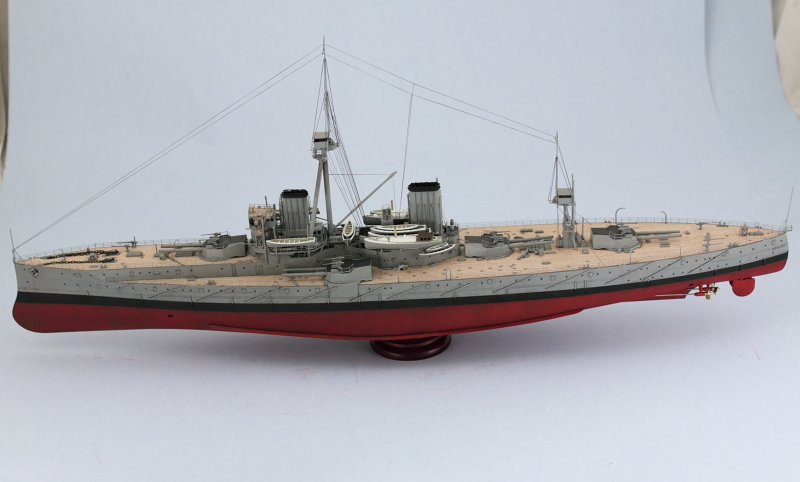
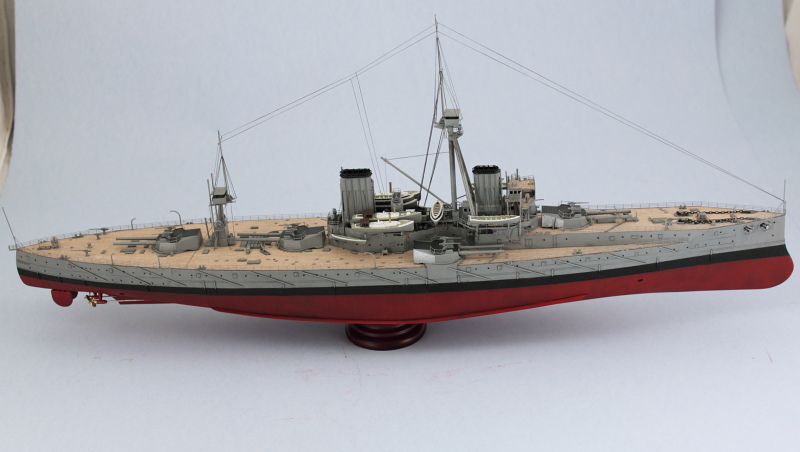
Image

Image

I also did some wash weathering on the 'brass' plaque for the stand. The metalizer finish was sealed with a coat of Future and then a wash of MM enamel Gunmetal applied over it to age the finish and provide some depth to the lettering. I used a thinner-dampened q-tip to 'polish' away most of the wash and then used fine point brushes to adjust it further. A coat of Model Master Gloss lacquer in the spray can sealed it together and restores some of the 'shine' to the brass. Another one of those hard-to-capture effects in person but looks pretty good in person, especially once the ship is on place on top of the stand.
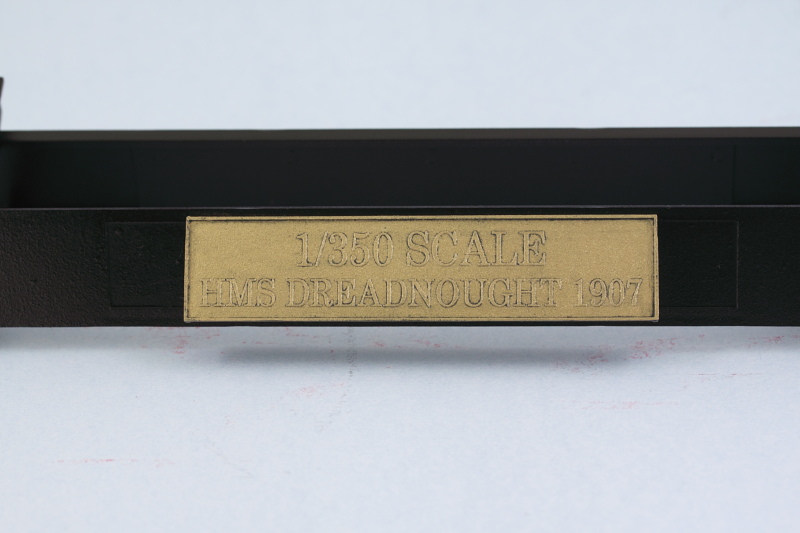
Image

I'll let this sit overnight so I can look it over with 'fresh eyes' tomorrow to see if I need to make any further adjustments. Almost done!
Bill Plunk
Posts: 1245
Joined: Wed Sep 28, 2022 10:18 pm

Completion 09-19-2014

Post by Bill Plunk »

After giving the Dreadnought a once-over, I decided to add some additional pin-wash application to the port holes and other fine details like the coal scuttles to improve their depth/look. I used a 10/0 spotter brush and the same gray wash applied to the hull earlier.

Image

Then it was time to seal it all up and remove the residual gloss/shine from the Future application. I used Testors Model Master Lusterless Flat in the spray can to dull the finish and tie everything together. One unexpected side effect of applying it is that some of the EZ-Lines that had a little bit of slack to them went out of tension but as soon as the lacquer dried out, the lines went back to their 'stretched' alignment. I did have to gently tease apart a couple of the signal flag lines that got slightly stuck together but otherwise everything went fine in that department. I did have to leave it in the spray booth with the vent fans going for a while before it thoroughly dried out and the lines went back to their intended tension but that's largely down to the fact that we've had 90%+ humidity lately due to lots of rain from Hurricane Odile's remnants passing through.

Image

Then it was time for Dreadnought to pull into the dock and get her final walk-around shots in the photo booth.

Image


Image


Image


Image


Image


Image


Image


Image


Image


Image


Image


Image


Image


Image


Image

Hope you enjoyed the voyage along with me!
Bill Plunk
Posts: 1245
Joined: Wed Sep 28, 2022 10:18 pm

Publication October 2015

Post by Bill Plunk »

This build has been featured in the FineScale Modeler October 2015 issue.

Image
Post Reply