Trumpeter 1/700 USS West Virginia BB-48 1941 (2016)

Bill Plunk
Posts: 1245
Joined: Wed Sep 28, 2022 10:18 pm

WIP 07-18-2016

Post by Bill Plunk »

I broke out the airbrush again today in order to get the superstructure and masts out of the way. They are fragile and I've already had to repair them a couple of times due to handling so I thought it best to try to get them out of harm's way sooner rather than later. :) I did the usual Flat Black primer treatment followed by Gunship Gray for the appropriate areas. Using thin strips of masking tape, I masked off the Light Gray portions of the superstructure and fighting tops and used MM enamel Light Gray for those areas. This is where using the 3D fighting tops really pays off as the open windows just can't be beat IMHO. I also airbrushed the smoke funnels while I was at it.

Image

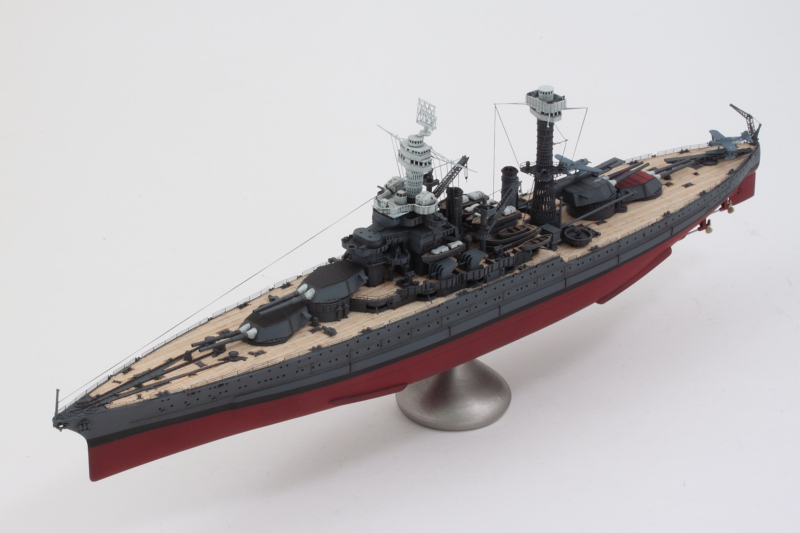
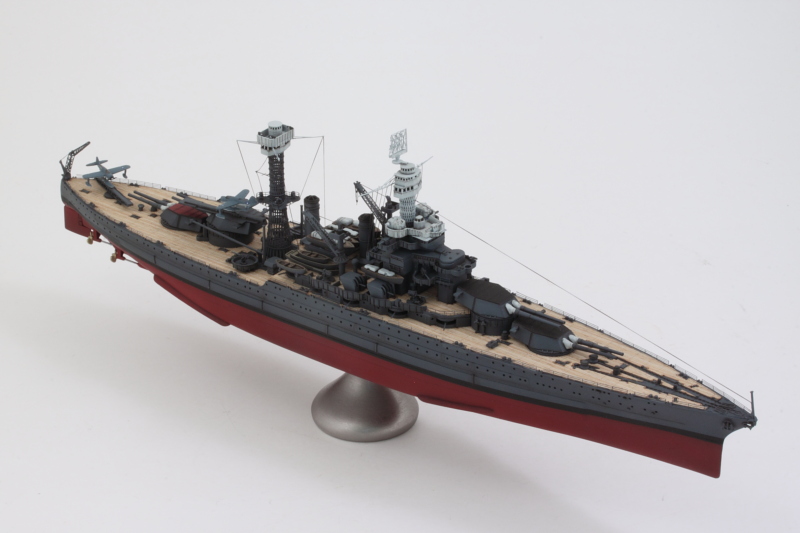
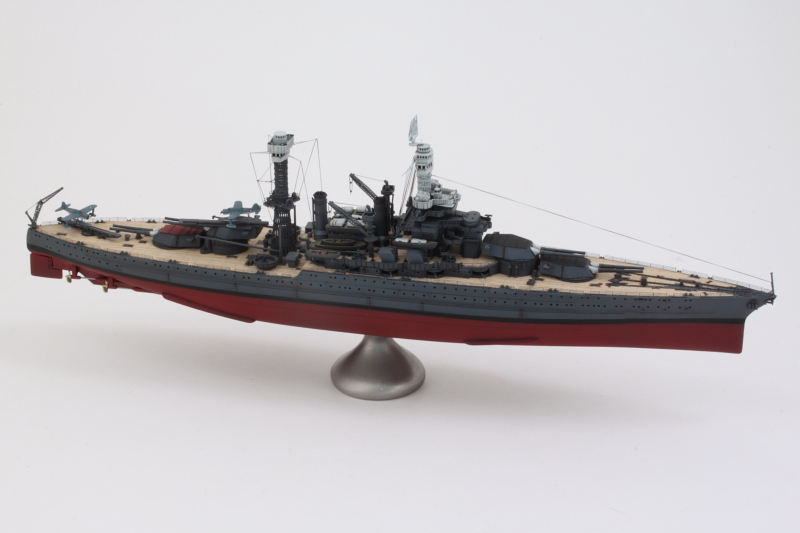
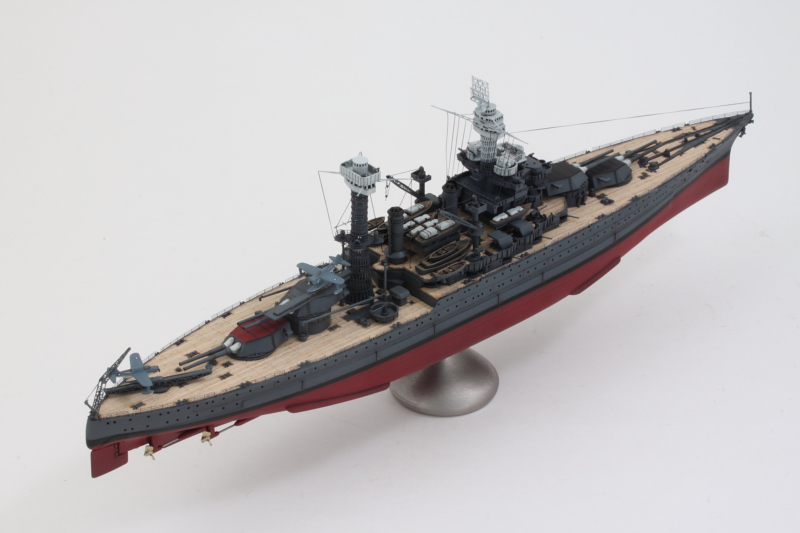
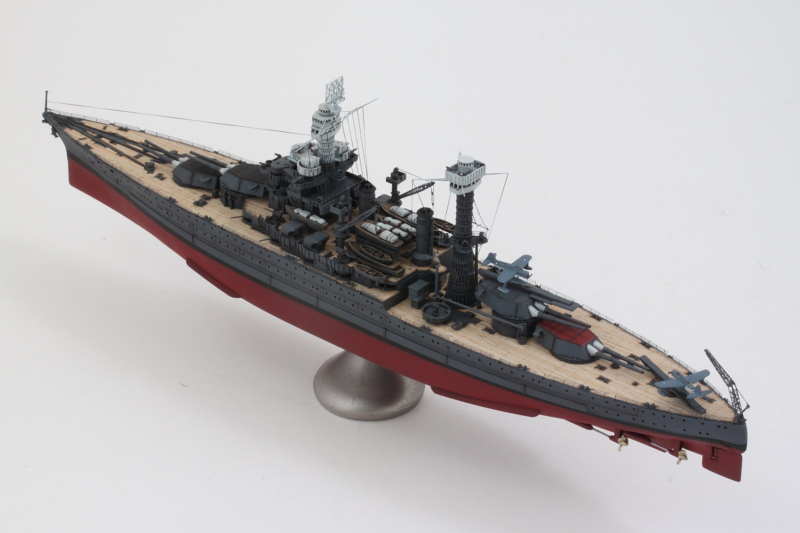
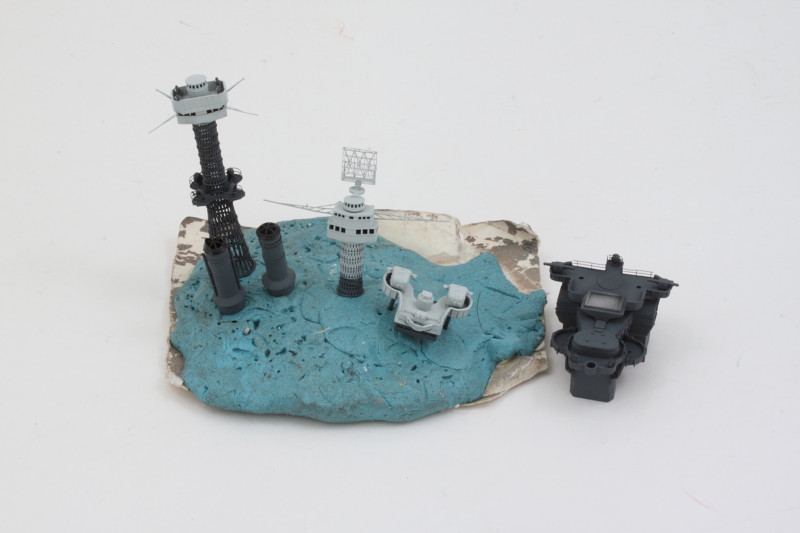
After the paint had dried, I assembled the superstructure into a single module. I found it easier to install the foremast and fighting top combo first into position then add the range finder upper deck around it since the base of the cage mast is slightly wider due to the correct hyperbolic shape and was a tight fit when trying to add it with the upper deck already in place. I also added the pair of 5-inch AA guns that mount into the tubs to round things out in this department.

Image

Those will get a chance to cure before getting a dose of Future. In the meantime, I worked on the remaining large details in the form of the boat cranes. The kit includes PE to replace the solid-molded frames on the cranes and these are delicate but designed to fold easily. You could say almost too easily so I had to be careful not to overstress the slight bend points and used very small amounts of CA to secure the edges of the box frame together before adding them to the plastic king posts. These are only dry fit for now of course.

Image

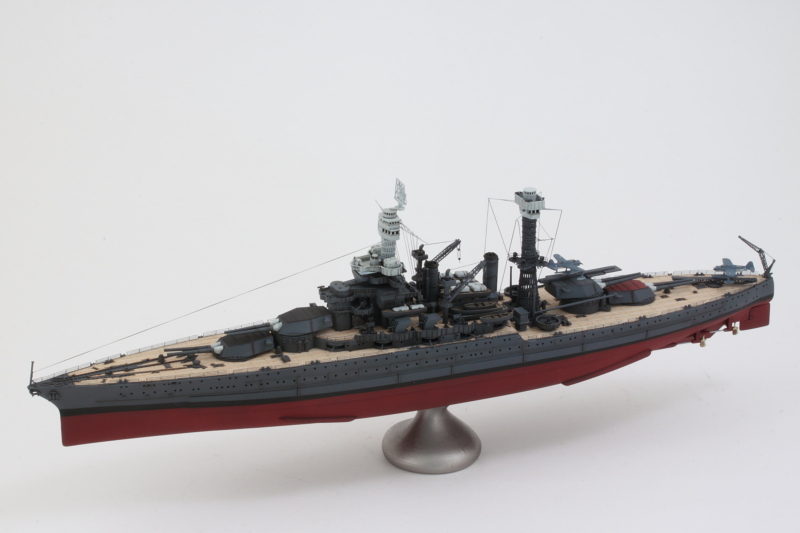
I also worked on the stern floatplane catapult and recovery crane. Both of these require massive surgery to the kit parts to accommodate the kit's replacement PE components. Similar to the boat cranes, these are an origami-like folding arrangement that produces a very nice end result. Due to the tight space arrangements in relation to the #4 turret, the catapult has to be installed in an angled position but will still clear the stern railing edge if angled just right but only just.

Image

Next up will be working on the ship's boats since some of them need assembly before they will be ready to join the cranes and catapult for another round in the spray booth.
Bill Plunk
Posts: 1245
Joined: Wed Sep 28, 2022 10:18 pm

WIP 07-21-2016

Post by Bill Plunk »

Spent some time working through the remaining details with a particular emphasis on the ship's boats. I installed the smoke funnels and the main boat support rack that sits between them to get things started. Due to the added wood deck, I needed to use CA to glue down the feet of the boat rack since they no longer made contact with the little angled mount points molded on the original deck.

Image

The boats themselves were assembled and prepped for painting. I used the airbrush to apply a primer coat of Flat Black, then airbrushed a 70/30 mix of Afrika Grunbraun/Light Gray for the exposed wood areas. Then the hull exteriors were airbrushed with Gunship Gray to match the hull scheme of the ship. I applied some Burnt Umber artist pastels to the wood areas to add more variation and tone to their look and then hand-painted the canopies on the launches and barges with Light Gray under the Optivisor.

Image

With that done, the boats were populated into the racks and the cutters/whaleboat stacks assembled in place one layer at a time to ensure they all sat level with each other.

Image

When the airbrush was loaded up working on the boats, I also got the cranes and catapult finished so they could move along with the rest of the superstructure process.

Image

Rounding things out for the moment, I also assembled to two Kingfisher seaplanes. These are provided in clear styrene with the main and wing floats separate parts that install into the main body. Once assembled, they were handpainted with MM enamel Intermediate Blue for the upper surfaces and Light Gray for the undersides.

Image

Getting closer to the finish line now!
Bill Plunk
Posts: 1245
Joined: Wed Sep 28, 2022 10:18 pm

WIP 07-24-2016

Post by Bill Plunk »

Lots of progress over the last few days as this one starts heading into the final stages. I detailed the prop shafts with MM non-buffing Metalizer Steel and cleaned up the propellers, taking care to keep them handed per side as called out in the instructions. These were finished with MM non-buffing Metalizer Brass and installed in place. The rudder was also permanently secured in place at this stage.

Image

I had airbrushed a coat of Future over the rest of the details that I'd already installed and those still pending installation. Once that had dried overnight, I applied a pin wash of thinned MM enamel Burnt Umber with a pointed 18/0 brush. This was followed up with some clean thinner to remove excess wash and tighten it up in places where needed.

Image

Image

With the pin wash out of the way, I turned my attention to rigging up the boat cranes and the mainmast. I used EZ Line Fine Black elastic thread and CA to do the rigging, taking special care with the mainmast due to how delicate the PE yardarms there are.

Image

The mainmast was installed in place with CA gel on the base to give me a little bit of work time to make sure I had it set properly and lined up in the right spot. The boat cranes were installed with liquid glue and carefully lined up as well as they have a slight tendency to lean due to the weight of the PE booms. Once the mast was set, I added the additional rigging lines that connect to the boat deck level along with the jackstaff flag lines.

Image

Next up will be rigging the signal flag lines on the superstructure foremast arrangement and then installing it as a module.
Bill Plunk
Posts: 1245
Joined: Wed Sep 28, 2022 10:18 pm

WIP 07-25-2016

Post by Bill Plunk »

Round 2 of the rigging effort got completed today. The main superstructure and foremast received the signal flag lines. I added them one side at a time starting inboard and working my way out until I had all the lines run.

Image

That cleared the way to install the superstructure in place as a full module. I also added the small supports for the final 2 launches and added them as well once the glue had set enough to hold things steady. The four 5-inch shielded AA guns were also installed and the pair that sits up against the launch support rack is a pretty tight fit, so it was a good thing I was working on them all at the same time. I also added some of the Tom's Modelworks railing to the area between the AA gun tubs and the #2 turret for a little added detail.

Image

Now the fun of adding the main deck railings begins!
Bill Plunk
Posts: 1245
Joined: Wed Sep 28, 2022 10:18 pm

WIP 07-29-2016

Post by Bill Plunk »

Adding the PE railings to the ship's main deck is definitely an exercise in patience. The 1/700 railings in the Tom's Modelworks set are of the generic variety and aren't designed to fit any particular section or arrangement. Combine that with their general fragile nature and the best way to get them done was to cut small sections to fit in between the rope cleats molded into the deck edge vs. trying to install them as one long run. I added the starboard side railings first, then added a scratch-built jackstaff to the bow using some 0.5mm diameter white rod since the kit doesn't supply one. The port side railings were added to match and then I ran the rigging line from the bow to the foremast fighting top once I was sure it wouldn't get snagged during the railing process.

Image

Now for the stern half of the railings! Almost done with this one. :)
Bill Plunk
Posts: 1245
Joined: Wed Sep 28, 2022 10:18 pm

WIP 07-30-2016

Post by Bill Plunk »

The final lap was completed today involving the stern railings and the installation of the Kingfishers. The Tom's set doesn't include enough railings to use all of the same type all the way around the ship and I deliberately decided to use one style for the forward bow sections and another similar, but shorter gaps between the stanchions, style for the stern so that it would at least look symmetrical. The stern sections run a little longer in spots but also have to curve a bit more so it worked out in the end. Same procedure as with the bow railings, I cut sections as needed and installed them individually one side at a time.

Once the railings were in place, I added the markings decals to the Kingfishers. The supplied roundels aren't 100% accurate, they include the white bars and don't have the red center dot, so I removed the white bars and added just the circular blue and white star combos. I toyed with trying to add the red dot but given how small these are, I decided that was more trouble than it was worth in the end.

Image

I did a couple of overall shots to check for any issues as well. I will let it sit overnight and do some walkarounds with the camera to see if I overlooked anything before calling it well and truly done.

Image

Image
Bill Plunk
Posts: 1245
Joined: Wed Sep 28, 2022 10:18 pm

Completion 07-31-2016

Post by Bill Plunk »

After letting it sit for a bit and making some small adjustments in spots, it was time for the Wee Vee to set sail! Definitely a 'stretch my horizons' type of build as my first 1/700 scale ship, hope you enjoy!

Image

Image

Image

Image

Image

Image
Bill Plunk
Posts: 1245
Joined: Wed Sep 28, 2022 10:18 pm

Publication December 2016

Post by Bill Plunk »

This project is also featured in the December 2016 Pearl Harbor 75th Anniversary issue of Military Modelling magazine.

Image

Image
Post Reply