Dragon Sdkfz 161/4 2cm Flakpanzer IV Wirbelwind (2011)

Bill Plunk
Posts: 1245
Joined: Wed Sep 28, 2022 10:18 pm

WIP 07-17-2011

Post by Bill Plunk »

More progress to report, this time in the painting department.

I used Testors Model Master enamel Italian Dark Brown as a primer coat and sprayed it through the airbrush. It provides a nice shade base for the Dunkelgelb coat that will come next and also allows for a last minute check of all the previous zim/putty work to make sure there aren't any areas needing touch-up. The turret is dry-fit only and remains removable. The zimmed surfaces dramatically increase the total surface area and more paint than normal is necessary to cover the entire model as a result.

Image

Next I applied a custom mix of 50/50 Testors MM enamel Light Gray/Panzer Dunkelgelb via airbrush over the primer coat. This was done using multiple passes of the thinned combination to slowly build up the necessary finish over the primer coat and provide a solid foundation for the camo pattern to come.

Image

That's all I had time for this weekend, hopefully next weekend will see the camo pattern added and work start on the details.
Bill Plunk
Posts: 1245
Joined: Wed Sep 28, 2022 10:18 pm

WIP 07-24-2011

Post by Bill Plunk »

Picking up from last week's efforts, the latest round focused on applying the camo scheme. I used MM enamel Khaki for the olivegrun portions and laid that down first freehand via airbrush. My goal was to stay roughly 1/3 coverage with each of the colors while still disrupting the vehicle's outlines effectively. This was followed by a 50/50 mix of MM enamel Military Brown/Leather for the rotbraun portions also applied freehand.

Once the pattern was down, I fine-tuned things in different places using the hull mix applied earlier, removing over spray and balancing out the pattern in a couple spots until I had it the way I wanted it. Final step was to thin down the hull mix to a wash consistency and then applied a mist coat from about 12" distance to tie the whole scheme together and form a foundation for later weathering steps.

Image

Image

Image

Image

I also got the road wheels painted. They were primered with the Italian Dark Brown used on the vehicle and the rubber portions were airbrushed with enamel MM Gunmetal. I used a QuickWheels mask for the outer hubs and a draftsman's circle template for the inner hubs since the QW mask only has openings for the outer hubs. I've use the QW masks before but wasn't 100% happy with this particular one, I think I could've gotten a little better result if I'd just used the circle template as the QW mask allowed a little bit of bleed through to happen. Nothing major though and once painted the road wheel halves were glued together and mounted on the vehicle.

Image

Now my attention will turn to working on all the remaining hull details and getting the turret interior done.
Bill Plunk
Posts: 1245
Joined: Wed Sep 28, 2022 10:18 pm

WIP 07-31-2011

Post by Bill Plunk »

More progress over the weekend, this time in the details department. All of the fender gear and tools were painted up and then installed into their respective places. For the metal portions, I used MM Metalizer Gunmetal with a light dry-brushing of MM enamel Steel to show metal wear/use. For the wood areas, I used a base coat of my 50-50 hull color overlaid with a light wash of Leather followed with a dusting of Burnt Umber pastels for some variety. The wire cutters had their Bakelite handles painted with MM Italian Dark Brown and their rubber end caps with MM enamel Gunmetal. Tool clamps were painted to match the camo pattern where appropriate and I also installed the spare road wheels into their bin.

Image

Image

I also spent some time on the Flakvierling guns, painting them with a base coat of MM Metalizer Gunmetal and dry-brushing with MM enamel Steel to create their look. The guns and recoil cylinders were installed to the gun base and I also detailed the various knobs and buttons on the gun mount. The gunner's seat was painted with MM enamel Leather then randomly dry-brushed with the 50-50 hull color and enamel Gunmetal to create some variation. To blend the colors in together, I applied some Burnt Umber pastels as well to finish it out.

Image

The turret interior also received some detail attention, the ready ammo racks were painted and installed and the loaders' seats were also detailed.

Image

Still more work to be done on the hull front and rear details but getting closer to the weathering stage, will be there before you know it!
Bill Plunk
Posts: 1245
Joined: Wed Sep 28, 2022 10:18 pm

WIP 08-02-2011

Post by Bill Plunk »

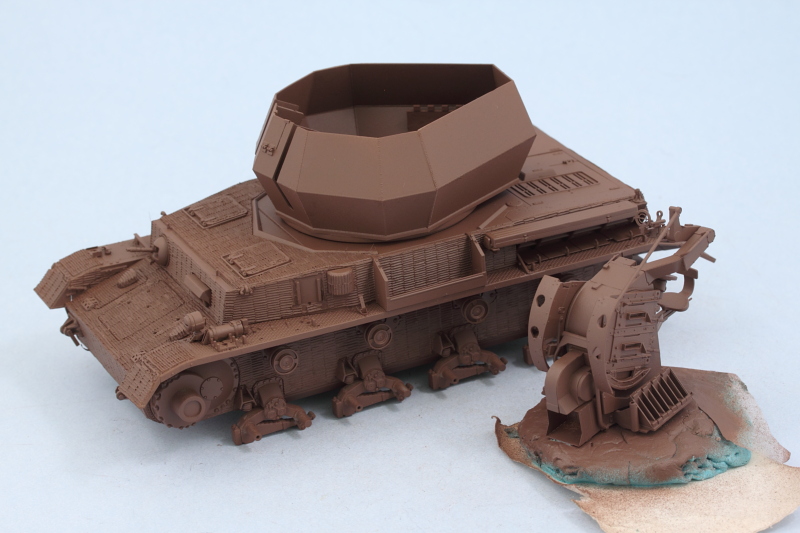
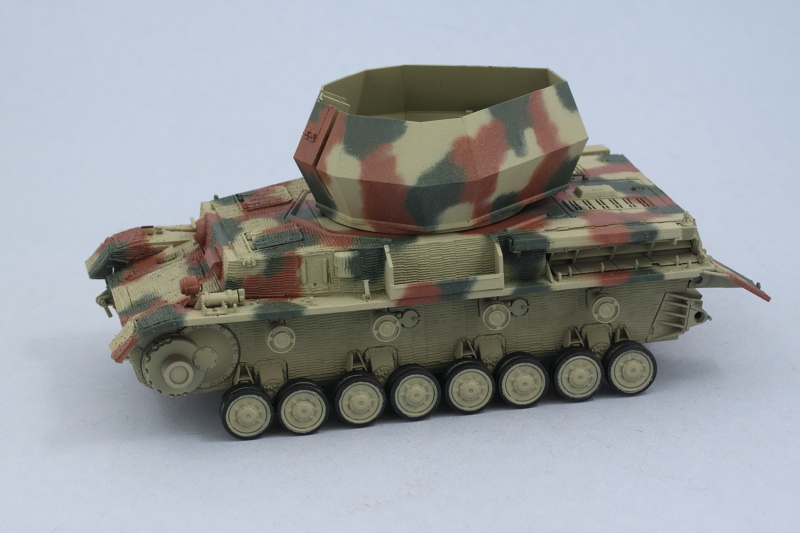
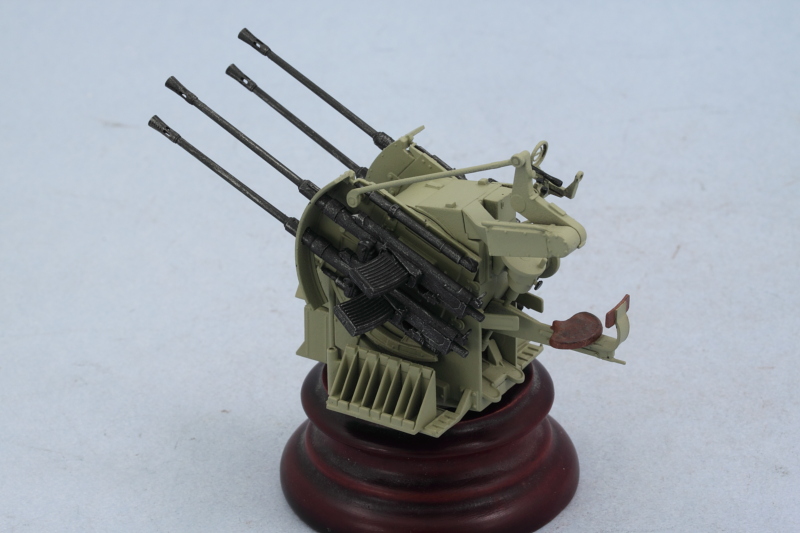
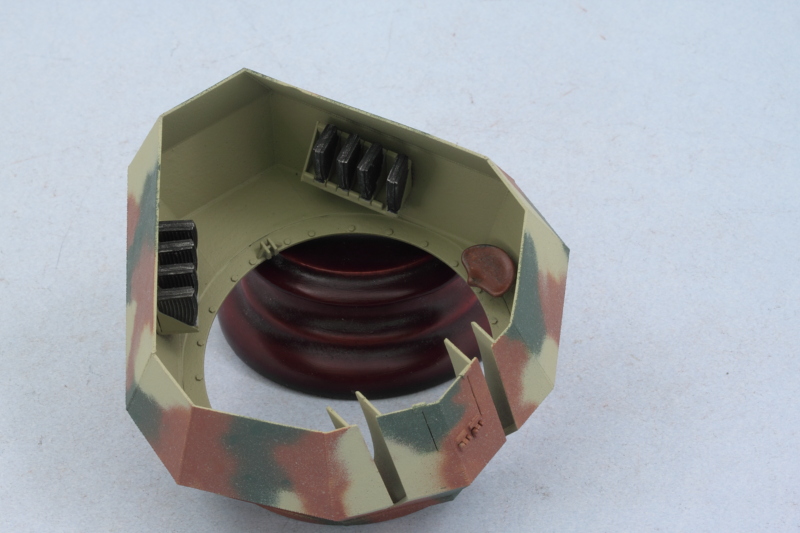
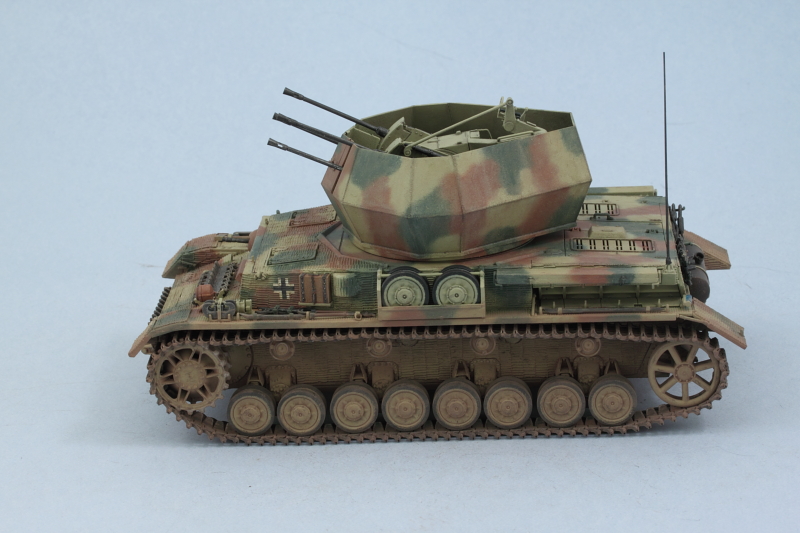
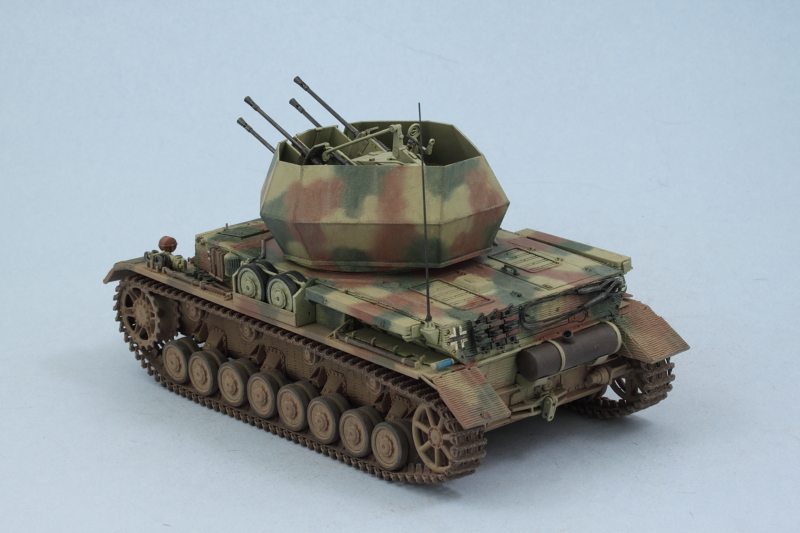
Had a couple of days off work so got some more done in the details department. Although it doesn't show too well in the photo, I weathered the interior of the turret and the Flakvierling with an overall wash of thinned enamel Burnt Umber and then dry-brushed my lightened Dunkelgelb mix over that to create some dirt accumulation and some variety. The Flakvierling was then installed into the turret and I discovered why the PE spent shell catcher bin is added after this in the instruction order...it's because there isn't enough clearance between the edge of the gun and the turret ring, so I ended up having to remove it in order for the gun to install properly. It's not visible anyhow so I just left it off completely since I'm going to display the turret in position.

Image

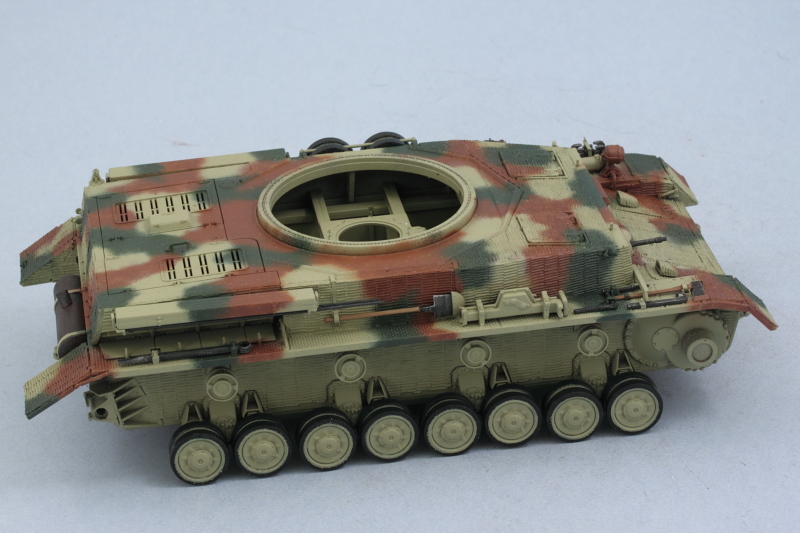
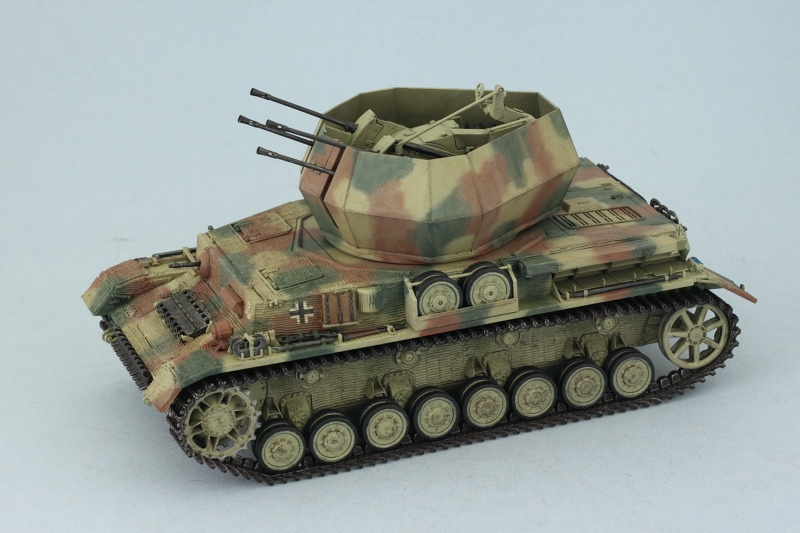
I also detailed and installed the spare track runs for the hull nose and glacis. The tracks were base coated with MM Nonbuffing Metalizer Gunmetal, given a wash of enamel Rust, then lightly dry-brushed with enamel Steel to create a bit of metallic finish. This was toned down and blended in with some Burnt Umber artist pastels. I also used a #76 finger drill to create the open pin holes on the first and last links of the hull nose run for some added detail.

Image

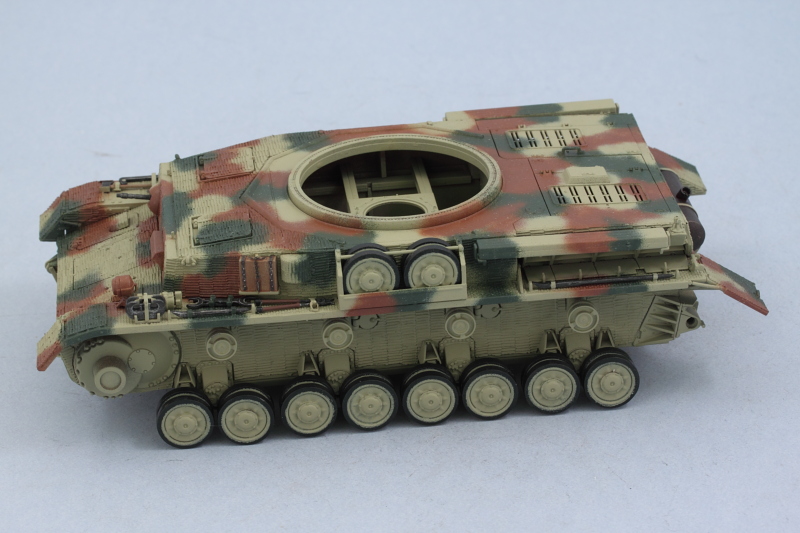
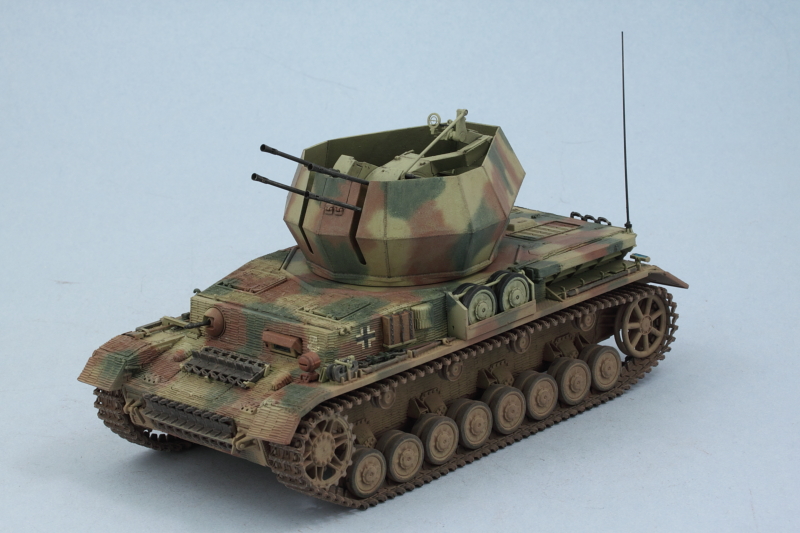
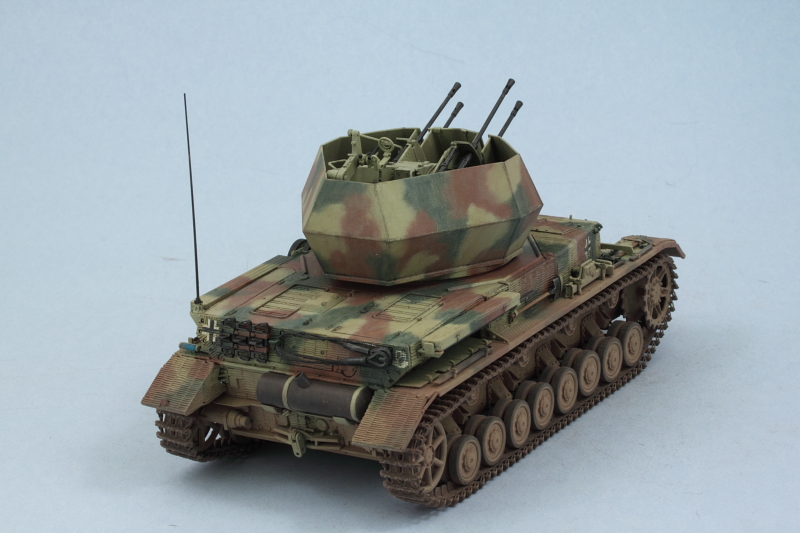
The rear hull also got some detail attention. The three spare track links were finished and installed using CA gel so they would stay put on the resin zim surface. The rear blackout light was painted with Tamiya Clear Blue and the fender reflector with some Testors enamel Flat Red. The muffler was painted in the same fashion as the spare track link runs minus the Steel dry-brushing with just a touch of black artist pastels applied to the exhaust spout.

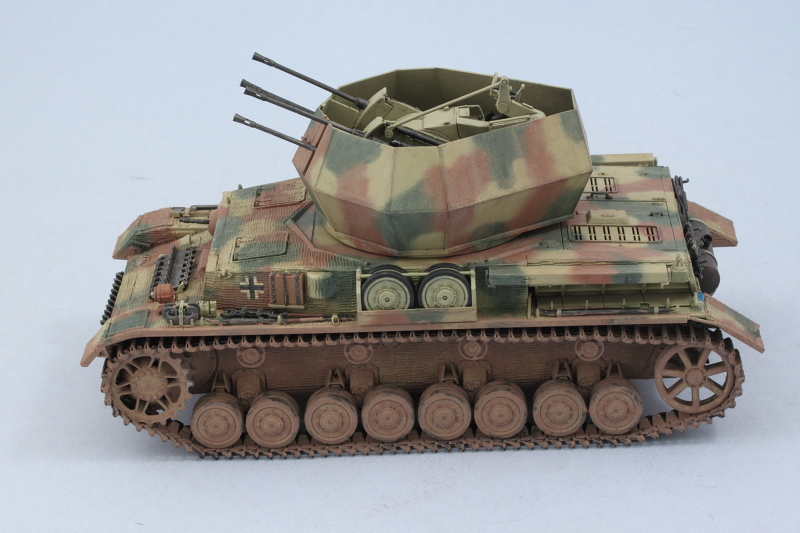
Instead of the kit-supplied braided steel wire (which is too stiff to easily work with), I used some crochet rope to create the tow cable. The rope was dipped in Future so it would stiffen up and also not go "fuzzy" when painted and left to air-dry. Then I cut it to the necessary length of 125mm (the instructions say 150mm but that includes the styrene eye ends) and glued it to the cable ends with CA gel. It will get painted and installed later after the weathering is done and is only dry-fit for now to insure I got the length/configuration correct.

Image

That's where she stands for now, still need to give some attention to the lower hull/running gear and tracks as the next phase.
Bill Plunk
Posts: 1245
Joined: Wed Sep 28, 2022 10:18 pm

WIP 08-14-2011

Post by Bill Plunk »

Some small progress to report this time around, didn't quite get as far as I wanted due to some RL distractions that took more time this weekend than anticipated. Still, progress is progress!

I pre-weathered the lower hull by stippling some enamel Burnt Umber to simulate scuffs/scratches and also detailed the bare metal contact surfaces on the return rollers, sprocket teeth, and idler wheels. I applied a base coat of MM Metalizer Steel followed by some dry-brushed Burnt Umber. Using some blue poster putty, I dry-fit the sprockets and tested out the length of the MK tracks assembled earlier to determine how many more links I needed. After fiddling with the idler position and the desired sag, 3 more links were needed on each side to bring the grand total to 99 links.

Image

The tracks themselves were ready for paint, so off to the spray booth and an airbrush coat of MM enamel Burnt Umber. The tracks received a heavy dry-brush of enamel Steel to provide a metallic look followed by a wash of enamel Raw Umber to blend everything back in. The tracks were installed along with the sprockets and the idlers given a slight adjustment where needed before they too were glued into permanent position.

Image

Next up will be the decals (minimal markings) and then on to the weathering!
Bill Plunk
Posts: 1245
Joined: Wed Sep 28, 2022 10:18 pm

WIP 08-21-2011

Post by Bill Plunk »

More progress to report this weekend. First up I applied an overall coat of Future acrylic floor polish by airbrush to seal in the paint work and serve as a protective barrier for the later weathering stages. I let this dry for an hour and the applied the decals. Markings for Wirbelwinds were generally minimal and mine is no exception. I chose to mark it as a vehicle with the LAH and applied the crosses to the hull sides and rear, using Walther's Solvaset and some gentle prodding with a toothpick to get them to conform to the irregular zim surfaces. Once the decals had set, a 2nd coat of Future was applied over them to protect and seal them in as well.

Image

Image

I let the Future cure for a full 24 hours before moving on to the weathering stages. First step was an overall application of MM enamel Raw Umber as a 90% thinner wash to the entire vehicle. After that air dried, I added dot filters using MM enamel Flat White, Raw Sienna, and Panzer Dunkelgelb. I worked in small sections at a time so that the paint dots wouldn't start to set and wore a paint breather mask throughout to avoid heavy exposure to the thinner fumes. The small dots were blended together using repeated strokes with a square tipped blender brush lightly dampened with thinner. After about 2 hours of work, the filters were done. As you might expect, the increased surface area of the zim portions made this a somewhat complicated task. I had to work those areas in smaller sections and apply the blending strokes in the direction of the zim "grain" in order to get the desired result.

Image

This one is pretty close to the finish line...just need to apply a pin wash and give the suspension/tracks a dose of pigments and this one will be complete.
Bill Plunk
Posts: 1245
Joined: Wed Sep 28, 2022 10:18 pm

Completion 8-28-2011

Post by Bill Plunk »

Got the finishing touches done on this one finally this weekend! First up was the application of a pin wash of enamel Burnt Umber to bring out some of the details and add some depth to the previous filter effects. I used a 10/0 pointed brush to apply the pin wash and then used the same brush and some clean thinner to clean up any excess or blooming that occurred.

Image

The entire vehicle received a dull coat using Testors Lusterless Flat in the spray can. Once that was dry, I added the pigment weathering to the lower hull and tracks using a combination of Mig Pigments Rubble Dust, Europe Dust, Dark Mud, and Light Dust. I combined these together as dry powders first to get the shade I wanted and then added water with a drop of dish soap mixed in to break the surface tension to convert the powder into a wet mix. This was applied liberally to the lower hull and tracks with an old paint brush and allowed to air dry.

Image

Using a combination of stiff bristled brushes and dry q-tips, I removed the excess pigment (while wearing a dust mask to avoid inhaling the fine powder) and adjusted the finish until I had it where I wanted it. The final details were added in the form of an RB Models 2m brass antenna and the tow cable on the rear before taking the completed walk-around photos.

Image

Image

Image

Image

Image

Image

Took me about 5 1/2 months to get it done, setting a new record in the process, but was an enjoyable build all around.
Post Reply