Bronco Pzkpfw I Ausf F (VK 18.01) (2014)

Bill Plunk
Posts: 1245
Joined: Wed Sep 28, 2022 10:18 pm

WIP 05-24-2014

Post by Bill Plunk »

The long holiday weekend means more bench time than usual and I'm taking full advantage of it! Of course it's more than a three-day weekend, this is also a chance to remember those who have given the ultimate in service to their country and I'd be remiss without acknowledging that and also extending my respect and admiration for all our men and women who serve in uniform.

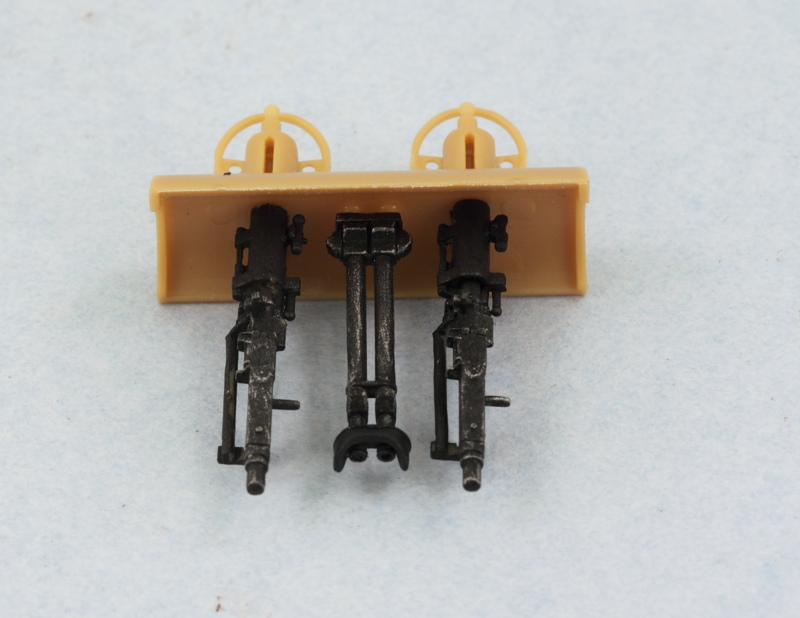
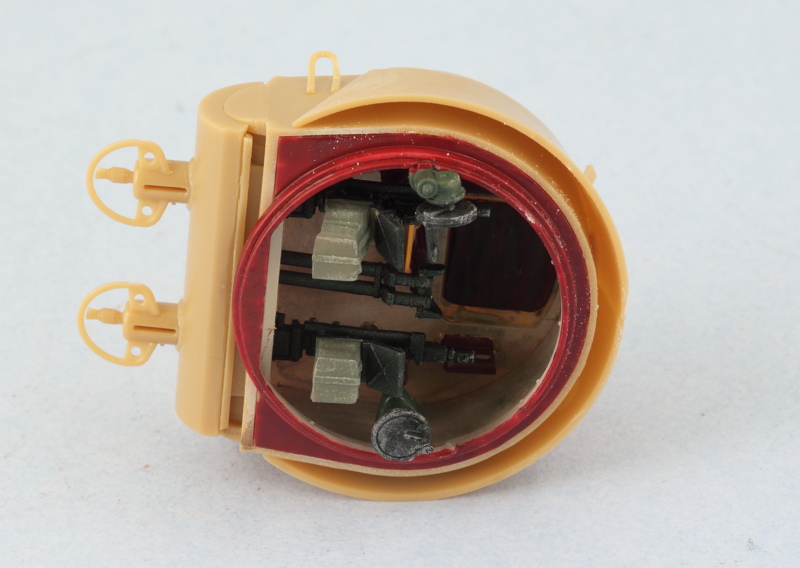
The last remaining detail on my pocket Tiger is the turret. Earlier I'd mentioned that I was deviating a little bit from the Bronco instructions in terms of the assembly order and I elected to detail and install the twin MGs and sights into the mantlet first and then add the ammo bags after it was in place. This provide to be a good call as it made it much easier to detail them and install them properly into the mantlet while doing test fits along the way to make sure everything played nice with the rest of the turret interior. The MGs were detailed with Testors Model Master non-buffing Metalizer Gunmetal and then lightly dry-brushed with enamel Steel for their finish.

Image

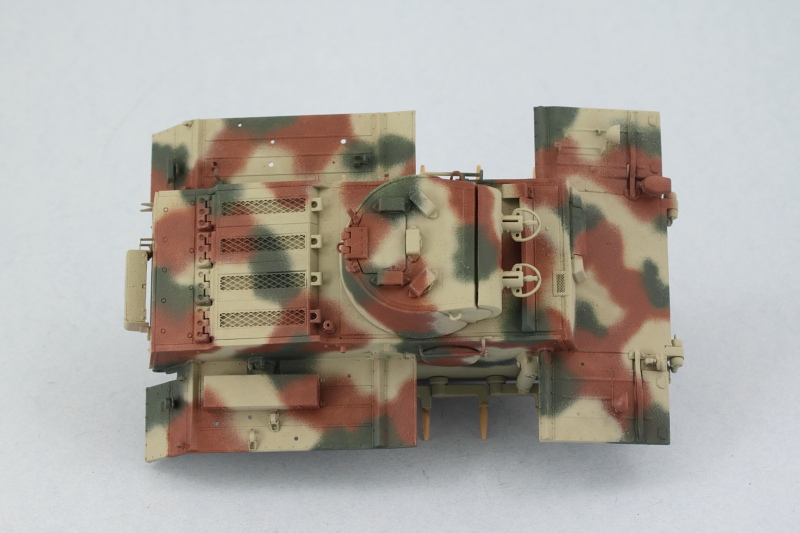
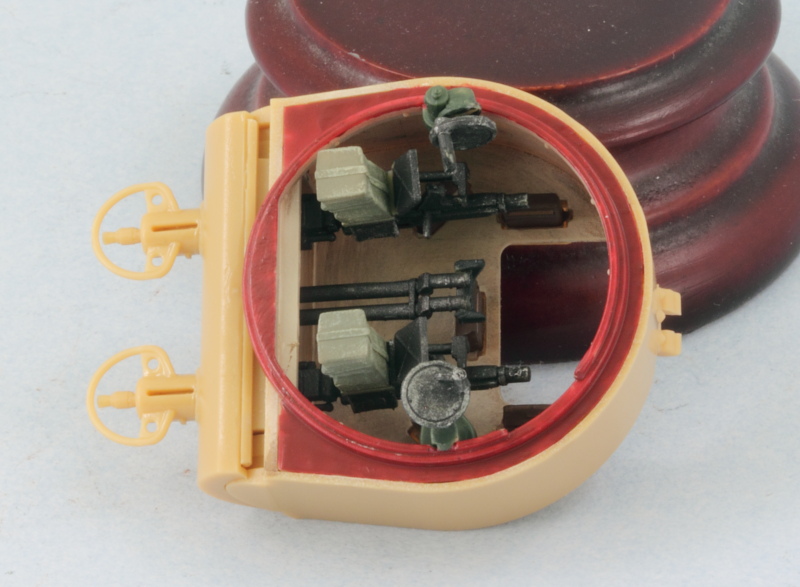
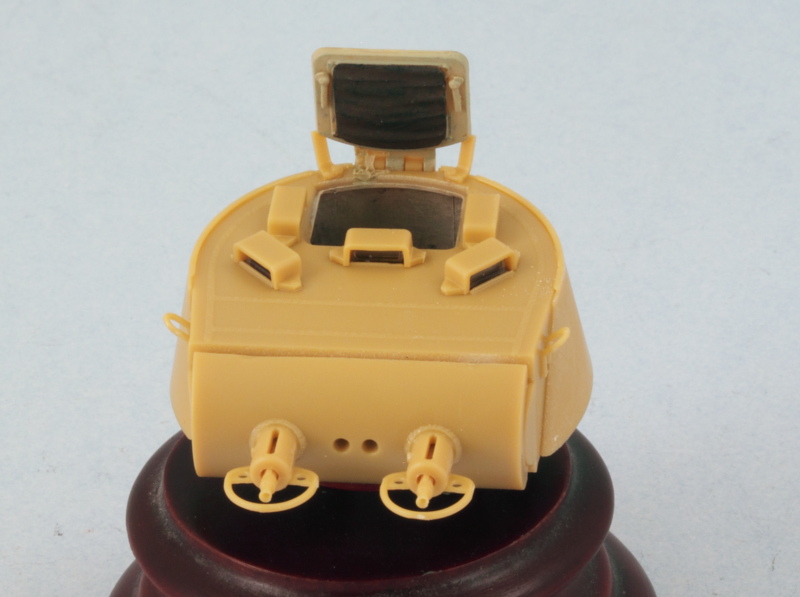
Here's the bottom up view of the turret after the mantlet was installed and the ammo bags added. I also need point out an instruction diagram-induced error that you can see in this pic. Notice that slight gap at the bottom of the mantlet? Turns out way back when I installed the rear part of the mantlet, part D44, into the turret, I used the instruction diagram as a guide and it shows the larger part of the piece on the bottom with the thinner piece on top. Problem is that the external mantlet is designed to fit that part the other way around...and the MG barrel sleeves are keyed as are the MG mounts on the inside to specific alignments...which will result in everything being upside down. Not a good thing...and once I realized the problem, it was no good trying to get the mounts out and flip it around...so I had to trim the part instead to allow it to fit correctly and remove the 'extra' that hung over the bottom...and produced that slight gap. Once painted it will look fine and of course will only be visible if the turret is off and flipped over...but a word of caution to anyone coming along behind! :)

Image

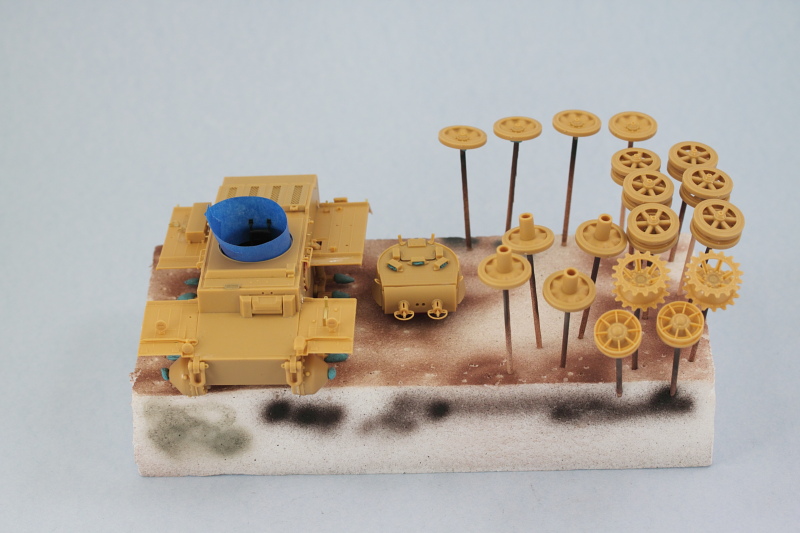
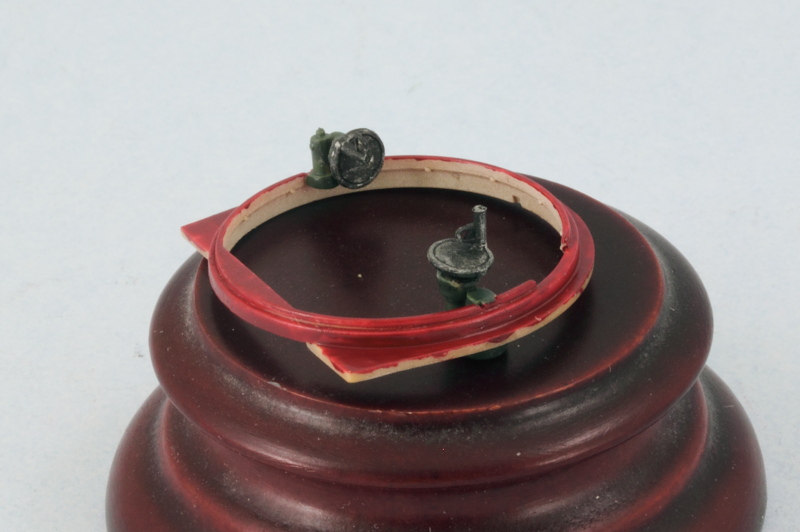
The base of the turret came next. The elevation and traverse wheels and gears were assembled and installed...they are delicate multi-part assemblies and were actually done last weekend and left off to the side to fully dry before handling. They were detailed and installed and the underside given a dose of red-oxide primer. After the paint was dry, the turret floor was installed in place.

Image

Image

Moving back topside on the turret, I detailed the commander's hatch using a 50/50 mix of Light Gray/Panzer Dunkelgelb so it will match what eventually will be the vehicle's exterior color and detailed the head pad. Bronco designed the hatch to remain workable and relies on a tight friction fit on the hinge to achieve this. A small note, the hatch stops on the edge of the turret swiveled on the real vehicle but Bronco has you position them in the 'open' stance, so a word to the wise if you decide to pose your hatch closed. ;) Mine will be left open on the final display but will be kept closed during painting to help protect the interior.

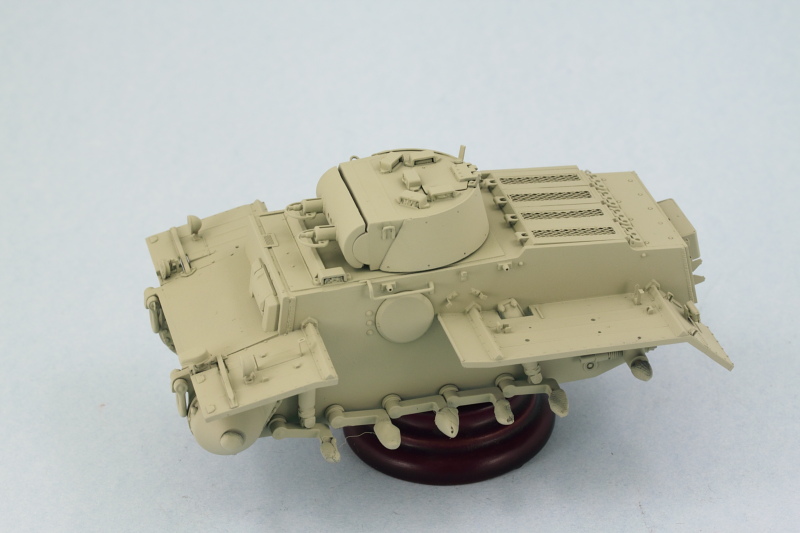
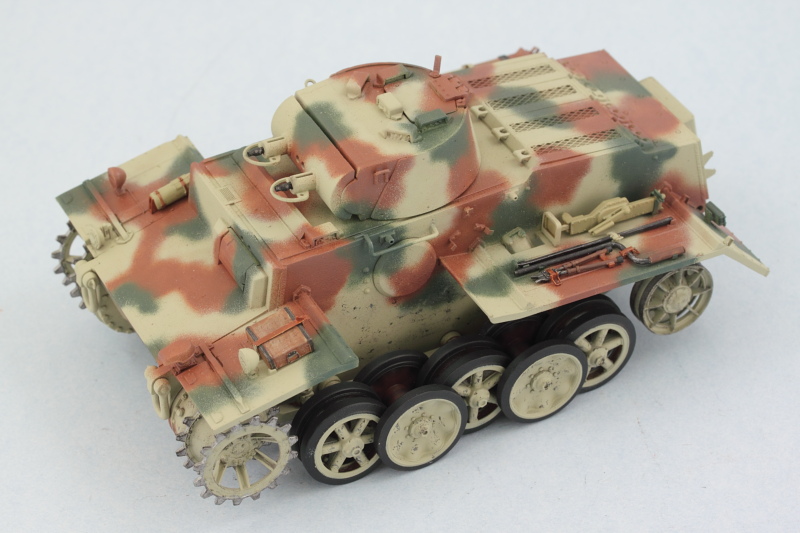
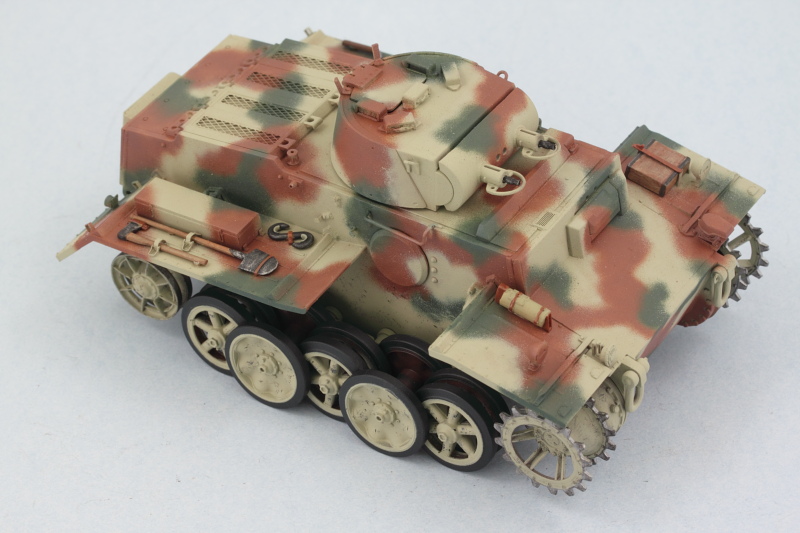
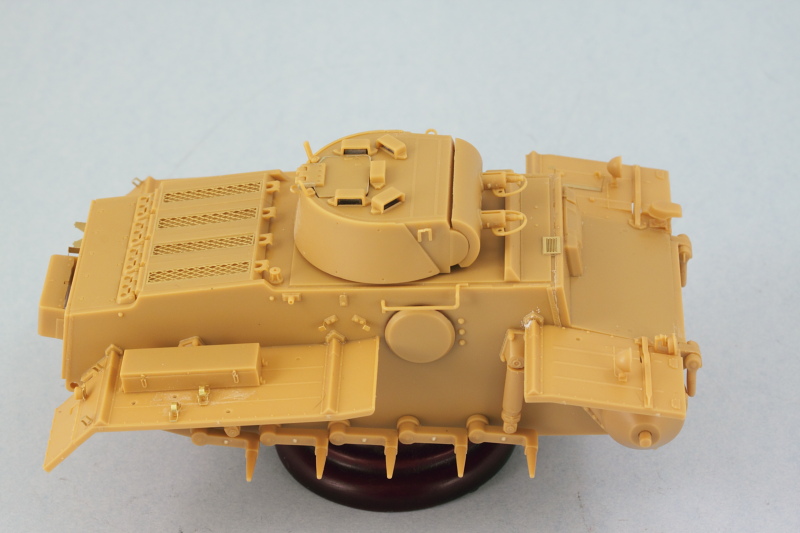
The add-on armor for the turret was also installed along with the lifting eyes to round things out.

Image

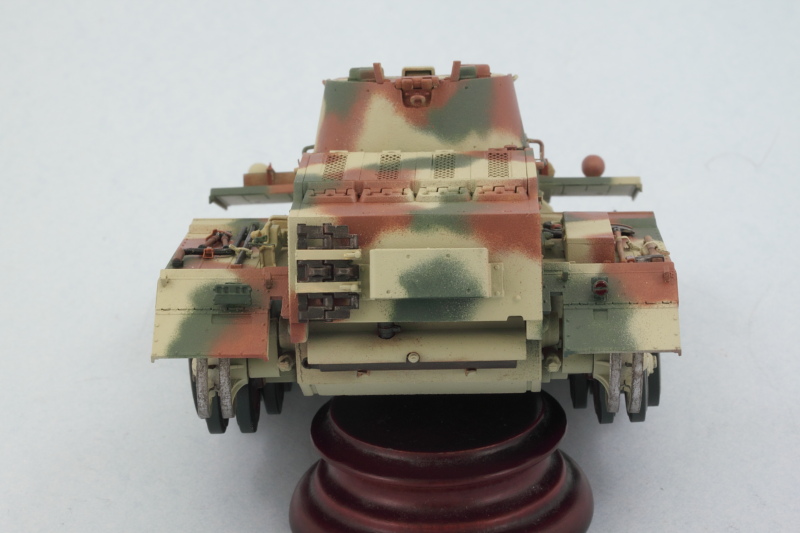
The key to the add-on armor is that it only touches the actual turret at the top edges and where the angled front pieces meet the turret sides. Be careful with the fit at the back, reference photos showed this was smooth so after the glue set, I did some light sanding to remove the join line that is inevitable.

Image

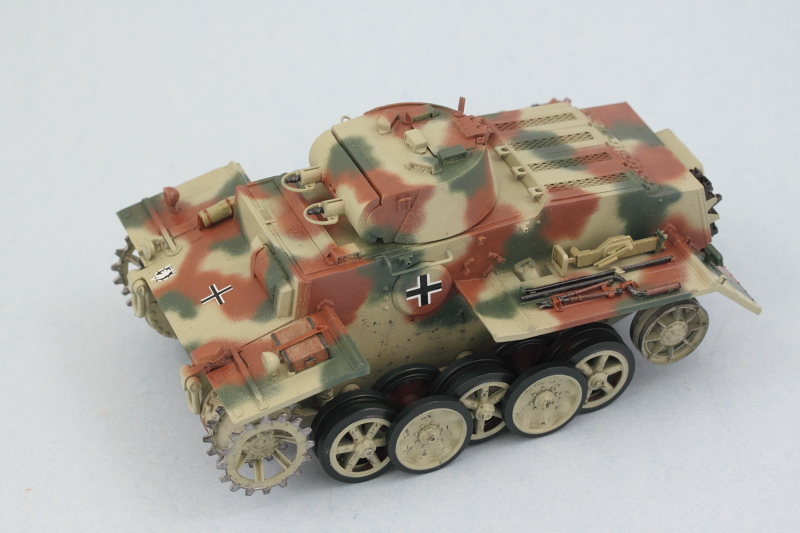
A quick test fit shows the turret sits properly in the hull and can be easily removed for painting and detailing...just have to remember that the commander's chair supports stick up slightly so you have to use the turret ring to push that forward slightly when you go to add the turret in place. The turret will rotate but not 360 degrees obviously because of interference with other detail items in the turret hull and the fact that the commander's chair itself doesn't rotate with the turret, so don't try to do too much here or you may knock something loose in the process!

Image

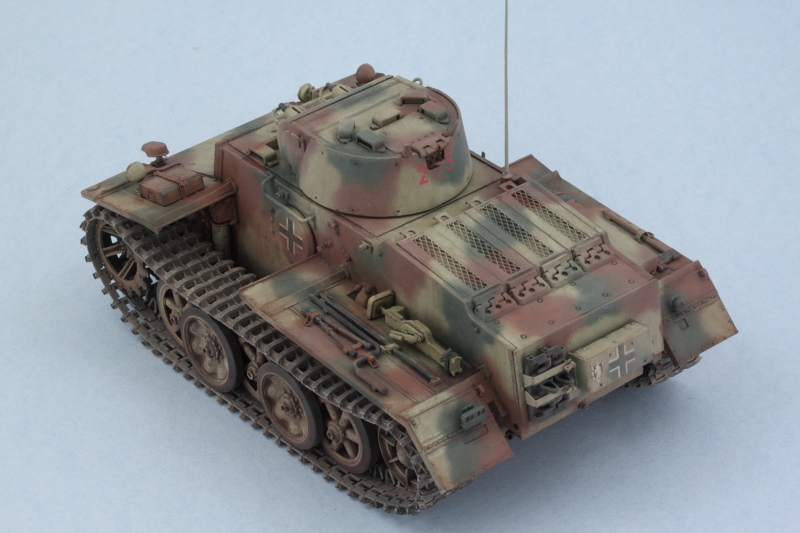
Next up will be getting everything ready for paint!
Bill Plunk
Posts: 1245
Joined: Wed Sep 28, 2022 10:18 pm

WIP 05-27-2014

Post by Bill Plunk »

Made some more progress over the last couple of days in the paint-slinging department. First up was the usual prep work to get things ready...so some poster blue-tack was used to mask off the wheel mount points on the suspension and to create the ever-necessary 'wheels on a stick' for those components. I also used very small amounts of the blue-tack to mask the periscope faces on the turret and some painter's blue tape on the fighting compartment interior and it was time for paint.

Image

First up was a primer coat of MM enamel Italian Dark Brown.

Image

Then a base coat of a custom mix of 50/50 MM enamel Light Gray/Panzer Dunkelgelb.

Image

Road wheels got their rubber rims done after the primer coat using MM enamel Gunmetal. The hubs were masked using a draftsman's circle template and the base coat airbrushed on the outer facing wheels while the inner surfaces were left in the primer color.

Image

Next up will be applying the camo pattern.
Bill Plunk
Posts: 1245
Joined: Wed Sep 28, 2022 10:18 pm

WIP 05-28-2014

Post by Bill Plunk »

More paint progress to report today. Camo pattern is on. I applied it free-hand and used MM enamel Khaki for the green splotches first then added the brown splotches with a custom mix of 50/50 MM enamel Leather and Military Brown. Some adjustments with the basecoat mix here and there and then a light misting coat of highly thinned basecoat mix to tie it all together.

Image

Image

Image

Next up will be getting the suspension installed and start work on the other remaining details.
Bill Plunk
Posts: 1245
Joined: Wed Sep 28, 2022 10:18 pm

WIP 05-30-2014

Post by Bill Plunk »

More progress to report, this time in the suspension and tracks department. I removed all the blue tack that had masked the mounting points and then did some 'pre-weathering' on the lower hull and suspension areas. I stippled some enamel MM Burnt Umber to create some scuffing/chipping given where the tracks would run and likely wear that would occur. Much of this area is going to be obscured by the road wheels but some of it will still be visible and of course more weathering will be applied later with pigments.

Image

Next up where the road wheels, these were installed and the track runs used to ensure that the outermost wheels set up level since their attachment points to the inner hubs isn't very large and the wheels have a tendency to bow out slightly as a result. The contact surfaces on the sprocket teeth and idler wheel were treated with a base of non-buffing MM Metalizer Steel and then dry-brushed with enamel Burnt Umber to create their foundation for the later weathering. The sprockets were carefully glued in place on the rotating pins so that they could move freely to facilitate fitting the workable tracks. The idler wheels aren't adjustable in terms of their position so they weren't glued down and only dry fit to make sure everything lined up correctly.

Image

Earlier when I was airbrushing the primer coat I got a little ahead of myself and also airbrushed the 60-link runs with some MM enamel Burnt Umber. I say I got ahead because they hadn't been test-fitted to the suspension yet and I knew I was going to need more links, just not sure how many...so these will get some more paint attention now that the runs are the right length. Bronco's instructions call for 66 links per side but I only needed 65 per side to get the right amount of sag. If you do use 66, then the idler will have to be modified to be adjustable to take up the extra slack of that added link...you can do that by removing the raised pin on the tension rod (part F28) that the idler attaches to. This will allow the idler to move in its mount but of course the rod won't adjust with it...not a big deal really but I didn't need to do this since the 65 links worked out just fine.

Image

Image

Tracks will get more weathering attention later as well before their final installation. Baby's got her shoes on now!
Bill Plunk
Posts: 1245
Joined: Wed Sep 28, 2022 10:18 pm

WIP 06-01-2014

Post by Bill Plunk »

Today's 'regular' Sunday update isn't too heavy on pics but does cover an essential step, the install of the on-board tools and equipment. All of the tools were hand detailed using different methods. For the metal portions, these were base coated with MM non-buffing Metalizer Gunmetal and lightly dry-brushed with MM enamel Steel. For the wood portions, these were base coated with the 50/50 Dunkelgelb/Light Gray mix used earlier and then given a light wash of MM enamel Leather followed by a dusting of Burnt Umber artist pastels to create their look. On the jack block, I scribed in some wood-grain detail using the point of a needle file to add some extra detail. Bakelite handles on the wire cutters and the engine crank were done with MM enamel Italian Dark Brown. For the jack and fire extinguisher, I mixed up a slightly darker shade of Dunkelgelb/Light Gray to provide some contrast for those parts as they would've come from a different manufacturer/supplier so their shade would naturally be different from the vehicle itself. For good measure, I also detailed the turret MGs while I was at it.

So without further ado, here's where the pocket Tiger stands for now:

Image

Image

Next up will be working on the rear hull details like the spare tracks, exhaust, tail lights, etc. before this one's ready for the decals and the weathering process to begin.
Bill Plunk
Posts: 1245
Joined: Wed Sep 28, 2022 10:18 pm

WIP 06-08-2014

Post by Bill Plunk »

Another round of progress to report! Finished off the details that were left on the rear hull. I detailed the two spare links using a combination of dry-brushed Steel, a light wash of Rust, and then some artist pastel treatment using various hues before installing them in place in the rack. Brake lights were picked out with Tamiya Clear Red and the exhaust weathered up to finish things up using a similar approach as that used on the spare tracks minus the Steel dry-brushing.

Image

I also did some work on the track runs. These were dry-brushed with Steel followed by a wash of thinned enamel Raw Umber. More weathering to follow later on with the pigments of course.

Image

Then it was time to seal it all up with some Future to protect the foundation paint work and set the stage for the weathering. Airbrushed a Future coat and let that stand for an hour before applying the decal markings. Speaking of which, the kit-supplied decal sheet was a bit of a let-down. The sheet provides markings for three different vehicles but most of the crosses were printed off register...I was able to salvage enough from the different sets though to get a decent single set to apply to mine though it was a close thing.

Image

Markings were applied along with some Solvaset to help them snug down. I'll apply a 2nd coat of Future tomorrow to seal that all in and let that set up for at least 24 hours before going any further. Markings are for a vehicle with Panzer Regiment 1 in Russia, 1943.

Image

Image

That's it for now, next up will begin the weathering adventure!
Bill Plunk
Posts: 1245
Joined: Wed Sep 28, 2022 10:18 pm

WIP 06-15-2014

Post by Bill Plunk »

Picking up where I left off last time, I applied a second coat of Future over the decals once they had fully set and let that cure for a good 24 hours before starting in on the weathering process. First order of business was the application of a thinned MM enamel overall wash of Raw Umber (roughly 90/10 thinner-to-paint).

Image

This inevitably darkens the overall finish but never fear, the next step addresses that using a dot filter approach. I applied small dots of MM enamel Light Gray, Raw Sienna, and the 50/50 base coat mix from earlier. The dots are blended together using a square brush lightly dampened with thinner to produce a nice filter and streaking result. I worked small sections at a time and wore a breather mask due to the high thinner exposure during this process starting at the front of the hull and working my way back.

Image

After a couple hours, the dot filter was done on the hull and turret. Next up will be a pin wash to bring out some of the detail further and get things ready for the pigment weathering stage on the suspension and tracks.

Image

Image
Bill Plunk
Posts: 1245
Joined: Wed Sep 28, 2022 10:18 pm

WIP 06-17-2014

Post by Bill Plunk »

Made some more progress on the weathering front. First up was the application of a pin wash using thinned MM enamel Burnt Umber and a pointed 10/0 brush to bring out the details. Excess wash was cleaned up here and there with clean thinner and the same brush to make adjustments where needed.

Image

Image

The lower hull got some pigment treatment using Mig Dark Mud pigments. This was applied as a wet mixture using tap water with a drop of liquid dishwashing soap added to break the surface tension and left to air dry. After removing excess pigment with stiff bristled brushes and some wet and dry Q-tips, the lower hull and suspension had the look I was after.

Image

Next up will be the weathering on the tracks. Almost home on this one!
Bill Plunk
Posts: 1245
Joined: Wed Sep 28, 2022 10:18 pm

WIP 06-19-2014

Post by Bill Plunk »

Pigment weathering continued with the tracks. For these I used Mig Productions Dry Mud, applied it wet, let air dry, then removed the excess pigment with a large round stiff bristle brush until I was happy with the look.

Image

Then it was time to finally fit baby with its shoes! After feeding the tracks in over the sprockets and idlers, I used a small amount of liquid glue to fix the idlers permanently in place but left the sprockets movable to allow for handling and small tension adjustments where needed.

Image

Image

Then under the 'minor detail' department I added some of the dried left-over pigment dust from the tracks and applied it to blend things in with the darker pigment weathering done earlier. I've found that the 'dried' pigment ends up being much finer and easier to work with vs. the straight dry powder in the container for this type of thing plus you use far less pigment in the process and achieve the same end. I also installed the RB Models 2m brass antenna and painted it up to round things out there.

Image

Will let this sit overnight and give it a once over with fresh eyes tomorrow to see if there's anything I missed or need to fine tune before declaring this one 'done'!
Bill Plunk
Posts: 1245
Joined: Wed Sep 28, 2022 10:18 pm

Completion 06-20-2014

Post by Bill Plunk »

This one's all done!

Image

Image

Image

Image

Image

Image
Post Reply