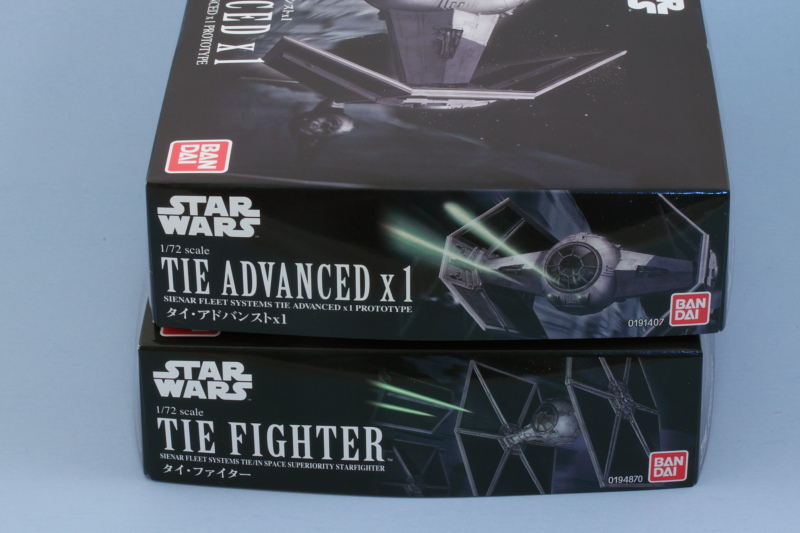
Bandai Star Wars 1/72 TIE Fighter and TIE Advanced x1 (2015)
-
Bill Plunk
- Posts: 1245
- Joined: Wed Sep 28, 2022 10:18 pm
Bandai Star Wars 1/72 TIE Fighter and TIE Advanced x1 (2015)
As a fun little diversion in-between projects, I'm going to spend a little time putting together the lovely new 1/72 Bandai TIE fighter kits that have recently come out. I'll be building them at the same time but will make a distinction between the standard TIE Fighter and the TIE Advanced x1 where appropriate!
-
Bill Plunk
- Posts: 1245
- Joined: Wed Sep 28, 2022 10:18 pm
WIP 08-21-2015
The first 3 steps of these kits are virtually identical, so I worked on them side-by-side at the same time as a result. I should note that even though these are 'press together' kits that don't require glue, I'm still gluing all the parts together as I go to both ensure I don't have any seams and that everything stays together permanently over the long haul.
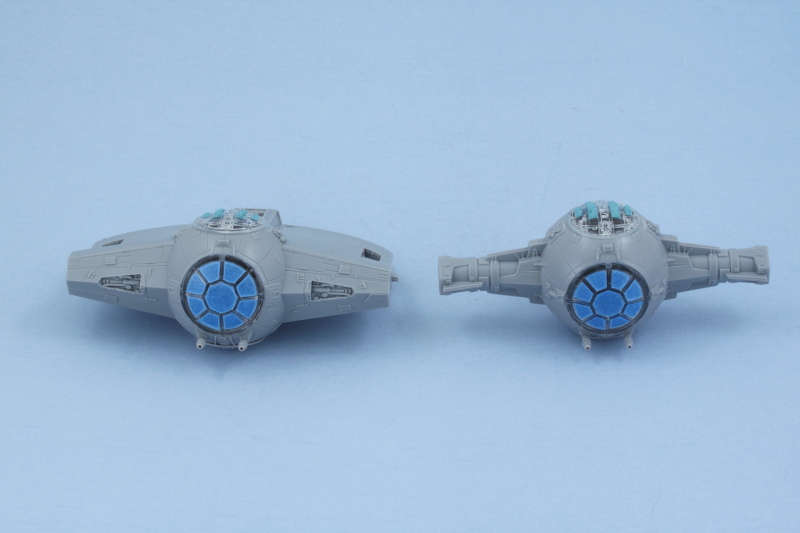
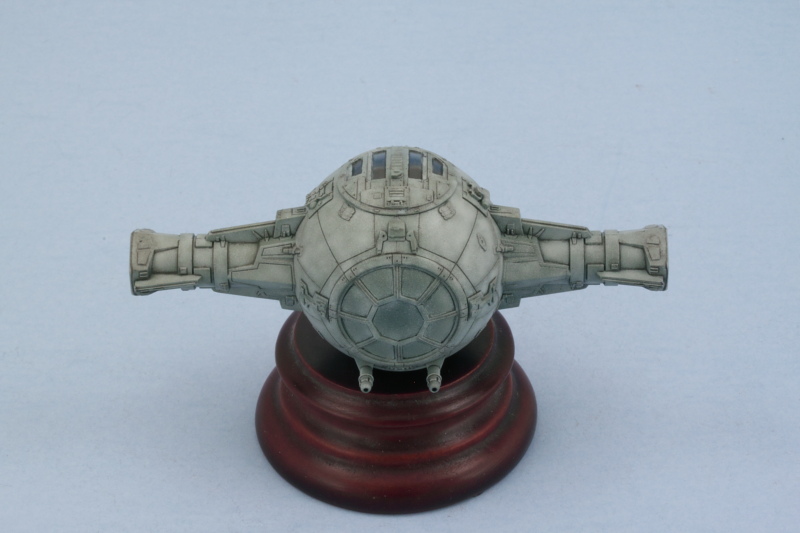
First up was getting the little 'pod' cockpits ready. The Advanced kit includes a Vader figure while the Fighter has a standard pilot. It's a nice touch I thought that they provide both sitting and standing figures depending on how you wanted to use/display them. I went with the sitting figures for both as they will be 'in flight' on their stands. The Vader figure is a tighter fit into the seat because of his cape but otherwise everything's identical.
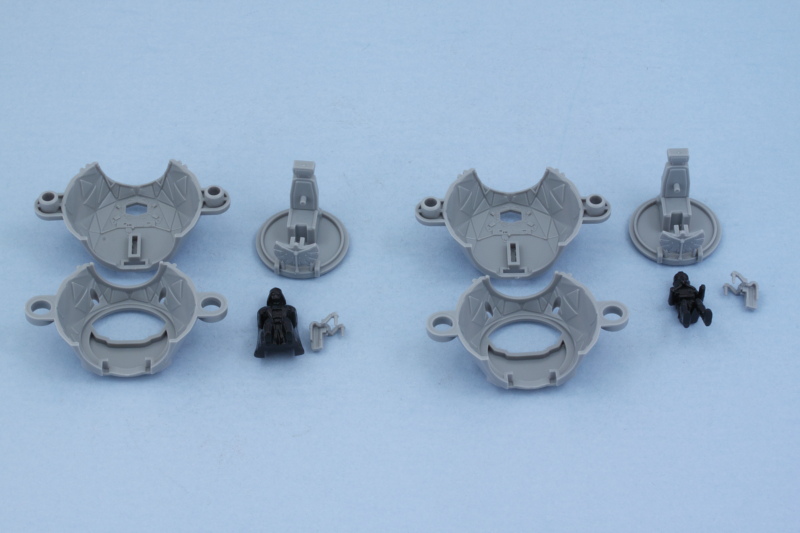
After a quick dose of airbrushed RLM 66 for the interior of the pod, the pilots and control columns were added and installed into the rear of the pods.
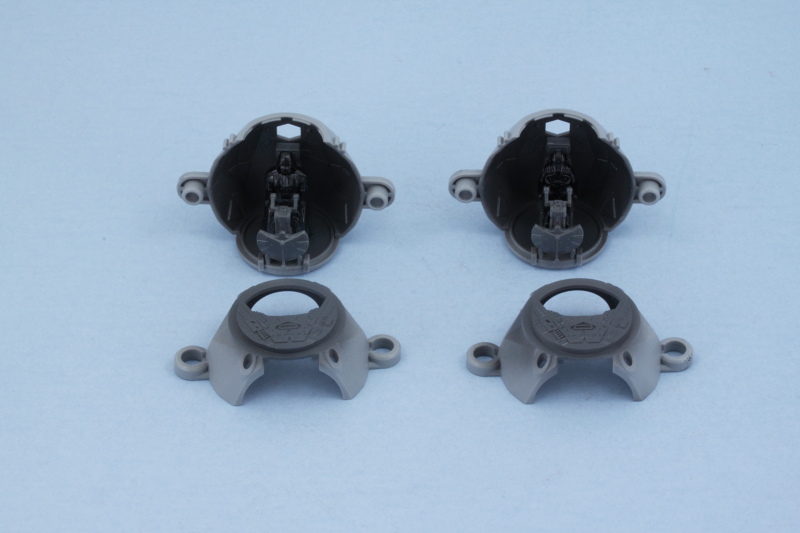
The pod halves were joined together, I found it easiest to align them at the top first and then slowly press together at the middle and then bottoms to get it to go together smoothly. Liquid glue was added around the seams and additional finger pressure and rubber bands used to make sure it was solid. Virtually all of the pod will disappear inside the hull as it nests inside the hull halves when finally installed.
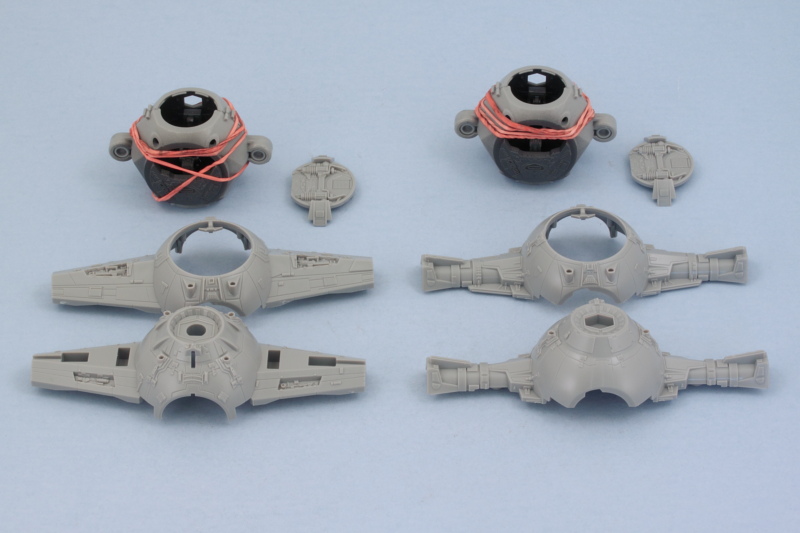
The hull halves are also designed to press together using multiple points including some on the pod...and this really is a snap together moment as you have to apply a good deal of pressure/force to get everything to sit as tight as it should and not leave any gaps. I used some rubber bands and liquid glue along the seams to make sure it all closed up properly. The Advanced hull went together a little smoother than that of the Fighter but that's largely due to their different designs I think than anything else.
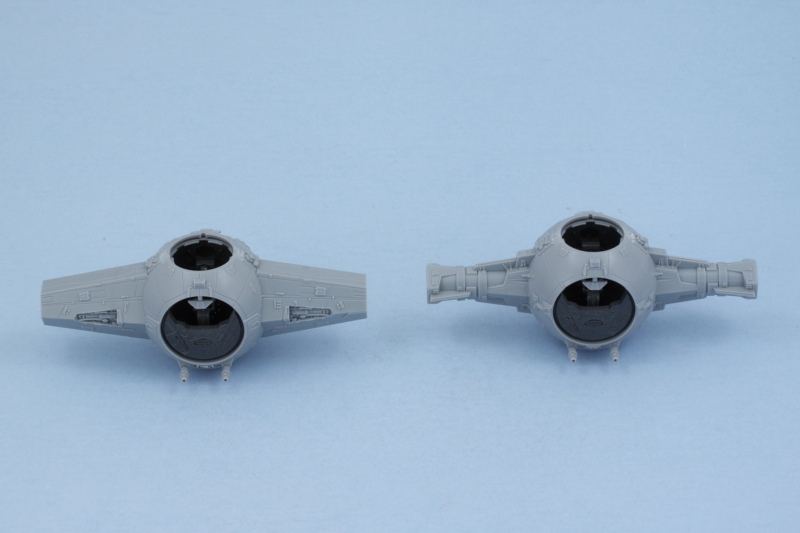
Next up will be working a bit on the clear parts for the front and top before moving on to the wings.
First up was getting the little 'pod' cockpits ready. The Advanced kit includes a Vader figure while the Fighter has a standard pilot. It's a nice touch I thought that they provide both sitting and standing figures depending on how you wanted to use/display them. I went with the sitting figures for both as they will be 'in flight' on their stands. The Vader figure is a tighter fit into the seat because of his cape but otherwise everything's identical.
After a quick dose of airbrushed RLM 66 for the interior of the pod, the pilots and control columns were added and installed into the rear of the pods.
The pod halves were joined together, I found it easiest to align them at the top first and then slowly press together at the middle and then bottoms to get it to go together smoothly. Liquid glue was added around the seams and additional finger pressure and rubber bands used to make sure it was solid. Virtually all of the pod will disappear inside the hull as it nests inside the hull halves when finally installed.
The hull halves are also designed to press together using multiple points including some on the pod...and this really is a snap together moment as you have to apply a good deal of pressure/force to get everything to sit as tight as it should and not leave any gaps. I used some rubber bands and liquid glue along the seams to make sure it all closed up properly. The Advanced hull went together a little smoother than that of the Fighter but that's largely due to their different designs I think than anything else.
Next up will be working a bit on the clear parts for the front and top before moving on to the wings.
-
Bill Plunk
- Posts: 1245
- Joined: Wed Sep 28, 2022 10:18 pm
WIP 08-22-2015
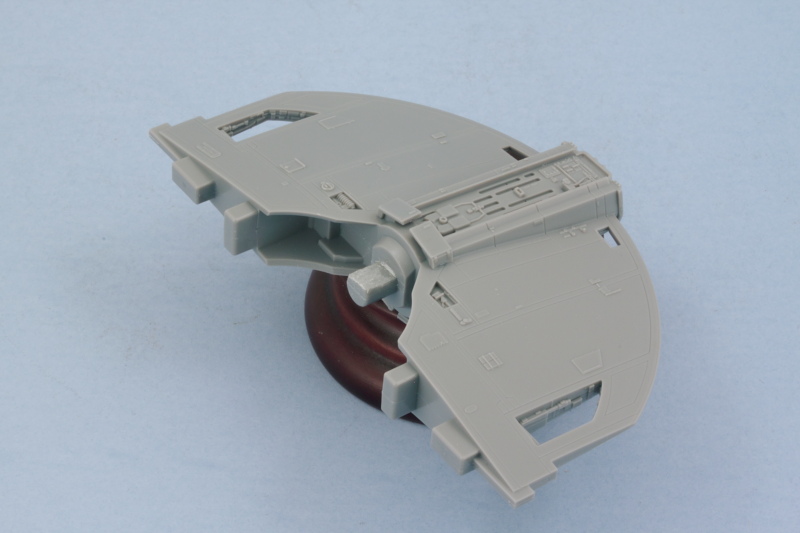
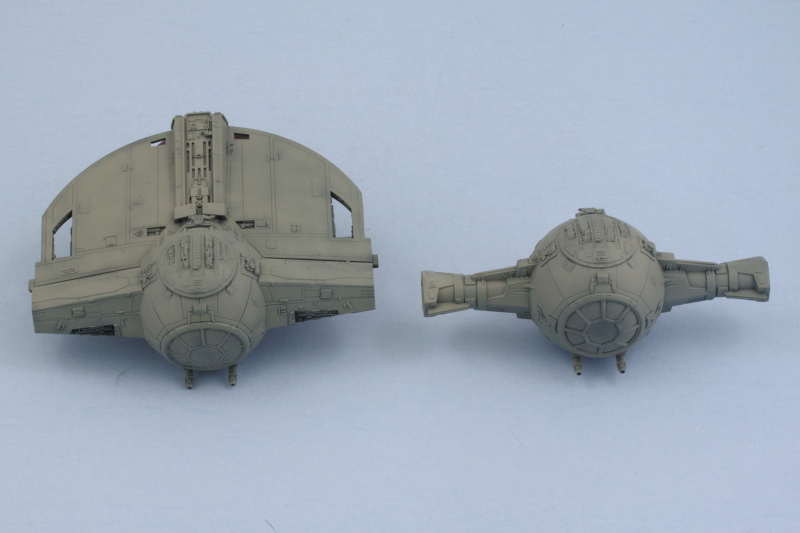
Most of the effort today went into the Advanced kit as it required a little more effort vs. the simpler design of the standard TIE fighter. I got the rear portion of the hull together without any real issues but did have to shave down the large round peg that mounts into the rear of the crew pod. For whatever reason it hadn't molded cleanly and had some extra plastic that had to be removed and sanded back to shape to fit the opening as designed.
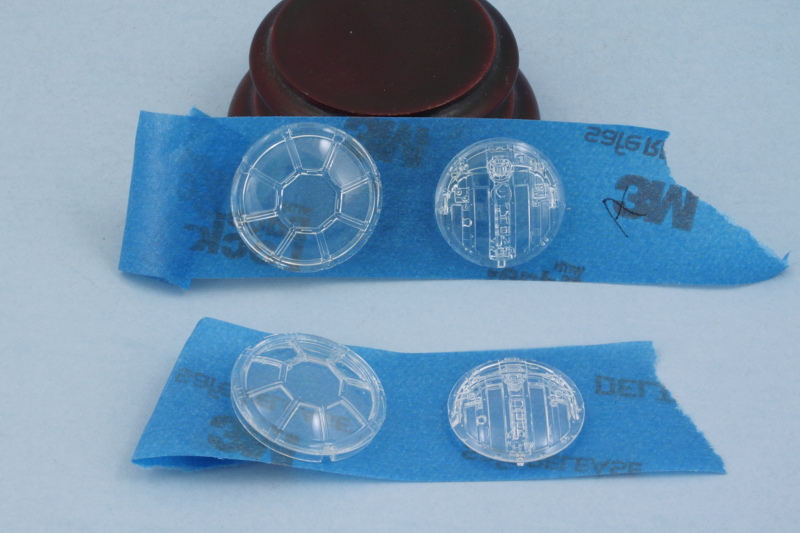
I also cleaned up the clear canopy parts for both kits. I brushed some Future acrylic floor polish on their surfaces and set them off to the side so they could dry thoroughly before handling further. As you can see they have a lot of nice molded-on detail to them. The kit also includes gray styrene options that don't have any clear parts to them, I'm guessing that's just to provide a more 'kid-friendly' aspect to the kits.
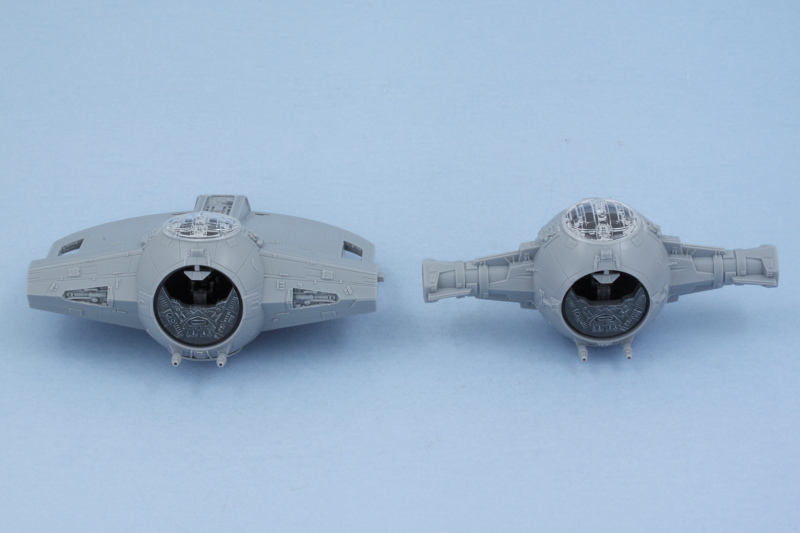
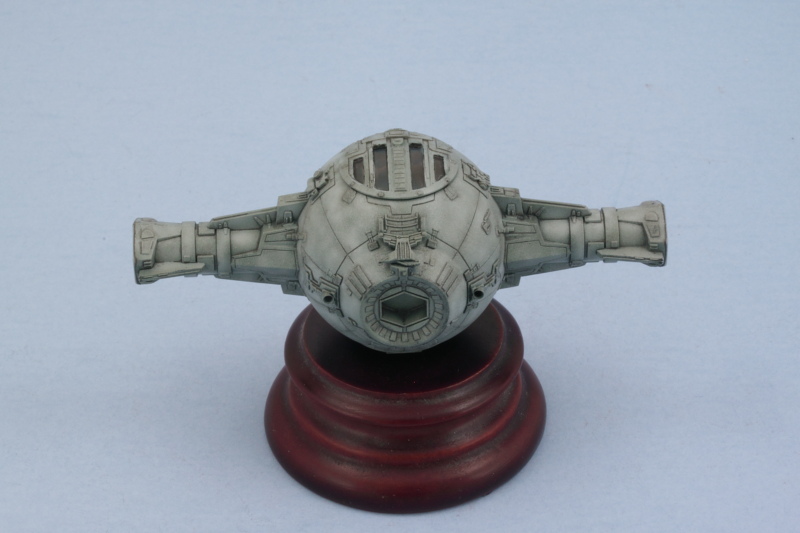
The Advanced hull was fully assembled and both fighters received their top domes since those are going to be painted to match the hull colors. I also did some dry-brushing with some Model Master Light Gray to bring out the details on the front of the cockpit bay.
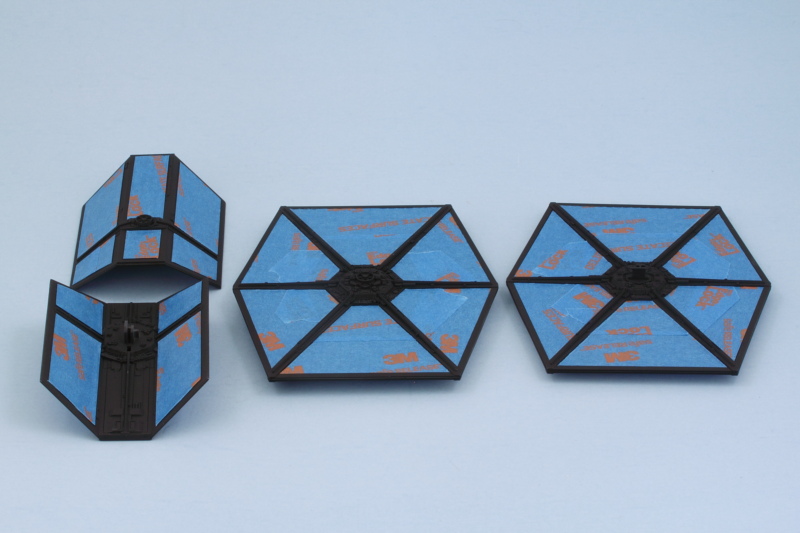
Rounding out the day's session, I spent some time on the Advanced's wings. Bandai took an interesting approach for these. The wing's are a composite of ABS for the black solar panel areas and regular gray styrene for the rest. Except for the interior plates that include the hull mounts, the wings are all one part. That's going to make painting and detailing them a little more fun as the ABS portions are slightly raised above the styrene as a result of the composite molding that was used to create them. It does create a neat pattern to the panels though. There were also several small ejector marks on the inside of the wing's perimeter edges that had to be dealt with but they weren't very deep or large.
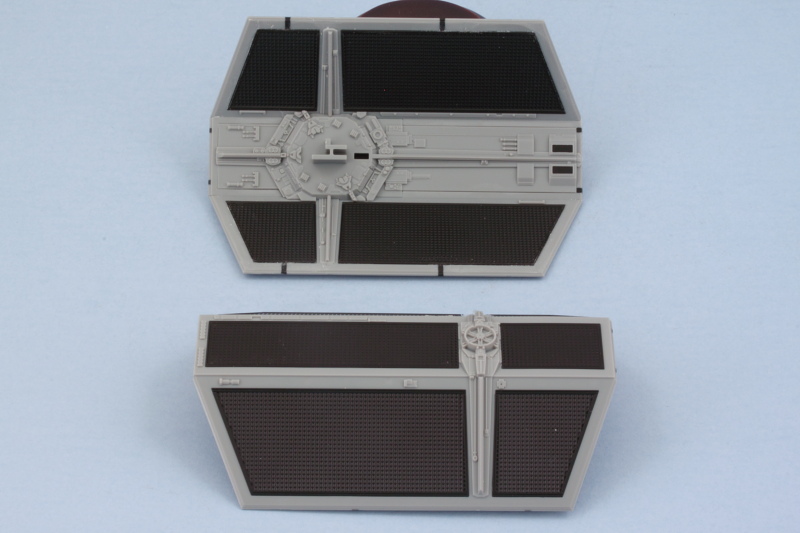
The standard Fighter's wings are all regular styrene although the solar panels are molded in black, so they only went the ABS route with the Advanced. I checked the Testors site and all of the enamel paints that I plan to use are supposed to be OK for use on ABS plastic, so hopefully I don't get any surprises down the road!
I also cleaned up the clear canopy parts for both kits. I brushed some Future acrylic floor polish on their surfaces and set them off to the side so they could dry thoroughly before handling further. As you can see they have a lot of nice molded-on detail to them. The kit also includes gray styrene options that don't have any clear parts to them, I'm guessing that's just to provide a more 'kid-friendly' aspect to the kits.
The Advanced hull was fully assembled and both fighters received their top domes since those are going to be painted to match the hull colors. I also did some dry-brushing with some Model Master Light Gray to bring out the details on the front of the cockpit bay.
Rounding out the day's session, I spent some time on the Advanced's wings. Bandai took an interesting approach for these. The wing's are a composite of ABS for the black solar panel areas and regular gray styrene for the rest. Except for the interior plates that include the hull mounts, the wings are all one part. That's going to make painting and detailing them a little more fun as the ABS portions are slightly raised above the styrene as a result of the composite molding that was used to create them. It does create a neat pattern to the panels though. There were also several small ejector marks on the inside of the wing's perimeter edges that had to be dealt with but they weren't very deep or large.
The standard Fighter's wings are all regular styrene although the solar panels are molded in black, so they only went the ABS route with the Advanced. I checked the Testors site and all of the enamel paints that I plan to use are supposed to be OK for use on ABS plastic, so hopefully I don't get any surprises down the road!
-
Bill Plunk
- Posts: 1245
- Joined: Wed Sep 28, 2022 10:18 pm
WIP 08-24-2015
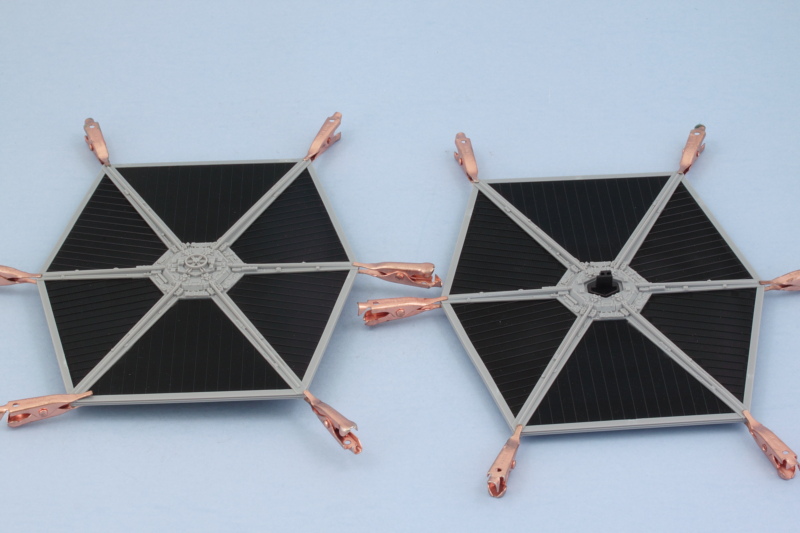
More progress to report, this time on the standard Fighter's wings. I have to say I'm impressed with Bandai's approach to these, the parts fit and engineering are outstanding and the ejector pins are all positioned on surfaces that aren't visible. Other than a few that were slightly raised vs. sunken that I sanded down to be sure they didn't cause any interference, the clean-up of the parts here is minimal. Each wing panel is molded in black and the perimeter edges are all separate parts that fit together along with the 'spider' centerpieces to create the full wing. Careful use of liquid glue and applied pressure did the trick. Some small clamps were helpful in getting all the edge join parts to glue together seamlessly and that was that!
There's always some tedious task to be done in every build, on these it's the canopy masking. I used regular blue painter's tape and burnished it down with a toothpick, then carefully cut out each window pane's mask with a sharp #11 blade. Due to the friction fit, I didn't want to run the risk of paint interference later on so I went ahead and installed them in place. I'm also not going to follow the instruction illustrations and paint the frames a darker gray from the rest of the exterior hull...instead they will all get the same gray treatment. Keeps life simpler that way. For the hatch tops, I masked the small window openings there with some poster blue tack putty. The windows are small and narrow and trying the masking tape approach was more challenging due to the relatively shallow frames on this part.
Next up will be spraying some flat black primer and getting ready to paint the exteriors. The wings are being kept separate deliberately to make the painting job easier.
There's always some tedious task to be done in every build, on these it's the canopy masking. I used regular blue painter's tape and burnished it down with a toothpick, then carefully cut out each window pane's mask with a sharp #11 blade. Due to the friction fit, I didn't want to run the risk of paint interference later on so I went ahead and installed them in place. I'm also not going to follow the instruction illustrations and paint the frames a darker gray from the rest of the exterior hull...instead they will all get the same gray treatment. Keeps life simpler that way.
Next up will be spraying some flat black primer and getting ready to paint the exteriors. The wings are being kept separate deliberately to make the painting job easier.
-
Bill Plunk
- Posts: 1245
- Joined: Wed Sep 28, 2022 10:18 pm
WIP 08-24-2015
Paint it black! It's primer time! I airbrushed some Testors Model Master Flat Black to do double duty as a primer/pre-shade for the gray areas and also to remove the plastic sheen from the solar panel areas on both wing sets.
Next up will be fun with gray!
Next up will be fun with gray!
-
Bill Plunk
- Posts: 1245
- Joined: Wed Sep 28, 2022 10:18 pm
WIP 08-29-2015
Today's update is brought to you by the number 3 and the letter M! While it may not seem like much, it actually took about 3 hours working with my cutting mat, trusty #11 Exacto, and of course some blue painter's tape to get all of the wing panels properly masked. That means paint will soon be flying once again!
-
Bill Plunk
- Posts: 1245
- Joined: Wed Sep 28, 2022 10:18 pm
WIP 08-30-2015
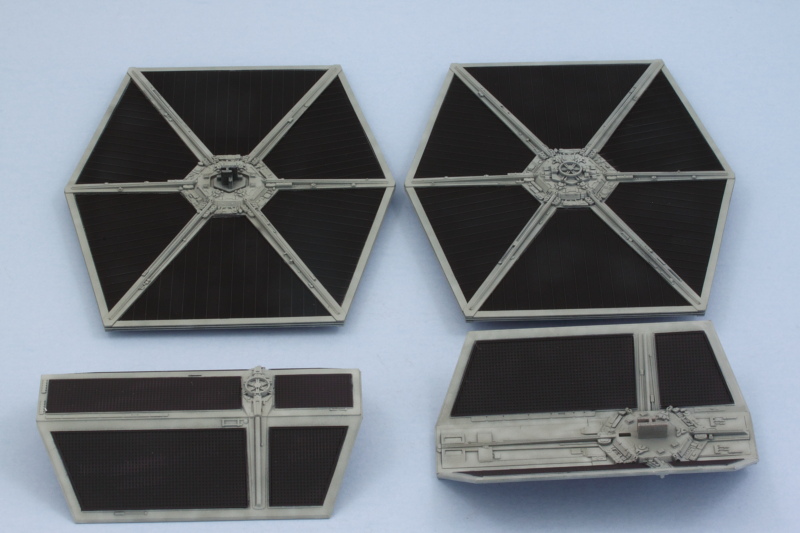
Spent a good while in the paint booth today...nearly as long as I spent yesterday masking in fact! Testors Model Master RLM 02 Grau did the trick nicely over the previous primer/pre-shade coat of Flat Black.
Working in 1/72 space meant getting up close and personal with the airbrush tip, I'm very glad that I kept the bodies and wings separate. I'm going to continue with that strategy through the rest of the finish/weathering stages and will attach them only at the very end for added flexibility.
Fun continues!
-
Bill Plunk
- Posts: 1245
- Joined: Wed Sep 28, 2022 10:18 pm
WIP 08-31-2015
Added another layer to the paint/finish today with more time spent in the spray booth. This time I was working with some Model Master IJN Sky Gray to provide some variation and depth to the overall finish.
This should provide a solid foundation for the additional weathering/finish steps so I should be just about done with the airbrush phases. We'll see how much touch-up work I'll have to do once I remove all the masking tape from the wings of course!
This should provide a solid foundation for the additional weathering/finish steps so I should be just about done with the airbrush phases. We'll see how much touch-up work I'll have to do once I remove all the masking tape from the wings of course!
-
Bill Plunk
- Posts: 1245
- Joined: Wed Sep 28, 2022 10:18 pm
WIP 09-03-2015
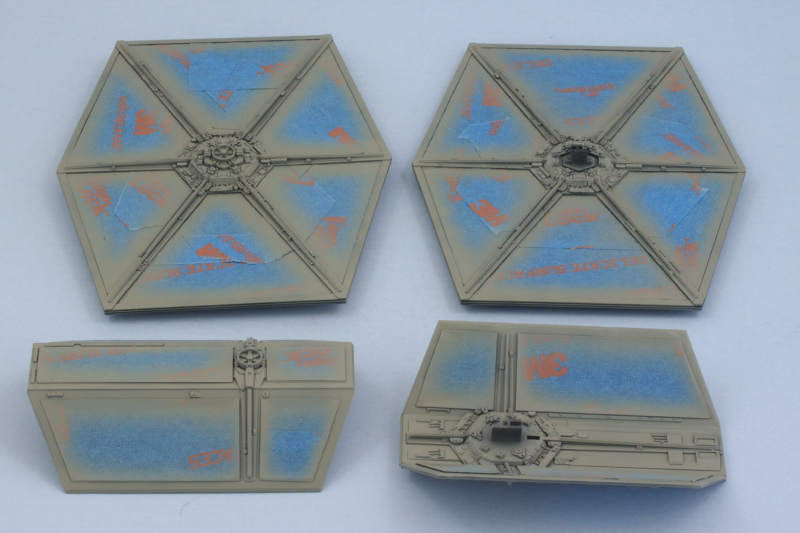
One of the nice little features in the Bandai kits is the inclusion of a small base. It's meant to represent a small section of the Death Star surface and while the instructions indicate that you can clip them together, they aren't big enough on their own to allow the two TIE fighters to be joined together...so I'll be keeping them separate.
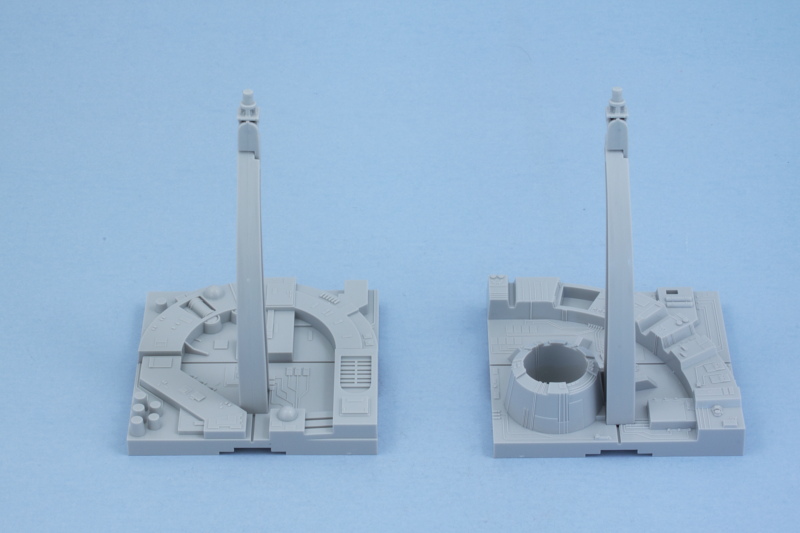
Out came the airbrush again and I did the same Flat Black pre-shade/primer and RLM 02 Grau overcoat approach. I'm going to leave these a darker gray to provide more contrast with the TIEs themselves, so the RLM 02 was sprayed with a fine diameter tip and very close application. That gave my trigger finger quite the workout but was worth it for the end result.

Since I had the Flat Black out already, I took the masking tape off the wings and checked them for any touch-ups needed. A little bit here and there was all that was necessary. I'm very happy with how well the masking did its job throughout the process.
Next up is sealing all this up and getting ready for the weathering process.
Out came the airbrush again and I did the same Flat Black pre-shade/primer and RLM 02 Grau overcoat approach. I'm going to leave these a darker gray to provide more contrast with the TIEs themselves, so the RLM 02 was sprayed with a fine diameter tip and very close application. That gave my trigger finger quite the workout but was worth it for the end result.
Since I had the Flat Black out already, I took the masking tape off the wings and checked them for any touch-ups needed. A little bit here and there was all that was necessary. I'm very happy with how well the masking did its job throughout the process.
Next up is sealing all this up and getting ready for the weathering process.
-
Bill Plunk
- Posts: 1245
- Joined: Wed Sep 28, 2022 10:18 pm
WIP 09-05-2015
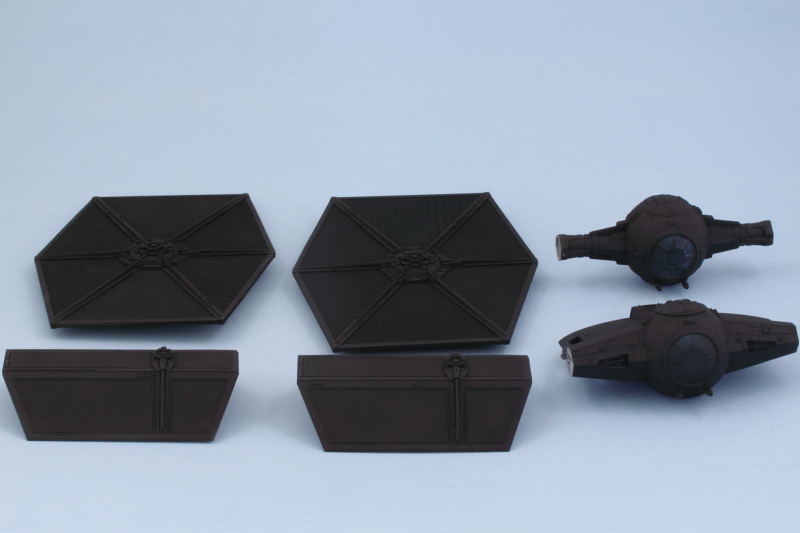
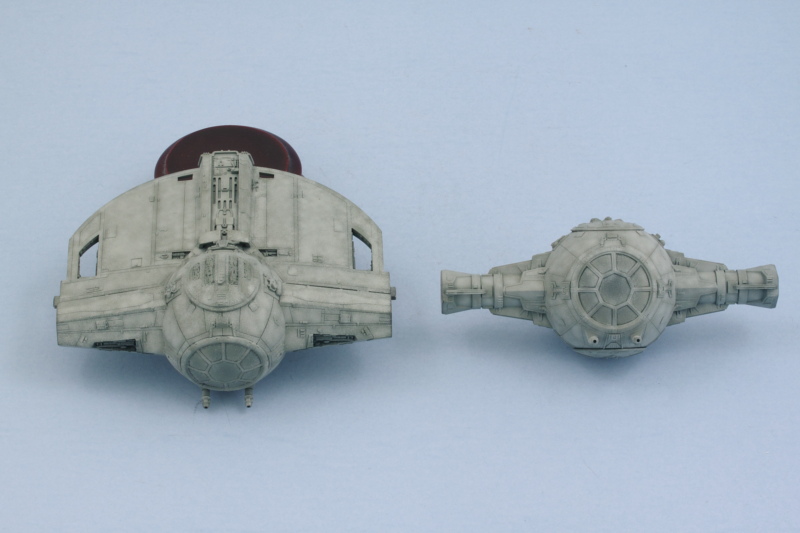
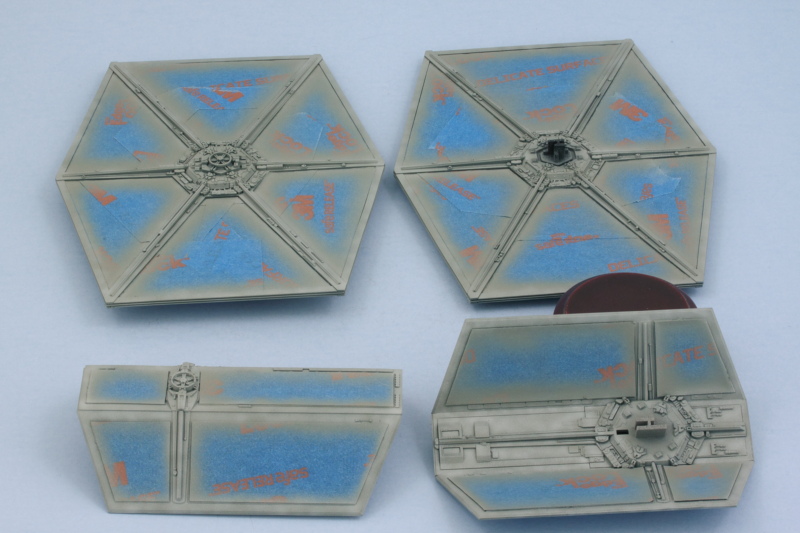
Taking advantage of the Labor Day extended weekend, I started in on the weathering. As usual, everything got a sealing coat of Future first yesterday and I let that sit overnight so it would be ready for today. There's so much detail on these TIEs that I decided to go with a pin wash approach vs. filters to get it all to pop out. The standard fighter went first and after about 4 hours, I had the body done. The wings won't take nearly as long, of course, it's the body that has the vast majority of the detail. My trusty combo of Burnt Umber and a 10/0 pointed brush followed by clean thinner to tighten things up where needed did the trick.
I noticed that my blue-tack masks for the cockpit hatch had gotten a little squished down during the painting phases, so I removed them to see if a little touch-up was required. Sure enough, there were a couple of rough spots so those were dealt with now and I'll re-mask before applying a flat coat to ensure they don't fog over.
I noticed that my blue-tack masks for the cockpit hatch had gotten a little squished down during the painting phases, so I removed them to see if a little touch-up was required. Sure enough, there were a couple of rough spots so those were dealt with now and I'll re-mask before applying a flat coat to ensure they don't fog over.