Tamiya 1/48 Vought F4U-1A Corsair (2016)
-
Bill Plunk
- Posts: 1245
- Joined: Wed Sep 28, 2022 10:18 pm
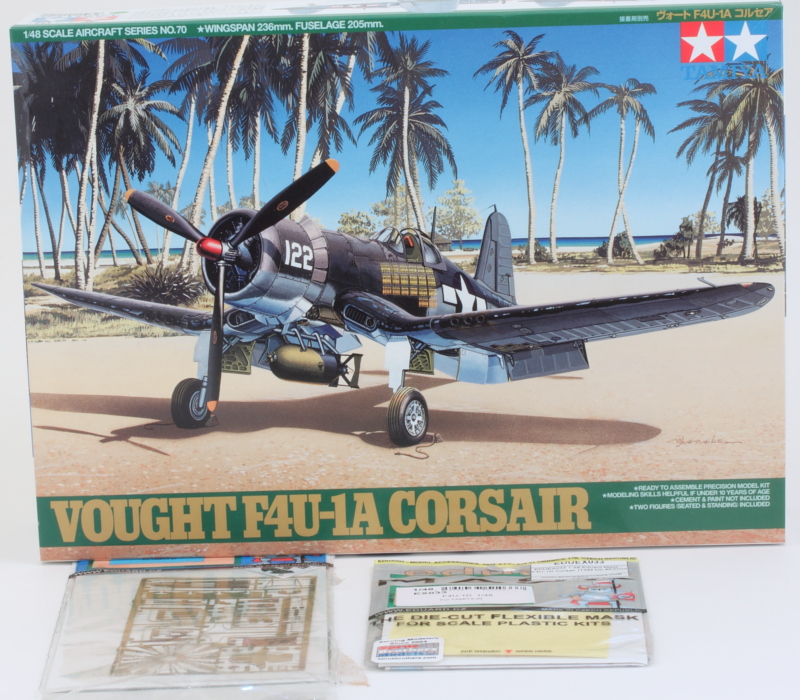
Tamiya 1/48 Vought F4U-1A Corsair (2016)
Courtesy of my lovely wife, I get to spread my wings a little and do something different! This project will feature Tamiya's lovely 1/48 Vought F4U-1A Corsair with some Eduard PE and masks to help things along.
-
Bill Plunk
- Posts: 1245
- Joined: Wed Sep 28, 2022 10:18 pm
WIP 04-12-2016
I had my choice of starting with the cockpit in Step 1 or starting on the engine in Step 2...so I picked the engine as it just called to me a little louder I guess! 
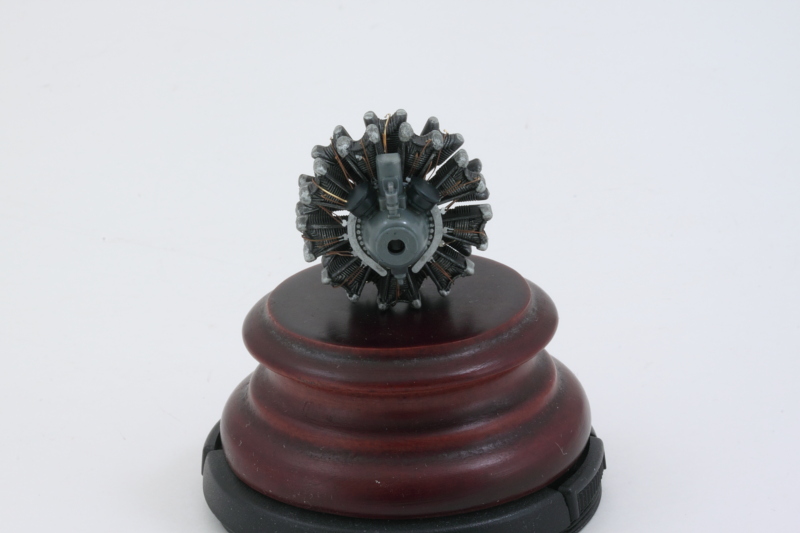
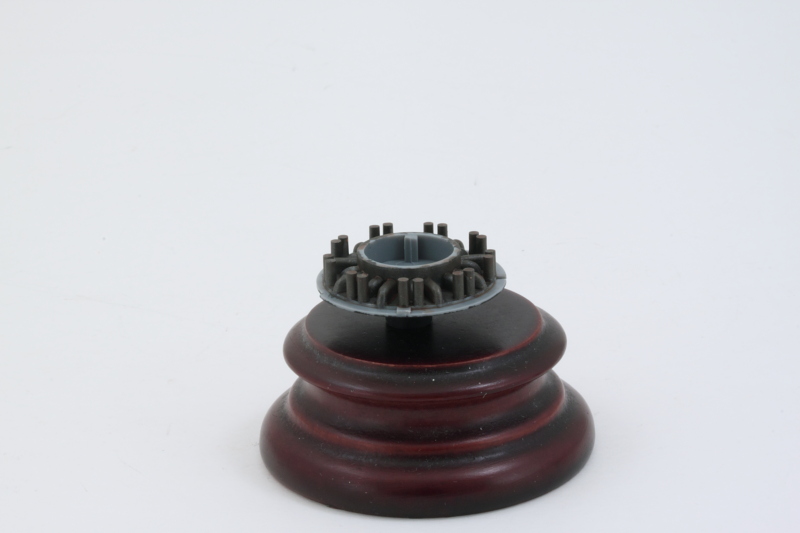
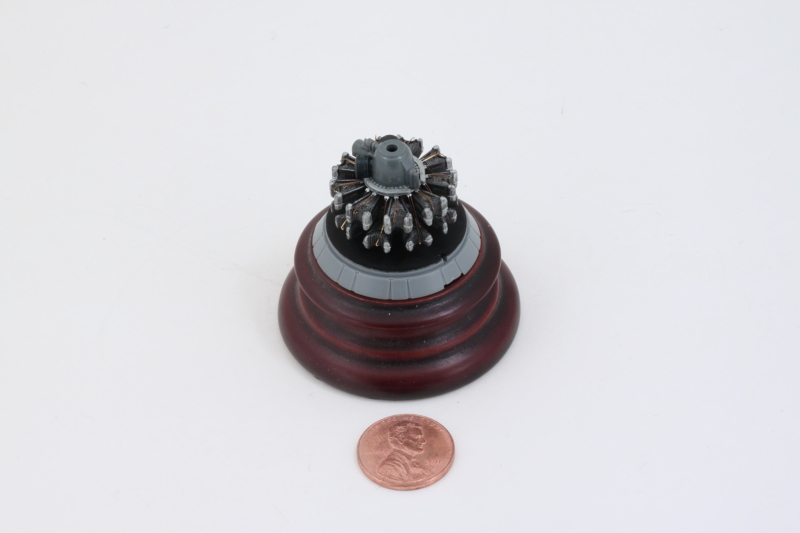
The two banks of cylinders are separate parts with the crankcase hub on the front as a third component. That made detailing and painting life pretty easy. I handpainted the cylinders with MM Non-Buffing Metalizer Gunmetal and lightly dry-brushed them with MM enamel Steel to bring out their detail. The cylinder heads were painted with the same Steel and the Eduard PE set provided the ignition wires as a single spider-like piece that slid in underneath the crankcase part. A medium gray mix I keep on hand from a previous build supplied the primer color for the crankcase and Non-Buffing Metalizer Steel picked out the ignition harness. Considering the whole engine is roughly the same diameter as a quarter, it's got a lot of detail IMHO.
The engine installs to a firewall that has the exhaust pipe details on the rear face with the option to have the cowl flaps open or closed, so I went for open since there's detail there to fill the space. Non-buffing Metalizer Gunmetal as the basecoat here with successive washes of thinned MM enamel Leather to build up their rusty/grimy look. 95% of this gets hidden away, but that 5% that stays visible is a nice detail.
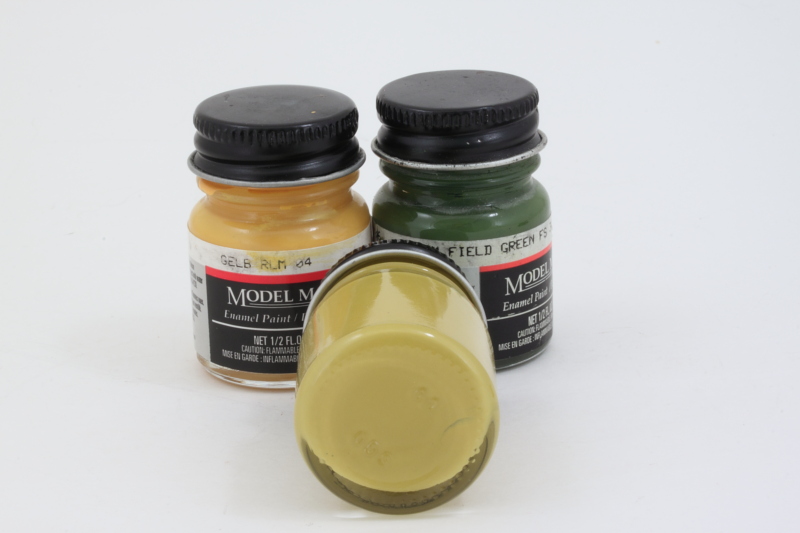
I needed to mix up some Yellow Chromate, so I created my own home-brew combination of MM enamel Gelb RLM 04 and Medium Field Green. It didn't take a lot of the green to do the trick, but don't ask me for the exact ratio...I just tinkered with it until it looked right to my eye. A little bit of the Green went a long way for sure! The new color was hand brushed inside the cowl and flaps in careful coats to build it up so it would cover the underlying gray plastic adequately.
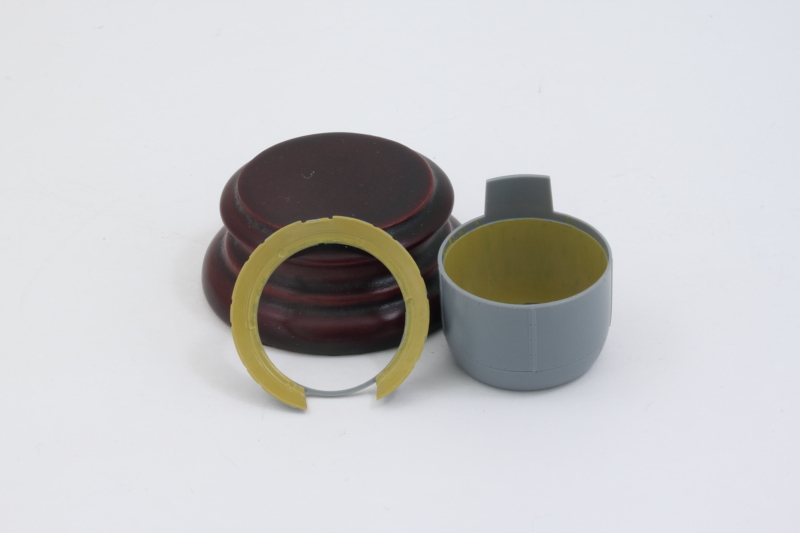
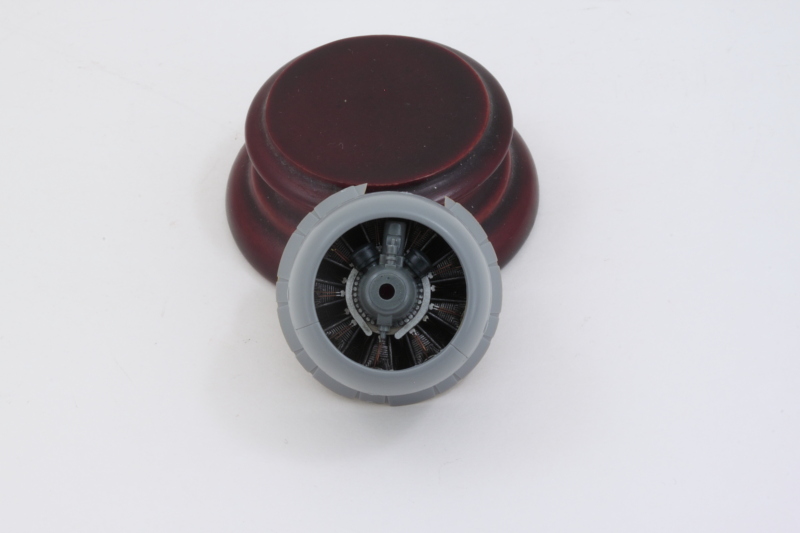
The engine was added to the firewall base first. This is a tight friction fit, so once it was done there was no going back. The full engine and firewall combo was then joined to the cowl flaps since the cowl itself mounts directly to the cowl flaps rim.
Cowl was added next and a quick test fit with the fuselage done to make sure everything was playing nice and lining up correctly.
The prop installs using a polycap trapped inside the crankcase, so that will make life easy in terms of painting and what not as well as installing the prop when the time comes later on.
The two banks of cylinders are separate parts with the crankcase hub on the front as a third component. That made detailing and painting life pretty easy. I handpainted the cylinders with MM Non-Buffing Metalizer Gunmetal and lightly dry-brushed them with MM enamel Steel to bring out their detail. The cylinder heads were painted with the same Steel and the Eduard PE set provided the ignition wires as a single spider-like piece that slid in underneath the crankcase part. A medium gray mix I keep on hand from a previous build supplied the primer color for the crankcase and Non-Buffing Metalizer Steel picked out the ignition harness. Considering the whole engine is roughly the same diameter as a quarter, it's got a lot of detail IMHO.
The engine installs to a firewall that has the exhaust pipe details on the rear face with the option to have the cowl flaps open or closed, so I went for open since there's detail there to fill the space. Non-buffing Metalizer Gunmetal as the basecoat here with successive washes of thinned MM enamel Leather to build up their rusty/grimy look. 95% of this gets hidden away, but that 5% that stays visible is a nice detail.
I needed to mix up some Yellow Chromate, so I created my own home-brew combination of MM enamel Gelb RLM 04 and Medium Field Green. It didn't take a lot of the green to do the trick, but don't ask me for the exact ratio...I just tinkered with it until it looked right to my eye. A little bit of the Green went a long way for sure!
The engine was added to the firewall base first. This is a tight friction fit, so once it was done there was no going back. The full engine and firewall combo was then joined to the cowl flaps since the cowl itself mounts directly to the cowl flaps rim.
Cowl was added next and a quick test fit with the fuselage done to make sure everything was playing nice and lining up correctly.
The prop installs using a polycap trapped inside the crankcase, so that will make life easy in terms of painting and what not as well as installing the prop when the time comes later on.
-
Bill Plunk
- Posts: 1245
- Joined: Wed Sep 28, 2022 10:18 pm
WIP 04-13-2016
Managed to get in a decent amount of benchtime today after an early morning 'distraction' of sorts.
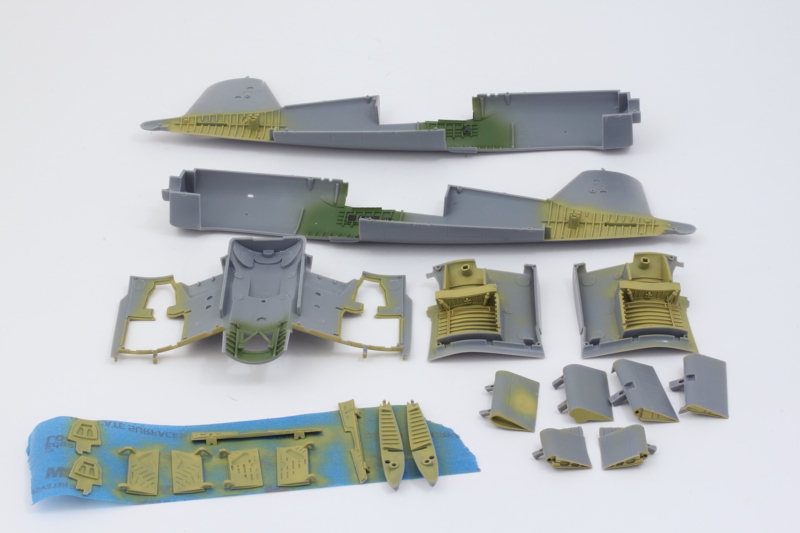
This time I focused on all the areas that will need the green treatment for the cockpit internals. Between the Tamiya parts and the Eduard sets, I did a little picking and choosing as to which details were worth the effort to include or leave as-is based on how much would actually be visible once it was all together. Some of the stuff in the Eduard set I think was included just to 'beef up' the set a little bit vs. really adding much value relative to the kit parts. That's the AM PE game sometimes, always good to pick and choose. The set does have some worthy additions like the knob wheels, the pilot's map holder, rudder pedal details, etc. that were added in. Others like the frame holders for the oxygen bottle that disappear under the seat once it's installed fall in the 'because we can' category and weren't used. I also decided to stick with the kit-supplied seat as the amount of surgery required combined with the fragile frame and connection design of the Eduard parts wasn't worth it to me. Your mileage may vary. All of this stuff will get painted and detailed before it's pulled together into a single module for install into the fuselage.

Speaking of the fuselage, I added in the PE canopy sills and cleaned up the bottom half of the wing since it also has the floor and window opening that need the interior green treatment. It was necessary to remove some raised ejector marks with a micro chisel at the front part of the window frame, these were interfering with the fit with the front cockpit bulkhead if left in place.

Some paint will fly tomorrow!
This time I focused on all the areas that will need the green treatment for the cockpit internals. Between the Tamiya parts and the Eduard sets, I did a little picking and choosing as to which details were worth the effort to include or leave as-is based on how much would actually be visible once it was all together. Some of the stuff in the Eduard set I think was included just to 'beef up' the set a little bit vs. really adding much value relative to the kit parts. That's the AM PE game sometimes, always good to pick and choose. The set does have some worthy additions like the knob wheels, the pilot's map holder, rudder pedal details, etc. that were added in. Others like the frame holders for the oxygen bottle that disappear under the seat once it's installed fall in the 'because we can' category and weren't used. I also decided to stick with the kit-supplied seat as the amount of surgery required combined with the fragile frame and connection design of the Eduard parts wasn't worth it to me. Your mileage may vary.
Speaking of the fuselage, I added in the PE canopy sills and cleaned up the bottom half of the wing since it also has the floor and window opening that need the interior green treatment. It was necessary to remove some raised ejector marks with a micro chisel at the front part of the window frame, these were interfering with the fit with the front cockpit bulkhead if left in place.
Some paint will fly tomorrow!
-
Bill Plunk
- Posts: 1245
- Joined: Wed Sep 28, 2022 10:18 pm
WIP 04-14-2016
Managed to get the cockpit squared away today. First order of business was airbrushing some Interior Green over all the different components.

Details were picked out on the fuselage side where appropriate.

Instrument panel got similar attention and the kit-supplied decal faces added with a couple doses of Solvaset needed to get it to snug down.

The arm rests got all of their panels, switches, and various controls picked out as well. Lots of patience and Optivisor time involved here!

The Eduard seat harness elements were detailed and added to the pilot's seat. I also added some drybrushed MM enamel Steel wear and tear to the seat itself and picked out the head rest cushion.

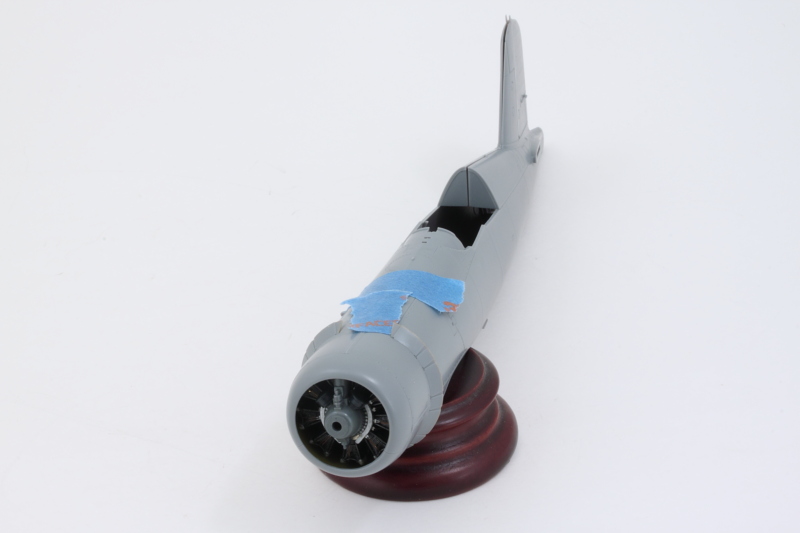
Then it was time to get all of these elements together to form the full pit.

And just to make sure it set up in the proper position, I taped the fuselage halves together around it. A lot of the detail disappears inside of course and there's still the gunsight and armored glass to add into the top once the fuselage is joined together.

Moving right along!
Details were picked out on the fuselage side where appropriate.
Instrument panel got similar attention and the kit-supplied decal faces added with a couple doses of Solvaset needed to get it to snug down.
The arm rests got all of their panels, switches, and various controls picked out as well. Lots of patience and Optivisor time involved here!
The Eduard seat harness elements were detailed and added to the pilot's seat. I also added some drybrushed MM enamel Steel wear and tear to the seat itself and picked out the head rest cushion.
Then it was time to get all of these elements together to form the full pit.
And just to make sure it set up in the proper position, I taped the fuselage halves together around it. A lot of the detail disappears inside of course and there's still the gunsight and armored glass to add into the top once the fuselage is joined together.
Moving right along!
-
Bill Plunk
- Posts: 1245
- Joined: Wed Sep 28, 2022 10:18 pm
WIP 04-15-2016
Not a huge update today but a necessary round of prep for the next bout with the airbrush. This time, I focused on the areas that will get yellow chromate, so the first item involved the main gear bays in the wings. There are some tricky ejector marks that need to be removed inside the bays, I used a micro chisel to get rid of them. The Eduard set provided some PE details including some wiring that was a fun challenge to get fitted since it had to be bent in multiple spots to conform to the curved bays.

The other mundane step involved getting all the landing gear doors prepped and the flap components assembled. One of the flaps has a step molded in it that the instructions direct to be filled in, so that was done with a combination of sheet styrene and Squadron green putty. The step goes all the way through the flap, so I had to be a little creative in terms of blanking it off from the inside first and then filling it gradually on the outside.

More fun with the airbrush tomorrow!
The other mundane step involved getting all the landing gear doors prepped and the flap components assembled. One of the flaps has a step molded in it that the instructions direct to be filled in, so that was done with a combination of sheet styrene and Squadron green putty. The step goes all the way through the flap, so I had to be a little creative in terms of blanking it off from the inside first and then filling it gradually on the outside.
More fun with the airbrush tomorrow!
-
Bill Plunk
- Posts: 1245
- Joined: Wed Sep 28, 2022 10:18 pm
WIP 04-16-2016
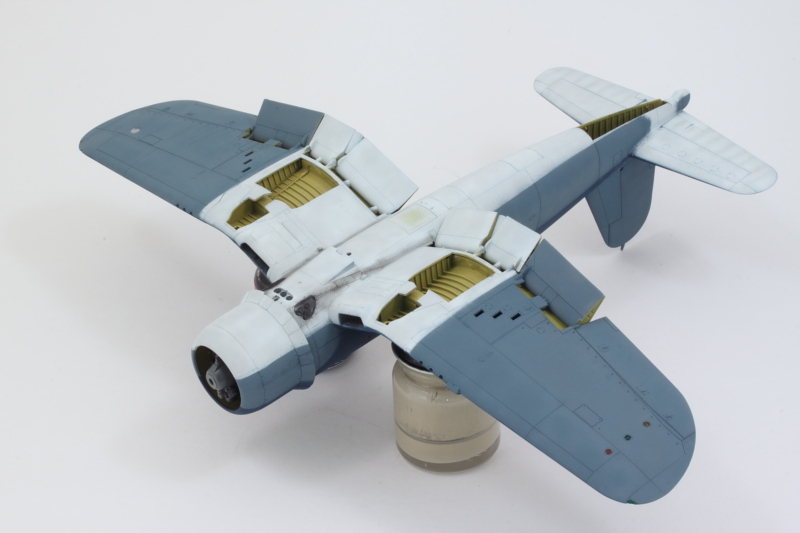
Lots of progress to report this time around with the Corsair. First order of business, I airbrushed some of the Yellow Chromate mix in all the internal spaces that needed it. For good measure, I also used it to check the putty/fill work on the one flap and made some adjustments there to get it nice and smooth.
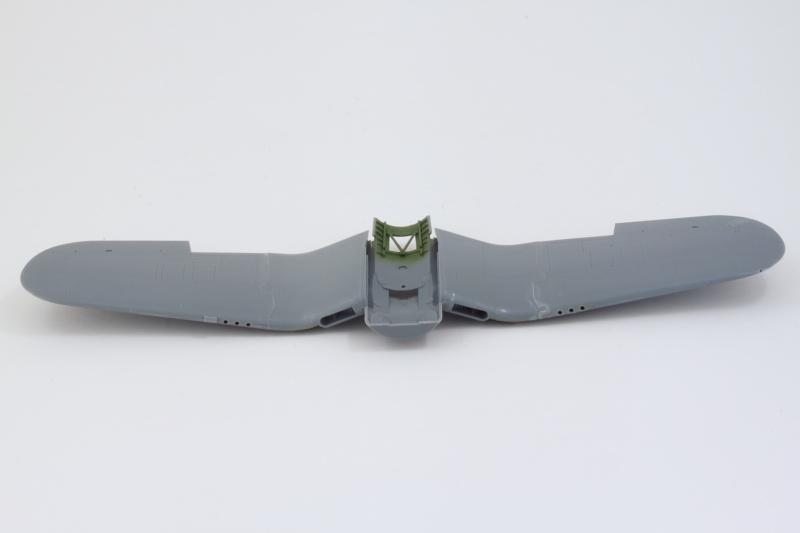
That meant I could now install the cockpit finally, so it went into the right fuselage side first so it wouldn't shift around when I joined the halves.

The fit on the fuselage is really very good, especially at the front. Liquid glue and some slight finger pressure was all that was needed there while the rear half needed a little more persuasion with the help of some rubber bands and smooth jaw clamps on the tail fin.

While the fuselage set up, I assembled the wing roots. The bottom halves are both flexible and a little fragile, so I used some non-slip clamps there to hold it all together while the glue set.

Coming back to the fuselage, I added the dorsal insert that installs behind the cockpit. This is a two-part deal that fits very snugly in place. It was at this moment that I realized I forgot to open up the slot for the antenna mast...I was too distracted by other things to notice the call-out in the instruction step until it was too late. I'll have to get a little creative on installing that later on. Some very light sanding was all that was needed to remove the very slight join seam.

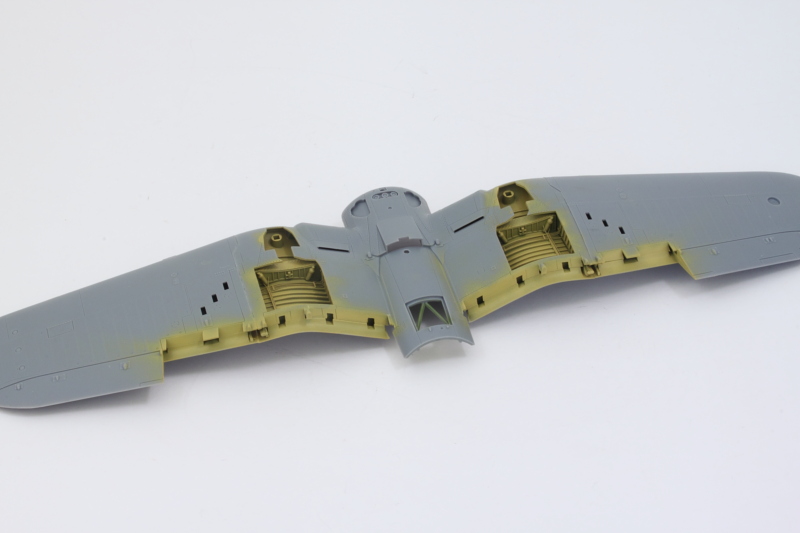
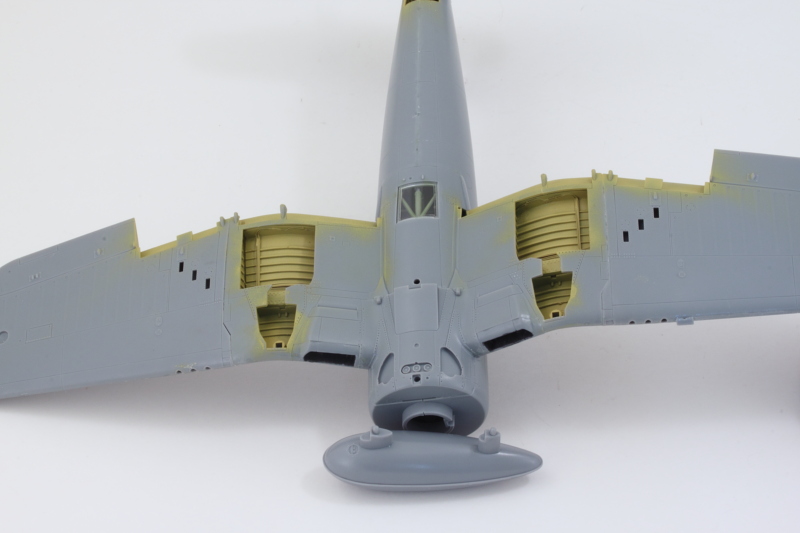
Wing roots got their support spars and inserts for the wing joint. The oil coolers were also added and their fit was mostly good, just some small putty and sanding needed in a couple of spots. I also added the Eduard PE cooler screens for some extra detail.

Main wing portions were assembled next. Pretty straightforward exercise, I used some small clamps along the edges and liquid glue, then removed the clamps once the glue had grabbed.

Last little bit for the day, I added in the Eduard PE insert for the tail wheel bay. This calls for a rectangular part to be removed from the blank bulkhead to match up with the opening in the PE part. That would've been hard to do with the halves separate, so now that the fuselage was joined, I used a mechanical pencil to outline the opening needed, drilled out the center with a micro drill, then widened it with a square needle file until it matched the necessary dimensions. The PE part went in and voila! Extra detail.

I'll need to airbrush a little more yellow for the tail wheel bay and a couple of spots on the main wings where the flaps are deployed, then it will be time to join the wing roots to the fuselage, add the stabilizers, and start thinking about the serious paint work. Since the main wings can slide on/off the spars easily, I'm probably going to paint them separate and then match everything up. Same thing with the engine and cowl. This modular approach might make life just a little easier in terms of getting the three-tone camo scheme on, have to see.
That meant I could now install the cockpit finally, so it went into the right fuselage side first so it wouldn't shift around when I joined the halves.
The fit on the fuselage is really very good, especially at the front. Liquid glue and some slight finger pressure was all that was needed there while the rear half needed a little more persuasion with the help of some rubber bands and smooth jaw clamps on the tail fin.
While the fuselage set up, I assembled the wing roots. The bottom halves are both flexible and a little fragile, so I used some non-slip clamps there to hold it all together while the glue set.
Coming back to the fuselage, I added the dorsal insert that installs behind the cockpit. This is a two-part deal that fits very snugly in place. It was at this moment that I realized I forgot to open up the slot for the antenna mast...I was too distracted by other things to notice the call-out in the instruction step until it was too late. I'll have to get a little creative on installing that later on.
Wing roots got their support spars and inserts for the wing joint. The oil coolers were also added and their fit was mostly good, just some small putty and sanding needed in a couple of spots. I also added the Eduard PE cooler screens for some extra detail.
Main wing portions were assembled next. Pretty straightforward exercise, I used some small clamps along the edges and liquid glue, then removed the clamps once the glue had grabbed.
Last little bit for the day, I added in the Eduard PE insert for the tail wheel bay. This calls for a rectangular part to be removed from the blank bulkhead to match up with the opening in the PE part. That would've been hard to do with the halves separate, so now that the fuselage was joined, I used a mechanical pencil to outline the opening needed, drilled out the center with a micro drill, then widened it with a square needle file until it matched the necessary dimensions. The PE part went in and voila! Extra detail.
I'll need to airbrush a little more yellow for the tail wheel bay and a couple of spots on the main wings where the flaps are deployed, then it will be time to join the wing roots to the fuselage, add the stabilizers, and start thinking about the serious paint work. Since the main wings can slide on/off the spars easily, I'm probably going to paint them separate and then match everything up. Same thing with the engine and cowl. This modular approach might make life just a little easier in terms of getting the three-tone camo scheme on, have to see.
-
Bill Plunk
- Posts: 1245
- Joined: Wed Sep 28, 2022 10:18 pm
WIP 04-17-2016
Another productive day at the bench on Project Black Sheep. After thinking about it all, I decided to go ahead and attach the main wing portions to the roots. The fit is pretty tight but also a little tricky since the kit is designed to give you the option of folded wings and the contact surfaces, as a result, aren't that large. Careful use of liquid glue, finger pressure, and lots of waiting ensued but I got both wings attached. This was accomplished a lot easier with the wing root separate from the fuselage vs. the order the instructions would have you do it IMHO.
The exposed flap areas on the undersides got some Yellow Chromate via the airbrush.
Moment of truth, the whole wing assembly was added to the fuselage. More finger pressure and liquid glue treatment but again, fit here is very good. The horizontal stabilizers were added as well and I cut down the radio mast so it would fit the exterior without the opening I neglected to create earlier.
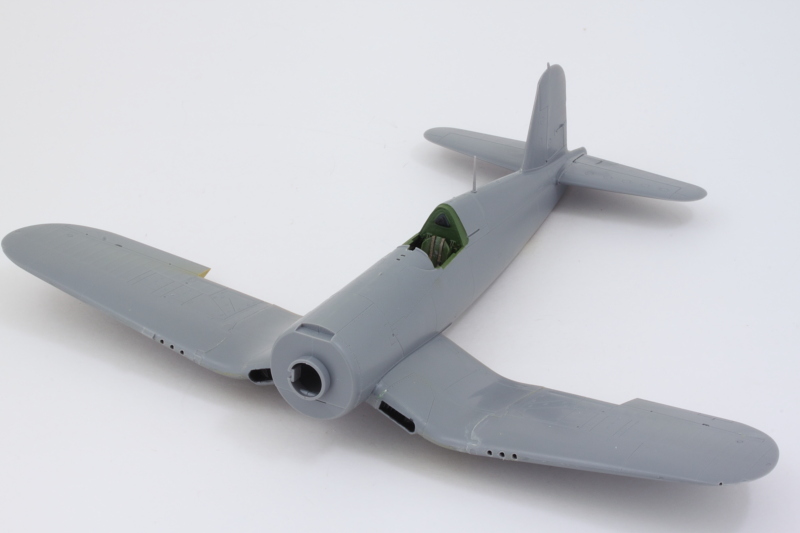
I went ahead and added the floor window clear piece since I'm getting close to painting the exterior. I debated whether or not to go with the bomb or the fuel tank and the fuel tank won out, so it was assembled as well.
I broke out the Eduard masks and got the canopy parts ready for paint. The Eduard masks were showing their age a little bit...it was a bit of a challenge to get them to fit correctly and the side parts for the main canopy had large oval openings in their middle. The set recommends using liquid mask for those areas but I used the oval cutouts on the sheet that already covered 99% of the opening (I guess the complex curves and stretch that the mask needs to make precludes using the whole thing) and used small pieces of regular masking tape to cover over those seams so nothing would seep through.
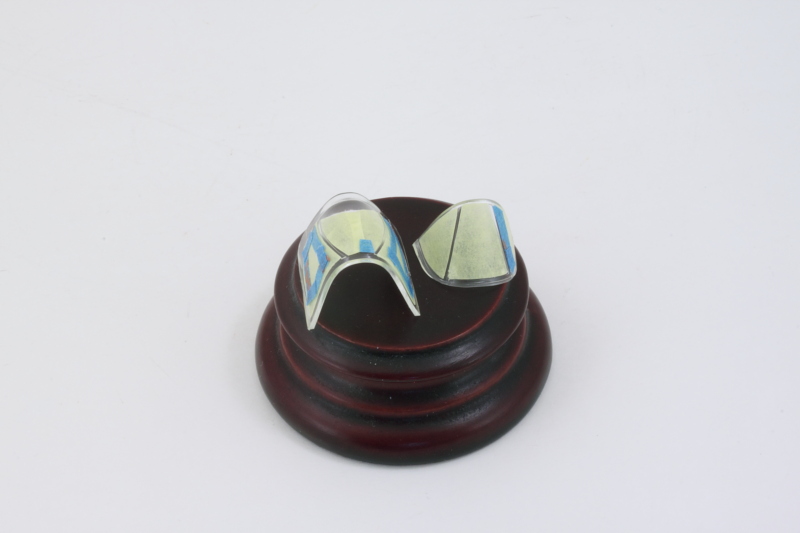
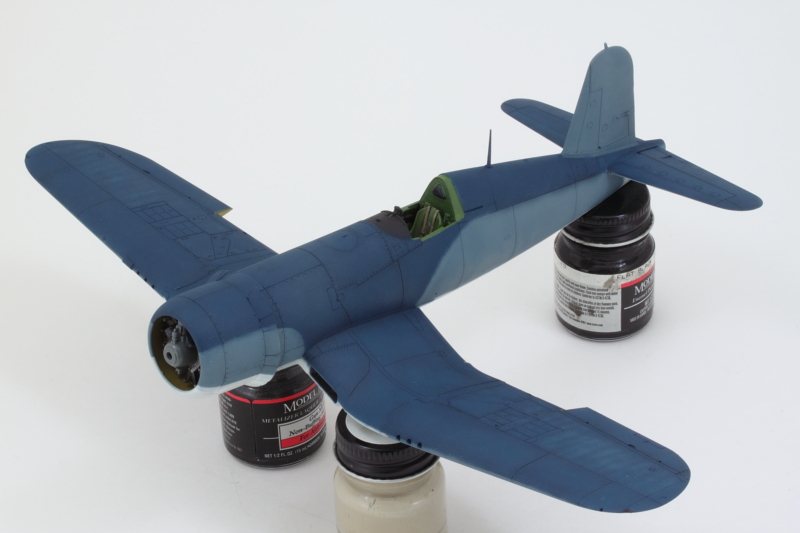
Airbrushed some MM enamel Interior Green first so that the inner frames would show a different color from the outsides.
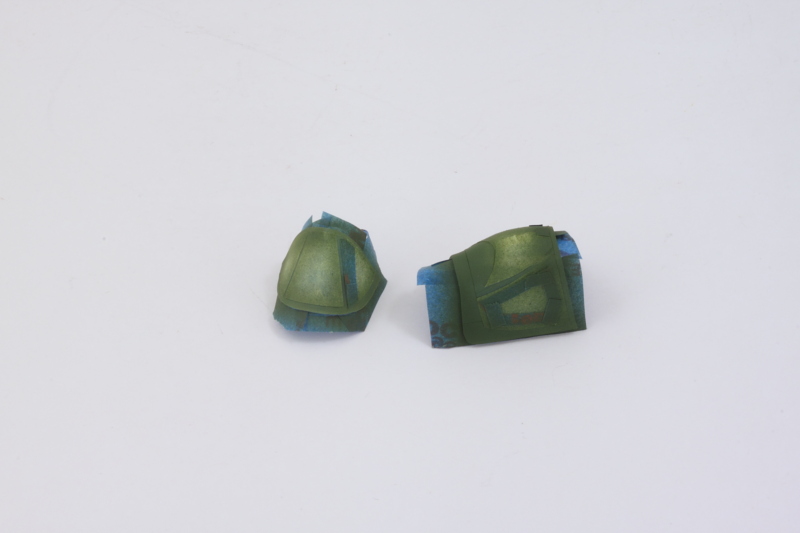
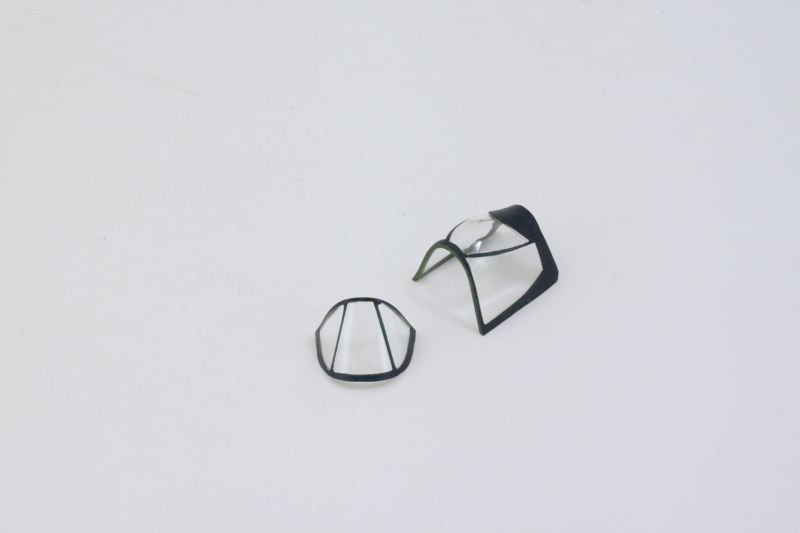
Another airbrush round of Testors enamel Dark Sea Blue provided the exterior color. Masks were removed and a couple of touch-ups here and there were all that were necessary. These will get set off to the side out of harm's way for now. They fit so well on the frame that I can wait and install them at the very end without worrying about filling or paint matching with the fuselage.
Next up will be a round of pre-shading to give the airbrush another workout.
The exposed flap areas on the undersides got some Yellow Chromate via the airbrush.
Moment of truth, the whole wing assembly was added to the fuselage. More finger pressure and liquid glue treatment but again, fit here is very good. The horizontal stabilizers were added as well and I cut down the radio mast so it would fit the exterior without the opening I neglected to create earlier.
I went ahead and added the floor window clear piece since I'm getting close to painting the exterior. I debated whether or not to go with the bomb or the fuel tank and the fuel tank won out, so it was assembled as well.
I broke out the Eduard masks and got the canopy parts ready for paint. The Eduard masks were showing their age a little bit...it was a bit of a challenge to get them to fit correctly and the side parts for the main canopy had large oval openings in their middle. The set recommends using liquid mask for those areas but I used the oval cutouts on the sheet that already covered 99% of the opening (I guess the complex curves and stretch that the mask needs to make precludes using the whole thing) and used small pieces of regular masking tape to cover over those seams so nothing would seep through.
Airbrushed some MM enamel Interior Green first so that the inner frames would show a different color from the outsides.
Another airbrush round of Testors enamel Dark Sea Blue provided the exterior color. Masks were removed and a couple of touch-ups here and there were all that were necessary. These will get set off to the side out of harm's way for now. They fit so well on the frame that I can wait and install them at the very end without worrying about filling or paint matching with the fuselage.
Next up will be a round of pre-shading to give the airbrush another workout.
-
Bill Plunk
- Posts: 1245
- Joined: Wed Sep 28, 2022 10:18 pm
WIP 04-18-2016
Today was a marathon session in the spray booth. First up, a pre-shade treatment using MM enamel Flat Black for all the panel lines.
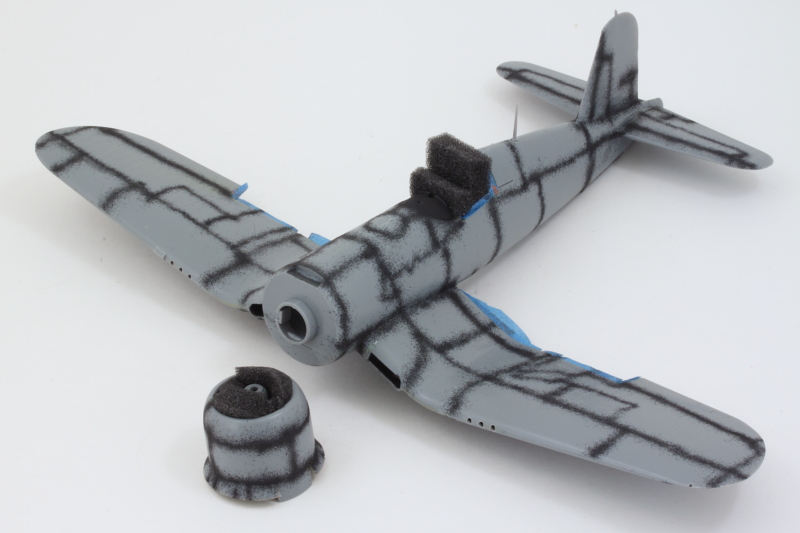
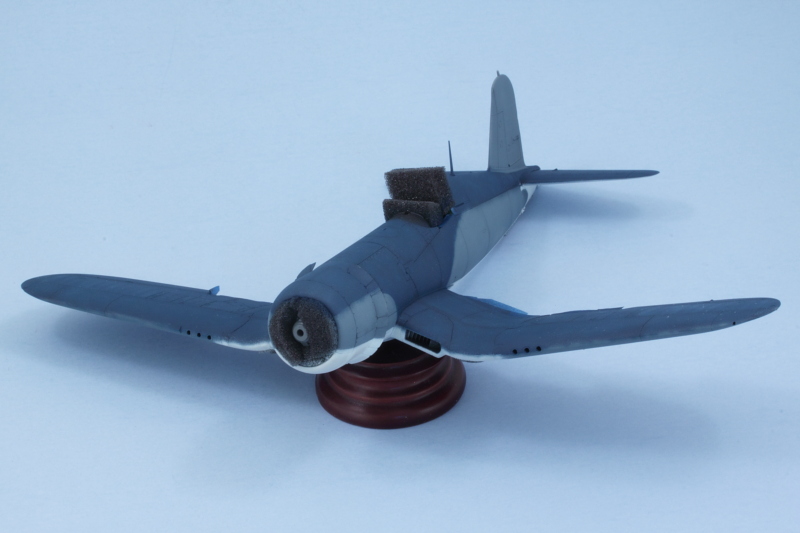
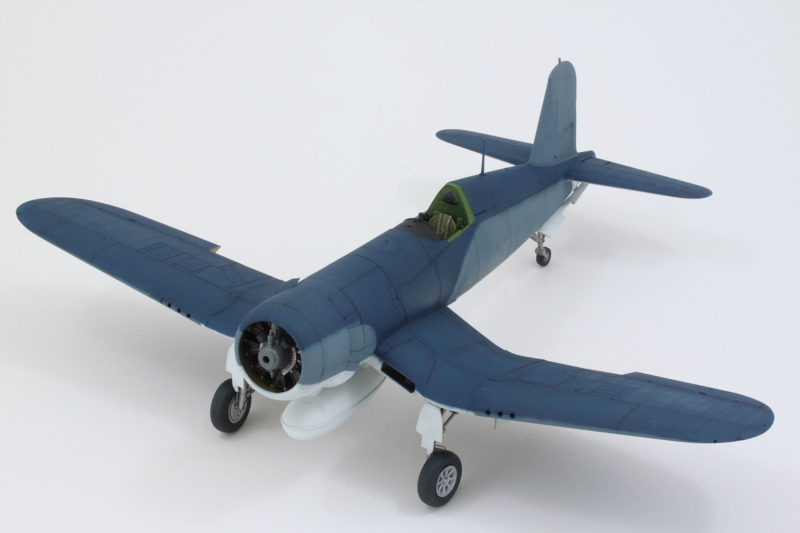
I started in on the three-tone scheme with Dark Sea Blue first.
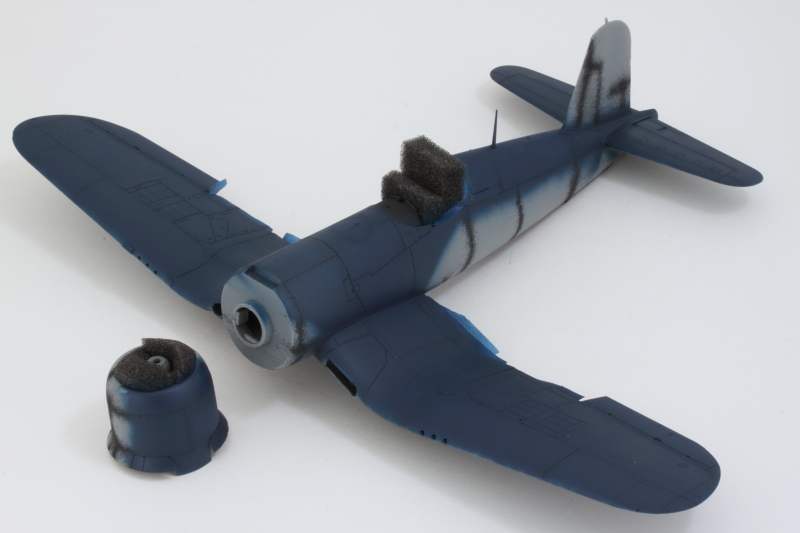
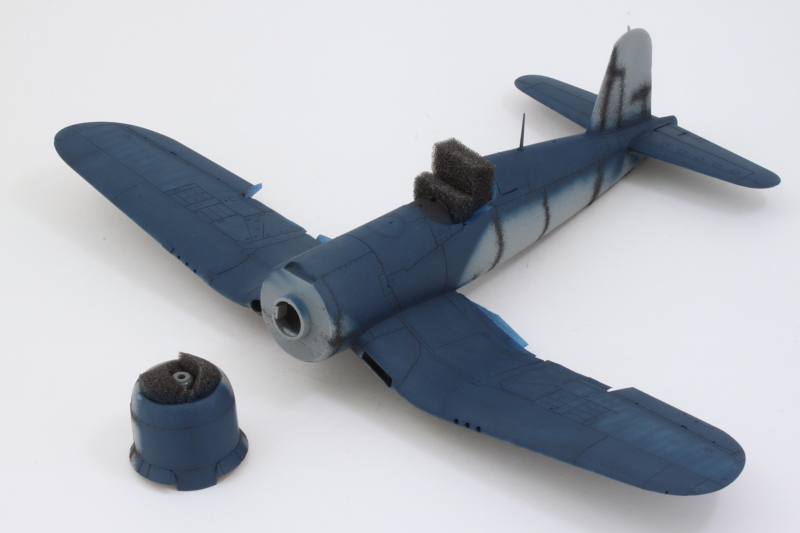
With that foundation in place, I added some MM enamel Light Gray and applied that for some variation. Then I added back in some of the original Dark Sea Blue and blended it back together with the original coat.
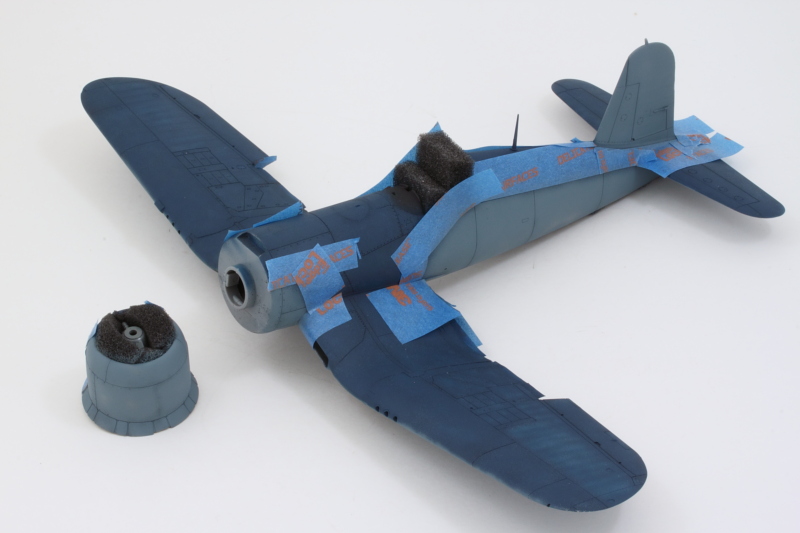
Lots of masking and prep work later, I airbrushed MM enamel Intermediate Blue for the 2nd level. Not pictured because I forgot to stop and take a shot is the use of some blue tack poster putty after the masking tape was pulled off to soften and round off the curves between the two colors around the wing roots.
More masking and I airbrushed MM enamel Flat White to the underside for the third color in the pattern.
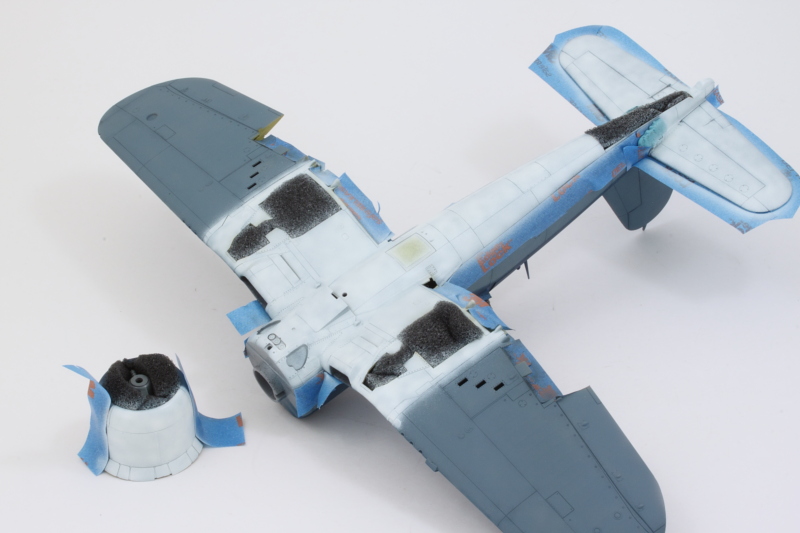
The Flat White is pretty stark all on its own, so I added some MM enamel Light Gray over the top of it to add some variation and tone it down just a touch.
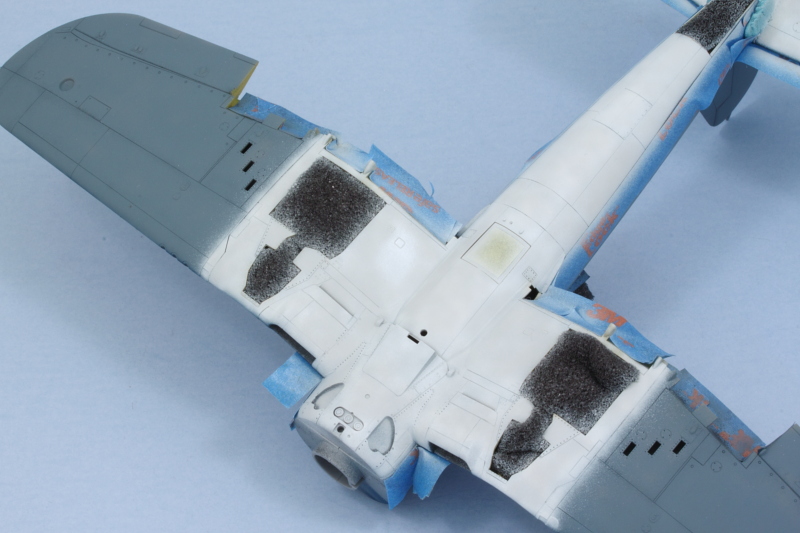
Removed all the masking and will let that sit up overnight. There's a couple of spots where I need to do some touchups along the wing edges and elsewhere, but all-in-all, I'm fairly pleased with where this is heading.
Also not pictured in all of this, I also airbrushed the various flaps and landing gear doors while I had the airbrush loaded up with the appropriate colors. After the touch-ups, I'll be working on the landing gear as the next big step.
I started in on the three-tone scheme with Dark Sea Blue first.
With that foundation in place, I added some MM enamel Light Gray and applied that for some variation. Then I added back in some of the original Dark Sea Blue and blended it back together with the original coat.
Lots of masking and prep work later, I airbrushed MM enamel Intermediate Blue for the 2nd level. Not pictured because I forgot to stop and take a shot is the use of some blue tack poster putty after the masking tape was pulled off to soften and round off the curves between the two colors around the wing roots.
More masking and I airbrushed MM enamel Flat White to the underside for the third color in the pattern.
The Flat White is pretty stark all on its own, so I added some MM enamel Light Gray over the top of it to add some variation and tone it down just a touch.
Removed all the masking and will let that sit up overnight. There's a couple of spots where I need to do some touchups along the wing edges and elsewhere, but all-in-all, I'm fairly pleased with where this is heading.
Also not pictured in all of this, I also airbrushed the various flaps and landing gear doors while I had the airbrush loaded up with the appropriate colors. After the touch-ups, I'll be working on the landing gear as the next big step.
-
Bill Plunk
- Posts: 1245
- Joined: Wed Sep 28, 2022 10:18 pm
WIP 04-19-2016
After a round of touch-ups and small adjustments in different places (mostly around the tail), I removed all of the masking and foam protection from the various spots. Only a few places around the cockpit needed some touch-up work, so that's always a plus. I went ahead and installed the engine and cowl permanently in place now that the need to have it separate was gone. The gunsight was also detailed and placed for good measure.
All the flaps were installed and the underside got some additional details like the exhaust pipes and some soot staining courtesy of black artist pastels. I picked out the wing lights with Tamiya Clear Red, Green, and Orange as called out in the instructions.
That clears the decks for me to work on the landing gear so I can get it up on its own legs.
-
Bill Plunk
- Posts: 1245
- Joined: Wed Sep 28, 2022 10:18 pm
WIP 04-22-2016
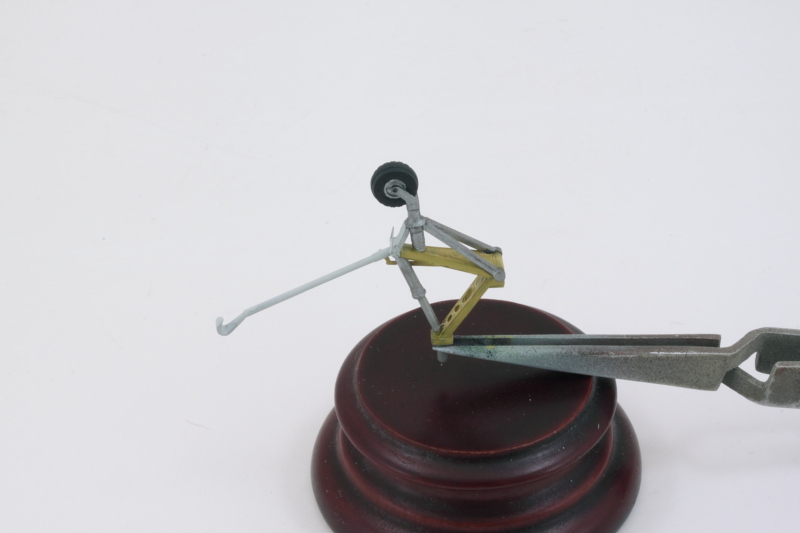
I've been working steadily on the most intricate part of this whole build, the landing gear. The Eduard set provides a lot of nice little details for the main gear as well as the tail wheel but some of that also requires surgery to remove portions of the kit parts and replace them with the PE stuff. On the tail wheel, I added in the structural support details and drilled out the lightening holes that the PE depicted but which aren't there on the solid kit part. A lot of this disappears up inside the tail but it still upped the detail level overall a good bit.
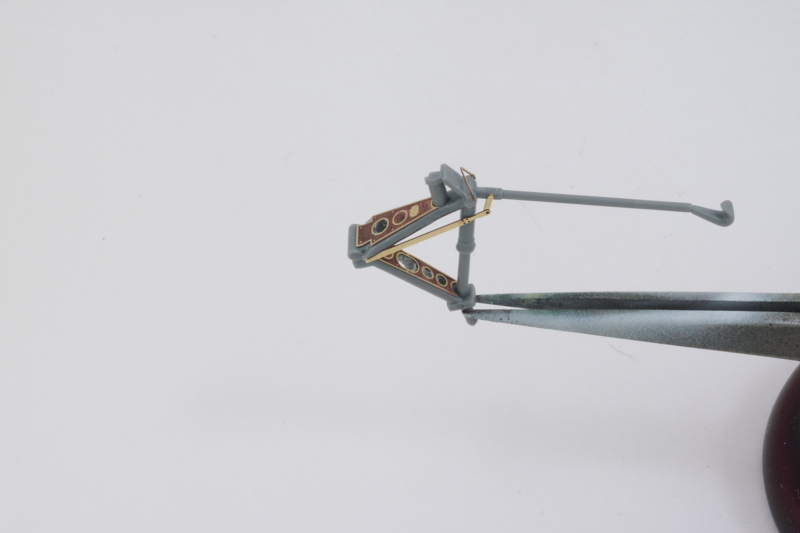
I hand painted the different components and details and airbrushed the tail wheel itself using the Eduard masks to assist. Then the rest of the wheel structure was assembled to create the whole unit that installs into the tail.
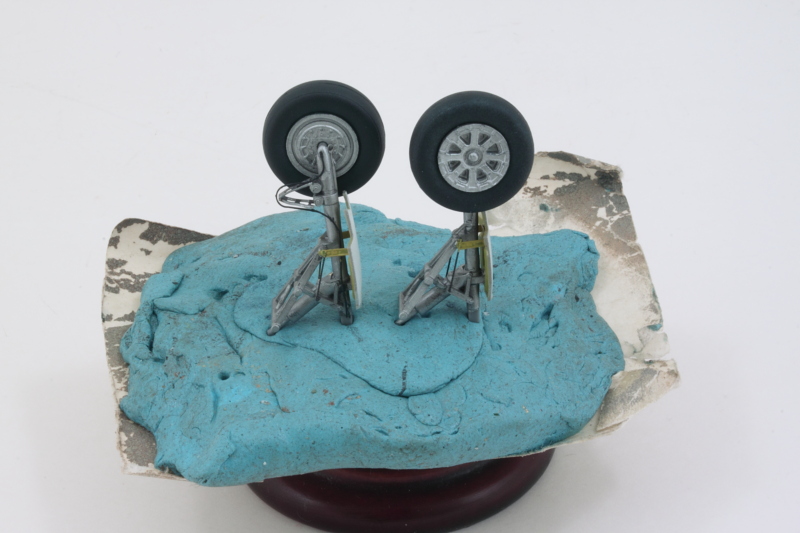
The main gear also got some attention. The Eduard set provided replacement scissor joints, brake lines, and door hinge's springs. More hand painting and detailing and airbrush work on the main wheels got those units together as well.
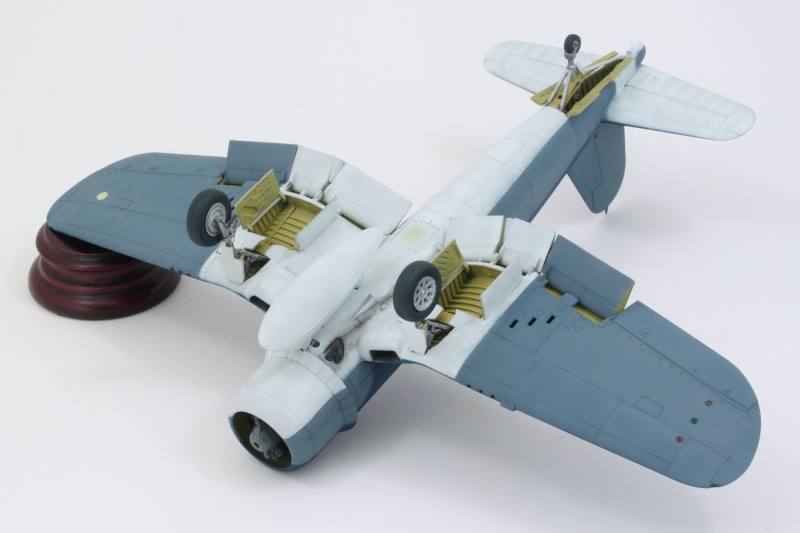
Moment of truth arrived and I added in the gear doors and installed all the gear into place along with the drop tank. Flipped it over and used some small bottles of paint to brace the gear while the glue set so that it would maintain a level stance.
Will spend some time on the prop next and then it will be ready to start the decal work.
I hand painted the different components and details and airbrushed the tail wheel itself using the Eduard masks to assist. Then the rest of the wheel structure was assembled to create the whole unit that installs into the tail.
The main gear also got some attention. The Eduard set provided replacement scissor joints, brake lines, and door hinge's springs. More hand painting and detailing and airbrush work on the main wheels got those units together as well.
Moment of truth arrived and I added in the gear doors and installed all the gear into place along with the drop tank. Flipped it over and used some small bottles of paint to brace the gear while the glue set so that it would maintain a level stance.
Will spend some time on the prop next and then it will be ready to start the decal work.