Tamiya 1/48 Vought F4U-1A Corsair (2016)

Bill Plunk
Posts: 1245
Joined: Wed Sep 28, 2022 10:18 pm

WIP 04-23-2016

Post by Bill Plunk »

Not a huge update this time around due to having to do some pruning work on a large elm tree that grows in my front yard. That time of year! :) I did get the prop painted and detailed though despite the little detour. Airbrushed MM enamel Flat Black, then hand painted the hub with MM enamel Intermediate Blue. The kit calls for the hub to be red but from what I've gathered, that was true only for the VMF-111 markings option and the VF-17 that I'm going with had the blue hub. Careful masking and some airbrushed MM enamel RLM 04 Gelb added the tip markers.

Image

Looks right at home when combined with the engine. The polycap mount design makes it a breeze to pop it on and off as needed.

Image

Next up will be some Future treatment to get ready for the multiple decal sessions that this will call for. I'll keep the prop separate to make life easier during the Future and decal stages as it's kind of big and 'snag prone' as a result.
Bill Plunk
Posts: 1245
Joined: Wed Sep 28, 2022 10:18 pm

WIP 04-25-2016

Post by Bill Plunk »

Every genre has its cross to bear and in this case, it's decals! Spent the last couple of days getting the markings on the Corsair. Some of this was due to the fact that there are decals that apply over decals (the roundels in particular), but mostly it was due to the sheer number that needed to go on. At least it's not a modern jet! :) I did the usual airbrushed Future coat first, then applied the decals using Solvaset to get them to snug down, then a final airbrushed Future coat to seal them in and create a unified layer.

Image

Image

Image

Image

I also got in some nice Eduard 1/48 styrene PSP bases that I will be using to construct a simple airfield setting for the Corsair to sit on, so that will occupy my attention for a bit before I turn back to weathering up the finish to match the base environment.

Image

More fun ahead! :)
Bill Plunk
Posts: 1245
Joined: Wed Sep 28, 2022 10:18 pm

WIP 04-26-2016

Post by Bill Plunk »

Made some good progress today on the base for the Corsair. I had picked up a nice piece of finished plywood that measures 11.75 inches square from Hobby Lobby as the foundation. Next, I had to figure out how to make the best use of the Eduard PSP bases since they measure 9.75 by 6.5 inches. That's why I ordered 2, I knew that no matter how I did the layout, one wasn't going to be enough on its own. After fiddling around with it, I decided to place the PSP portion at a slight angle and marked that out on the base so I could cut the two pieces accurately and maintain the needed end result. Since the PSP sections are hollow, I knew some supports would be needed to keep it level, so I drilled some holes in the wood and CA glued some short lengths of sprue in strategic locations to serve as props.

Image

After some careful measurements, I used masking tape to define the angles I needed to cut on the two different sections and set to work with a razor saw.

Image

No matter how you slice it, there was going to be a slight gap between the two sections due to how they were molded. Rather than try to join the styrene sections into a single unit, I decided to use the base to my advantage. The bottom section was placed first with CA glue then the top was added. Clamps and liquid glue secured the sections to the support posts and some white styrene rod of different lengths was used to fill the gap in between.

Image

Strip styrene was glued to the exposed edges to blank them off and some putty and sanding down to the section join. I had deliberately left a slight overhang all around when I made the razor saw cuts to make life a little easier vs. trying to get it perfectly flush to the wood base.

Image

Here's how it will look when the rest of the base is complete in terms of how the Corsair will sit.

Image

This is the reference I'm using for inspiration, hopefully, I can pull off a similar look with the rest of the base since it will be essentially sand/dirt.


Image

Still plenty to do! :)
Bill Plunk
Posts: 1245
Joined: Wed Sep 28, 2022 10:18 pm

WIP 04-28-2016

Post by Bill Plunk »

Work continued on the base once again and the first order of business was to stain the plywood with some Minwax Oil walnut stain. Once that had dried, I taped off all the exposed edges and began the paintwork.

I started on the runway section and airbrushed a primer/basecoat of MM enamel Flat Black. Next came a dose of MM enamel Burnt Umber followed by some MM enamel Rust and MM enamel Leather in different spots. I had two airbrushes working simultaneously in the last phase, alternating some Leather and Burnt Umber to randomize things a bit. Since it was a lot of trial and error and 'looks good to the eye' assessments, I didn't take any in-progress shots, sorry! After all the paint was down, I dusted some orange artist pastels with a large make-up style sable brush since that allowed it to behave more like a dry brush treatment. It added a lot of nice subtle tone variations, more than I was expecting when I first started adding it.

Image

The camera has a little trouble picking it up head-on, but looking down the planking pattern shows it off more.

Image

Then it was time to get the rest of the base in place. For this, I used Woodlands Scenics Mold-A-Scene Plaster since I had it on hand and needed to cover a large surface area. It has about a 30 minute work time, so I mixed up small batches at a time (3 one-cup batches were needed) and combined them together to build up the section. It needs 24 hours to cure rock hard, so it will get some 'quiet time' while that happens. :D

I had to clean up a couple of spots on the plastic area where some plaster dust got away from me and marked the finish, so out came the artist pastels one more time to blend it all back together after I'd wiped up the dust.

Image

Next up will be getting the plaster section where I want it to be!
Bill Plunk
Posts: 1245
Joined: Wed Sep 28, 2022 10:18 pm

WIP 04-29-2016

Post by Bill Plunk »

Efforts on the base continued, this time, I needed some really fine dirt to go over the plaster base. Nothing works for this like the real thing, so I employed some fine vinyl screen mesh to sift some of El Paso's finest to get rid of the little rocks and junk. I applied a light layer, added some Woodland Scenics Scenic Cement with a plastic pipette, then added another light layer over that so it would soak up the glue and still look like sand. To create the wheel tracks, I drafted a spare 1/35 Pz III wheel on a toothpick.

Image

Image

That was going to need a good bit of time to thoroughly dry, so I turned my attention to some of the little details I needed for the parked Corsair. I scratch-built some chocks out of carved wood with their knotted pull chords added using ship rigging thread. I also used some sprue and white rod to rig up a fire extinguisher to sit at the front of the aircraft as seen in the reference pic. I also decided to give the pilot figure a shot and cleaned him up.

Image

This is the first time I've worked on a 1/48 figure so I can't compare it to anything else in the same scale, but the level of detail on the figure was pretty good I think considering it was molded all in one piece. He was painted using various enamels. Same deal with the fire extinguisher.

Image

He looks right at home on the wing, especially since that's the only place he can go without some serious surgery or alteration. :)

Image

And just for kicks, I checked out how things are looking for the base as a whole.

Image

Next up will be working on the dirt areas to get it to look more like 'tropical island' vs. its current 'West Texas Desert' aesthetic! :)
Bill Plunk
Posts: 1245
Joined: Wed Sep 28, 2022 10:18 pm

WIP 04-30-2016

Post by Bill Plunk »

After thinking it over a bit on the base, I felt like it needed just a little something more besides the dirt and the PSP sections. Even though the reference photos showed the areas around the planes were typically kept clear of virtually everything, I decided to take a little artistic license and add a small group of three 50-gallon drums in one corner. This was driven by the fact that I had a 1/35 Tamiya jerry can and fuel drums set tucked away in the closet from years ago before I knew that the jerry cans inside were inaccurate...but the fuel drums are still good!. Out came the calculator to determine how much I needed to cut them down to get their height down to 1/48 instead of 1/35 and the razor saw made quick work. Pilot dude approves and understands that the diameter issue couldn't be helped and was only a difference of a couple of mm regardless. :) He also knows that there won't be any figures standing around near them to compare against, so they will still look the part for our needs.

Image

My terra-forming project also continued, the first transformative step was to airbrush some MM enamel Flat Black to create some shadows and tonal variation around the wheel tracks in particular. Then I airbrushed MM enamel Armor Sand over the dirt areas to shift it to the lighter shade needed.

Image

This still wasn't quite the 'tropical island' shade needed, so I turned to some MIG Light Dust pigment. Using a wide-bore nozzle in the airbrush, I airbrushed a highly diluted water-based coat. This is an exercise in patience as the water needs to evaporate before the pigments will show, so a case of spray a little, wait, spray a little more, etc. Once I had the dirt area done, I did a very light quick pass over the PSP section to tie it together with the dirt side.

Image

The barrels were airbrushed with a primer coat of Flat Black and then light coats of MM enamel Rust. Some dry-brushed Burnt Umber and then treatment with different shades of 'rusty' artist pastels were applied to vary their look a bit.

Image

A quick test fit in terms of where they will sit and how the base is looking now after all the different steps.

Image
Bill Plunk
Posts: 1245
Joined: Wed Sep 28, 2022 10:18 pm

WIP 05-01-2016

Post by Bill Plunk »

Spent some more time on the base details today. The barrels needed a chance to cure a bit before I went after them some more to give them some individuality. I applied some very thin washes using Rust, Leather, and Gun Metal in various spots to build up a layered finish along with some strategic burnt orange artist pastels. The idea being that they are still being actively used, so some spills and residue would be there on the tops, but also exposed to the elements of the South Pacific, so rust would quickly appear on any non-spill areas. That's the mental image I had while working on them anyhow, the trick was working to keep them from looking identical to each other, so hopefully I pulled that off convincingly. Tamiya molded them with dings and dents, so I tried to bring that out a little bit on their sides with some dry-brushed Olive Drab followed by dry-brushed Burnt Umber to create a little bit of contrast without it being too strong.

Image

I used some Gator Grip Thin Blend to glue the barrels in position onto the base. Using a pointed brush, I applied some highly thinned enamel Gunmetal to the surrounding dirt areas to simulate some spills and contamination. The beauty of using thinned paint is that the dirt behaved just like the real thing and helped create the pattern through capillary action. I just had to be careful not to let it look too uniform.

Image

Next up, I worked on adding the dust wheel tracks on the PSP section similar to what's visible on the reference photo. This proved a little challenging in practice, fortunately, I had the scraps from the earlier surgery to experiment with first before committing on the full base. I tried out both wet and dry methods, using just a brush or the Pz III wheel I'd used for the dirt tracks, etc. Turned out that the best way involved a square tip stiff-bristled brush, loading it up with dry pigment on the tip, then using another brush handle to tap it to 'unload' the pigment in the places I wanted and not where I didn't. Then the brush was used to form the pattern and excess pigment removed with a large soft sable brush where necessary. I added the two larger main wheel tracks first and then the smaller tail wheel track in the middle so I could accurately place it where it needed to go in between the other two.


Image

A quick check with the Corsair shows that everything is continuing to play nice.

Image

For the curious, since the camera is playing a little trick on the previous angles in suggesting there's a ton of room on this base, a shot from the backside shows a little different story. :)

Image

Now I can start in on the Corsair's weathering process as the base is complete for all intents and purposes.
Bill Plunk
Posts: 1245
Joined: Wed Sep 28, 2022 10:18 pm

WIP 05-02-2016

Post by Bill Plunk »

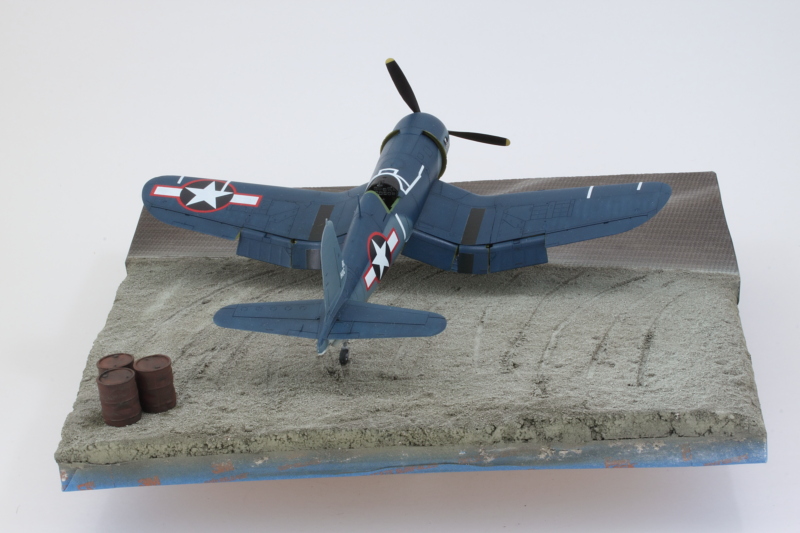
I know I said the base was done, but that turned out to not be quite accurate. :) The back corner seemed a little empty, so after much back and forth and looking at the pics of all the Solomons airfields, I decided to try my hand at making a palm tree. I poked around on the Internet to see if there were any good ideas out there I could steal and sure enough, I came across lots of different ways to try it, so I cherry-picked what I thought I could pull off with the materials I had available to me.

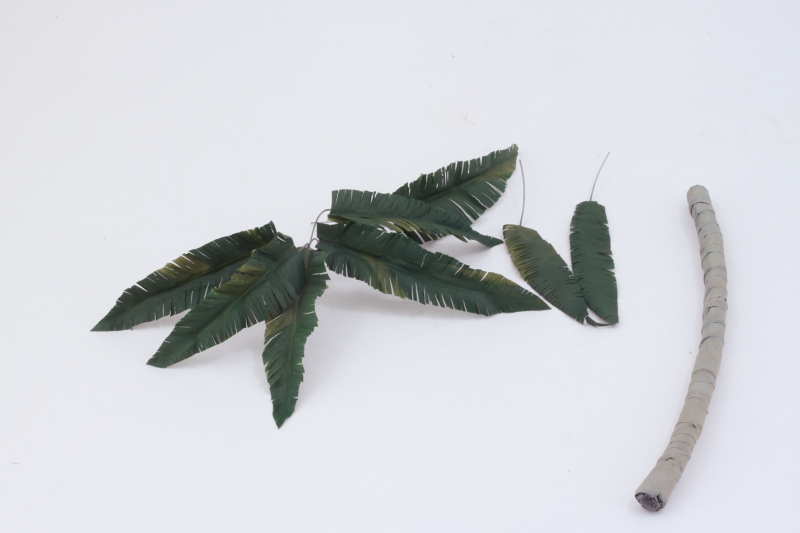
For the trunk, I just went out into my front yard and found a suitably sized dead branch/stick that our large elm tree sheds on a regular basis. It had just the right curve and diameter in a long enough section to suit my needs. I took some 0.5mm diameter solder and wrapped it around the trunk then covered that with masking tape to create the 'ridged' look needed. Airbrushed some Flat Black as a primer coat, then used a 50/50 Light Gray/Dunkelgelb over that followed by some highlights with a 70/30 Afrika Grunbraun/Light Gray mix to get a 'woodish' enough appearance.

The fronds were the real challenge...at first, I was going to try to create them out of paper but as I was eating dinner with my lovely wife, one of her decorative silk plants that sits on top of the kitchen cabinets caught my eye. She graciously agreed to sacrifice 6 of its leaves so long as I took them from a place that 'wouldn't be noticeable'. :) Thos leaves were cut down to the necessary dimensions and I used a pair of small curved scissors to cut the edges one little cut at a time. A tedious effort but it paid off in the end. I airbrushed some Medium Field Green tone down the overall colors a bit and blend in the undersides. Steel wire and CA created some nice handles that would also do double duty for use in mounting them to the trunk.

Image

Getting the trunk and fronds together required a little creativity. I used a ball of 2-part Aves epxoy-sculpt to cap off the trunk and provide a place for me to stick the fronds into. The steel wire handles were cut down to the bare minimum and CA used on what remained and the frond bases to secure them in place.

Image

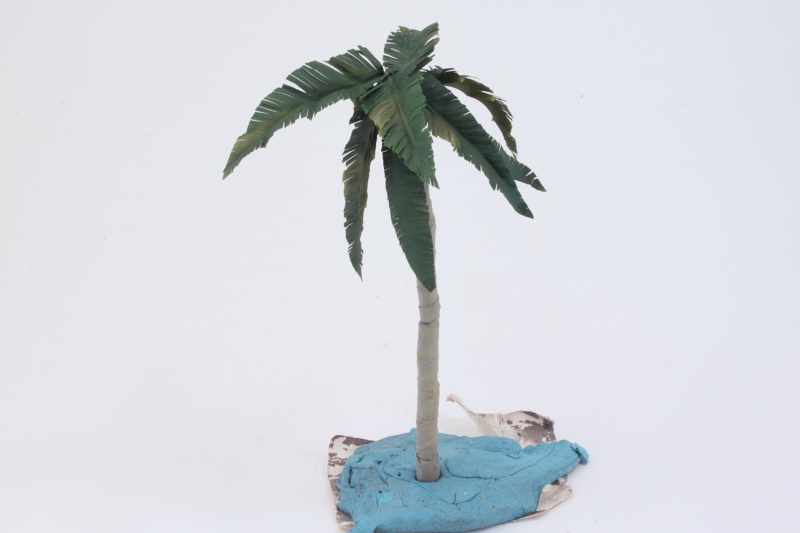
A small ball of the Aves was shaped into a coconut and placed appropriately so it could dry in place. Some pencil shavings provided a 'collar' around the area where the Aves and trunk joined. Once the Aves has fully set, I'll come back and hand paint this area to get it to match up with the rest of the 'tree'.

Image

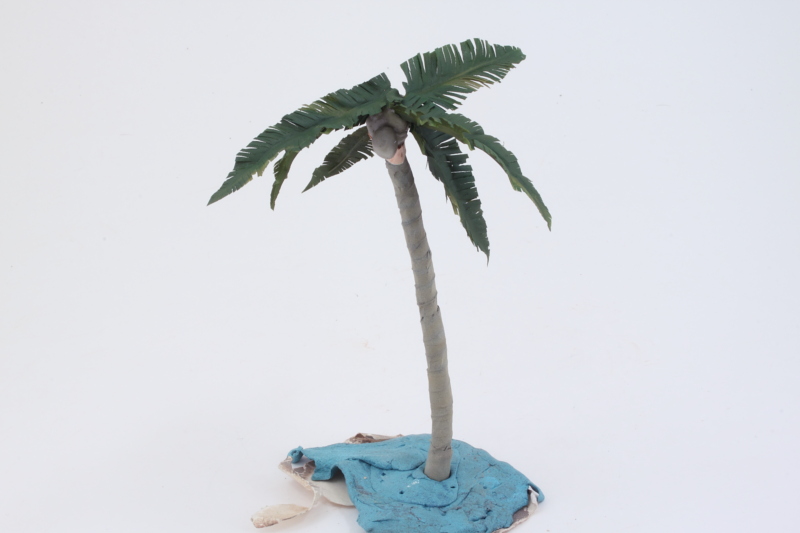
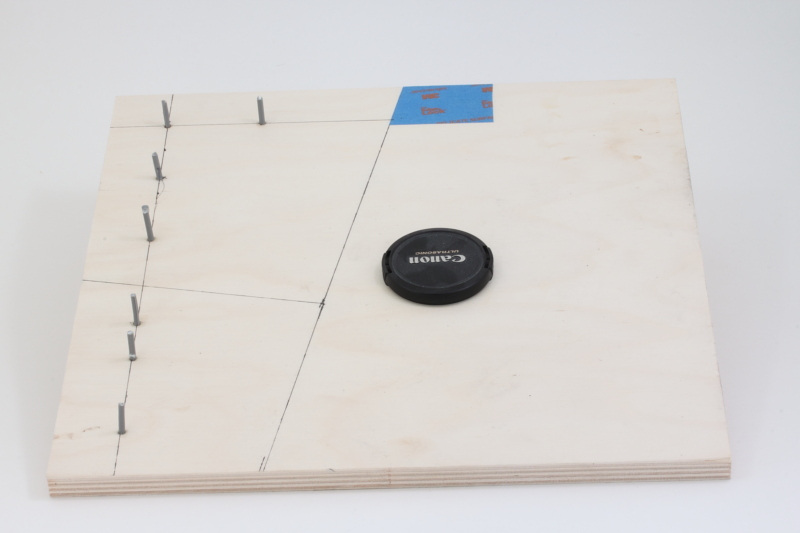
I drilled a small hole in the base of the trunk and also into the base and inserted a copper staple into the trunk base to allow me to 'plant' the tree later when it's ready. The staple goes into the wood base and provides the perfect amount of support for the leaning palm tree.

Image

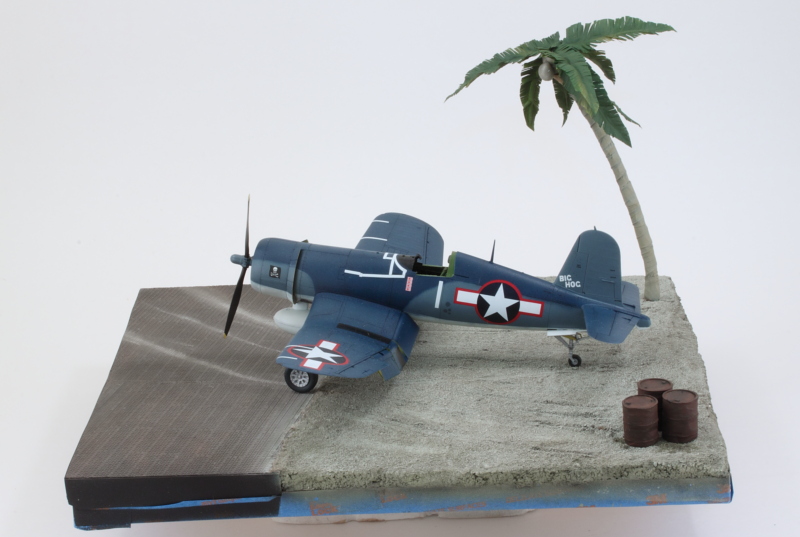
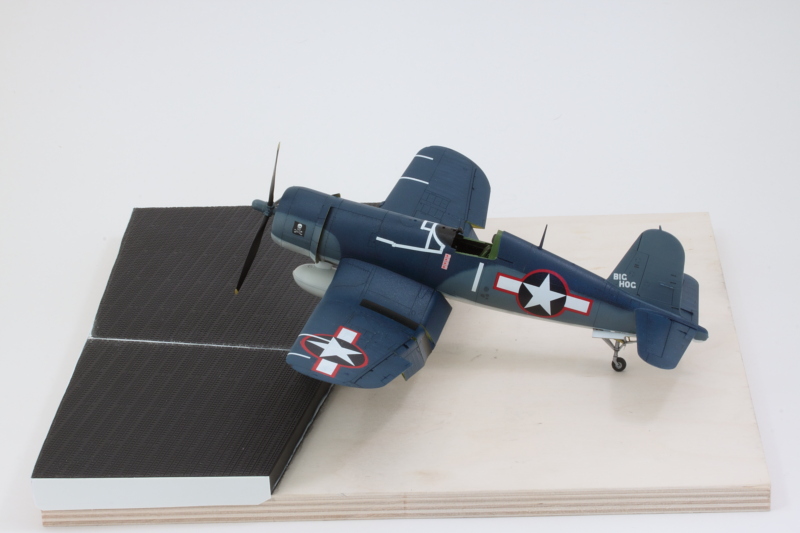
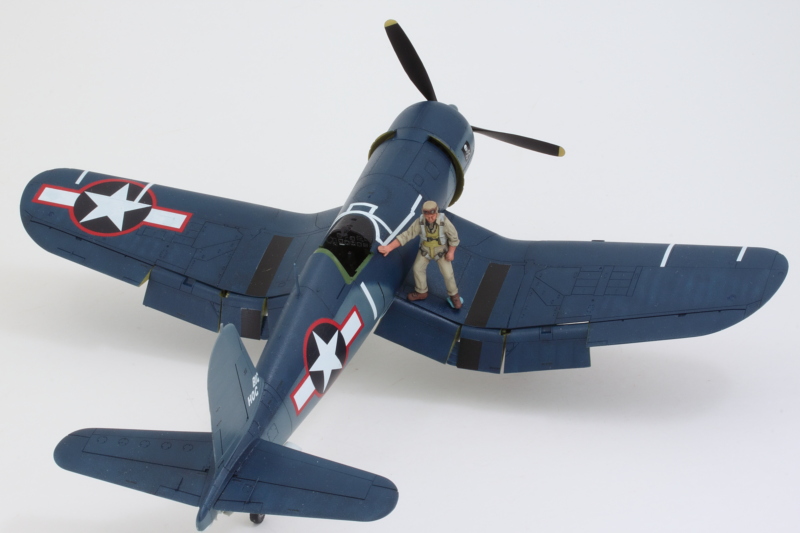
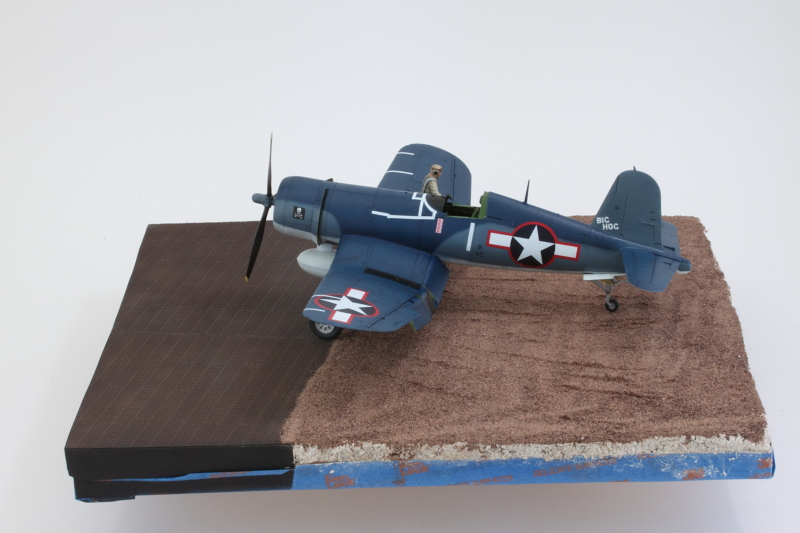
Now the pilot dude has a little shade to relax under when he's not out hunting for Zeros. :) 
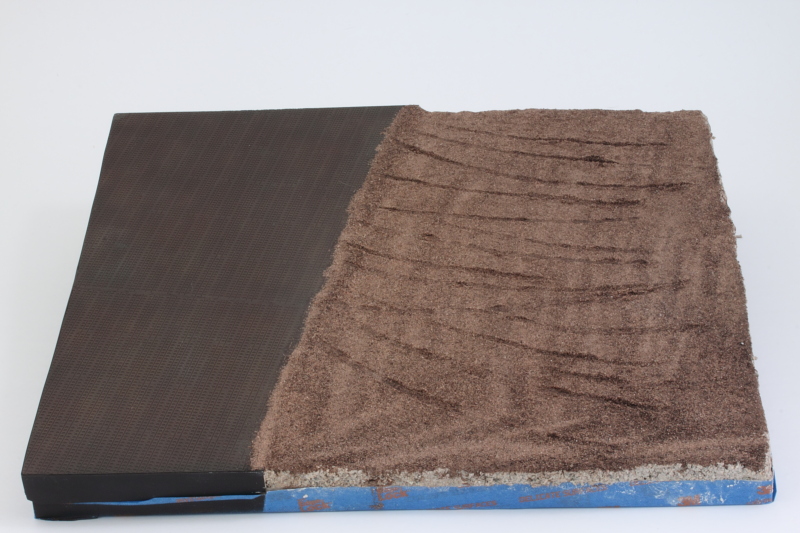
Ok, now I think the base is done. ;)
Bill Plunk
Posts: 1245
Joined: Wed Sep 28, 2022 10:18 pm

WIP 05-03-2016

Post by Bill Plunk »

Finally got a start on the weathering process for the Corsair today. I started on the Sea Blue portions first and applied a dot filter using Light Gray, Intermediate Blue, and the lightened Dark Sea Blue mix airbrushed previously. I worked in small sections at a time and used different sized square tip brushed in various spots to create variation in the finish.

Image

After a few hours, I got all the dark blue areas covered. Photos of Solomons Corsairs invariably show a lot of dust/fading, so that's what I was aiming to capture. I will be coming back over the panel lines to draw them back out a bit more as well.

Image

Image

Still a ways to go but I've entered the final lap on this project. :)
Bill Plunk
Posts: 1245
Joined: Wed Sep 28, 2022 10:18 pm

WIP 05-05-2016

Post by Bill Plunk »

More progress on the weathering front. The undersides got their share of attention although once placed on the base, you would need a dental mirror to see much of it. I applied an overall Raw Umber wash to the underside and then adjusted that with a square-tipped brush and clean thinner. On the Intermediate Blue areas, I did some fading with Light Gray as a dot filter in addition to the Raw Umber.

Image

I applied a pin wash using a pointed 18/0 brush and thinned enamel Burnt Umber to get the panel lines and other details to pop. Same brush and clean thinner tightened it up where needed.

Image

The same process was applied to the topside to complement the previous fading/weathering done to the sea blue areas in particular.

Image

Image

Image

I'll let that sit overnight and see if I need to make any adjustments before sealing it all in. Heading down the home stretch now!
Post Reply