GWH 1/48 Northrop P-61B Black Widow (2017)
-
Bill Plunk
- Posts: 1245
- Joined: Wed Sep 28, 2022 10:18 pm
GWH 1/48 Northrop P-61B Black Widow (2017)
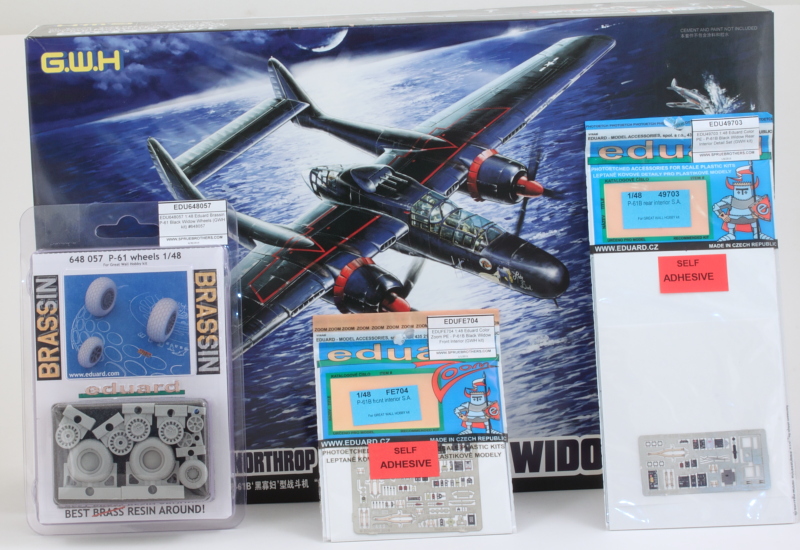
Build log for the 1/48 GWH (Great Wall Hobby) WWII USAAF Northrop P-61B 'Black Widow' Last Shoot Down 1945 kit S4802 in combination with Eduard Brassin set 648057 and PE sets 49703 and FE704 to dress up the interior with.
-
Bill Plunk
- Posts: 1245
- Joined: Wed Sep 28, 2022 10:18 pm
WIP 08-07-2016
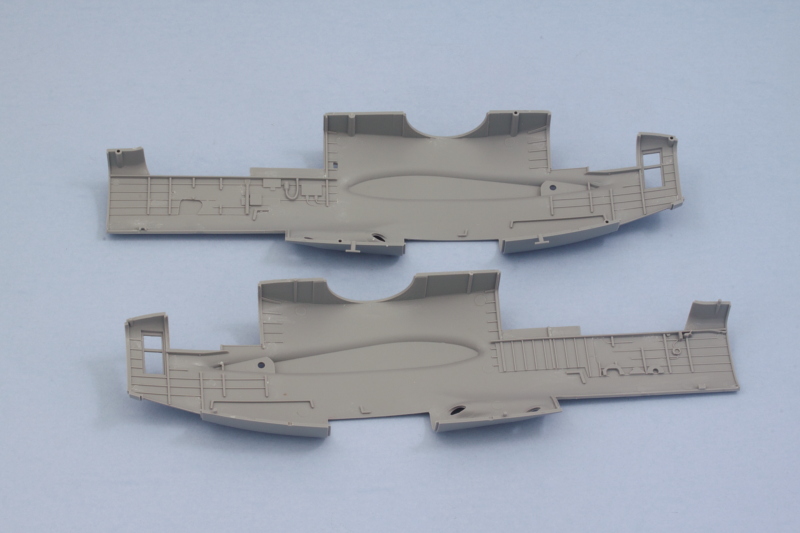
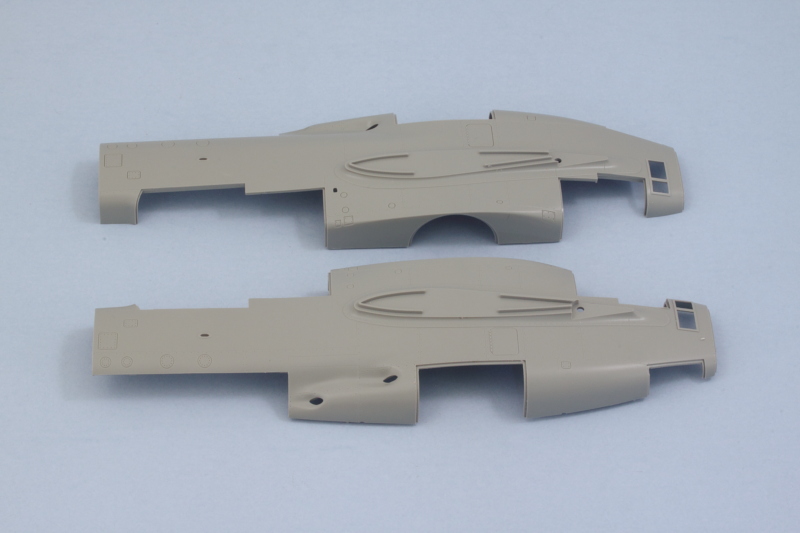
Finally managed to get around to starting this one although not a huge amount of progress to report. I removed the main crew pod halves from the sprue and cleaned them up. The interior areas have several raised ejector marks that need to be dealt with but that's the price to pay for the excellent level of detail on the exterior, so I'm not complaining. I used a micro-chisel to deal with most of them and GWH did a good job in their size and placement so that they didn't overlap onto any of the other molded on details. Since I'm going to be using the Eduard details as well as the kit's PE details in various places, it's important to have the two halves clean and ready so I can work on getting the components for the interior assembled as much as possible before the first round of paintwork with the Interior Green. Small steps are necessary on a long journey like this, but at least it's started! 
-
Bill Plunk
- Posts: 1245
- Joined: Wed Sep 28, 2022 10:18 pm
WIP 08-08-2016
I started work on the PE details that go in the radar observer's area in the rear of the fuselage. Eduard has the sets for the Black Widow broken up by area/section and the rear area has a lot of PE to it aimed mostly at replacing the bulkhead and instrument cluster for the RO, but after consulting the references in the Squadron/Signal P-61 Black Widow book, the Eduard layout/configuration is radically different from that in the kit and what the book shows. No idea why that is, but there's still enough of the set that's usable in various spots to still make it useful.
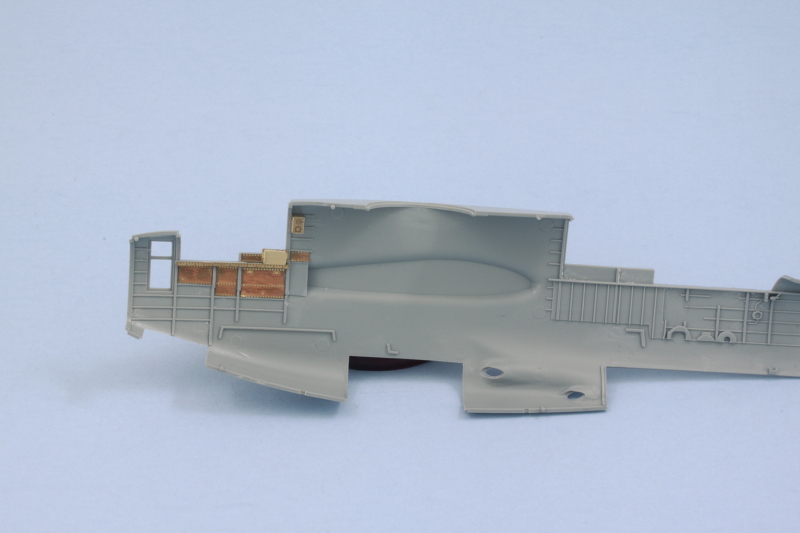
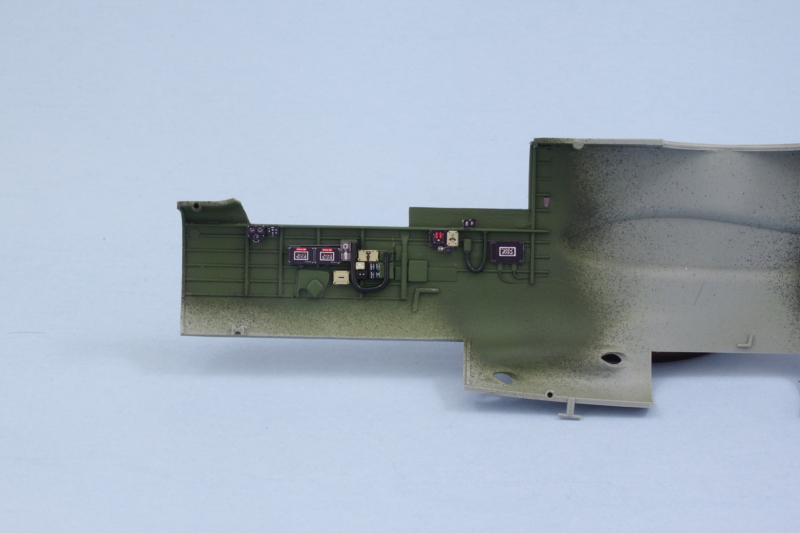
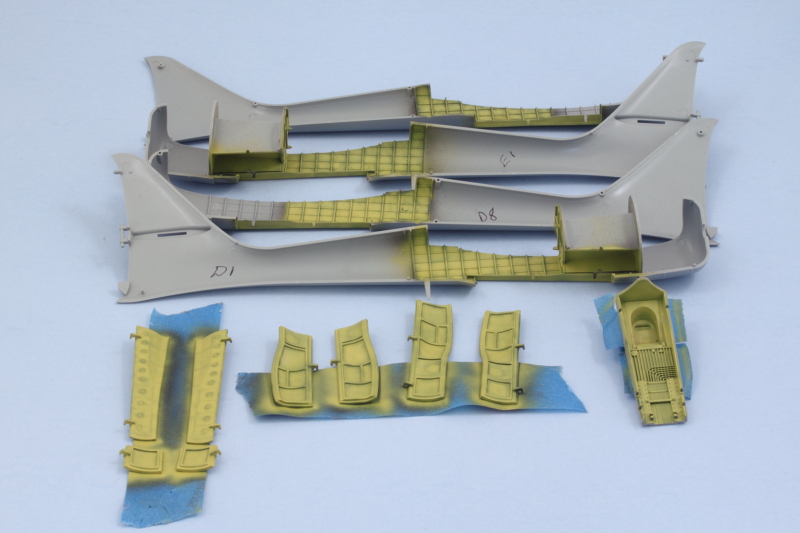
The fuselages get an insert that covers the area where the flaps attach from the wings but there's an inevitable join line in that space that can't be dealt with easily. The Eduard set provides PE panels that literally paper over this and restore the look of things. I also added the PE electronics and wiring that I could fit along with the kit's bulkhead part to increase the level of detail.
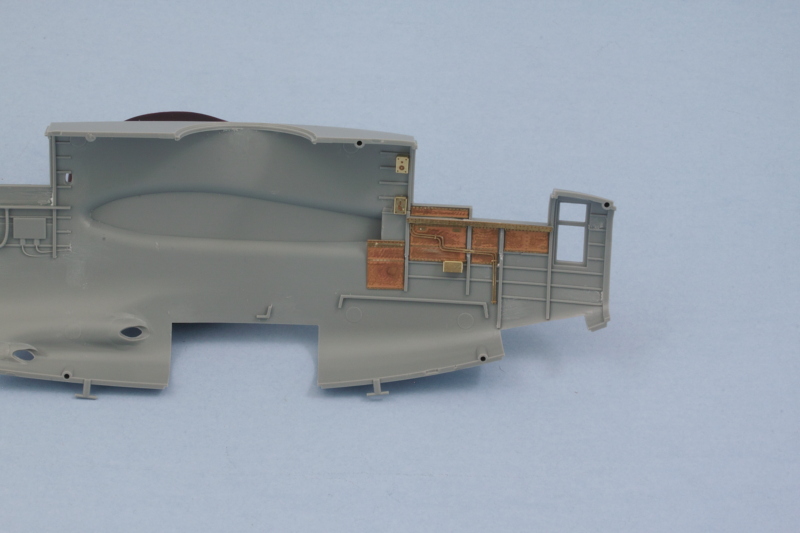
One side down, one to go!
The fuselages get an insert that covers the area where the flaps attach from the wings but there's an inevitable join line in that space that can't be dealt with easily. The Eduard set provides PE panels that literally paper over this and restore the look of things. I also added the PE electronics and wiring that I could fit along with the kit's bulkhead part to increase the level of detail.
One side down, one to go!
-
Bill Plunk
- Posts: 1245
- Joined: Wed Sep 28, 2022 10:18 pm
WIP 11-12-2016
I certainly did not expect to step away from this build for quite this long, but sometimes that's just the way it goes! Had a chance to get back to the bench for the first time since August and made some more progress. I finished up the PE work on the other side of the rear fuselage courtesy of the Eduard PE detail set. I was selective in what I used, making sure at each step along the way that what I added wouldn't interfere with the bulkhead and seat arrangement for the radar operator's station.
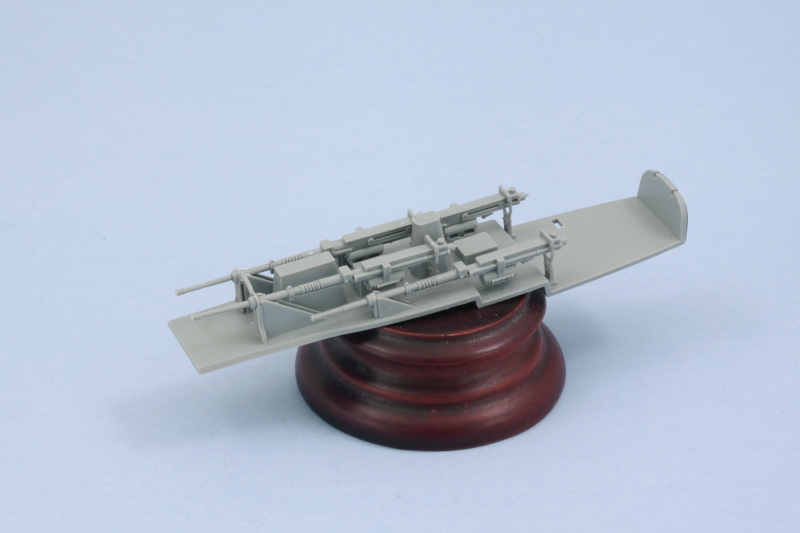
The steps in the instruction booklet aren't numbered, but I suppose the block that deals with the 20mm guns could be called #4. The guns required some slight clean-up and the barrels were drilled out better with a finger drill to enhance their detail. I don't intend to display the gun bays exposed, so there was no need to paint them prior to installing into position. The mount holes for the locking brackets at the gun breeches are a little loose, so I had to be patient and use finger pressure to hold them down until the glue had grabbed enough to secure the guns in place.
It felt good to get back to work a little on this project, hopefully with the holidays approaching I can get in a little more time on a somewhat more regular schedule as well.
The steps in the instruction booklet aren't numbered, but I suppose the block that deals with the 20mm guns could be called #4.
It felt good to get back to work a little on this project, hopefully with the holidays approaching I can get in a little more time on a somewhat more regular schedule as well.
-
Bill Plunk
- Posts: 1245
- Joined: Wed Sep 28, 2022 10:18 pm
WIP 11-25-2016
Taking full advantage of the extended Thanksgiving Day holidays, I made some more progress on the Widow. The fundamental challenge at this stage of the build is deciding what to paint first given all the exposed areas in the crew areas, so I focused on getting as much together as possible in the areas that were going to need the interior green/zinc chromate treatment first.
Returning to the radar operator's area, I added the Eduard PE parts for the top step on the access ladder and the rest of the ladder to the access hatch using the GWH supplied PE and some 0.6mm styrene rod. I'll be posing the hatch in the closed position but it's a prominent detail still visible through all the greenhouse windows.
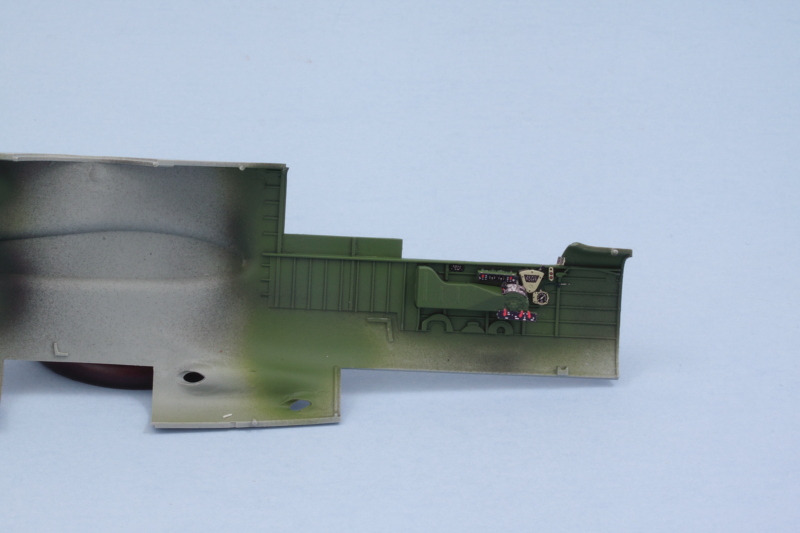
Since I'm using the Eduard detail set for the front of the cabin as well, I had to decide how much stuff to install first vs. keeping separate to make it possible to add the pre-painted detail stuff easily. I installed most of the detail parts to the cabin sides where appropriate that needed to be zinc chromate and will add the rest of the details after the airbrush work is done. There were some raised ejector marks where the cabin bulkhead mated up with the fuselage, so a micro chisel was put to use to remove those and avoid fit problems later on.
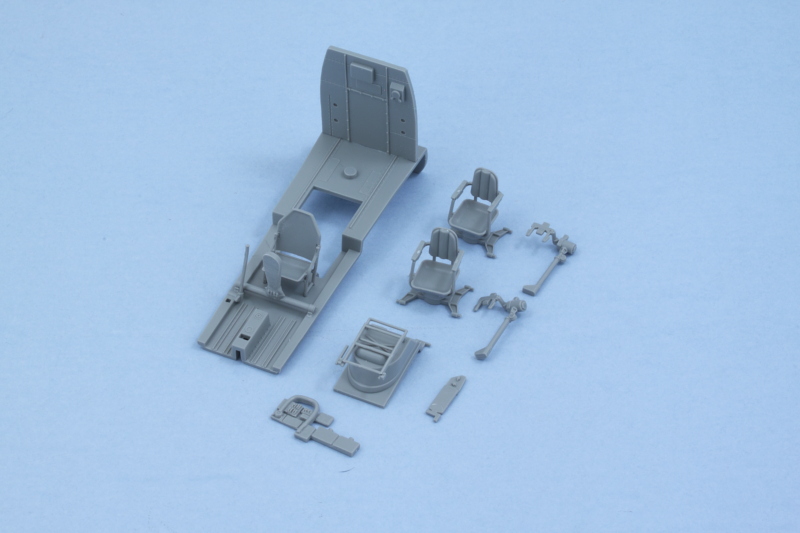
The real exercise in patience in this area has to be the crew seats. GWH decided to have all the supports and armrests as separate pieces to increase their detail level but that comes with the tradeoff of having to deal with tiny fragile pieces that all need to mate up with each other properly to create the three seats. The pilot's seat was the hardest to get to line up because the supports are spindly and have to support not only the seat pan but also the seat back. For the gunner and radar operator seats, I found it best to attach the seat backs to their supports first and let that set up solid first before attempting to attach them to the seat bottoms. Definitely an area you want to go slow in to get it all together! All of the seats, including the pilot's, are removable at this point to allow for easier painting and detailing.
I had considered posing the front access hatch with the ladder extended but that idea died quickly when I tried to remove the ladder parts from the sprue. They have several large attachment points and they are fragile to begin with and, as luck would have it, it was the last point that caused the bottom part of the latter to break right at the attachment points needed to extend the ladder properly. So, closed up instead! For good measure, I cleaned up the remote controls for the quad .50 turret but left them off for now to make it easier to add the crew harness belts after painting.
Next step will be to sling some Interior Green!
Returning to the radar operator's area, I added the Eduard PE parts for the top step on the access ladder and the rest of the ladder to the access hatch using the GWH supplied PE and some 0.6mm styrene rod. I'll be posing the hatch in the closed position but it's a prominent detail still visible through all the greenhouse windows.
Since I'm using the Eduard detail set for the front of the cabin as well, I had to decide how much stuff to install first vs. keeping separate to make it possible to add the pre-painted detail stuff easily. I installed most of the detail parts to the cabin sides where appropriate that needed to be zinc chromate and will add the rest of the details after the airbrush work is done. There were some raised ejector marks where the cabin bulkhead mated up with the fuselage, so a micro chisel was put to use to remove those and avoid fit problems later on.
The real exercise in patience in this area has to be the crew seats. GWH decided to have all the supports and armrests as separate pieces to increase their detail level but that comes with the tradeoff of having to deal with tiny fragile pieces that all need to mate up with each other properly to create the three seats. The pilot's seat was the hardest to get to line up because the supports are spindly and have to support not only the seat pan but also the seat back. For the gunner and radar operator seats, I found it best to attach the seat backs to their supports first and let that set up solid first before attempting to attach them to the seat bottoms. Definitely an area you want to go slow in to get it all together! All of the seats, including the pilot's, are removable at this point to allow for easier painting and detailing.
I had considered posing the front access hatch with the ladder extended but that idea died quickly when I tried to remove the ladder parts from the sprue. They have several large attachment points and they are fragile to begin with and, as luck would have it, it was the last point that caused the bottom part of the latter to break right at the attachment points needed to extend the ladder properly. So, closed up instead!
Next step will be to sling some Interior Green!
-
Bill Plunk
- Posts: 1245
- Joined: Wed Sep 28, 2022 10:18 pm
WIP 11-26-2015
More progress today after I convinced the airbrush that it really did need to get back to work after a longer than planned hiatus! I airbrushed some Flat Black as a primer and then applied MM enamel Interior green over that for the crew areas and various details.
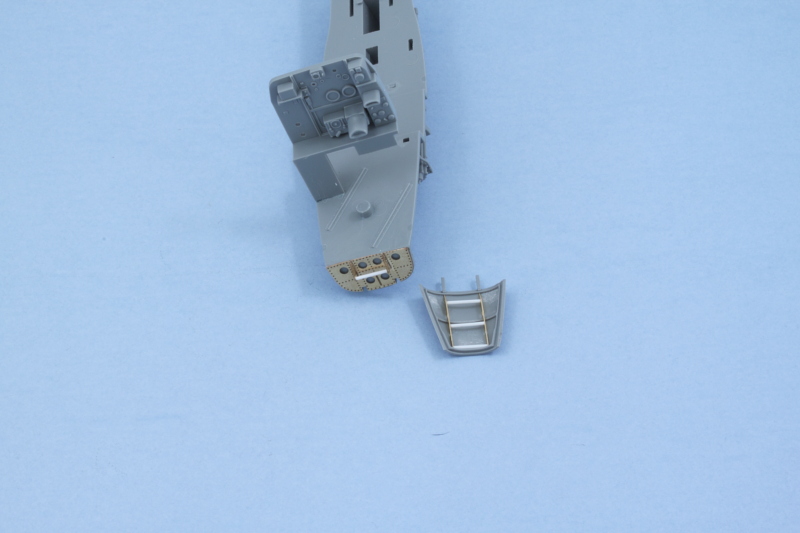
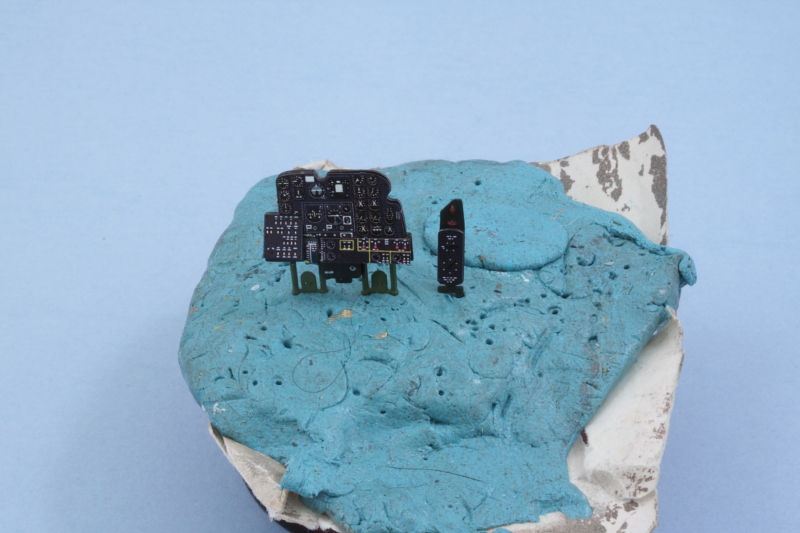
Time to tackle those cockpit details, so I began with the instrument panel. The GWH kit's IP has a lot of nicely molded detail but it all had to go to be able to use the Eduard detail set. That was a little trickier than I thought it would be as the rudder pedals are a little fragile, so it didn't leave a lot of places to hang onto it while removing all that detail. I did manage to slice up my thumb nicely though, so the model gods were appeased with an appropriate dose of blood sacrifice along the way! It's worth noting that the kit also had a PE (unpainted) upgrade for the IP that involved the same amount of surgery but would've achieved its detail for the instrument faces through individual decals for each one, so the Eduard approach was a big time-saver in that area for sure. I'll be adding the clear part gunsight after the cockpit is installed and the IP secured in place as the fit tolerances are pretty tight and it needs to line up just right to work properly.
I'm building this kit for my dad and he decided he wanted the canopies all closed on the finished build, so that's influencing some of my decisions on the interior detailing. With that in mind, I did add the cockpit side details courtesy of the Eduard PE set as well and installed the cluster on the right side after I'd attached the self-adhesive PE parts with it separate from the fuselage wall.
I still need to do some detailing on the crew seats including the harness belts, so that will probably be the next item on the to-do list.
-
Bill Plunk
- Posts: 1245
- Joined: Wed Sep 28, 2022 10:18 pm
WIP 11-27-2016
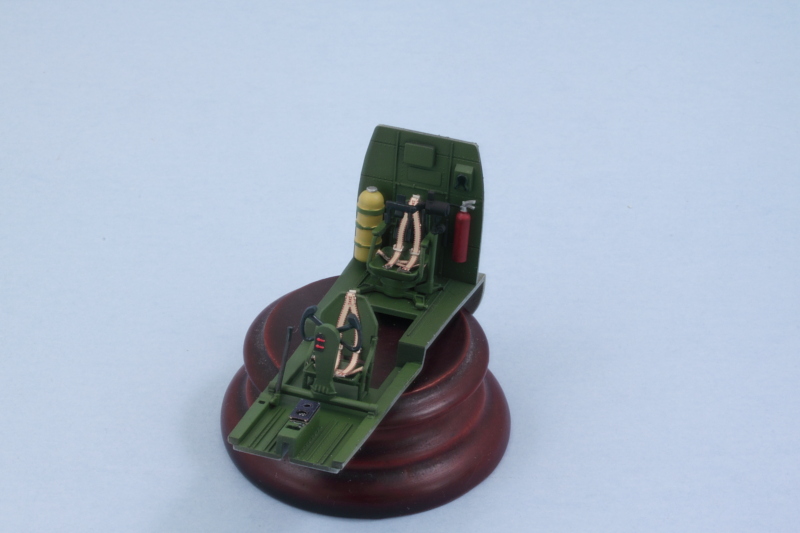
Last round of the Turkey Day efforts today! Managed to get the rest of the details done on the front and rear crew areas. I had picked up the Eduard rear interior detail set not realizing that it was designed to totally replace the bulkhead and equipment racks with different stuff but it wasn't a total loss...I used several pieces of the pre-painted instrument faces in different spots with some modifications to help dress up the RO's panel. Some of the unused decals intended for the pilot's instrument panel also got drafted to fill in some of the molded-on gauge faces. The Eduard set provided the harnesses for the seat and then the remote control sight was added to the seat to complete its assembly before it was installed in place.
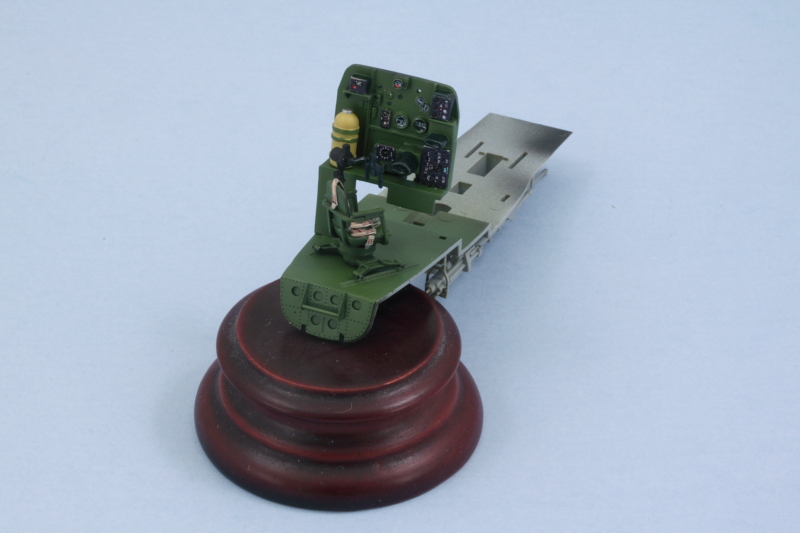
For the front area, I added the Eduard PE harnesses to the gunner and pilot seats before they were installed in place in the pit floor. The control yoke was added as well along with the oxygen cylinder and fire extinguisher.
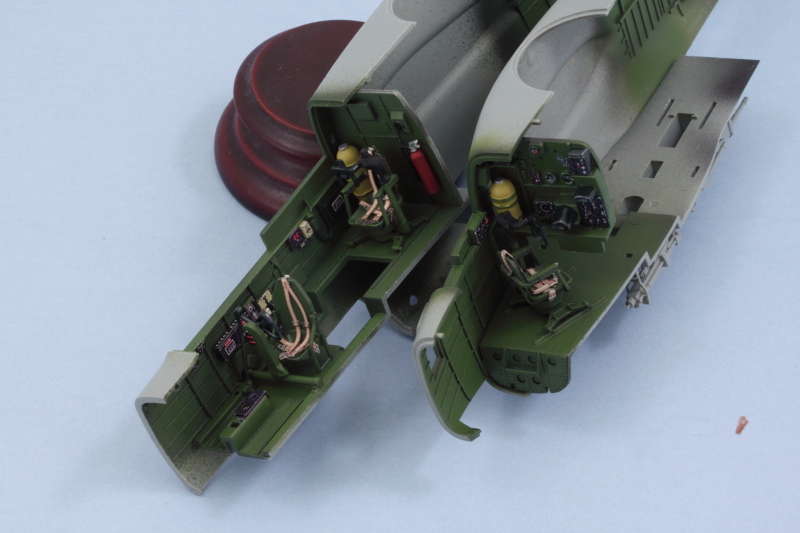
Just to make sure everything is continuing to play nice, I did a test fit of the front and rear elements into the fuselage. So far, so good! I've deliberately left off the two instrument panel parts as they fit a little loose will get permanently installed only when I'm ready to join up the fuselage halves.
I still need to do some work with the nose wheel gear bay before the interior will be all set for the halves to come together but that won't take long. Almost there!
For the front area, I added the Eduard PE harnesses to the gunner and pilot seats before they were installed in place in the pit floor. The control yoke was added as well along with the oxygen cylinder and fire extinguisher.
Just to make sure everything is continuing to play nice, I did a test fit of the front and rear elements into the fuselage. So far, so good! I've deliberately left off the two instrument panel parts as they fit a little loose will get permanently installed only when I'm ready to join up the fuselage halves.
I still need to do some work with the nose wheel gear bay before the interior will be all set for the halves to come together but that won't take long. Almost there!
-
Bill Plunk
- Posts: 1245
- Joined: Wed Sep 28, 2022 10:18 pm
WIP 12-23-2016
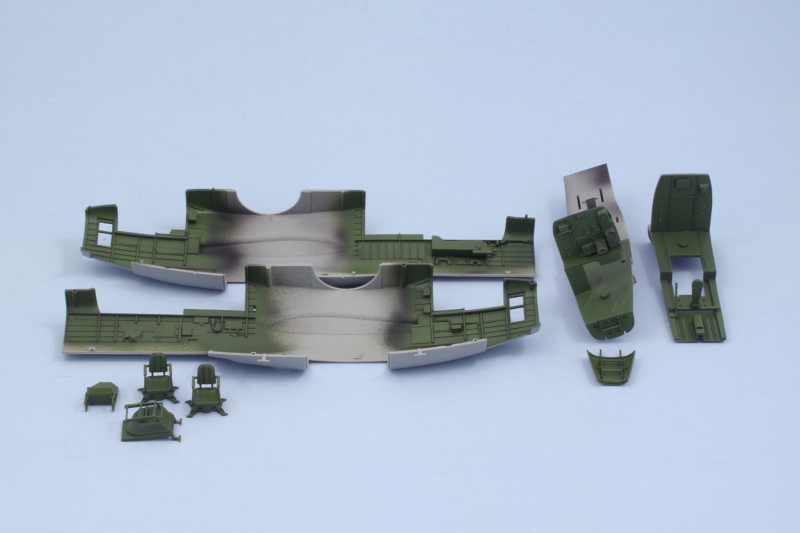
Holiday break started this past week so that meant I could get some time in on the Black Widow project again. Since I need to airbrush Yellow Chromate for the landing gear bays, I decided to get the wings together and prep the twin booms for that.
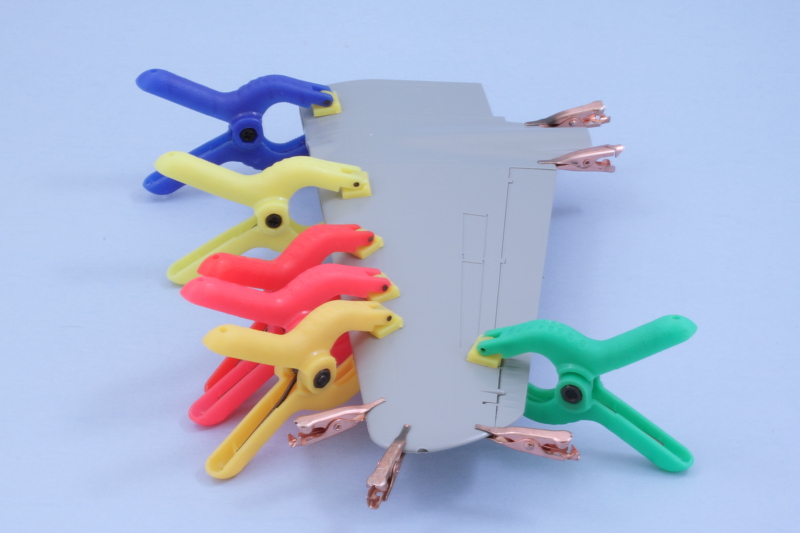
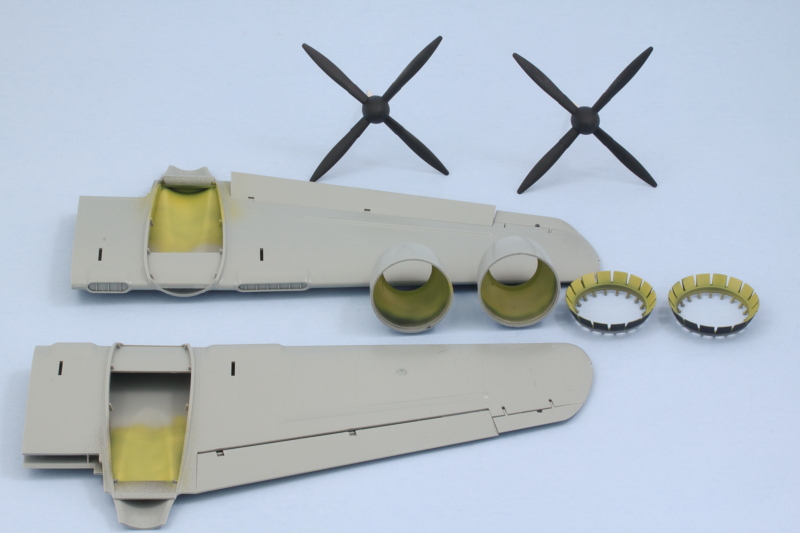
The wings go together fairly smoothly but since they trap the flaps and ailerons in a design to keep them movable, it makes getting it all together a little tricky. I used a combination of regular glue on the inside contact surfaces followed by liquid glue on the external edges and clamps to hold it all together while the glue set.
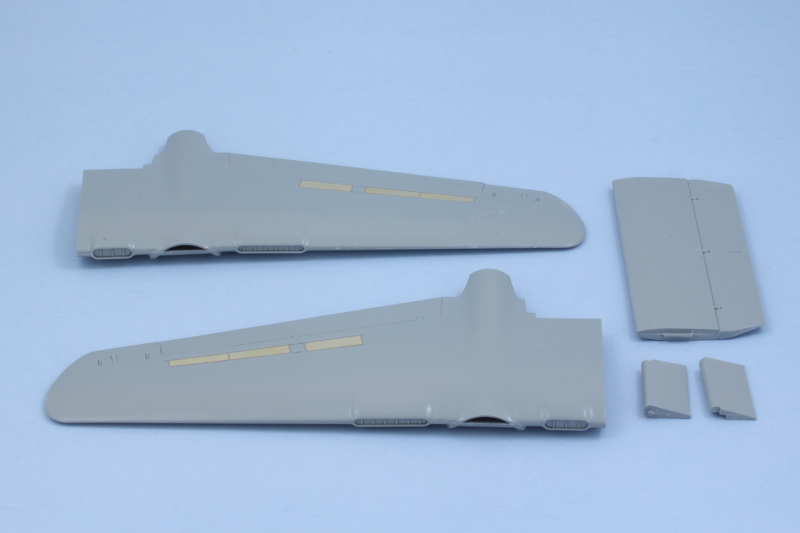
Some light sanding cleaned up the seam edges and I added the oil cooler inserts and the PE air brake flaps in the closed position since these would only be open while in the air. The PE parts have angled supports that have to be removed to install them in the closed position, easily done by using the etched bend line and bending them more than once until the ends come free. I also assembled the rear elevator section and the two small flap portions that install between the crew pod and the tail booms.
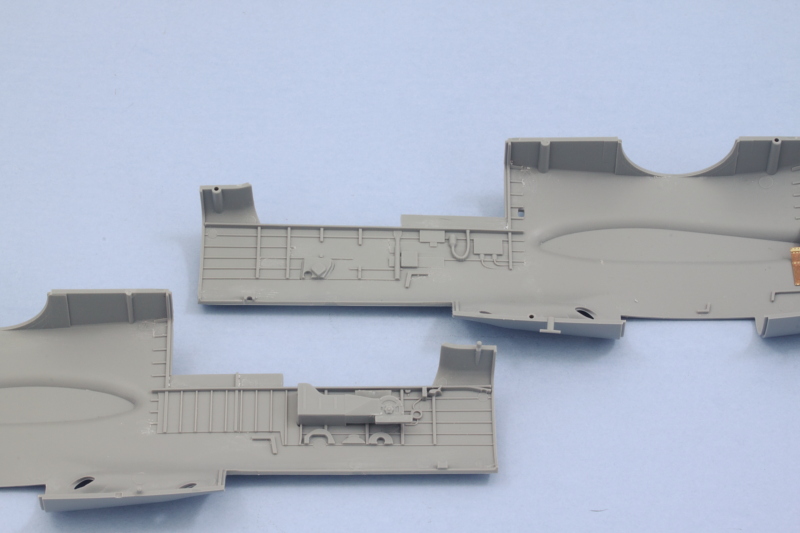
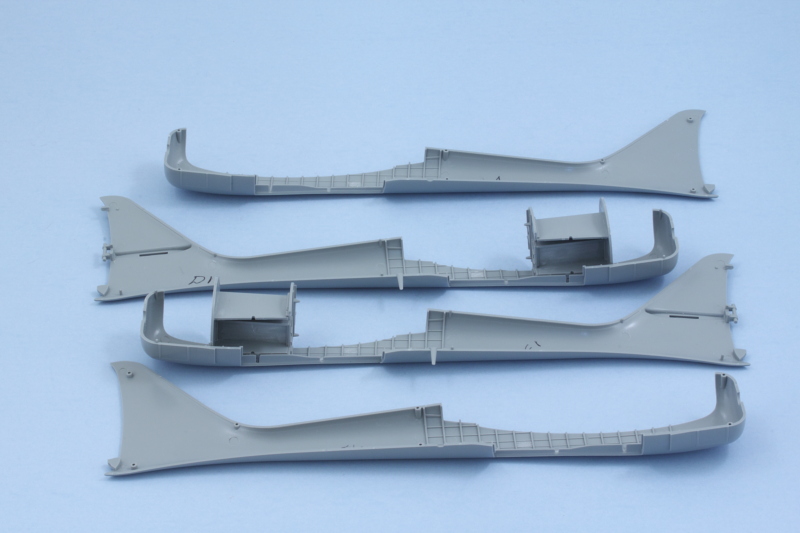
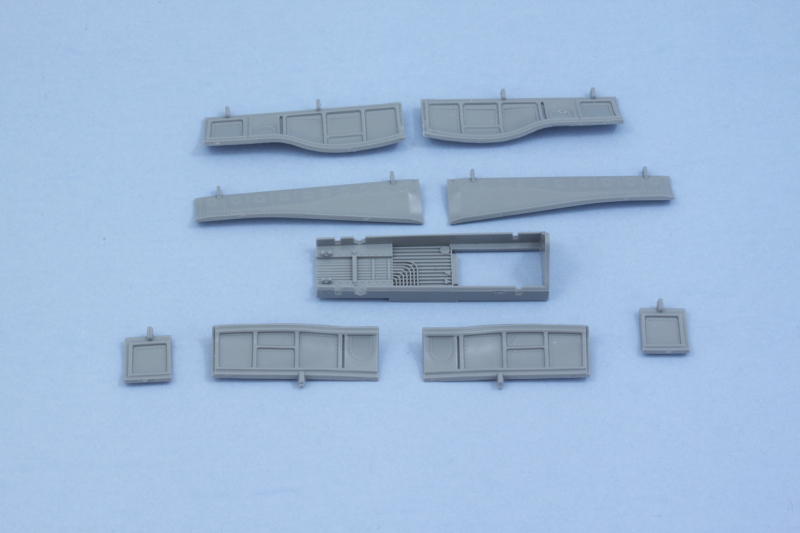
Speaking of the booms, I cleaned up the halves for each boom and assembled the main landing gear bays that go with them. After some test fits, I decided to install the bays in the boom half opposite the narrow section that the gear strut installs into so I could still access everything for painting and also be able to install the strut later on without interference. There were some tricky ejector marks that had to be removed with a round needle file to allow the bay bulkheads to install correctly and also remove some marks that will still be visible with the gear doors open.
Last, but not least, I cleaned up all the gear bay doors for the main gear and nose gear so they could get their dose of Yellow Chromate as well.
One thing's for sure, this Widow is going to be on the heavy side once it's all put together!
The wings go together fairly smoothly but since they trap the flaps and ailerons in a design to keep them movable, it makes getting it all together a little tricky. I used a combination of regular glue on the inside contact surfaces followed by liquid glue on the external edges and clamps to hold it all together while the glue set.
Some light sanding cleaned up the seam edges and I added the oil cooler inserts and the PE air brake flaps in the closed position since these would only be open while in the air. The PE parts have angled supports that have to be removed to install them in the closed position, easily done by using the etched bend line and bending them more than once until the ends come free. I also assembled the rear elevator section and the two small flap portions that install between the crew pod and the tail booms.
Speaking of the booms, I cleaned up the halves for each boom and assembled the main landing gear bays that go with them. After some test fits, I decided to install the bays in the boom half opposite the narrow section that the gear strut installs into so I could still access everything for painting and also be able to install the strut later on without interference. There were some tricky ejector marks that had to be removed with a round needle file to allow the bay bulkheads to install correctly and also remove some marks that will still be visible with the gear doors open.
Last, but not least, I cleaned up all the gear bay doors for the main gear and nose gear so they could get their dose of Yellow Chromate as well.
One thing's for sure, this Widow is going to be on the heavy side once it's all put together!
-
Bill Plunk
- Posts: 1245
- Joined: Wed Sep 28, 2022 10:18 pm
WIP 12-25-2016
Merry Christmas everyone!
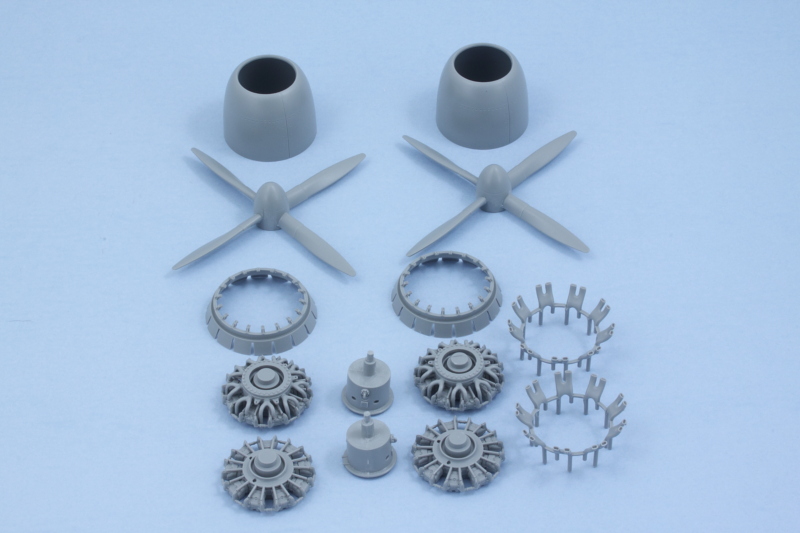
I decided to hold off on the airbrush work just a bit since there are some other parts that can benefit from a session and I'm always a believer in maximizing the paint time for obvious reasons. To that end, I spent some effort on getting the engines together and cleaning up the cowls and flaps. I decided to go with the open cowl flap option since the kit gives you the choice of different separate flap parts for either open or closed. The engine crankcases were also assembled and cleaned up and the one-piece propeller/spinner combinations were also dealt with. Can't say I'm 100% thrilled with GWH's choice to go that route with the props, but it is what it is. There was a slight mold seam/shift between the prop blades where they meet the spinner due to the pitch on the blades that had to be carefully sanded down while preserving the curve on the spinner that was a little tricky. Sanding twigs to the rescue!
The engines possess a pretty nice level of detail in the molded parts but virtually all of it gets hidden away inside the cowls once it's all put together and in place on the mount booms. A test fit with the exhaust pipes also shows that their fit is pretty tight and I'll have to slightly sand down/trim the pipes to be able to slide in place properly. Either that or just cut down the longer pipes since they will be totally invisible once installed, have to decide which way I want to go.
-
Bill Plunk
- Posts: 1245
- Joined: Wed Sep 28, 2022 10:18 pm
WIP 12-26-2016
Made the most of the airbrush session today, laying down a primer coat of MM enamel Flat Black to all the areas that needed Yellow Chromate plus the props and engine cowl flaps that will get a dose of Red later on. For the Yellow Chromate, I used the standard Testors enamel color in the little square bottle properly thinned and sprayed through the airbrush over the Flat Black in thin coats to allow the Flat Black to work as a pre-shade as well.
With that out of the way, I added the cockpit instrument panels that I'd left off previously and permanently installed all of the interior components into the fuselage pod on the right side. The fit of all the modules is pretty tight together as all three interact with each other to varying degrees in their placement. The only wobbly component is the turret cylinder, so I had to fit it carefully to make sure it lined up properly with the opening in the roof. I also added the clear windows to the radar operators pod at the rear since they have to go in now before the halves can be joined.
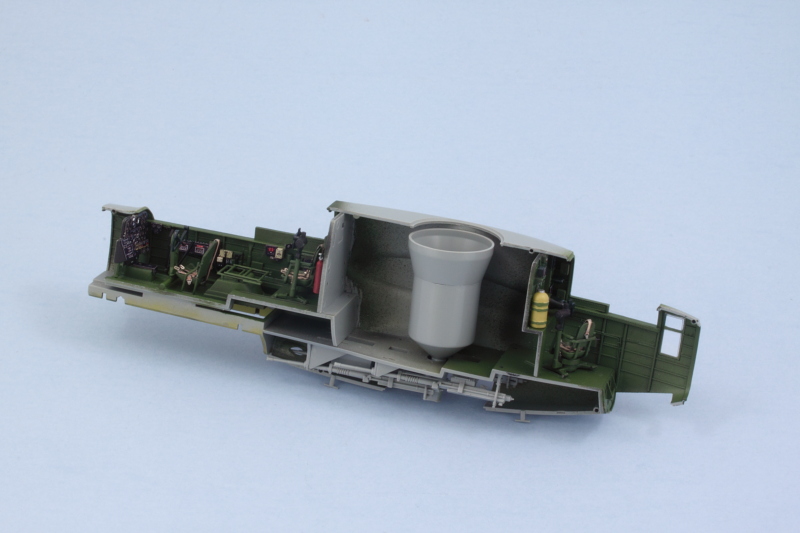
With all of the interior stuff in place, I painted up the nose gear strut since it has to sandwich in the bay between the fuselage halves and fitted it in place. Then the real fun of getting the fuselage halves together began. The mount pin holes weren't quite large enough for the pins to fit flush, so I used a micro drill bit to enlarge them enough to remove that obstacle. Starting at the nose, I added liquid glue to the seams and used a combination of rubber bands, clamps, and finger pressure to get it all together.
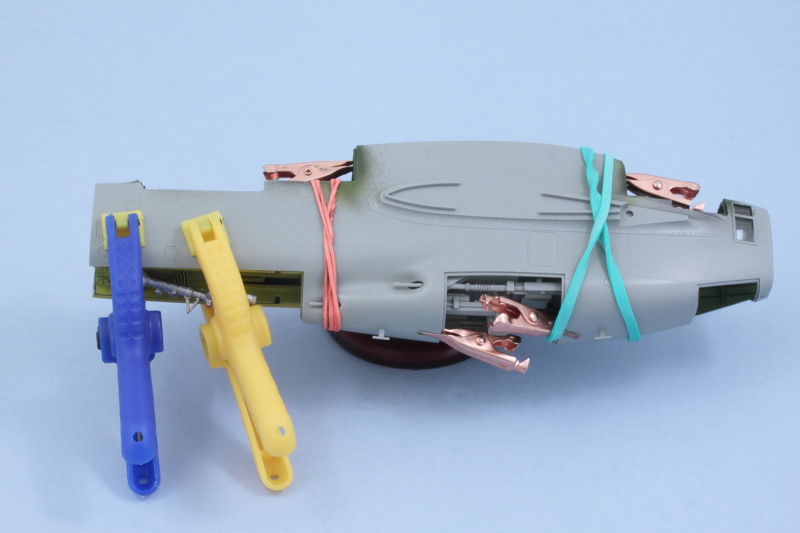
The two halves lined up pretty well with just a couple of small spots around the 20mm gun bays on the underside that will need some putty attention to completely fill. That will come tomorrow!
With that out of the way, I added the cockpit instrument panels that I'd left off previously and permanently installed all of the interior components into the fuselage pod on the right side. The fit of all the modules is pretty tight together as all three interact with each other to varying degrees in their placement. The only wobbly component is the turret cylinder, so I had to fit it carefully to make sure it lined up properly with the opening in the roof. I also added the clear windows to the radar operators pod at the rear since they have to go in now before the halves can be joined.
With all of the interior stuff in place, I painted up the nose gear strut since it has to sandwich in the bay between the fuselage halves and fitted it in place. Then the real fun of getting the fuselage halves together began. The mount pin holes weren't quite large enough for the pins to fit flush, so I used a micro drill bit to enlarge them enough to remove that obstacle. Starting at the nose, I added liquid glue to the seams and used a combination of rubber bands, clamps, and finger pressure to get it all together.
The two halves lined up pretty well with just a couple of small spots around the 20mm gun bays on the underside that will need some putty attention to completely fill. That will come tomorrow!