GWH 1/48 Northrop P-61B Black Widow (2017)

Bill Plunk
Posts: 1245
Joined: Wed Sep 28, 2022 10:18 pm

WIP 12-27-2016

Post by Bill Plunk »

More progress today, I started in with the fuselage pod clean-up after it had a chance to set up overnight. I used Squadron white putty to fill a couple of gaps in different spots and also to help remove a slight step that occurred on the top near the cockpit edge. That step was a by-product of the locator pin that originally was there getting broken off back at the very beginning when I did the first dry-fits. I had used a small copper clip to try to minimize that and it was partly successful with the putty taking care of the rest.

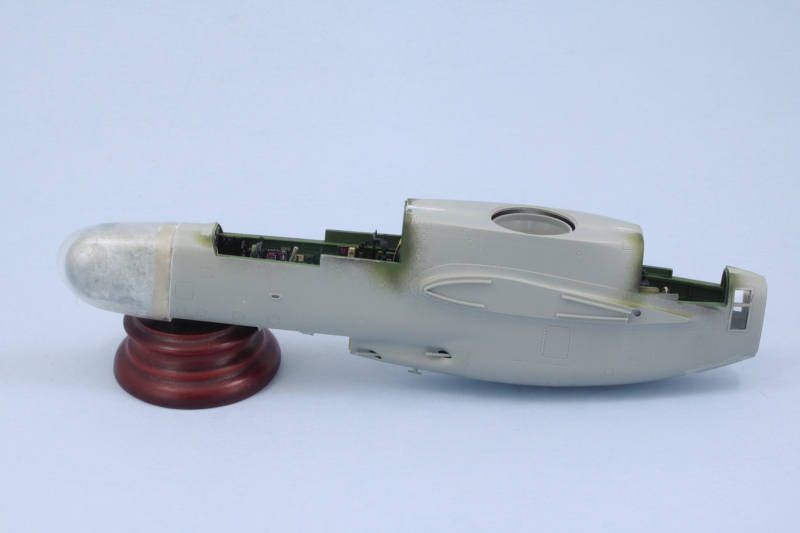
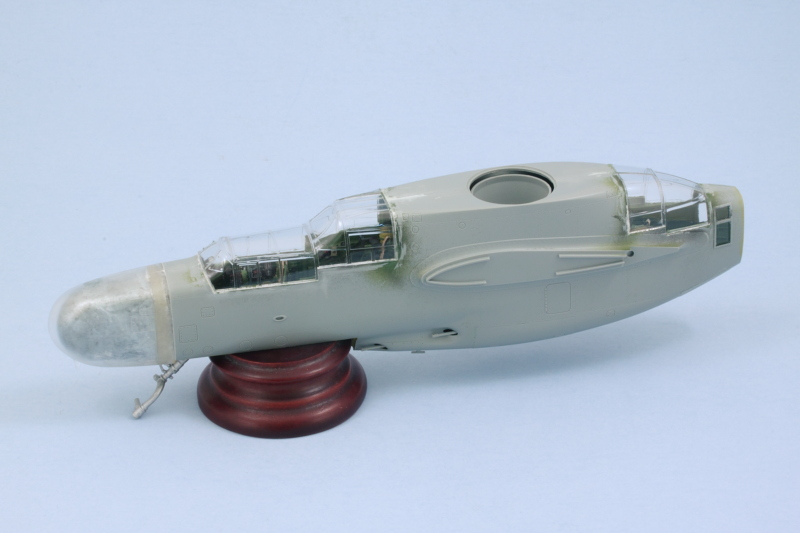
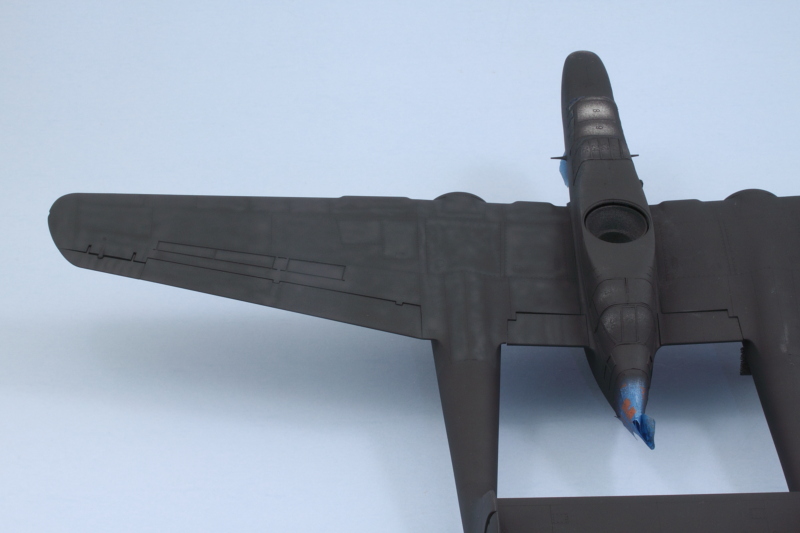
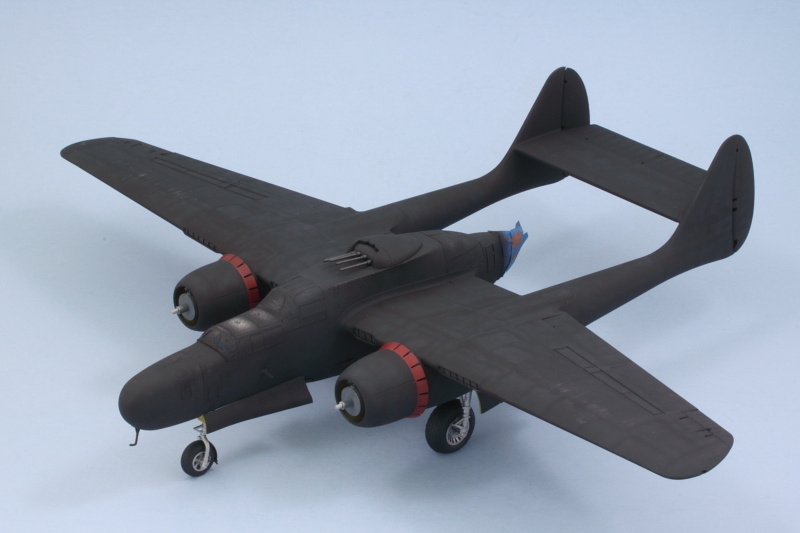
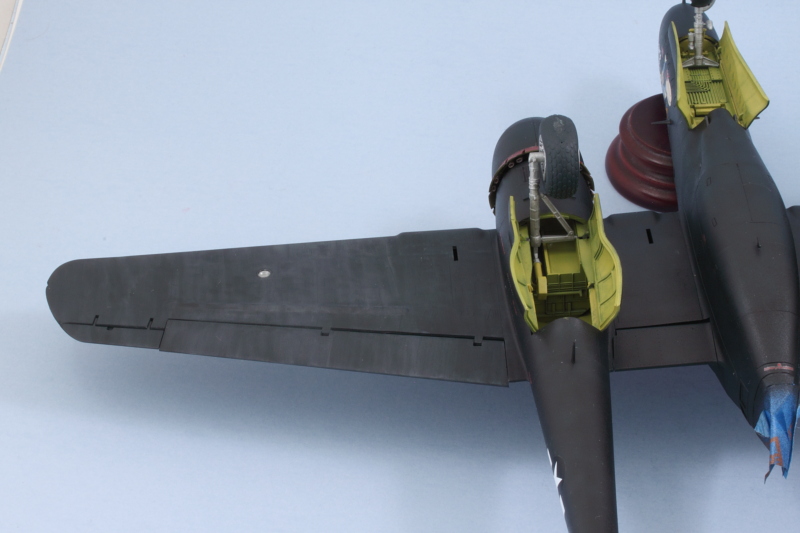
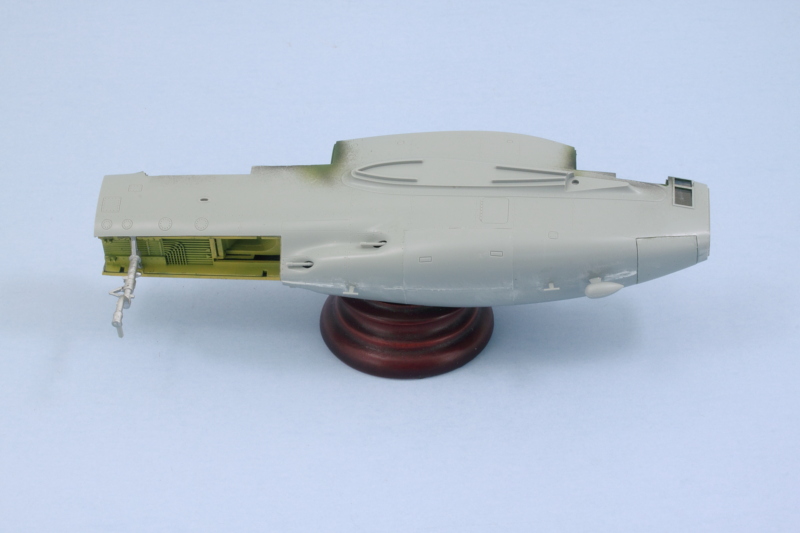
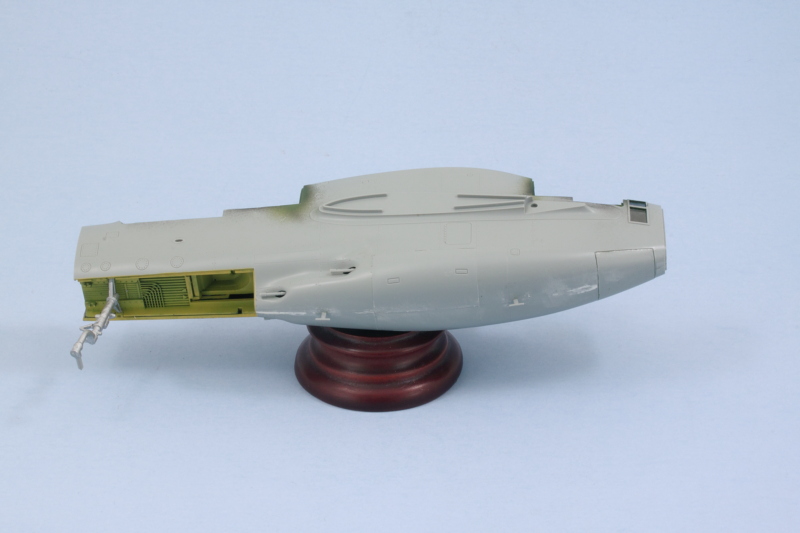
I also noticed that the egg-shaped antenna that goes on the pod underside relies on a cutout to fit...but the instructions never tell you to open up the spot required on the pod halves. I removed the little mount tab so it would sit flush and added it (the instructions also erroneously label it as part F55, there are two different ones on the F sprue to choose from, F60 or 61) flush to the underside halfway between the little smaller antenna and the radar operator's access hatch. Speaking of that hatch, it was also installed along with the ammo access doors for the 20mm gun bay.

Image

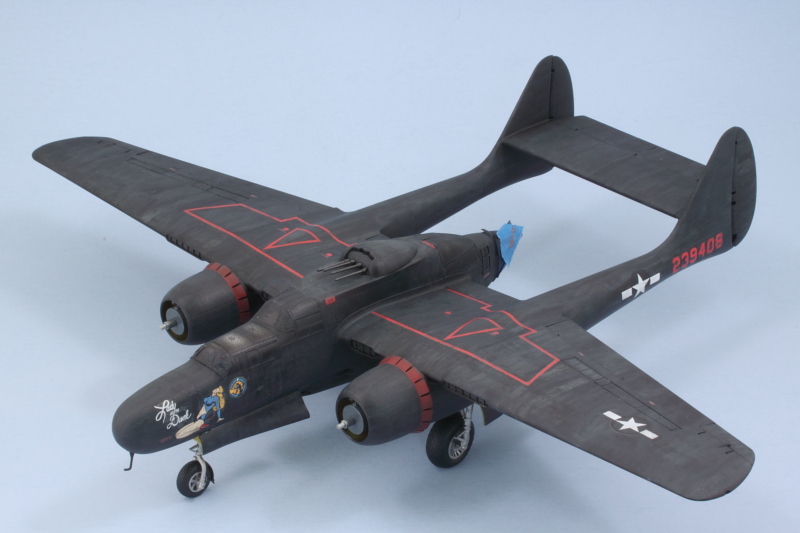
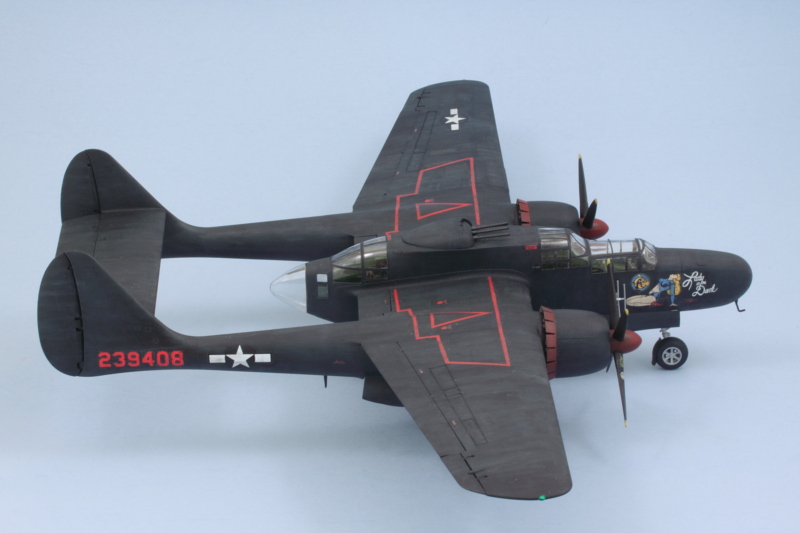
EDIT: I was flipping through reference photos in the Squadron In Action book for something else on this build and it suddenly jumped out at me that the little egg-shaped antenna wasn't present on the underside of any of the P-61 variants pictured and the photos of one of Lady in the Dark's squadron mates, The Spook, clearly shows a 'clean' profile on the pod behind the hatch. So that got me wondering, and I found this photo of Lady in the Dark captioned as being on Ie Shima in 1945.

Image

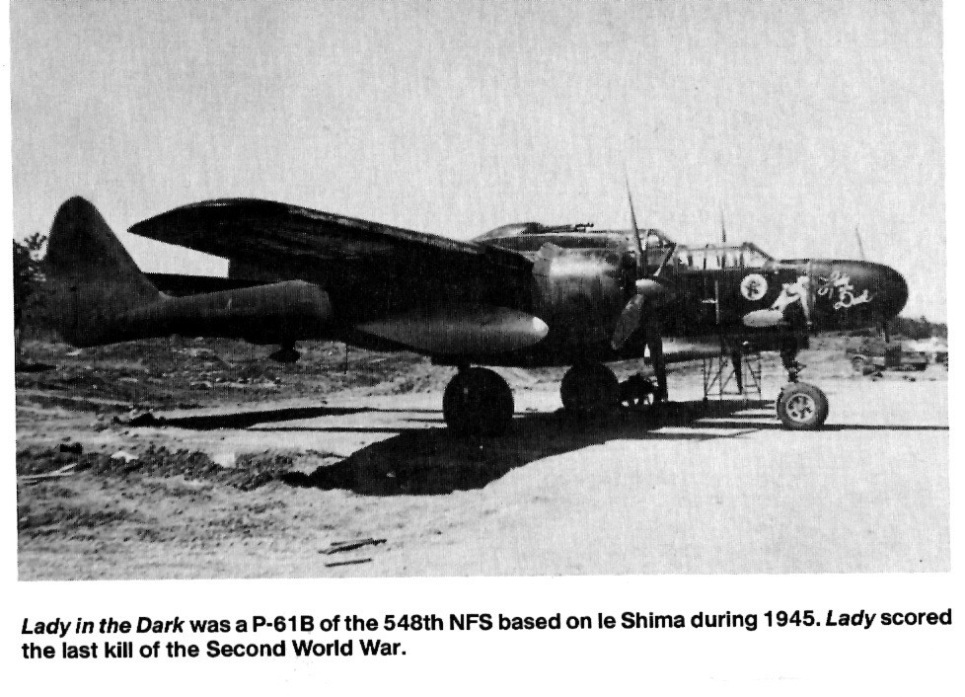
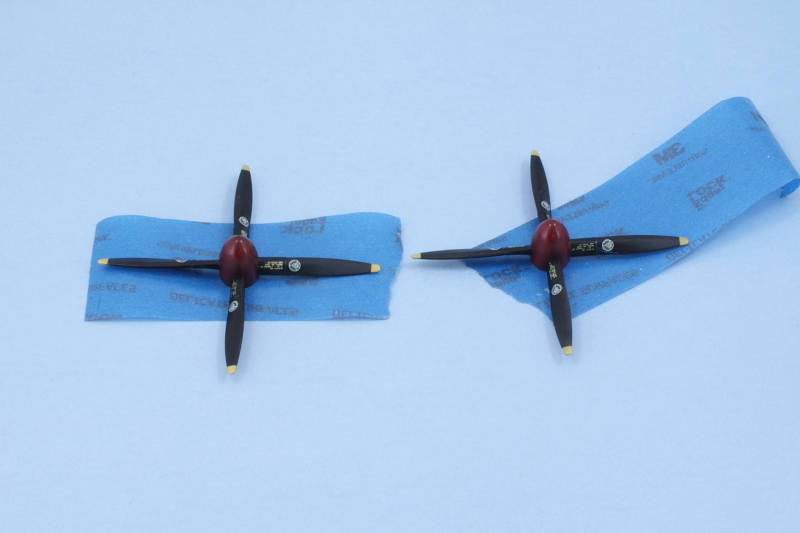
It shows an egg-shaped antenna, but on the boom, not the pod! That would explain, I guess, why there are 2 in the kit but they are never mentioned in the instructions. I'm guessing they took the place of the blade antennas at some point that are on each boom, but not 100% sure as the reference book never shows them or mentions them. So with that now known, I removed it from the pod and sanded it back clean.

Image


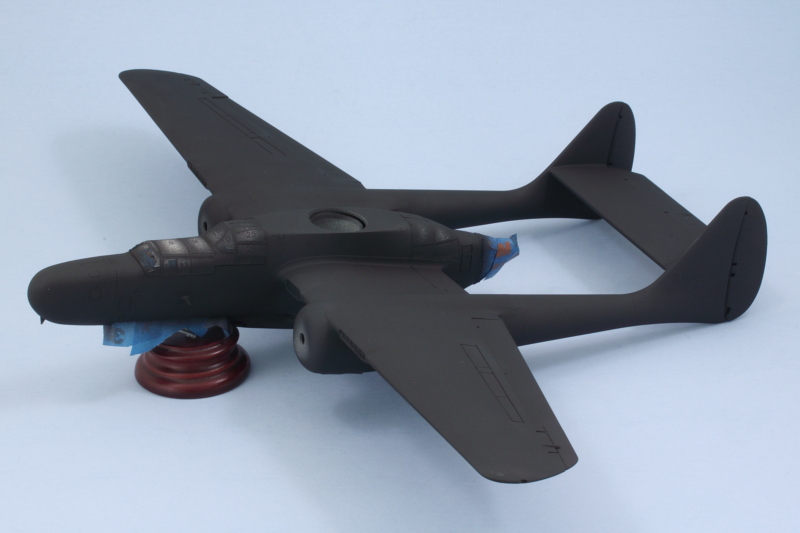
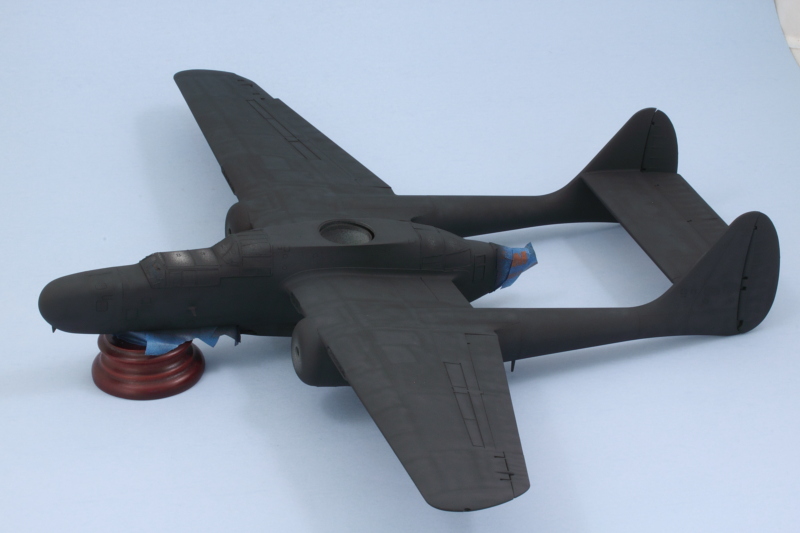
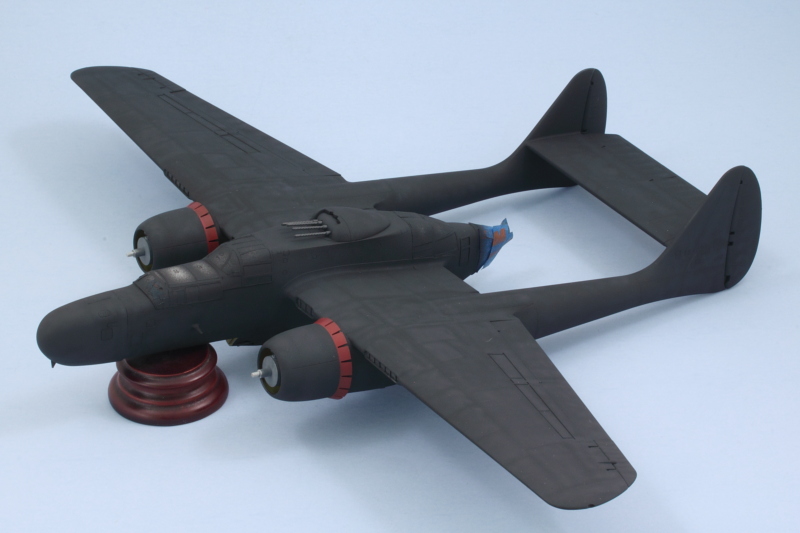
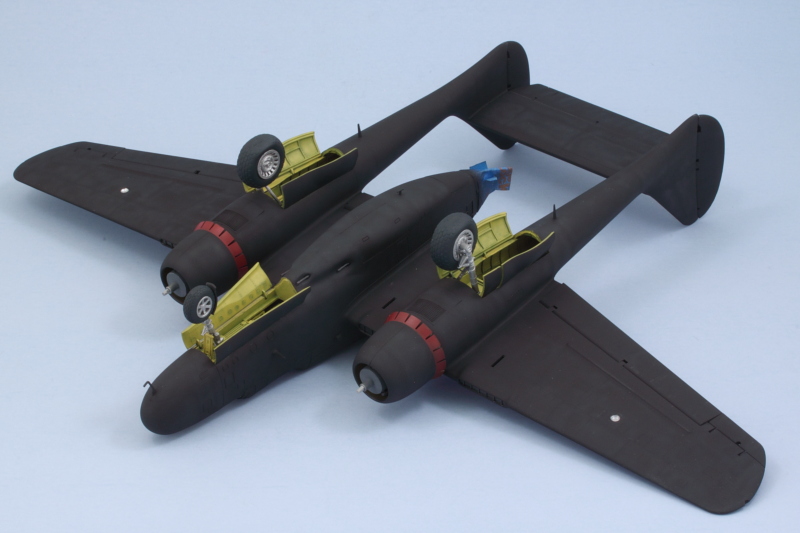
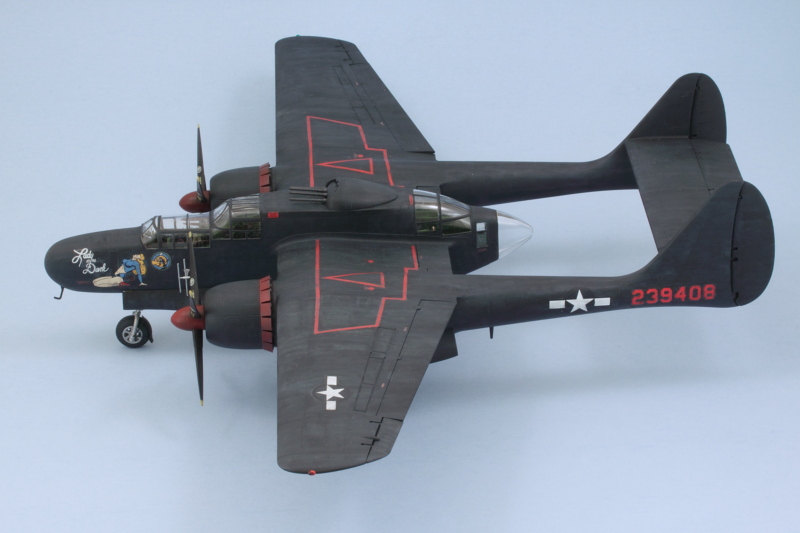
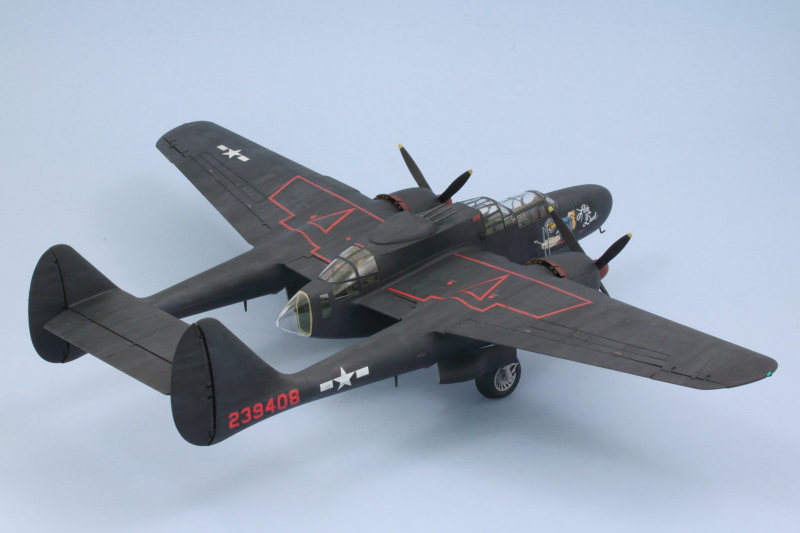
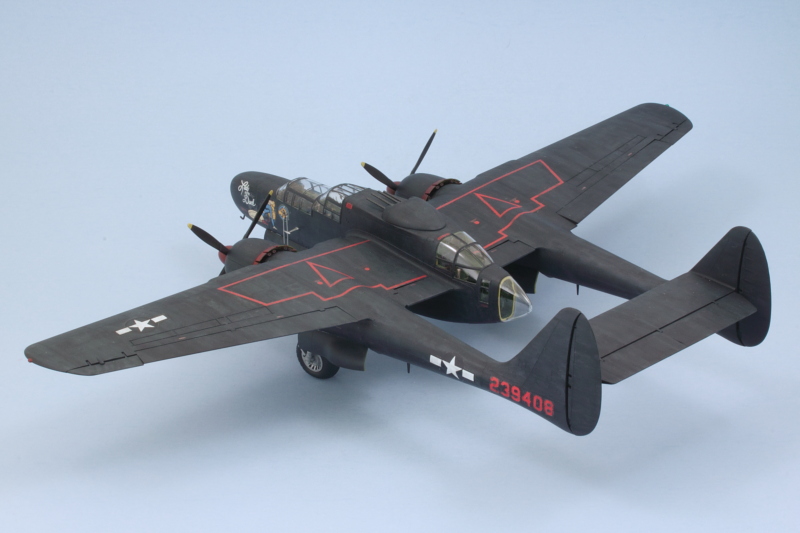
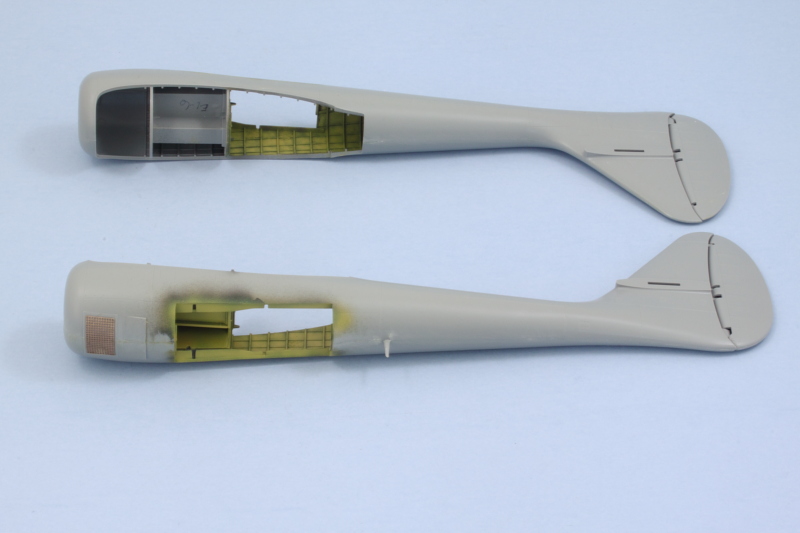
Next major item on the list is the twin tail booms. I used liquid glue to join the boom halves together starting at the front and working my way back using finger pressure along the way to get a solid join. I did a quick check with the main landing gear and it's just possible to slide the gear in and out of the pin slots, so that will make life a lot easier from a painting/finishing standpoint. Rudders were assembled around the hinge points on each boom and I also added the PE intake screens to the undersides of each boom. Light sanding on the join seams was all that was needed to clean them up.

Image

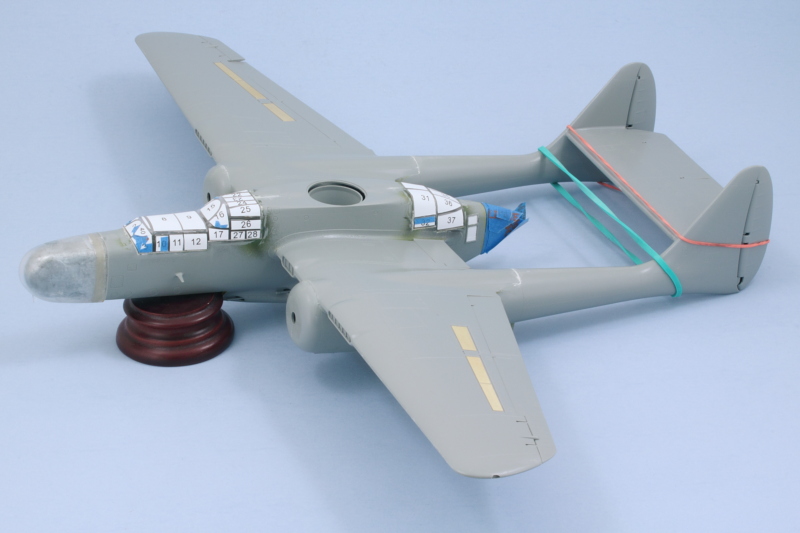
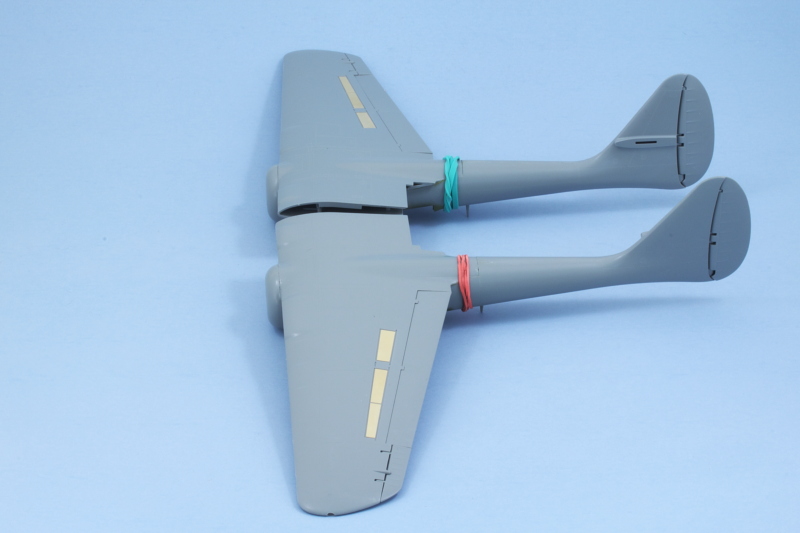
Time for the big plunge, adding the booms to the wings. It's important to keep the booms straight so that they attach to the correct wing so I had marked the tops of the gear bays so I could double-check that with the instructions before committing to the glue. Regular glue was applied to the engine nacelles so I could adjust the fit with the wing and then liquid glue was applied around the exterior of the seam to get it all solid. After holding it together with finger pressure so the glue could grab, I added a rubber band to the rear of the wing where it meets the boom for some extra help. There's a small gap on each wing in that area that will need some putty attention to fill but nothing too serious.


Image

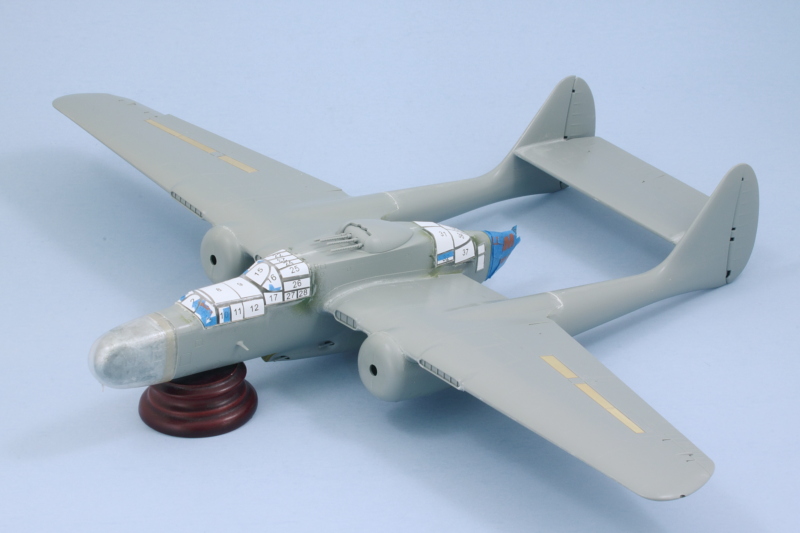
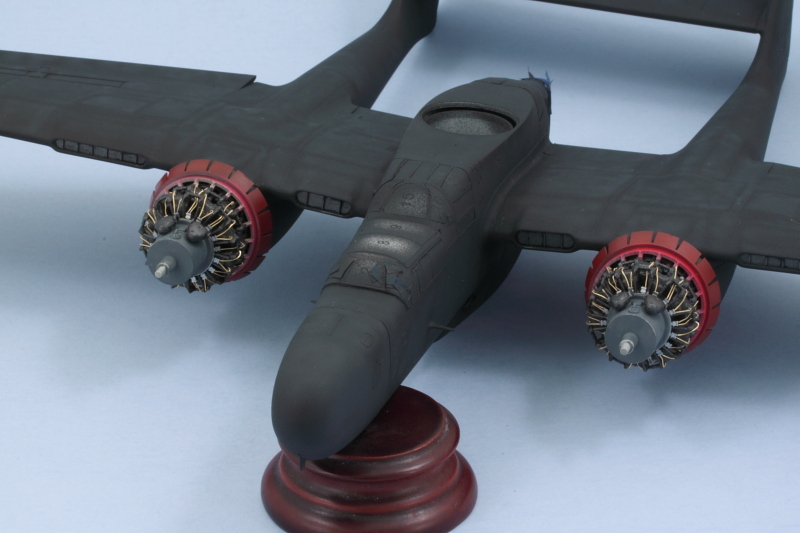
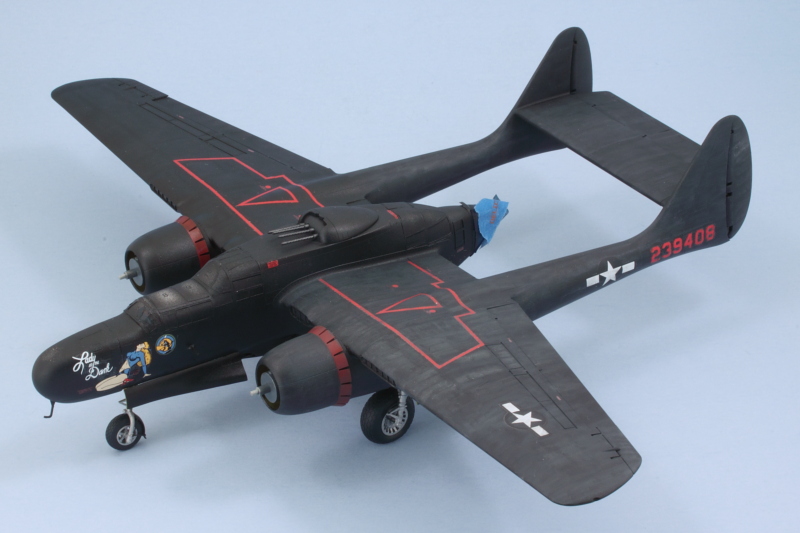
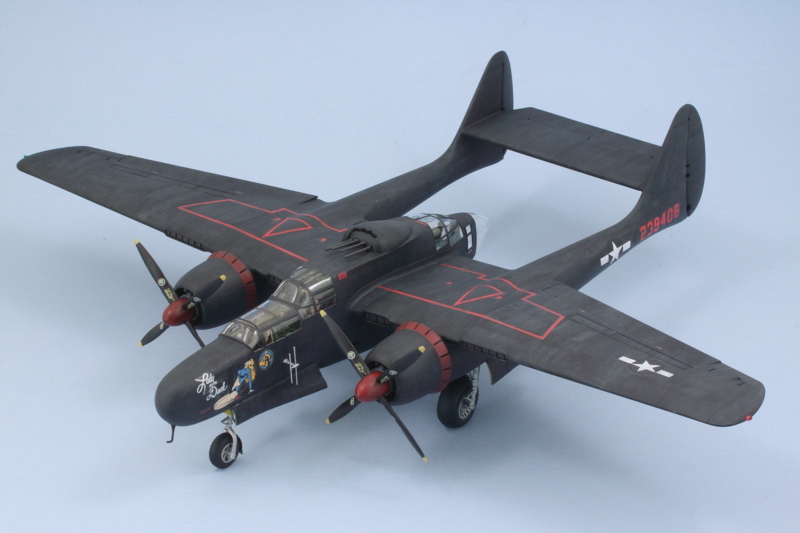
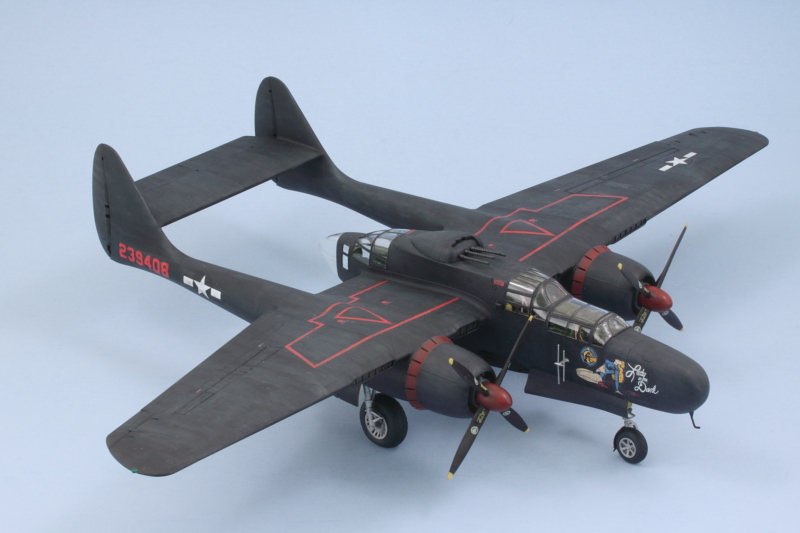
The P61 is a big bird, once the pod is added it's going to be fun handling it for both painting and photos!
Bill Plunk
Posts: 1245
Joined: Wed Sep 28, 2022 10:18 pm

WIP 12-28-2016

Post by Bill Plunk »

One of the things I really like about this kit is that it includes an excellent solution to the tail-sitting problem by way of a very large and appropriate nose counterweight. The counterweight is a hefty chunk of cast white metal that is shaped to fit inside the radome nose perfectly in place of the radar gear. To secure it in place, I used CA gel around the weight at roughly its midpoint and slid it into the clear radome nose. This was followed by some 2-part Aves EpoxySculpt to ensure it wouldn't come loose and rattle around in the future and also would add a little more weight to fill up the nose proper. Once that had started to cure, I added the nose bulkhead to the pod and then installed the nose permanently in place with liquid glue so I could make sure it all lined up properly. Due to the heavy weight, I braced it up vertically inside the kit box and let gravity help out for an hour or so while the glue firmly set.

Image

I had debated whether or not to fit the pod to the wings before working on all the canopy glass or after, so I did some test fits to see how it would all play together to help make up my mind. The fit is good but not perfect, so that made the decision for me as handling is much simpler with the pod separate, especially since there are multiple parts needed to get the cockpit and radar operator areas' glazing done. The kit has the option to pose portions of both the forward and rear areas open but these will be closed up for my build. To facilitate that, I installed the large portions in place first with a combination of liquid glue and careful finger pressure to get it all to fit properly. I used latex gloves to prevent leaving any prints on the clear parts during their clean up and installation during this process, just had to be careful not to get any glue on the latex.

Image

Some careful sanding and putty work was necessary in a couple of spots. I also painted up the small reinforcing strip for the clear tail cone and installed it in place as the last piece of the canopy work. To protect the clear parts and remove any imperfections created during the install and sanding clean up, I brushed on a coat of Future to all the exterior clear surfaces. I'll let that cure up overnight before I add the kit-suppled pre-cut masks over the glass areas.

Image

Last, but not least, I masked off the propeller blades with thin strips of masking tape to go around the compound curves and airbrushed some MM enamel Insignia Red for the hubs and cowl flaps. MM enamel Gelb was airbrushed for the tip markers as well.

Image

Tomorrow should see the whole thing come together in anticipation of throwing some Gloss Black at this baby.
Bill Plunk
Posts: 1245
Joined: Wed Sep 28, 2022 10:18 pm

WIP 12-29-2016

Post by Bill Plunk »

Today's effort focused exclusively on getting all the clear parts masked off in preparation for joining the pod and booms together and ultimately leading to the main paint work for the body. Little did I know just how long that was going to take. I knew it wasn't going to be quick, after all there are 44 different panels/areas that need to be masked off on this baby. The kit supplies self-adhesive pre-cut masks that are made out of a soft flexible vinyl material and they help considerably with the masking effort, but they don't quite make it effortless. Some of the masks fit better than others and virtually all of them required some kind of trimming or adjustment to get them into the correct shape.

Each mask was burnished down with a wooden toothpick and I used an Optivisor and a sharp #11 blade to carefully trim away the extra material where needed. It was a slow process, taking about 4 hours in total to get it all done. Oddly enough, the masks don't address the four small windows just forward of the tail cone, so I used some of the extra material on the masking sheet and made my own for them. The little bits of blue tape are regular painter's tape that helped supplement in a couple of spots where either the mask wasn't quite the right shape or I needed to add just a little more to get it right. I did end up removing the three small nuts on each of the triangular ports on the forward windscreen as they were making it impossible to mask off those areas effectively.

Image

I've attached both wings and they are going to dry overnight before I fit the rear stabilizer since the booms have to be put under a little bit of tension to close up properly and I don't want to run the risk of warping out one of the wings in the process of doing that.
Bill Plunk
Posts: 1245
Joined: Wed Sep 28, 2022 10:18 pm

WIP 12-30-2016

Post by Bill Plunk »

Big push today towards the finish line as a follow-on to yesterday's work. I added the wings to the fuselage pod and let them set up overnight since the rear stabilizer needed the booms to be put under some slight tension to match up properly. A pair of rubber bands, liquid glue, and a little hand-holding later and it was all in place.

Image

The last remaining structural detail was the quad-50 turret for the fuselage top, so that was taken care of as well. The assembly is a little tricky in terms of getting the guns lined up at the right elevation, each one has a little wiggle room in their mount so some patience is necessary to get all 4 sitting like they should. The instructions indicate that it should be able to rotate freely on top of the cylinder but mine sits very loose and will be glued down later after painting and detailing.

Image

Speaking of paint, it was time to get the airbrush busy on the main paint work. I used MM enamel Flat Black as the overall basecoat color and built it up slowly using multiple thin passes.

Image

The Pacific environment wasn't kind to the gloss black finish on the P-61s and I wanted to produce a faded look, so I added a few drops of MM enamel Light Gray to the Flat Black to create a faded lighter shading coat. This was applied close-up, working a section at a time, and using the straight Flat Black as a pre-shade layer as well.

Image

Takes a while, but it produces a nice result I think. It's subtle but what I was aiming for in the first place. Rather than try to do it with enamel Gloss Black, I will apply a Gloss varnish layer later on after the decals are in place to create the gloss finish to go with the faded look.

Image

While I was at it, I also did the same work on the still separate pieces for the turret, gear doors, and engine cowls.

Image

All that's left now is getting the landing gear together and detailing the engines, so moving right along!
Bill Plunk
Posts: 1245
Joined: Wed Sep 28, 2022 10:18 pm

WIP 12-31-2016

Post by Bill Plunk »

Today's update is reflective of the amount of progress reached, so apologies for the semi-epic nature! A good way to cap off 2016 though as the Black Widow is very close now to the finish line.

First order of business, the engines! I got the detail paint work done using non-buffing Metalizer Gunmetal for the cylinder heads and added the kit-supplied PE ignition wires and harness ring. The crankshaft case was detailed with Gunship Gray and the whole thing carefully assembled along with the cowl flap base.

Image

I modified the exhaust pipes by cutting down the long pipes that were meant to connect up to the front bank of cylinders as 1) they wouldn't fit otherwise due to the space constraints and 2) those pipes aren't visible anyway once it's all mounted. I applied a wash of MM enamel Leather over the Gunmetal to provide some burnt rust/oxidation to the exhausts themselves.

Image

A quick test fit with the cowls showed everything was playing nice even if it all but disappears inside, we know it's there!

Image

The cowls don't have any locating guides so I decided to fit the engines to the booms first so I could place the cowls in the correct alignment afterwards. Regular glue was used to help give it a little extra grab due to the relatively small contact surfaces involved. I also picked out the oil cooler intakes with some of the non-buffing Gunmetal while I was at it.

Image

Once the engines had set solid, I added the cowls to both booms. I also picked out the .50-cals on the turret and the 20mm belly guns with the non-buffing Gunmetal and installed the turret permanently in place on top of the fuselage.

Image

That left one very important area to deal with, the landing gear! The kit's tires are split half affairs for all three wheels, so I opted to replace them with some Eduard Brassin tires. The resin tires are one piece with separate hubs, so they were all cleaned up and the hubs handpainted separately with MM non-buffing Metalizer Steel. Eduard conveniently includes masks with the tires for two options, one where the hubs are in place and one not (very convenient!), and I used the separate mask option and airbrushed the tires with MM enamel Gunmetal.

Image

As with any aftermarket replacement, there's usually some degree of modification/work needed to make it play nice. For the wheel hubs, I had to open up their openings slightly with a drill bit/needle file combo before the kit strut axles would fit correctly. Not a big deal, just a lot of careful back and forth until the fit worked out. I fitted the gear first and did some test fits to make sure the flattened bottoms of the tires sat correctly in relation to each other. Once that was set, I added the opposite hub halves and then mounted all the gear doors. The doors were a bit of an exercise in patience as their contact points inside the bays aren't very big and some of the notches didn't quite fit properly, so careful trimming and gluing plus some strategic bracing and waiting for glue to set was called for to get all the doors in place. I also picked out the wing landing lights with some enamel Silver and will add the lenses in later as a final detail along with the wing tip lights when the time comes.

Technically the doors aren't 100% accurate for the B since they were redesigned as cyclic doors to close up and only expose the strut post to prevent dirt/rocks/mud from getting slung up into the bay on rougher forward strips. GWH didn't completely redesign them though for the B in terms of allowing the longer side to clear the angled portion of the strut and close properly, so I ended up posing them all full open. Not a huge deal for me as it has the added benefit of showing off the detail work I did on the bays to begin with! ;)

Image

She's now up on her own two feet. I've left the props off, for now, to make it easier to handle her while adding the markings and also to give a little more room to work on removing the masks.

Image

I've applied a coat of Future in anticipation of the decal work to come for tomorrow, going to be another busy round with lots of little tiny red stencils to add all over the place.
Bill Plunk
Posts: 1245
Joined: Wed Sep 28, 2022 10:18 pm

WIP 01-02-2017

Post by Bill Plunk »

Yesterday was spent working on the decals and letting them dry overnight before they were sealed in with a 2nd pass of the Future to unify them with the finish and protect them going forward. The GWH decals mostly went on without issue but the toughest ones to deal with were the red walk-strip indicators. These had a tendency to want to tear even though they were already designed in 4 separate pieces/sections, so it was an exercise in patience to piece them all together. They responded reasonably well to the Solvaset I normally use but they did take a long time to settle in, so I had to be strategic in how I added the markings. I did all the big stuff first and then added the smaller stencils where appropriate.

Image

Image

Not hard to see where the 'Black Widow' nickname comes from once the markings are on! I also added the stencils and maker's marks to the props. The stencil and round label are separate decals, so that meant a total of 16 decals but worth it to avoid having to conform single decals to the complex surfaces of the angled prop blades.

Image

Will let that 2nd Future coat thoroughly dry and then it will be time to add some light weathering to show an aircraft in service but not too badly abused.
Bill Plunk
Posts: 1245
Joined: Wed Sep 28, 2022 10:18 pm

WIP 01-03-2017

Post by Bill Plunk »

The weathering adventure started yesterday but was really a 2-day effort to get the dot filtering process done. You never truly appreciate the amount of surface area involved until you actually have to cover it all, slowly, one section at a time! I've been looking at different photos of P-61s in the Pacific to get an idea of how they weathered and decided to go with a dusty finish. Since 'Lady in the Dark' was based at Iwo Jima, that made things perfect. After all, the sand there is volcanic and a shade variation of black.

Image

To that end, I mixed up a 90/10 mix of Flat Black and Light Gray to use as my filtering/fading shade and applied it as small dots along with small amounts of straight Light Gray dots to get the look I was after. The underside of the wing served as a nice little test area to get the ratios right.

Image

I worked with square tip blender brushes lightly dampened with thinner to blend the dots. Since they are enamels, they dry quickly so had to do it in small sections at a time working my way from wing tip to wing tip on the underside, including the booms, before I stopped for the night, saving the topside surfaces for the next day. I did the left-hand wing first so I could get a good feel for how it would all look and to match it up with the work I had done the day before for consistency.

Image

A total of 9 hours later, I had the whole surfaces faded/weathered.

Image

Will take a little bit of a break from the paint breather mask before starting in on the last phase, adding a pin wash to bring out some of the excellent panel detail. Almost there!
Bill Plunk
Posts: 1245
Joined: Wed Sep 28, 2022 10:18 pm

Completion 01-04-2017

Post by Bill Plunk »

I did a quick test with my planned pin wash as I suspected that it might not do what I wanted it to. Sure enough, even pure Flat Black wasn't strong enough relative to the other shades to produce any noticeable difference, so that was scrapped. I suppose if I used a much lighter shade it would'ver caused the panel lines to pop out but it would look strange IMHO against the fading work already done, so I left it as-is. After doing an airbrush test with both Model Master Semi-Gloss and full Gloss Lacquer on an old model that I keep around as a test subject, I opted for the full Gloss option. Normally I would use the spray can varieties for applying a sealing coat but I needed more control this time around and was pleased with how it performed through the airbrush.

That meant it was time to remove the masks. I had no issues with how the masks performed, in fact they performed almost too well in terms of the adhesive on the vinyl. I had to work very carefully to lift the masks, a task made a little harder with the fuselage attached vs. separate when I placed them, but I managed. The masks did leave some adhesive residue behind in some spots, so I used an old strip of T-shirt and a wooden toothpick to carefully remove it. A second coat of Future applied with a small square tip brush completed the canopy work. The last remaining details included the install of the propellers, the addition of the small antennas, the wingtip lights, and the landing lights on the wing undersides. With that, Lady in the Dark was ready for her walk-arounds!

Image

Image

Image

Image

Image

Image
Bill Plunk
Posts: 1245
Joined: Wed Sep 28, 2022 10:18 pm

Publication October 2017

Post by Bill Plunk »

This project has also been featured in the Halloween Special October 2017 issue of FineScale Magazine.

Image
Post Reply