Dragon 1/350 German Destroyer Z-38 (2013)
-
Bill Plunk
- Posts: 1245
- Joined: Wed Sep 28, 2022 10:18 pm
Dragon 1/350 German Destroyer Z-38 (2013)
After several years of nothing but armor building, I was recently talked into trying something different so the next build will be a ship! It's still German, has armor, and sports several turrets so it's not too far out there. This project consists of Dragon's 1/350 kit #1049 German Destroyer Z-38 in 1/350 plus an Eduard PE detail set.
-
Bill Plunk
- Posts: 1245
- Joined: Wed Sep 28, 2022 10:18 pm
WIP 08-25-2013
Due to the nature of this particular subject, it's impossible to do a 'traditional' build log going step by step through the instructions as I normally would. This is down to the fact that it's 1) a ship and 2) requires a totally different approach to building and painting. So with that little introduction, the project begins!
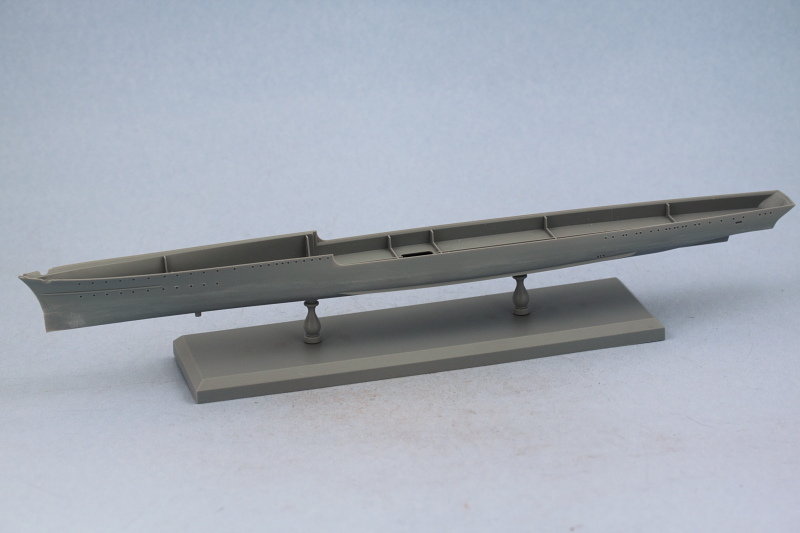
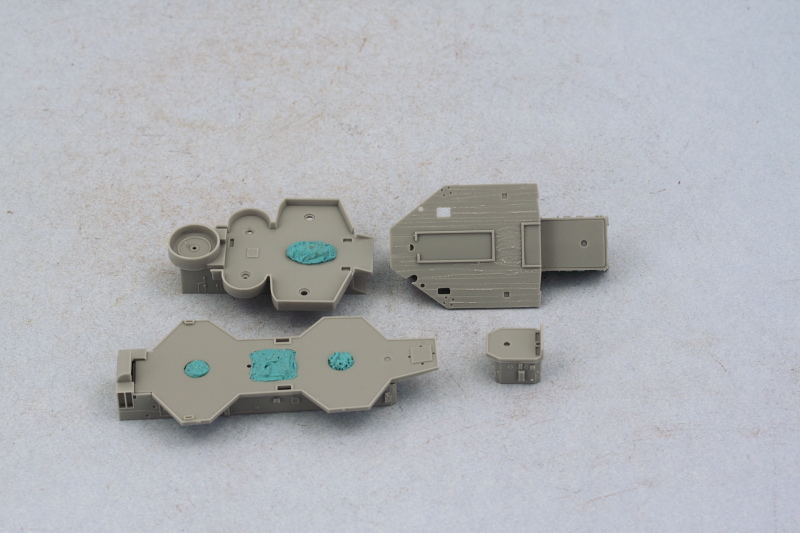
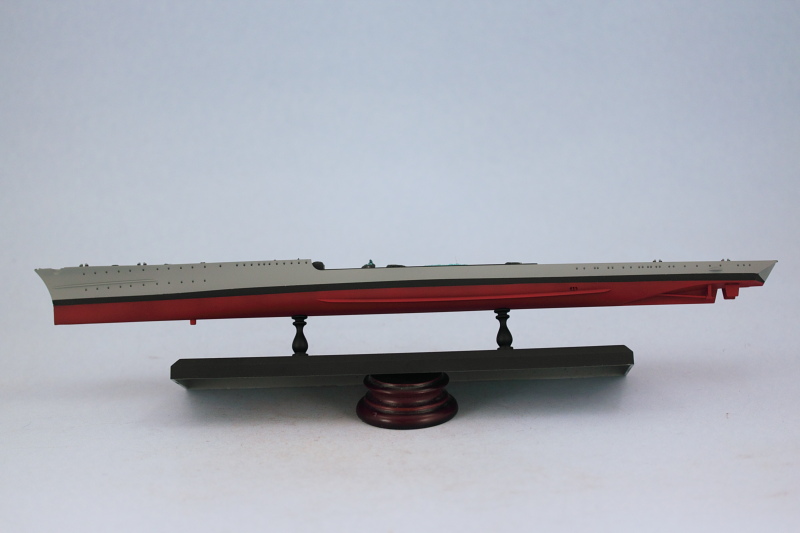
First up was deciding whether to build this one as waterline or full hull since Dragon provides that option in terms of adding the lower hull half to an upper part or leaving the upper as-is. The kit includes a nice base to support the kit and I've always been partial to full hull, so the first task was joining the two parts of the hull together to go that route. The fit of the two hull portions was very good but some sanding was required to smooth away the join line to create a seamless hull result. As the hull is just over 14 inches long, that took a couple of hours of careful work to get the desired result. The Dragon instructions neglect to tell you to open up the holes in the bottom of the hull to take the stand supports, so be sure to do that before you join the hull halves. I didn't, so I had to drill the holes myself after assembling the stand and measuring to get them centered. The stand is only dry-fit and will be permanently fixed much later.
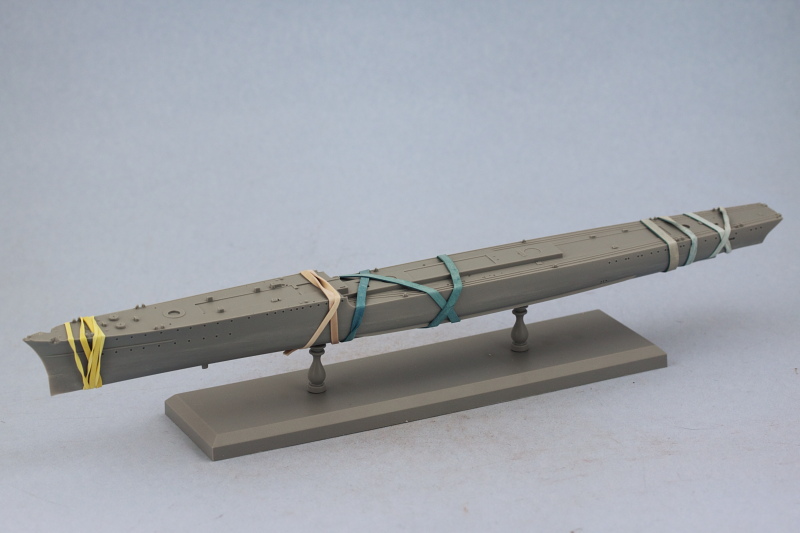
Next came attaching the one piece main deck insert. This also has a good fit but the deck curves upward slightly at the bow so it's necessary to use finger pressure and/or rubber bands to ensure it stays down until the glue sets up.
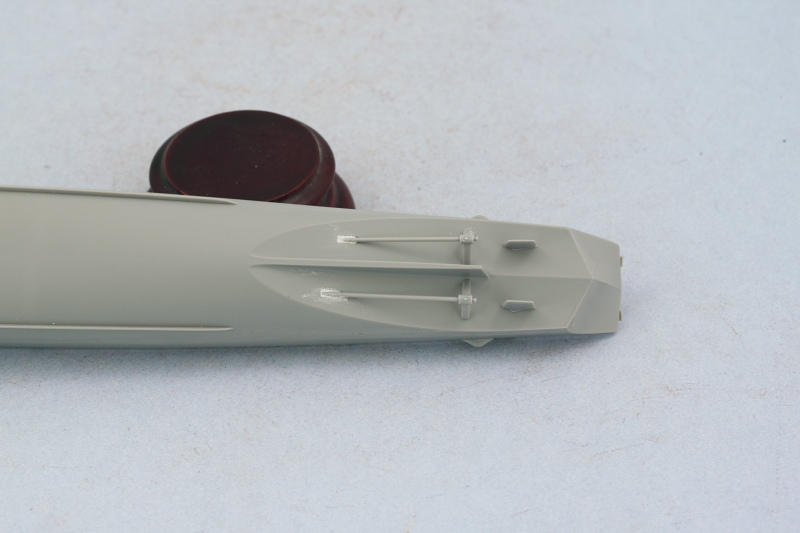
After the deck was done and the bands removed, the propeller shafts and rudders were installed along with the little fins that attach to the rear hull sides. Some putty was needed at the base of the shafts where they attach to the hull to fill gaps.
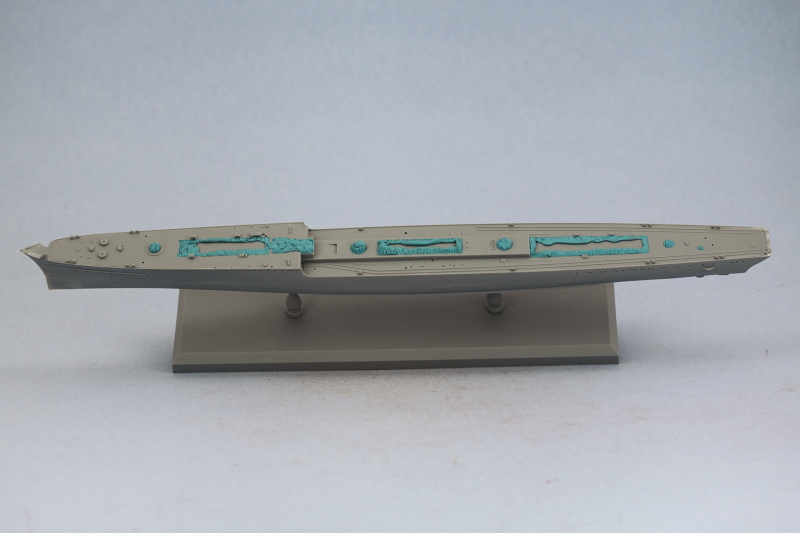
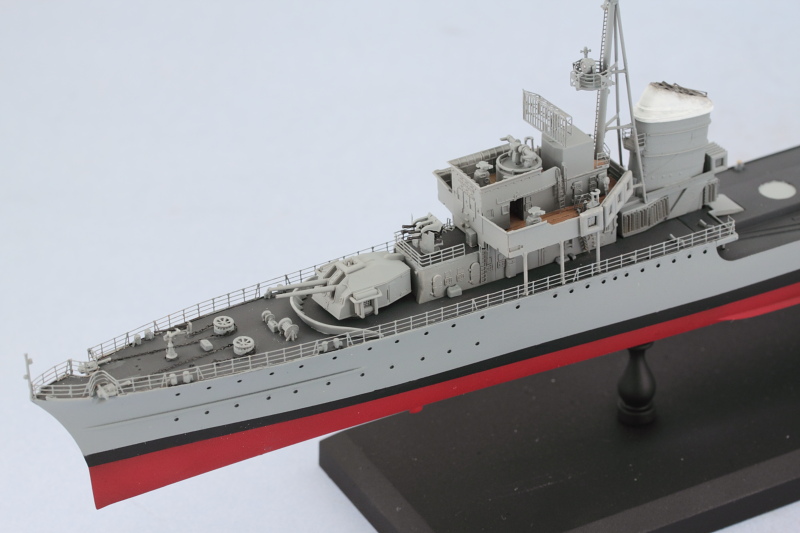
As part of the prep work for the first stage of painting, I identified all the upper works decking that needs to match the main deck in terms of the paint scheme. These consist of the gun platforms at the rear as well as around the second smoke stack. The lower bridge deck is a hybrid, the area around the bridge received some scribed planking using the tip of a triangular needle file and metal ruler while the deck holding the Flakvierling mount remained steel. Blue-tack poster putty was used to mask off the mount areas for the main guns and other items to avoid having to scrape paint later on.
Rounding out the day's efforts, more Blue-tack was used on the main deck to mask off key areas for the superstructure elements.
Next step will be painting the hull and decks.
First up was deciding whether to build this one as waterline or full hull since Dragon provides that option in terms of adding the lower hull half to an upper part or leaving the upper as-is. The kit includes a nice base to support the kit and I've always been partial to full hull, so the first task was joining the two parts of the hull together to go that route. The fit of the two hull portions was very good but some sanding was required to smooth away the join line to create a seamless hull result. As the hull is just over 14 inches long, that took a couple of hours of careful work to get the desired result. The Dragon instructions neglect to tell you to open up the holes in the bottom of the hull to take the stand supports, so be sure to do that before you join the hull halves. I didn't, so I had to drill the holes myself after assembling the stand and measuring to get them centered. The stand is only dry-fit and will be permanently fixed much later.
Next came attaching the one piece main deck insert. This also has a good fit but the deck curves upward slightly at the bow so it's necessary to use finger pressure and/or rubber bands to ensure it stays down until the glue sets up.
After the deck was done and the bands removed, the propeller shafts and rudders were installed along with the little fins that attach to the rear hull sides. Some putty was needed at the base of the shafts where they attach to the hull to fill gaps.
As part of the prep work for the first stage of painting, I identified all the upper works decking that needs to match the main deck in terms of the paint scheme. These consist of the gun platforms at the rear as well as around the second smoke stack. The lower bridge deck is a hybrid, the area around the bridge received some scribed planking using the tip of a triangular needle file and metal ruler while the deck holding the Flakvierling mount remained steel. Blue-tack poster putty was used to mask off the mount areas for the main guns and other items to avoid having to scrape paint later on.
Rounding out the day's efforts, more Blue-tack was used on the main deck to mask off key areas for the superstructure elements.
Next step will be painting the hull and decks.
-
Bill Plunk
- Posts: 1245
- Joined: Wed Sep 28, 2022 10:18 pm
WIP 08-30-2013
In honor of the Labor Day holiday weekend coming up, this is a special update edition! I've been working on the paint work on the hull of the Z-38 since the enamels need time in between steps to cure so there aren't any issues with the masking or potential for paint lifting during handling. As a result, this update took place over a period of several days as an upfront disclaimer and not all at once.
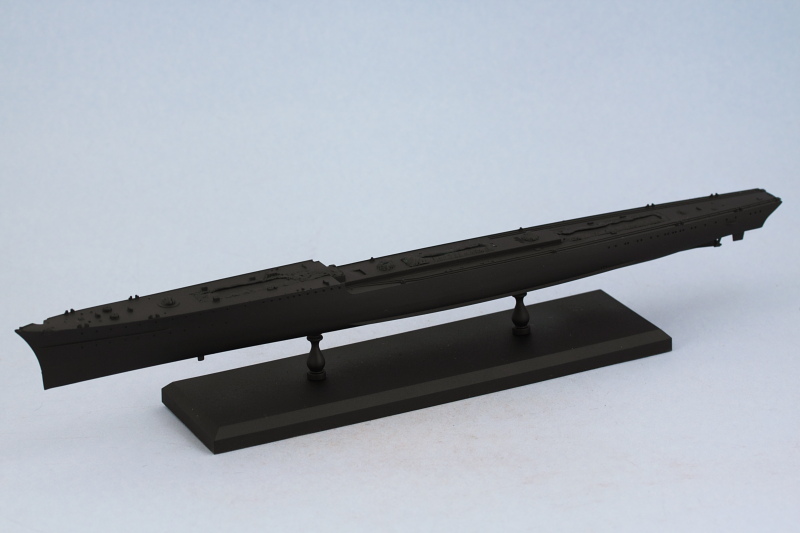
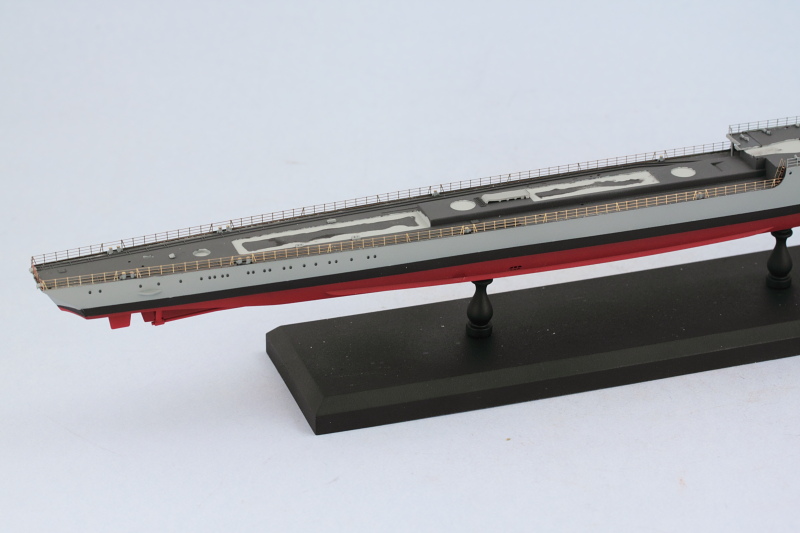
First up was an application of a primer coat of MM enamel Flat Black by airbrush. This serves three purposes, a multi-benefit approach that also saves on paint. The first purpose is the usual one for primer, to check my sanding work and the little bit of putty work that was required on the main deck plate. The second purpose is to serve as an insurance policy against unpainted plastic and to provide a foundation for some pre-shading in the steps to come. The third purpose is to make life much easier when masking off the boot stripe on the hull.
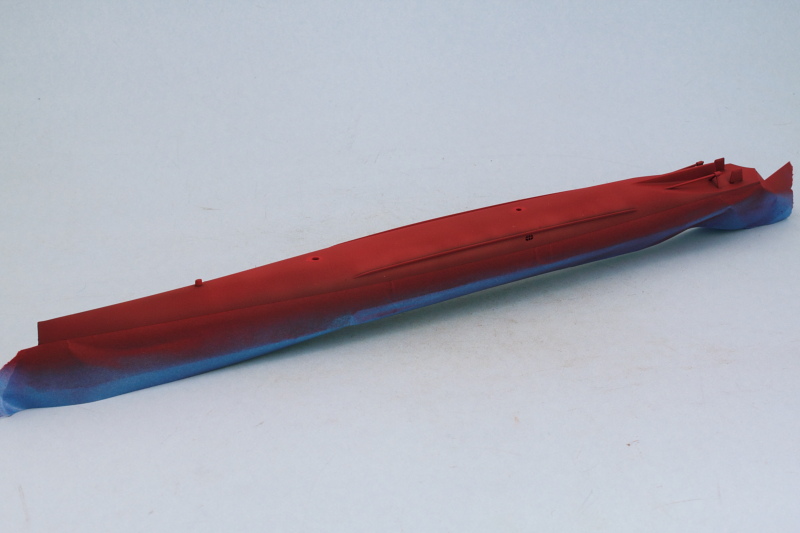
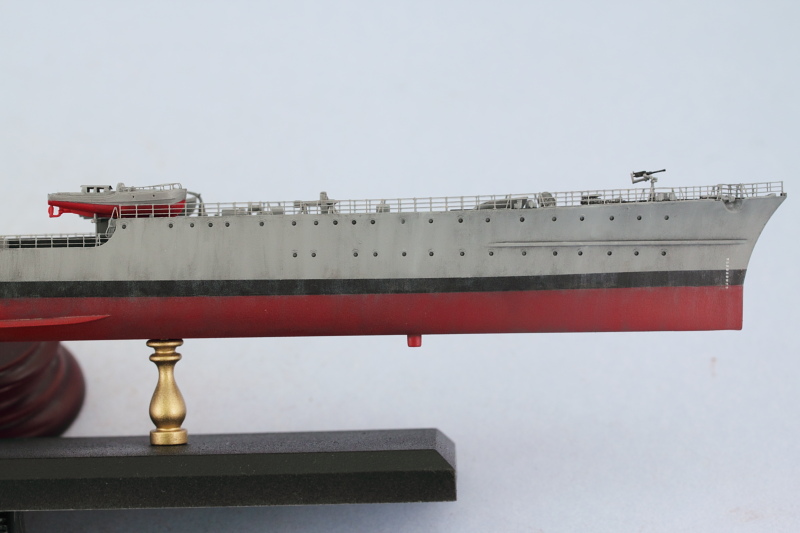
Looks awfully sinister all in black, but after letting that set up over night, the next step involved the RAL 8013 needed below the waterline. I used MM enamel Insignia Red for this as earlier tests showed it behaved well over a dark undercoat and provided a good 'hull red' color in the process. Lots of masking tape required as the red was laid down in very thin multiple passes and I needed reliable ways to handle the hull off the stand during this process.
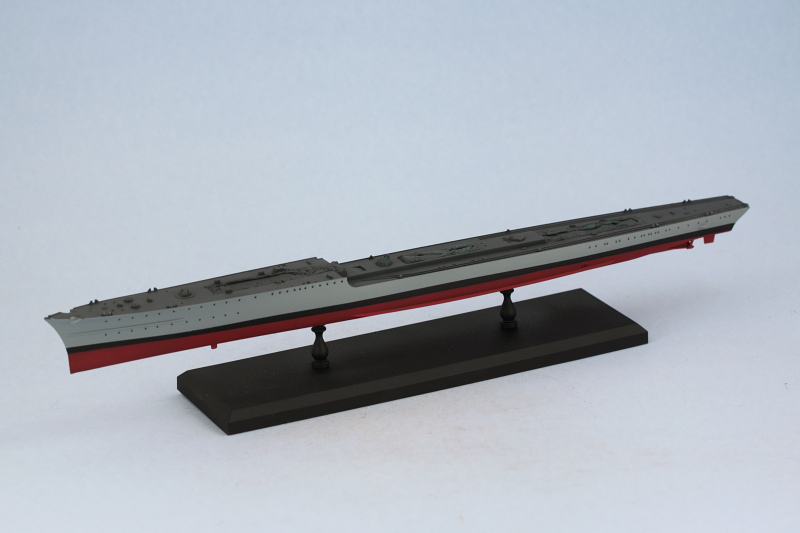
After that set up overnight, the next step was to mask off the boot stripe. Using a metal ruler and a small pointed brush, I marked off a series of dots 3mm above the red boundary using the upper hull light gray color (a custom mix of roughly 2/3 MM enamel Light Gray and 1/3 MM enamel Panzer Schwarzgrau) and then masked it off after the dots had dried. Then the upper hull was airbrushed with the light gray mix over the primer coat. Once it had dried, the masking tape was removed to reveal the handiwork. Minor touch-ups here and there with a pointed brush were necessary but nothing major.
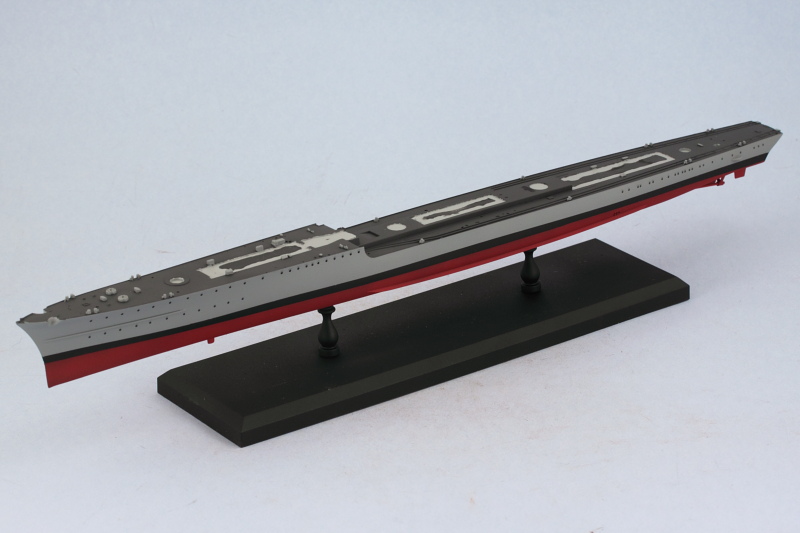
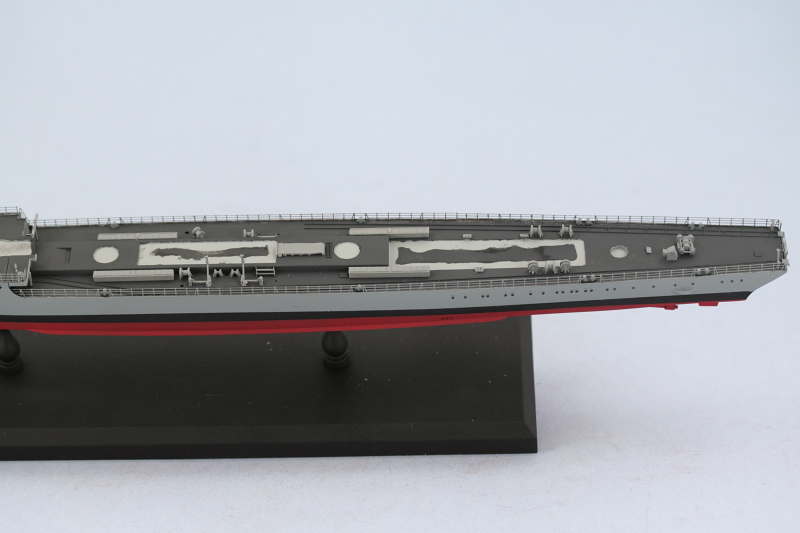
One more time, that was allowed to set up overnight and then, you guessed it! More masking and painting...this time for the main deck. Long strips of tape protected the previous paint work and MM enamel Panzer Schwarzgrau was airbrushed for the deck. While I was at it, the superstructure and gun decks got the same treatment where needed.

Once that was set, I used the hull gray and picked out the raised features molded on the main deck that needed to be light gray instead of dark gray. This was done using the trusty Optivisor and a small brush. I have a feeling I'll be saying that a lot on this build. The masking was also removed for the areas where the superstructure attaches and some minor touch-ups done there where needed.
Next up will be something detail oriented, not sure exactly what, lots to choose from!
First up was an application of a primer coat of MM enamel Flat Black by airbrush. This serves three purposes, a multi-benefit approach that also saves on paint. The first purpose is the usual one for primer, to check my sanding work and the little bit of putty work that was required on the main deck plate. The second purpose is to serve as an insurance policy against unpainted plastic and to provide a foundation for some pre-shading in the steps to come. The third purpose is to make life much easier when masking off the boot stripe on the hull.
Looks awfully sinister all in black, but after letting that set up over night, the next step involved the RAL 8013 needed below the waterline. I used MM enamel Insignia Red for this as earlier tests showed it behaved well over a dark undercoat and provided a good 'hull red' color in the process. Lots of masking tape required as the red was laid down in very thin multiple passes and I needed reliable ways to handle the hull off the stand during this process.
After that set up overnight, the next step was to mask off the boot stripe. Using a metal ruler and a small pointed brush, I marked off a series of dots 3mm above the red boundary using the upper hull light gray color (a custom mix of roughly 2/3 MM enamel Light Gray and 1/3 MM enamel Panzer Schwarzgrau) and then masked it off after the dots had dried. Then the upper hull was airbrushed with the light gray mix over the primer coat. Once it had dried, the masking tape was removed to reveal the handiwork. Minor touch-ups here and there with a pointed brush were necessary but nothing major.
One more time, that was allowed to set up overnight and then, you guessed it! More masking and painting...this time for the main deck. Long strips of tape protected the previous paint work and MM enamel Panzer Schwarzgrau was airbrushed for the deck. While I was at it, the superstructure and gun decks got the same treatment where needed.
Once that was set, I used the hull gray and picked out the raised features molded on the main deck that needed to be light gray instead of dark gray. This was done using the trusty Optivisor and a small brush. I have a feeling I'll be saying that a lot on this build.
Next up will be something detail oriented, not sure exactly what, lots to choose from!
-
Bill Plunk
- Posts: 1245
- Joined: Wed Sep 28, 2022 10:18 pm
WIP 09-01-2013
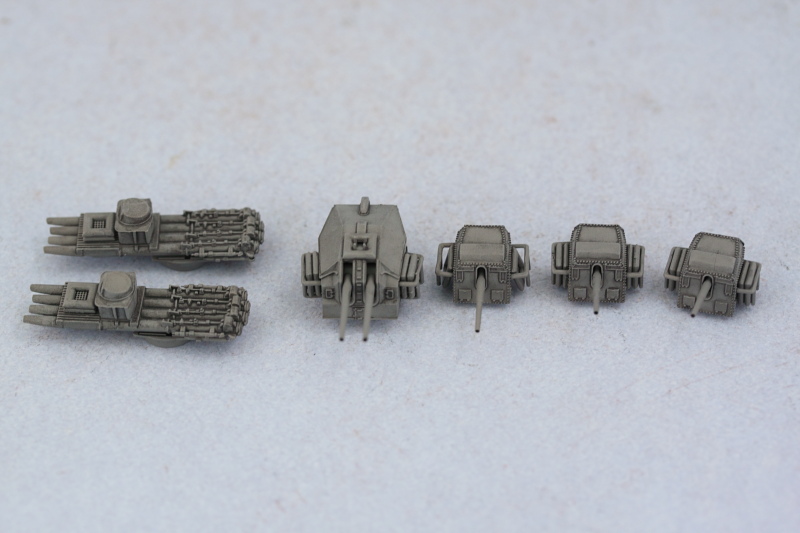
Latest round of progress dives head first into the details of this kit. Dragon's not kidding when they say it has over 650 parts...there are lots of them and they are tiny! I headed over to Step 1 in the instructions and assembled the main guns as well as numerous (40!) life rafts. Each one of them is molded separately and requires a little bit of clean-up on their edges, so that had to be done using the Optivisor. The Eduard detail set includes nice PE lattice floor inserts for each of the rafts, but since most of them are stacked, I only added the inserts for those that were on the top of the stacks. An interesting little note here, for the single-gun turrets, the 'racks' for the rafts don't have a bottom, so to ensure they are placed correctly and the rafts are at the right height, you need to test the fit with the turrets in their respective deck mounts to avoid any issues down the road. I also assembled the torpedo launchers called for in Step 2. The life rafts that didn't go on the guns or launchers were secured to a strip of masking tape to prevent them from wandering off after this photo was taken.

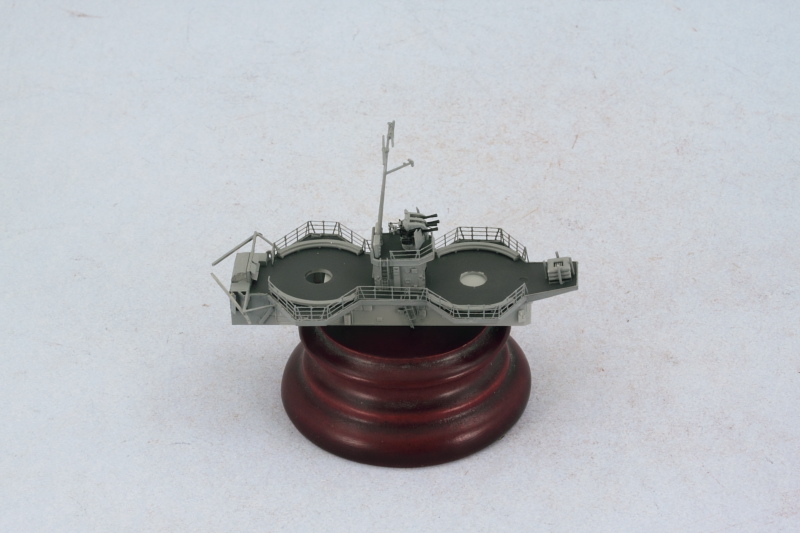
I decided to work on the aft gun deck next, this is covered in Steps 11 and 12 of the instructions. The base superstructure has a lot of nice molded-on detail including 19 square windows that each require its own separate cover. Dragon wants you to install these all open but the little ridge of the window is tiny as are the little hinges on the covers, so I just installed them all closed after fighting with a couple for several minutes and deciding it wasn't worth the little extra detail given that the gun deck overhangs it anyhow and the squares themselves are solid. Adding another little typical Dragon instruction boo-boo, the diagram shows 19 port covers to go with the 19 molded on windows but Dragon only provides 18 on the sprues. The 19th unlucky window was simply removed with a #11 blade tip and sanded into oblivion.
This area also marked my first foray into the railings from Eduard. I'm very happy so far with this set, definitely adds a lot to the look. Railings were added to the gun deck as well as the Flakvierling tower using Gator Grip glue to provide some flexibility to get them positioned just right. Ladders were added courtesy of the Eduard set as well. One other little caution, the tower is home to the aft mast and it has to slide down through the tower into the deck...but the hole is the diameter of the portion of the mast that sticks out above it, now the diameter of the base, so it has to be opened up slightly for this to go correctly. The tower was dry-fit only to ensure the mast alignment was correct and to allow easier painting of the railings.
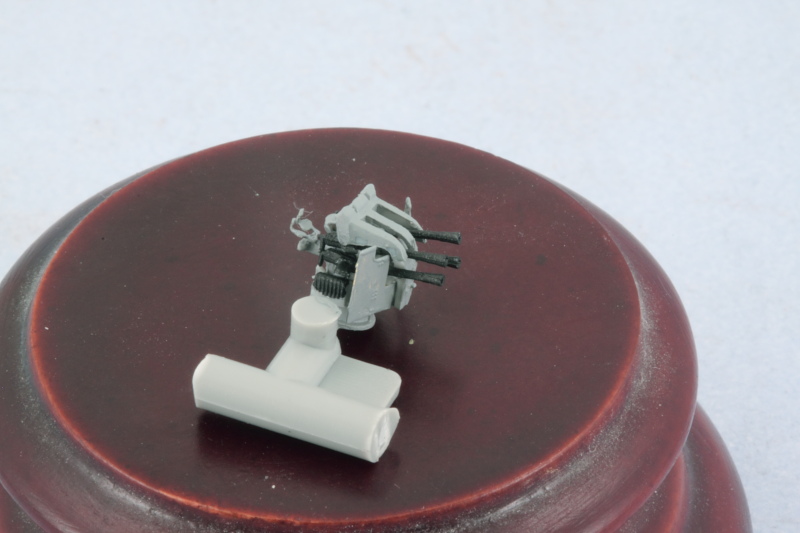
Speaking of the Flakvierling...it's a little beauty of an item but requires a lot of patience to get it together. It consists of 14 parts including PE and separate barrels with hollow muzzles for the guns. The PE shield has no bend lines so that's a bit of a chore to get it bent correctly as the fit tolerances on the tower platform have to be exact. To aid in assembly, I left the base of the gun, H24, attached to the sprue point to provide a better handle for the assembly of the gun and only removed it when it was time to install it onto the platform.
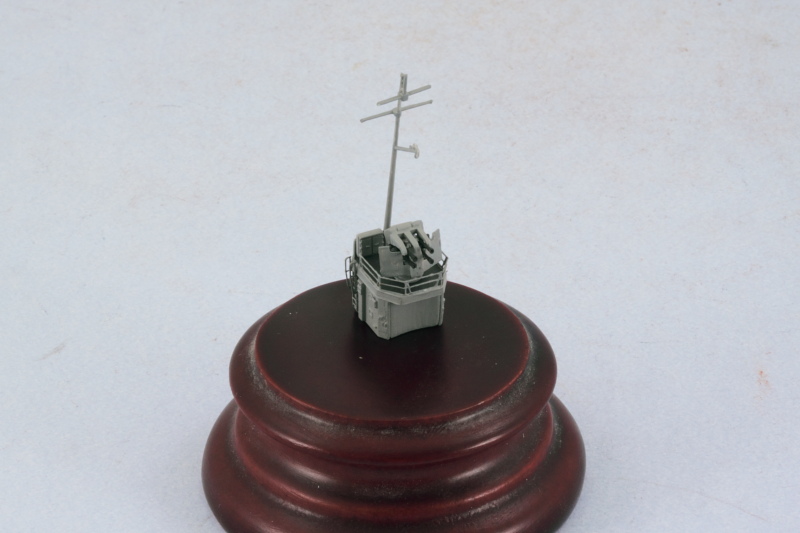
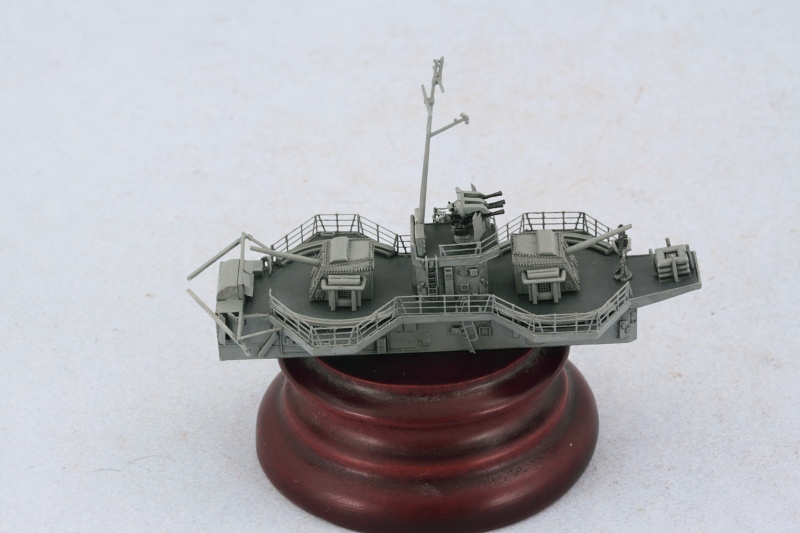
After painting the railings on the gun deck and adding in the turret protection half-rings, the Flakvierling tower and mast were permanently installed in position. I also added the four-raft stack and retainer rods to the ski ramp to round things out. All that's left is a single-mount 20mm gun between the raft stack and the turret ring to complete this portion of the deck. I'll add that after I've painted the underside of the structure along with the turrets tomorrow as it's a pretty delicate thing and I'm running out of ways to safely handle this little module!
More to come in the details department as I work my way forward.
I decided to work on the aft gun deck next, this is covered in Steps 11 and 12 of the instructions. The base superstructure has a lot of nice molded-on detail including 19 square windows that each require its own separate cover. Dragon wants you to install these all open but the little ridge of the window is tiny as are the little hinges on the covers, so I just installed them all closed after fighting with a couple for several minutes and deciding it wasn't worth the little extra detail given that the gun deck overhangs it anyhow and the squares themselves are solid. Adding another little typical Dragon instruction boo-boo, the diagram shows 19 port covers to go with the 19 molded on windows but Dragon only provides 18 on the sprues. The 19th unlucky window was simply removed with a #11 blade tip and sanded into oblivion.
This area also marked my first foray into the railings from Eduard. I'm very happy so far with this set, definitely adds a lot to the look. Railings were added to the gun deck as well as the Flakvierling tower using Gator Grip glue to provide some flexibility to get them positioned just right. Ladders were added courtesy of the Eduard set as well. One other little caution, the tower is home to the aft mast and it has to slide down through the tower into the deck...but the hole is the diameter of the portion of the mast that sticks out above it, now the diameter of the base, so it has to be opened up slightly for this to go correctly. The tower was dry-fit only to ensure the mast alignment was correct and to allow easier painting of the railings.
Speaking of the Flakvierling...it's a little beauty of an item but requires a lot of patience to get it together. It consists of 14 parts including PE and separate barrels with hollow muzzles for the guns. The PE shield has no bend lines so that's a bit of a chore to get it bent correctly as the fit tolerances on the tower platform have to be exact. To aid in assembly, I left the base of the gun, H24, attached to the sprue point to provide a better handle for the assembly of the gun and only removed it when it was time to install it onto the platform.
After painting the railings on the gun deck and adding in the turret protection half-rings, the Flakvierling tower and mast were permanently installed in position. I also added the four-raft stack and retainer rods to the ski ramp to round things out. All that's left is a single-mount 20mm gun between the raft stack and the turret ring to complete this portion of the deck. I'll add that after I've painted the underside of the structure along with the turrets tomorrow as it's a pretty delicate thing and I'm running out of ways to safely handle this little module!
More to come in the details department as I work my way forward.
-
Bill Plunk
- Posts: 1245
- Joined: Wed Sep 28, 2022 10:18 pm
WIP 09-02-2013
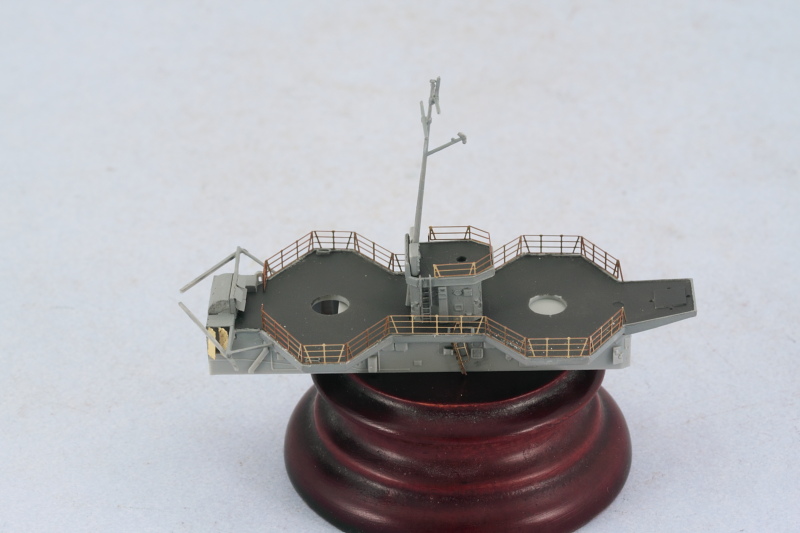
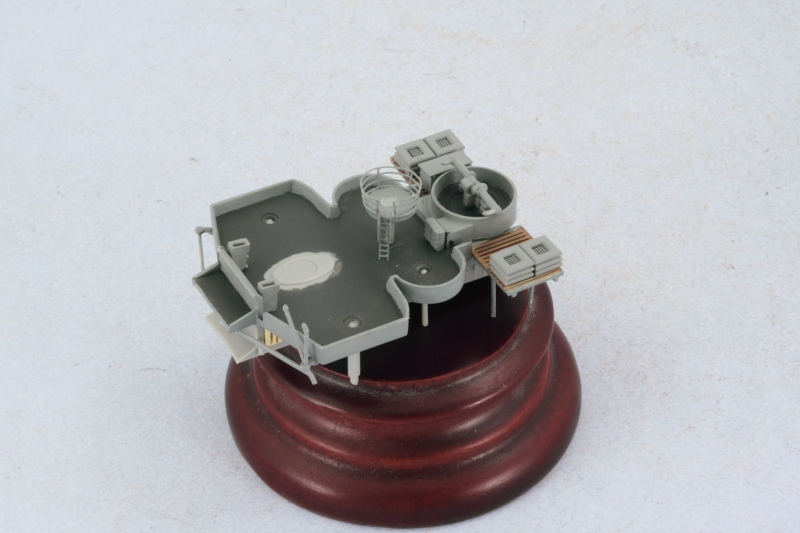
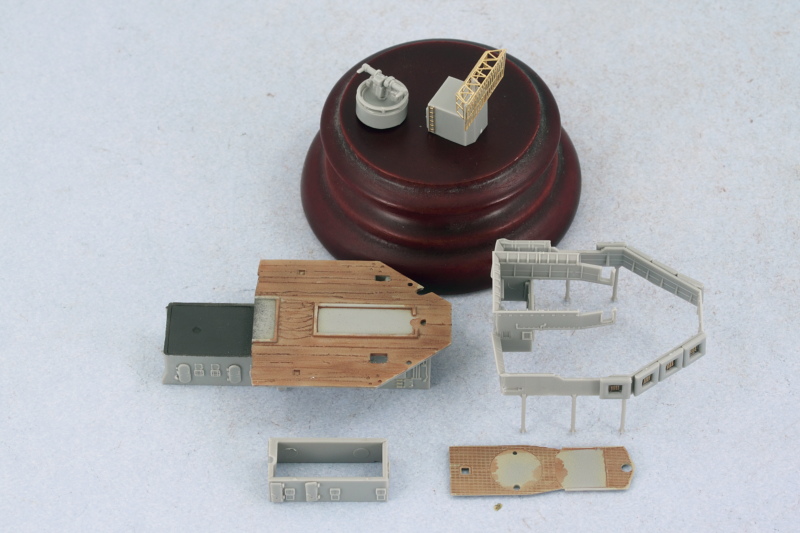
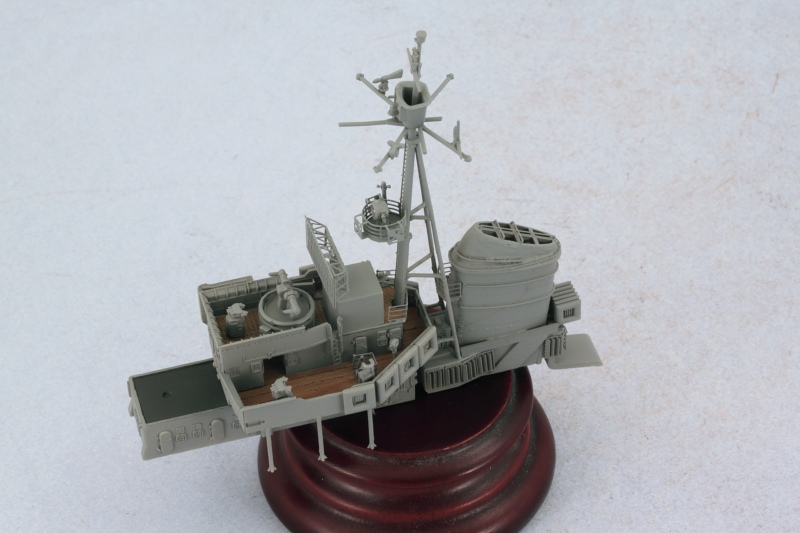
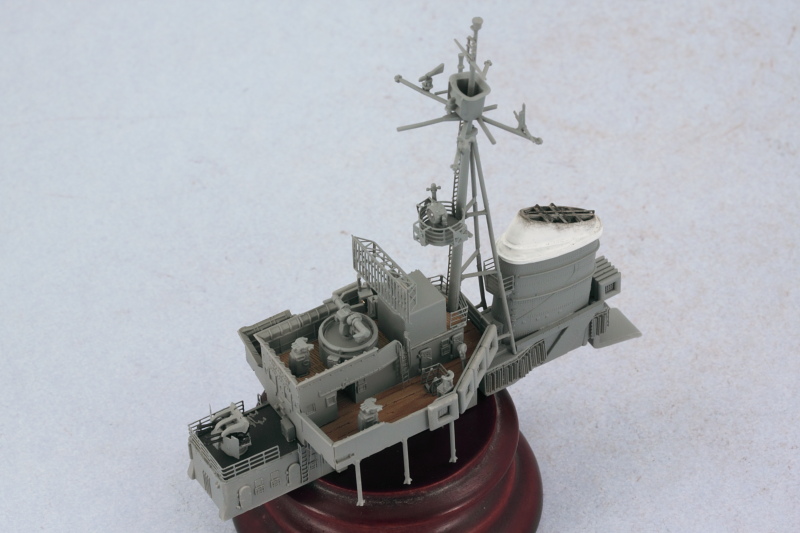
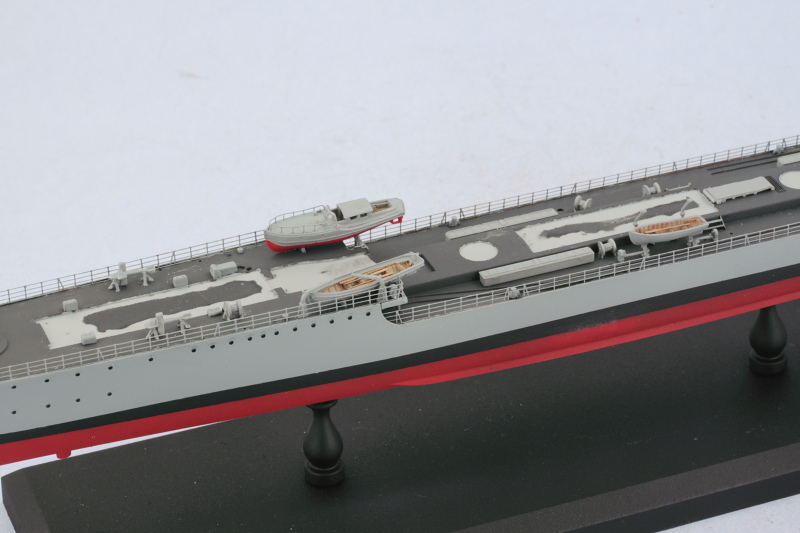
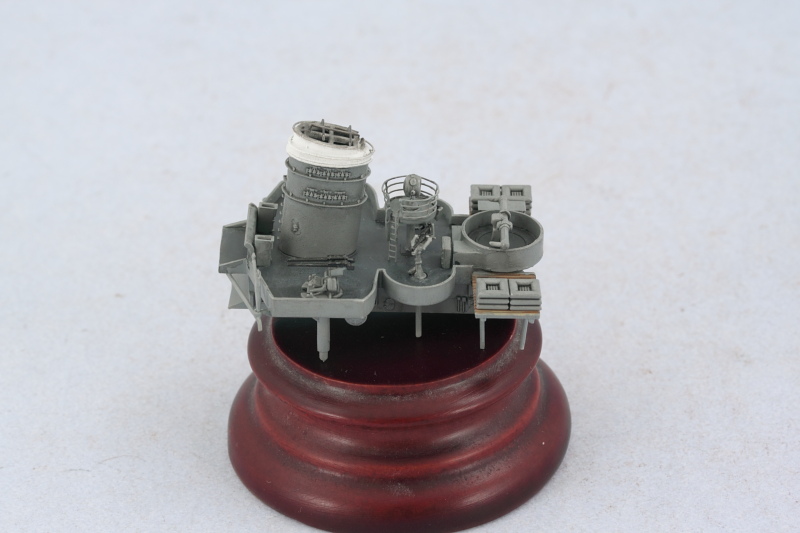
The Labor Day special edition concludes today with more progress to report on the mid-deck that is covered in Steps 9 and 10 of the instructions. I began by working on the base of the deck and adding the Dragon-provided PE air vent flaps and screens for the aft funnel. The PE for these is one piece that folds over on itself and then to create the flaps, you flip up the flaps with the screen in place behind it. Pretty nifty and provides a very nice level of detail.

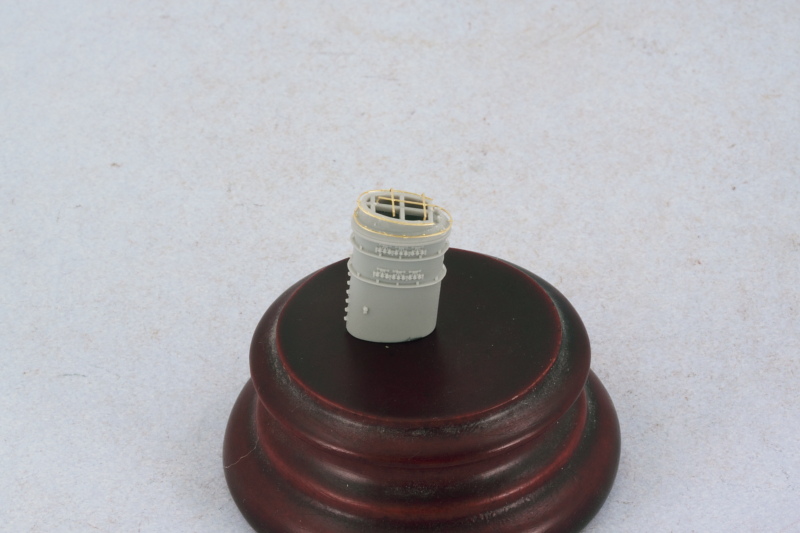
With that out of the way, the funnel was next. This is molded as a single piece via slide-molding with the funnel cap separate. There are 3 PE parts for the funnel cap/screen and they are, thankfully, provided already shaped with just the small 'feet' of the cross bar needing to be bent. The parts are extremely delicate and the contact points for gluing are tiny. I used extra thin CA with a pin-point applicator tip to secure them in place after tacking them temporarily using liquid glue to allow them to get a grip of sorts before the CA was applied.
Then it was time to spend a lot of effort in the details department on this deck portion. The top portion of the deck had the steel plate surfaces airbrushed earlier and now I went back and hand-painted the raised elements and installed all the various support structure components and torpedo boom cranes to the front. I drilled a shallow hole in the deck to provide a little more structural support for the spotlight tower as the kit doesn't provide one and having it sit flat on the deck was a little too fragile for my liking. The PE provided for the tower's railings is a single piece, so annealing and very careful shaping is necessary to get it to the right arrangement. Spotlight itself will be added later. Last but not least, the range-finder was painted and installed and the life rafts and little storage box were added to the elevated wing platforms to round things out for the day.
The mid-deck isn't quite done, still needs its AA guns and of course the stack needs to be airbrushed and installed before it's complete. Details, details, details!
-
Bill Plunk
- Posts: 1245
- Joined: Wed Sep 28, 2022 10:18 pm
WIP 09-08-2013
This latest update is a big one so let's dive right into it!
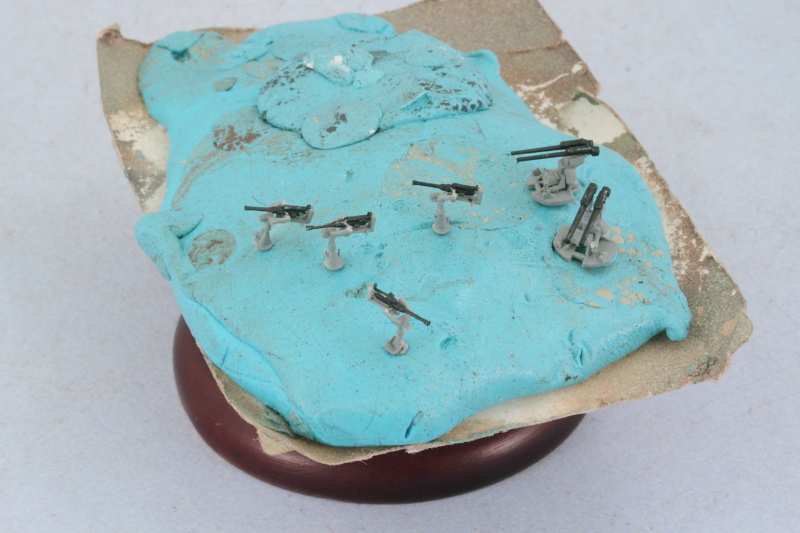
In order to finish off the AA gun deck, it was necessary to assemble more AA guns of the single 20mm and double 37mm variety. This is covered under Step 1 of the instructions and the parts involved are tiny. I didn't bother with the PE hand wheels and little crew shoulder pads for the 20mm guns as there was no way to handle them without knocking those delicate parts off. Two of the 20mm guns are destined for the AA deck, one for the aft main gun deck, and the fourth one forward of the bow dual gun turret.
The aft smokestack received its white top and some soot weathering courtesy of black artist pastels before it was added to the AA gun deck. The searchlight was installed on its platform and the AA guns added as well. I had to position the two 20mm guns a little creatively as they didn't quite clear the searchlight tower if aimed at 90 degrees as called for in the instructions.
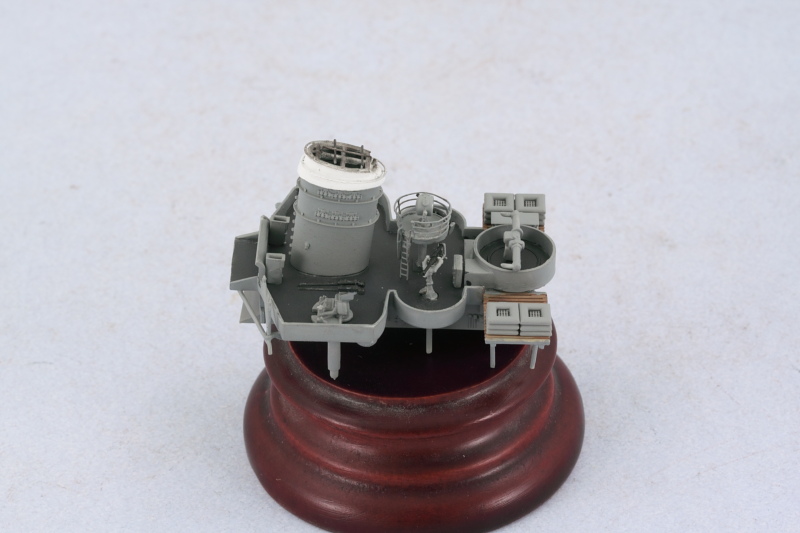
At the same time I had airbrushed the stack and the AA gun deck I had also airbrushed the torpedo launchers and the main gun turrets. Those all got a test fit to see that everything was playing nice with each other before moving on forward to the bridge deck and main smokestack.
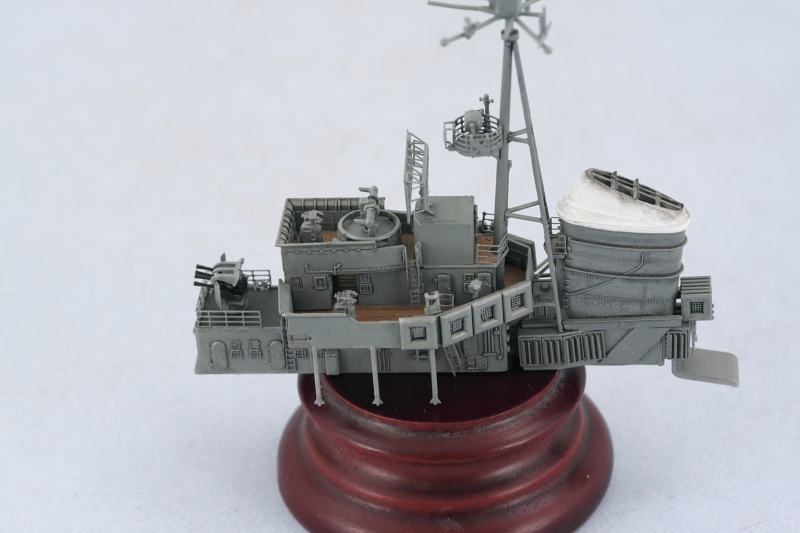
The bridge deck is a multi-layer affair covered under Steps 4-7. The wood portions had been airbrushed with a 50-50 mix of MM enamel Panzer Dunkelgelb/Light Gray and allowed to thoroughly cure. Then a light wash of enamel MM Leather was applied followed by varying layers of artist pastel application using raw umber, burnt umber, and yellow ochre to create some variation in the wood look/feel. The Dragon design of how the parts go together allows the two different deck levels to be kept separate from each other if you're careful in the assembly process and use the wood floors as a support while you build up the separate panels of the raised portions. I opted for the PE version of the radar antenna because it looks so much better than the solid one-piece styrene alternative provided in the kit. As a side note, the front plate of the superstructure base that fits into the main deck isn't called out in the instructions but can be found as part E3, the only part used from that sprue for this particular kit.
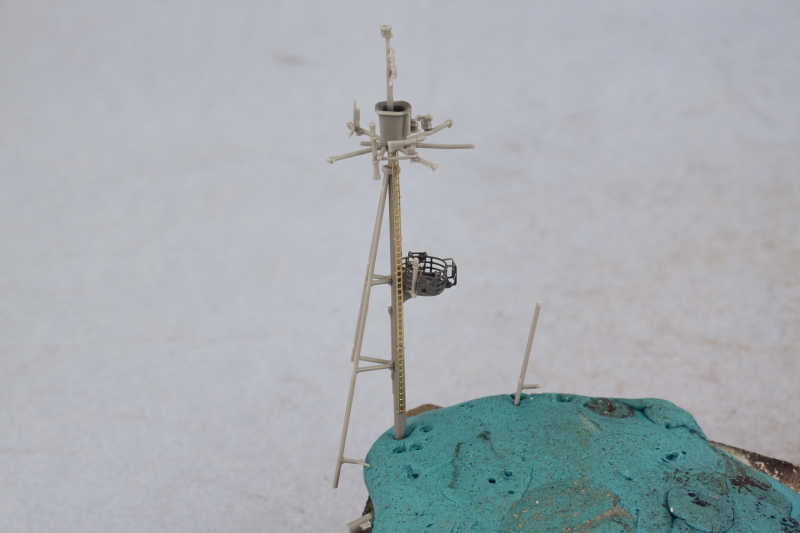
Steps 2 and 3 deal with the main mast and all of its various details. One of the support legs was broken on the sprue so it will get a full repair later on as it's too delicate to work with at this point in the build. Later on in the build when I test fit the mast into the deck, the PE ladder proves to be too long and has to be trimmed back vs what you see in the photo below to allow the mast to sit at the right height, so fair warning at this point to others attempting the same project in the future!
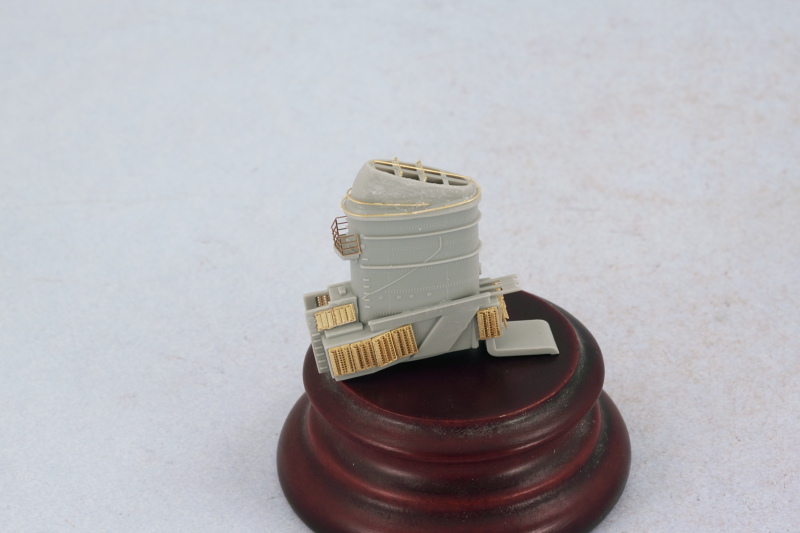
While the mast set up, I worked on the main smokestack as called for in Step 8. The PE screen/flap combinations have to be added as individual pieces and then lined up together to create the full arrangement. The instructions don't call out the rear panel screen/flap PE part, it's MB27, so don't overlook it in the process. The Eduard set provided the railing for the small lookout platform on the smokestack and the Dragon PE was used for the tiny railings/guards on the stacks itself. A minor CA mishap when attempting to fit the top-most ring rendered that part unusable and required me to do some sanding repair work but otherwise no lasting damage resulted.
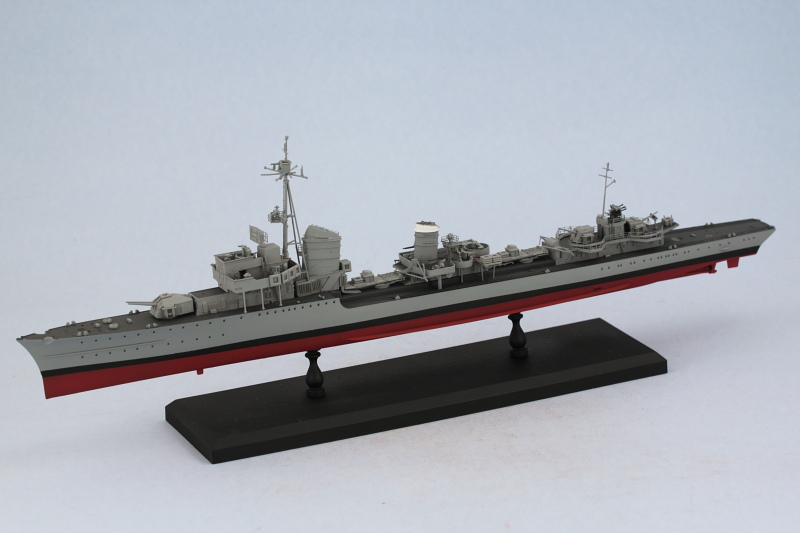
All of the bridge deck components were airbrushed and then the bridge assembled first with all of its added components along with Eduard ladders and railings where appropriate. The smokestack component was then joined up with the bridge and the mast installed. Once the mast had set, the repair was accomplished with the missing leg so it had some support at both the bridge and the smokestack to help stabilize it.
So this is where things stand right now, still a lot more work to do in the details department!
In order to finish off the AA gun deck, it was necessary to assemble more AA guns of the single 20mm and double 37mm variety. This is covered under Step 1 of the instructions and the parts involved are tiny. I didn't bother with the PE hand wheels and little crew shoulder pads for the 20mm guns as there was no way to handle them without knocking those delicate parts off. Two of the 20mm guns are destined for the AA deck, one for the aft main gun deck, and the fourth one forward of the bow dual gun turret.
The aft smokestack received its white top and some soot weathering courtesy of black artist pastels before it was added to the AA gun deck. The searchlight was installed on its platform and the AA guns added as well. I had to position the two 20mm guns a little creatively as they didn't quite clear the searchlight tower if aimed at 90 degrees as called for in the instructions.
At the same time I had airbrushed the stack and the AA gun deck I had also airbrushed the torpedo launchers and the main gun turrets. Those all got a test fit to see that everything was playing nice with each other before moving on forward to the bridge deck and main smokestack.
The bridge deck is a multi-layer affair covered under Steps 4-7. The wood portions had been airbrushed with a 50-50 mix of MM enamel Panzer Dunkelgelb/Light Gray and allowed to thoroughly cure. Then a light wash of enamel MM Leather was applied followed by varying layers of artist pastel application using raw umber, burnt umber, and yellow ochre to create some variation in the wood look/feel. The Dragon design of how the parts go together allows the two different deck levels to be kept separate from each other if you're careful in the assembly process and use the wood floors as a support while you build up the separate panels of the raised portions. I opted for the PE version of the radar antenna because it looks so much better than the solid one-piece styrene alternative provided in the kit. As a side note, the front plate of the superstructure base that fits into the main deck isn't called out in the instructions but can be found as part E3, the only part used from that sprue for this particular kit.
Steps 2 and 3 deal with the main mast and all of its various details. One of the support legs was broken on the sprue so it will get a full repair later on as it's too delicate to work with at this point in the build. Later on in the build when I test fit the mast into the deck, the PE ladder proves to be too long and has to be trimmed back vs what you see in the photo below to allow the mast to sit at the right height, so fair warning at this point to others attempting the same project in the future!
While the mast set up, I worked on the main smokestack as called for in Step 8. The PE screen/flap combinations have to be added as individual pieces and then lined up together to create the full arrangement. The instructions don't call out the rear panel screen/flap PE part, it's MB27, so don't overlook it in the process. The Eduard set provided the railing for the small lookout platform on the smokestack and the Dragon PE was used for the tiny railings/guards on the stacks itself. A minor CA mishap when attempting to fit the top-most ring rendered that part unusable and required me to do some sanding repair work but otherwise no lasting damage resulted.
All of the bridge deck components were airbrushed and then the bridge assembled first with all of its added components along with Eduard ladders and railings where appropriate. The smokestack component was then joined up with the bridge and the mast installed. Once the mast had set, the repair was accomplished with the missing leg so it had some support at both the bridge and the smokestack to help stabilize it.
So this is where things stand right now, still a lot more work to do in the details department!
-
Bill Plunk
- Posts: 1245
- Joined: Wed Sep 28, 2022 10:18 pm
WIP 09-15-2013
Work continued from last week by finishing up the remaining details on the bridge deck and superstructure. I painted the funnel cap Flat White and added some exhaust soot accumulation via some black artist pastel dusted around the top. The 2nd Flakvierling was assembled and installed along with its railings and Eduard-supplied ladders.
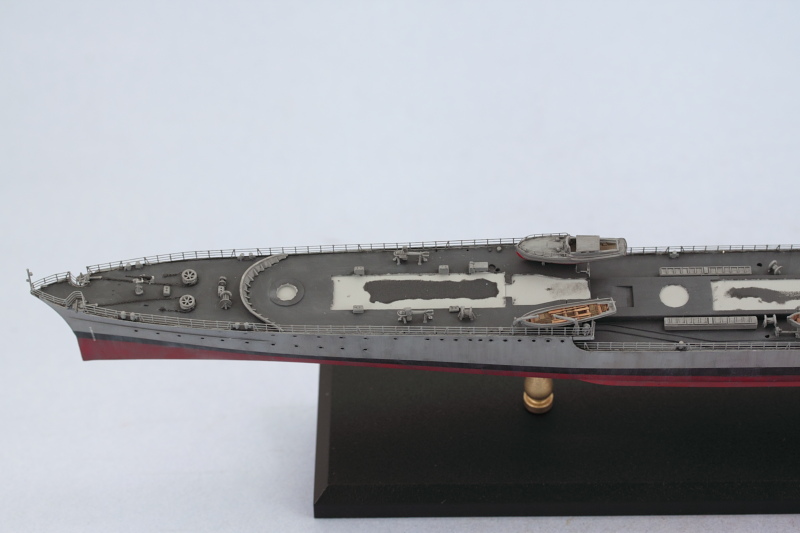
That cleared the way to return to the main deck and its remaining details. First up were the Eduard railings which are conveniently sloped to mirror the angle of the deck. The railings are in three pieces per side with the long railing as one piece up until the anchor well, a second piece that's curved around the well, and a third piece that connects up to the jack staff at the tip of the bow. Rinse and repeat for the other side. Dragon provides PE chains for the anchors but they are too long and had to be shortened by 4 links to be the correct length. Eduard bollard caps rounded out things in the detail phase.
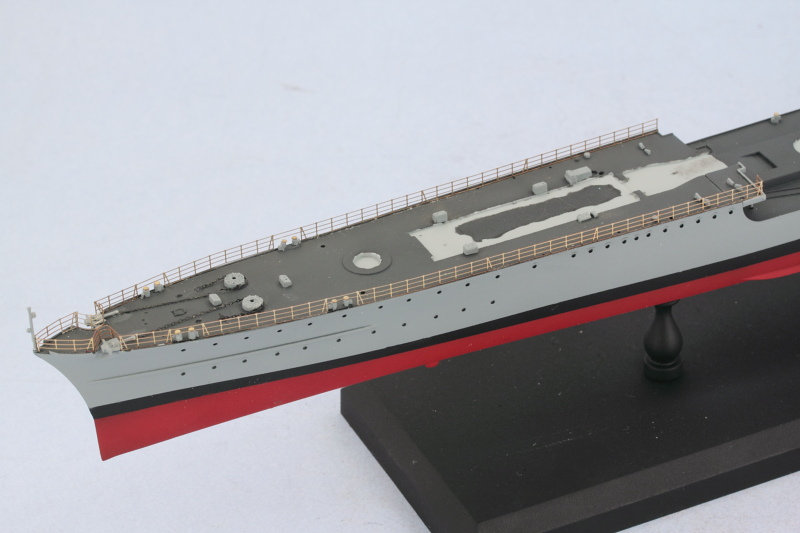
After painting the railings, the other deck details for this area were added in the form of the capstan wheels, the 20mm AA gun, the front turret shield, and the hose reels. The hose reels just magically appear on the instructions so you have to figure out which ones are the right ones and assemble them accordingly. The front turret and bridge deck were dry-fit to make sure everything lined up and it proved necessary to trim the little 'feet' on the three bridge deck supports on either side to avoid interference with the added railings.
Then it was time to move aft, adding the necessary railings to the stern half of the ship. Eduard provides these in two sections per side plus one small section for the stern.
These were painted up and then the fun of adding the necessary details to the main deck began. The instructions are somewhat vague on the exact placement of various items like the hose reels but their positioning has to be precise to avoid problems with the different deck elements. Test fits with the different sections and careful use of land marks like the locating holes for other parts helped get everything in the right position. The boat support davits in particular have to be placed at just the right angle and position and while the rectangular mount holes in the deck help, there's still a little 'play' in them that can cause an issue if you're not careful since the tops of the davits fit precisely with the curve of the 'tub' for one of the AA guns above.
Still more work to do in the detail department in regards to the boats and mines but getting closer to having this one ready to enter the weathering stage.
That cleared the way to return to the main deck and its remaining details. First up were the Eduard railings which are conveniently sloped to mirror the angle of the deck. The railings are in three pieces per side with the long railing as one piece up until the anchor well, a second piece that's curved around the well, and a third piece that connects up to the jack staff at the tip of the bow. Rinse and repeat for the other side. Dragon provides PE chains for the anchors but they are too long and had to be shortened by 4 links to be the correct length. Eduard bollard caps rounded out things in the detail phase.
After painting the railings, the other deck details for this area were added in the form of the capstan wheels, the 20mm AA gun, the front turret shield, and the hose reels. The hose reels just magically appear on the instructions so you have to figure out which ones are the right ones and assemble them accordingly. The front turret and bridge deck were dry-fit to make sure everything lined up and it proved necessary to trim the little 'feet' on the three bridge deck supports on either side to avoid interference with the added railings.
Then it was time to move aft, adding the necessary railings to the stern half of the ship. Eduard provides these in two sections per side plus one small section for the stern.
These were painted up and then the fun of adding the necessary details to the main deck began. The instructions are somewhat vague on the exact placement of various items like the hose reels but their positioning has to be precise to avoid problems with the different deck elements. Test fits with the different sections and careful use of land marks like the locating holes for other parts helped get everything in the right position. The boat support davits in particular have to be placed at just the right angle and position and while the rectangular mount holes in the deck help, there's still a little 'play' in them that can cause an issue if you're not careful since the tops of the davits fit precisely with the curve of the 'tub' for one of the AA guns above.
Still more work to do in the detail department in regards to the boats and mines but getting closer to having this one ready to enter the weathering stage.
-
Bill Plunk
- Posts: 1245
- Joined: Wed Sep 28, 2022 10:18 pm
WIP 09-21-2013
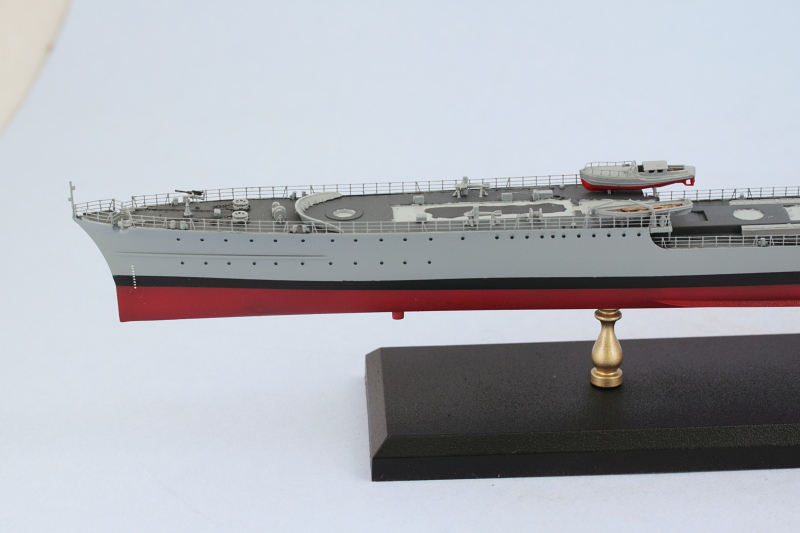
I've been working on the remaining little details here and there in short bursts throughout the week in order to make the most of the available time this weekend. First up were the boats. The Eduard set provided the railings for the motor launch as well as an in-scale canopy that replaced the Dragon part. The whale boat and row boat received PE oars also courtesy of the Eduard set. The whale boat's tiller was carefully cut out and replaced with an Eduard part to round things out. Then careful paint and detailing done on each where appropriate, the wood portions used the same recipe applied earlier to the decking to take advantage of the fabulous detail that Dragon included in the boats.
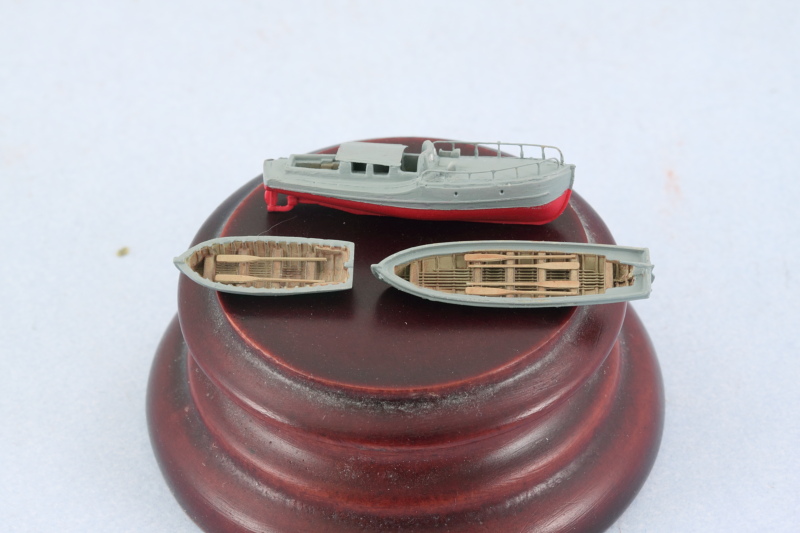
The boats where then installed into their respective places. Dragon's instructions contain an error in Step 14, they incorrectly label the boat that goes on the forward port (left) side as N16 when it should be G18. N16 is the smaller row boat while G18 is the whale boat. Further compounding things, they never tell you to install N16 in the correct position, it just magically appears in place with no call out in Step 18. Because of this, I had the cranes, parts D19-D20, installed to accommodate the smaller boat in the forward position and it was too late to try to re-position them without potentially causing major damage, so they were left as-is.
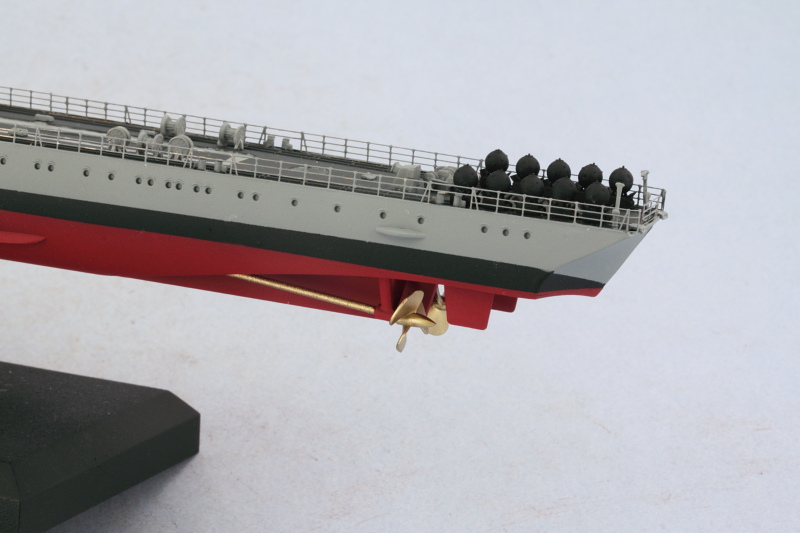
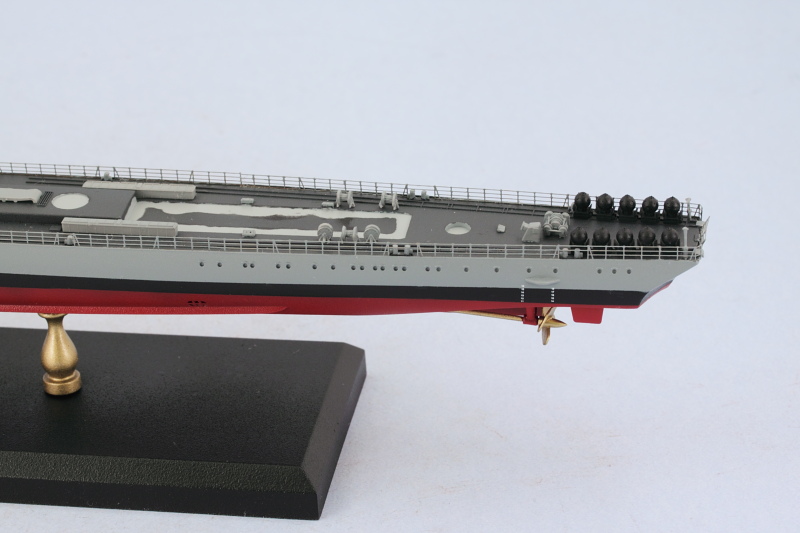
Back in Step 1, you're instructed to assemble the 10 mines that install on the stern and these guys are tiny little things. They consist of separate anchors and mines and the anchors have 2 PE 'wings' that install at an angle, the angle of which is key to them installing properly in the space available on the stern. While the kit provides 4 PE horns per mine, I didn't use them as I knew there was just no way they would survive any kind of painting and handling prior to their installation. Below the obligatory 'penny' shot to show their scale.
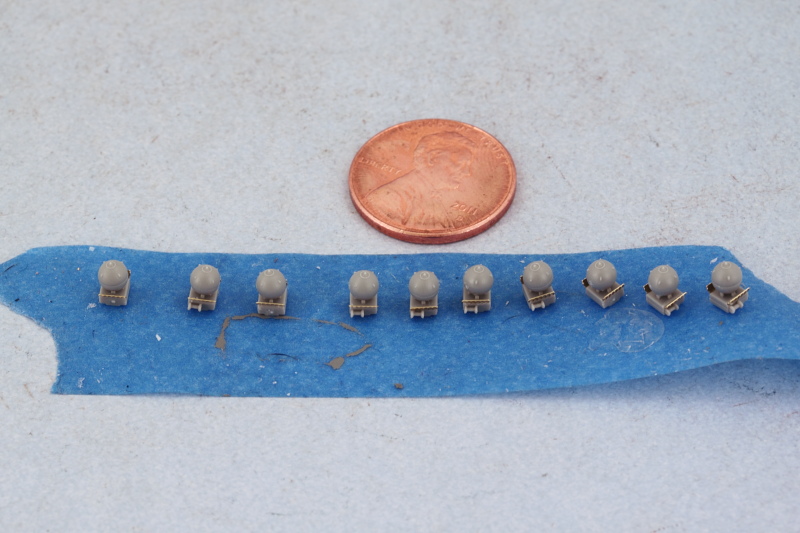
A dose of MM Flat Black enamel via the airbrush and then the mines were installed in position on the tracks at the stern.

Last but not least, the propeller shafts and propellers needed attention. They were airbrushed with MM Non-Buffing Metalizer Brass and the props installed into position. I also took advantage of the opportunity and airbrushed the stand posts at the same time.
Everything received a sealing coat of Future to protect the paint work during the weathering phases to come. The decal markings for this vessel are minimal, just the water depth gauge lines, but these are truly impressive...when viewed under 10x magnification on the Optivisor, they read clear as day and were a little bit of a pain to get in place. Dragon's decal sheet provides extras if you need them but I was able to get them in place on either side without losing any.
Now it's on to the weathering!
The boats where then installed into their respective places. Dragon's instructions contain an error in Step 14, they incorrectly label the boat that goes on the forward port (left) side as N16 when it should be G18. N16 is the smaller row boat while G18 is the whale boat. Further compounding things, they never tell you to install N16 in the correct position, it just magically appears in place with no call out in Step 18. Because of this, I had the cranes, parts D19-D20, installed to accommodate the smaller boat in the forward position and it was too late to try to re-position them without potentially causing major damage, so they were left as-is.
Back in Step 1, you're instructed to assemble the 10 mines that install on the stern and these guys are tiny little things. They consist of separate anchors and mines and the anchors have 2 PE 'wings' that install at an angle, the angle of which is key to them installing properly in the space available on the stern. While the kit provides 4 PE horns per mine, I didn't use them as I knew there was just no way they would survive any kind of painting and handling prior to their installation. Below the obligatory 'penny' shot to show their scale.
A dose of MM Flat Black enamel via the airbrush and then the mines were installed in position on the tracks at the stern.
Last but not least, the propeller shafts and propellers needed attention. They were airbrushed with MM Non-Buffing Metalizer Brass and the props installed into position. I also took advantage of the opportunity and airbrushed the stand posts at the same time.
Everything received a sealing coat of Future to protect the paint work during the weathering phases to come. The decal markings for this vessel are minimal, just the water depth gauge lines, but these are truly impressive...when viewed under 10x magnification on the Optivisor, they read clear as day and were a little bit of a pain to get in place. Dragon's decal sheet provides extras if you need them but I was able to get them in place on either side without losing any.
Now it's on to the weathering!
-
Bill Plunk
- Posts: 1245
- Joined: Wed Sep 28, 2022 10:18 pm
WIP 09-22-2013
A very productive session following on the heels of the details completed earlier. First stage in the weathering process focused on the hull. Here's where leaving off all the superstructure components came in handy as I needed to be able to lay the hull over on its side and use the main deck to hold it at various points. First step was an application of a wash of MM Panzer Schwarzgrau over the gray portion and the boot stripe and a wash of MM Italian Dark Brown over the hull red portion.
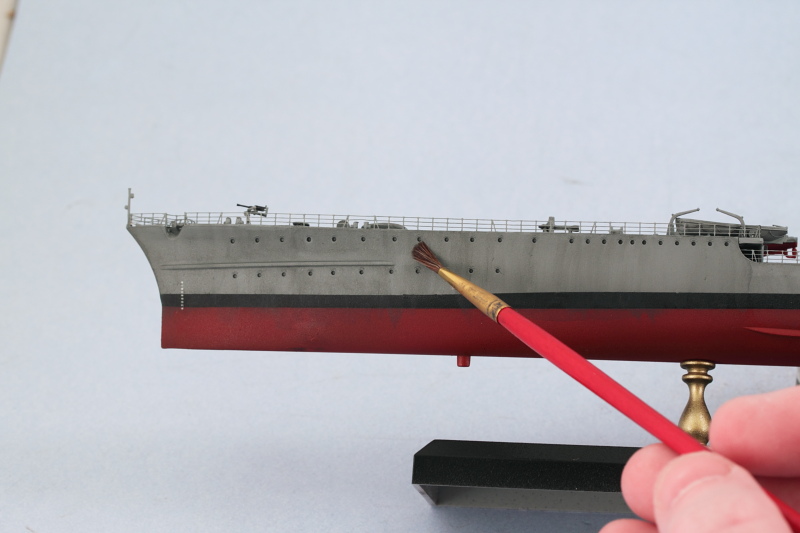
Then a dot filter of MM Light Gray was applied and the dots blended in using a 10/0 square tip blender brush.
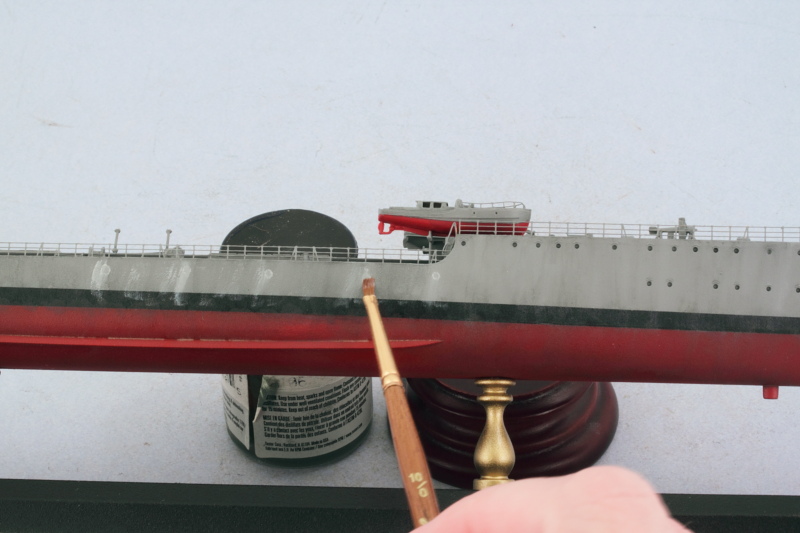
After the dot filter, more blending was done using a larger square tip brush to even things out a bit.
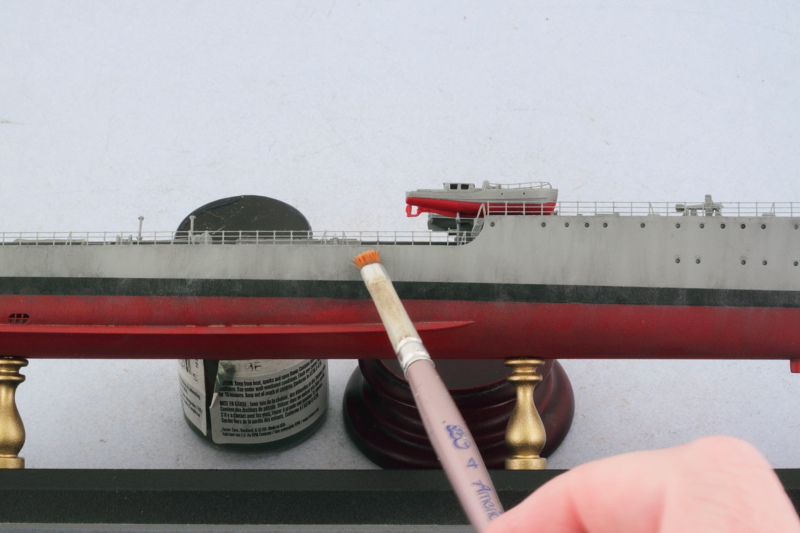
And a shot of the 'after' result.
Working on the details, I applied a pin wash of the Panzer Schwarzgrau with a pointed 10/0 brush, then followed that with a dry-brush pass using the hull gray color mix to bring out the detail with the 10/0 square tip brush.
The dark gray steel decks received a dot filter treatment using the hull gray color. The lighter gray elements got the Panzer Schwarzgrau pin wash and dry-brush treatment as well where appropriate.
Then each of the superstructure modules received the pin wash and dry-brush dose as well. First the bridge deck.
Then the gun deck with the two turrets installed in place.
Last but not least the second funnel deck.
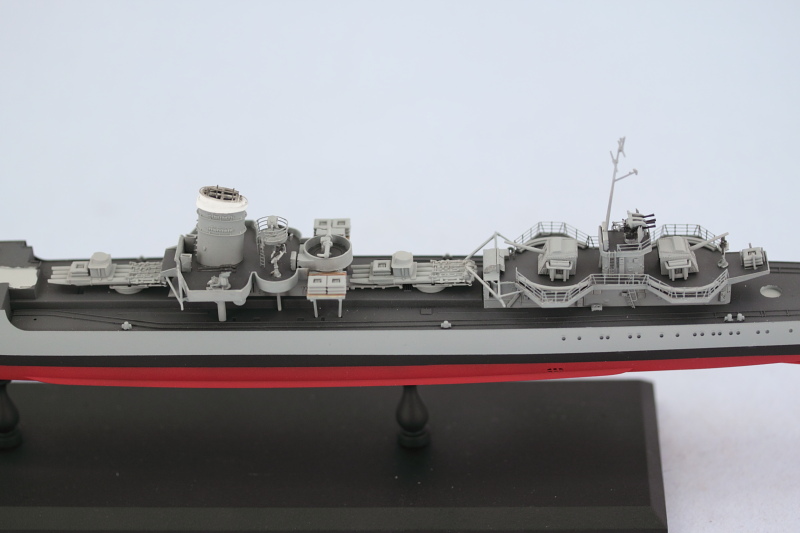
All the modules and the hull were sealed up with a coat of MM Lusterless Flat and the modules were installed in their respective positions.
I also added the side navigation lights to the edges of the bridge deck. A base of MM Non-Buffing Metalizer Steel was painted in the recessed light area and then Tamiya Clear Red and Clear Green applied over that for the respective sides.
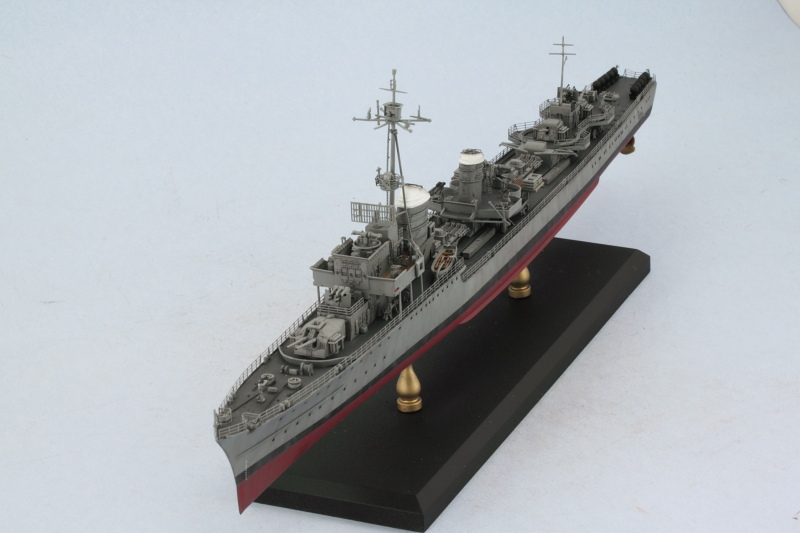
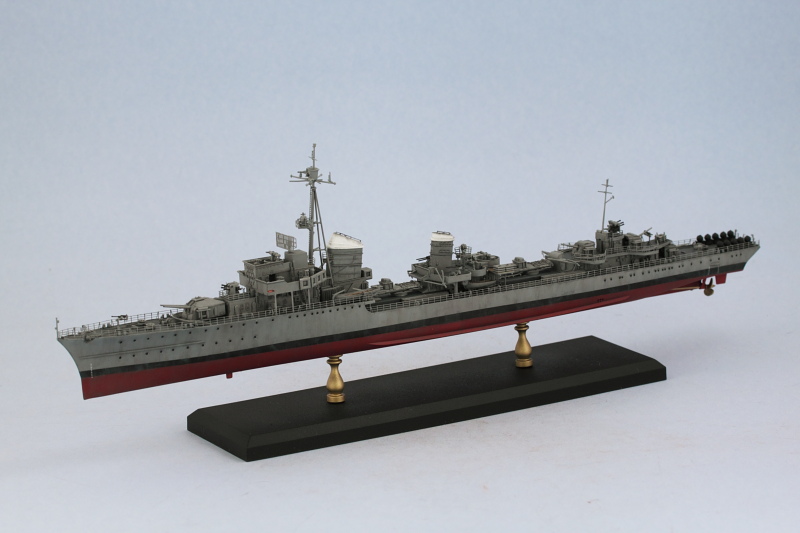
So that's where she sits for now, will take another look after a bit to see if I need to anything more or touch up before declaring this one as finished.
Then a dot filter of MM Light Gray was applied and the dots blended in using a 10/0 square tip blender brush.
After the dot filter, more blending was done using a larger square tip brush to even things out a bit.
And a shot of the 'after' result.
Working on the details, I applied a pin wash of the Panzer Schwarzgrau with a pointed 10/0 brush, then followed that with a dry-brush pass using the hull gray color mix to bring out the detail with the 10/0 square tip brush.
The dark gray steel decks received a dot filter treatment using the hull gray color. The lighter gray elements got the Panzer Schwarzgrau pin wash and dry-brush treatment as well where appropriate.
Then each of the superstructure modules received the pin wash and dry-brush dose as well. First the bridge deck.
Then the gun deck with the two turrets installed in place.
Last but not least the second funnel deck.
All the modules and the hull were sealed up with a coat of MM Lusterless Flat and the modules were installed in their respective positions.
I also added the side navigation lights to the edges of the bridge deck. A base of MM Non-Buffing Metalizer Steel was painted in the recessed light area and then Tamiya Clear Red and Clear Green applied over that for the respective sides.
So that's where she sits for now, will take another look after a bit to see if I need to anything more or touch up before declaring this one as finished.
-
Bill Plunk
- Posts: 1245
- Joined: Wed Sep 28, 2022 10:18 pm
WIP 09-24-2013
Small little update, literally! Dragon's kit includes several 1/350 crew members in different poses and I opted to include 2 of them on the bridge deck. Really shows the scale I think and the figures are very nicely molded. The two selected were the Captain in a relaxed pose with one leg raised and a hand outstretched and a crewman standing with his hands behind his back. Painting them under the Optivisor was fun, I used Testors enamel Flat Sea Blue for the uniforms, Flat Light Tan for the faces and hands, and Flat Black for the belts, boots, and hat brim. Flat Light Gray for the captain's signature hat and then a quick snip off the sprues, little bit of touch-up, then voila! Both were positioned on the bridge wing gazing out over the bow.


Just a couple of minor touch-ups here and there needed to wrap this one up.
Just a couple of minor touch-ups here and there needed to wrap this one up.