Bronco 1/35 Seehund Type XXVIIB/B5 Midget Submarine (2014)
-
Bill Plunk
- Posts: 1245
- Joined: Wed Sep 28, 2022 10:18 pm
Bronco 1/35 Seehund Type XXVIIB/B5 Midget Submarine (2014)
Build log for Bronco's 1/35 kit #CB35053 Seehund Type XXVIIB/B5 Midget Submarine.
-
Bill Plunk
- Posts: 1245
- Joined: Wed Sep 28, 2022 10:18 pm
WIP 11-26-2014
This particular project is meant to be a relatively quick effort...the whole kit has less than 100 parts to it so it will build up in short order. The real fun will be in the painting and finishing department!
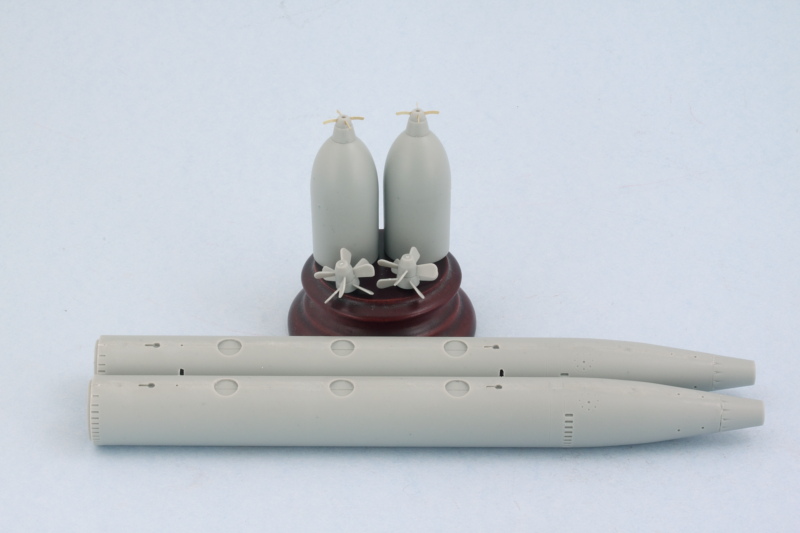
First order of business involves the 2 torpedoes that the Seehund carried externally. These together account for 52 parts and are nice little mini-kits in their own right as a result. I started in Step 1 with the assembly of the torpedo bodies. These are split-halves, so careful use of glue and some light sanding helped create a seamless join. The mount holes in the sides were opened up, taking care to do one torpedo with holes in B13 for the left side and in B3 for the right side since they are 'handed' to the external mounts. I also assembled the paired propellers. These are a little tricky to get together since they both have two blades molded on and two separate but a little patience and careful fitting gets them in shape. Last but not least I cleaned up the warhead portions of the torpedoes and assembled their front fuses complete with PE 'whiskers' (the fuses are only dry-fit for the photos). These are all left separate as three different components so it will be easier to paint and detail them prior to final assembly.
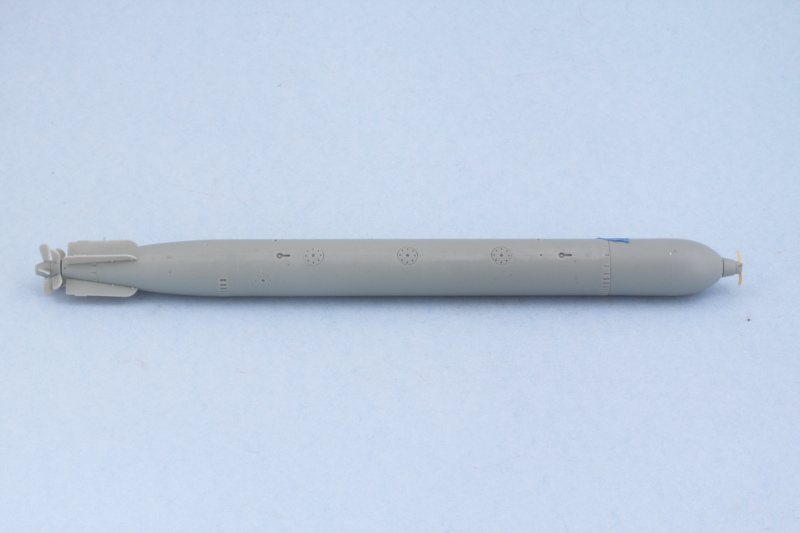
Step 2 adds all the circular access panels and other details including the fins. Using small amounts of blue-tack putty and a strategically placed bit of masking tape to hold it together, I checked the fit to see how the final 'fish' will look.
Next up will be working on getting the sub's hull together. I'll be building a straight XXVIIB vs. the B5 and that means paying some close attention to the instructions (and not opening up the holes in the hull for the 'saddle' tanks) to get the right set of features for that model.
First order of business involves the 2 torpedoes that the Seehund carried externally. These together account for 52 parts and are nice little mini-kits in their own right as a result. I started in Step 1 with the assembly of the torpedo bodies. These are split-halves, so careful use of glue and some light sanding helped create a seamless join. The mount holes in the sides were opened up, taking care to do one torpedo with holes in B13 for the left side and in B3 for the right side since they are 'handed' to the external mounts. I also assembled the paired propellers. These are a little tricky to get together since they both have two blades molded on and two separate but a little patience and careful fitting gets them in shape. Last but not least I cleaned up the warhead portions of the torpedoes and assembled their front fuses complete with PE 'whiskers' (the fuses are only dry-fit for the photos). These are all left separate as three different components so it will be easier to paint and detail them prior to final assembly.
Step 2 adds all the circular access panels and other details including the fins. Using small amounts of blue-tack putty and a strategically placed bit of masking tape to hold it together, I checked the fit to see how the final 'fish' will look.
Next up will be working on getting the sub's hull together. I'll be building a straight XXVIIB vs. the B5 and that means paying some close attention to the instructions (and not opening up the holes in the hull for the 'saddle' tanks) to get the right set of features for that model.
-
Bill Plunk
- Posts: 1245
- Joined: Wed Sep 28, 2022 10:18 pm
WIP 11-29-2014
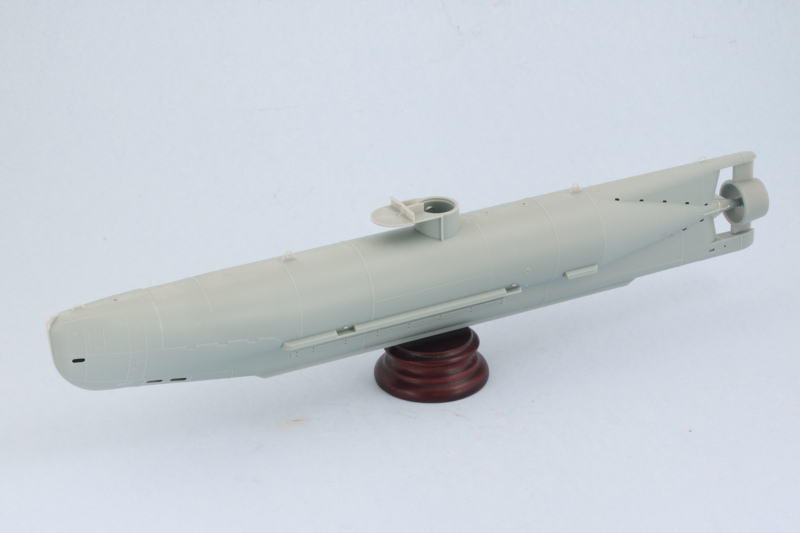
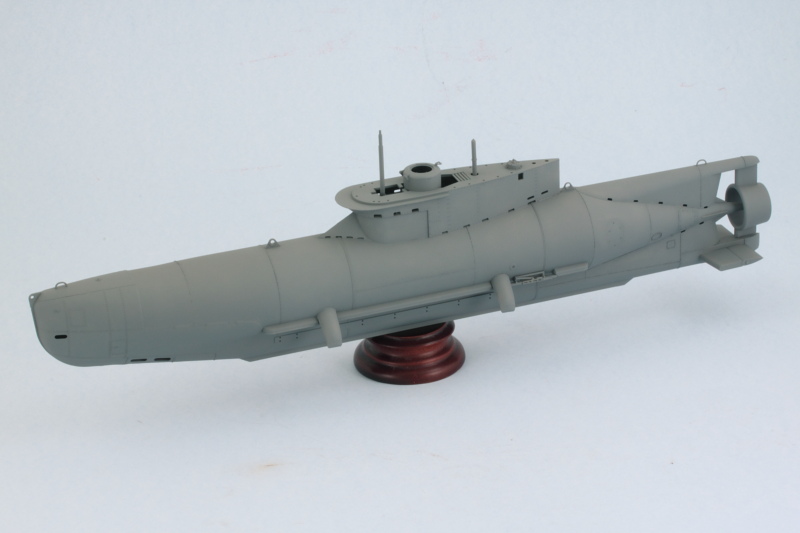
More progress on the Seehund to report! Continuing on from before, Step 3 deals with the main hull assembly and adds the rudder and propeller arrangement. Here's where the first choice between the B or B5 variant comes in, so you have to make sure you choose the right parts to get the proper configuration. It also determines which holes you open up at the stern to accept the rudder pins, with the further out holes meant for the B5. Not called out in the instructions is the need to open up holes in the hull sides if you're going to do the B5 with the extra fuel saddle tanks, so be aware of that as well.
I carefully glued the hull together starting at the bow and working my way back, using liquid glue and finger pressure to get a good join in sections at a time to avoid any slight misalignments. The finely detailed bow eyes were a little damaged from shifting around inside the box on mine on one side, so I had to carefully repair it using a brass clip and small amounts of liquid glue. Once the glue had set, some light sanding along the join eliminated the seam
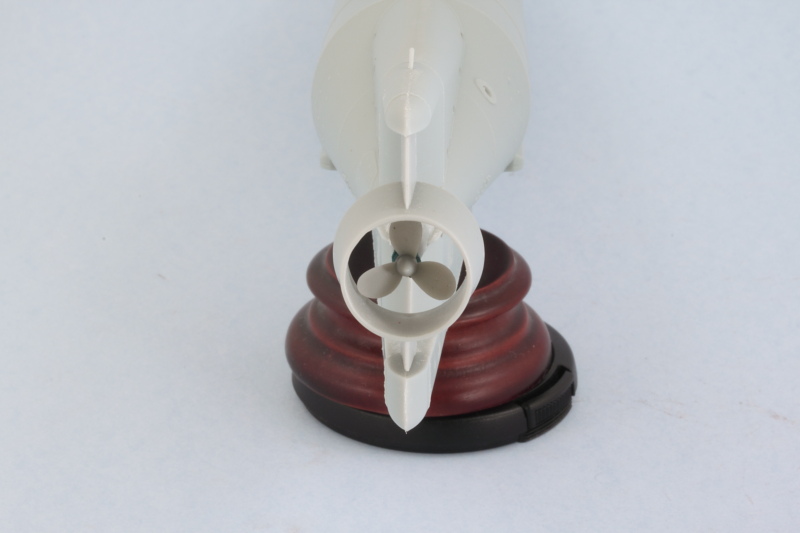
The only place where there were some minor fit issues was at the stern where the prop shaft cone mates up with the 'fins' on the hull. I used a little bit of putty to correct it and careful sanding with a sanding twig to correct it.
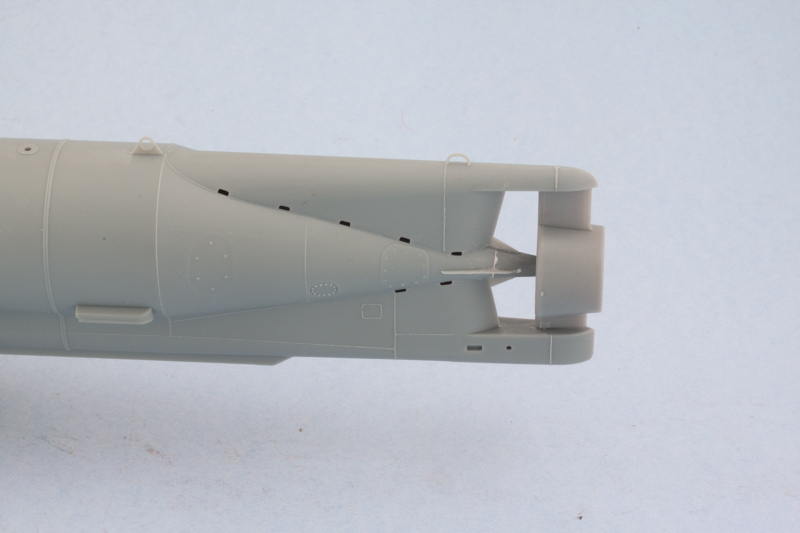
I was careful with the glue around the rudder posts so that it could stay movable. This is helpful to not only ensure it lines up properly but also sits at the correct height relative to the prop. The prop was temporarily placed with some poster blue tack to make sure everything played nice here.
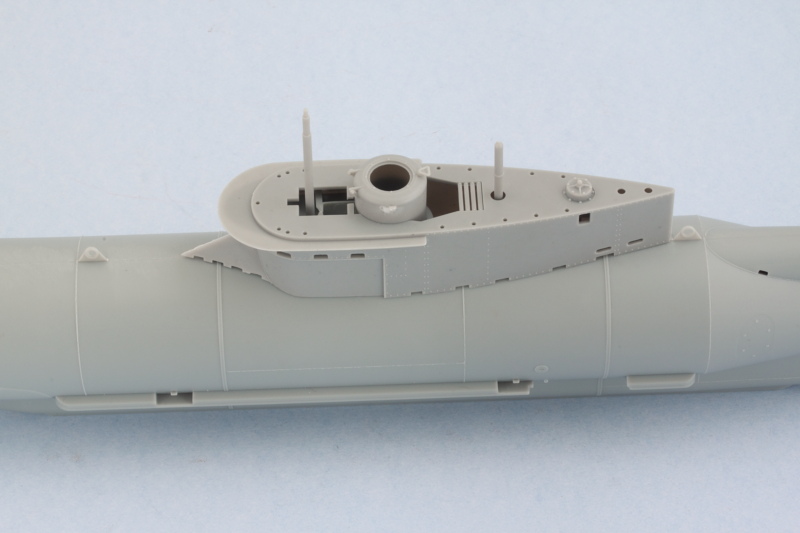
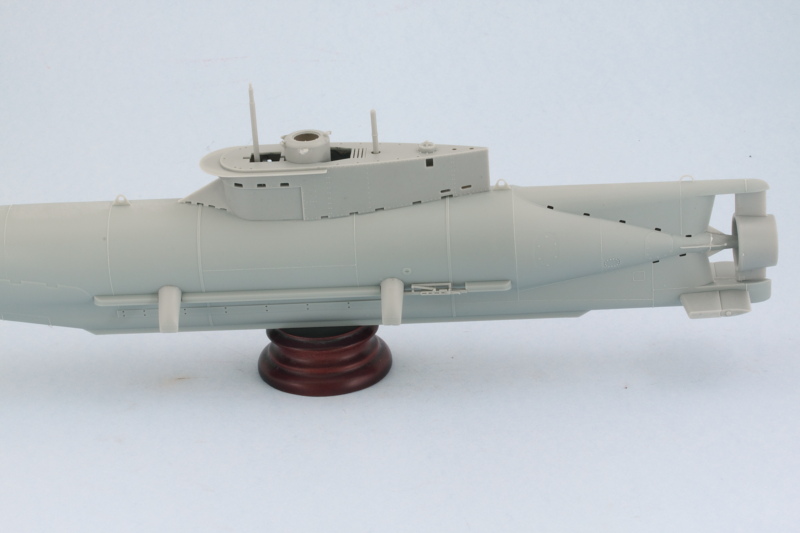
Step 4 adds all the top-side details as well as the side mounts for the torpedoes. The A9-A10-A-19-A21-A22 part combo (I don't know what the actual thing is called but looks like some kind of pressure valve/ballast device?) is the critical one to ensure the sail sits properly, so I cleaned up part A29 that's called out in Step 5 to make sure I didn't create any fit or alignment issues at this point.
The instruction diagrams and steps lead you to believe that you can slip the sail on/off over the conning tower and the periscopes after they are installed but this is not really the case if you also install the top hatch, A6 onto the conning tower as called out in Step 4. If A6 is installed, the sail cannot fit over the hinges at the front of the tower hatch while still lining up with the other components. My original intent had been to use the sail as a fitting guide and then paint the interior since some of it is visible after installation before it was permanently added. Of course, I discovered what I just noted above regarding the top hatch after I had already installed it onto the conning tower and it had set up...so that went out the window. The sail can still slide up a little to allow for some access from the underside, so I'll have to see what can be managed from a painting angle before permanently attaching it and doing the rest of the painting as part of the regular process.
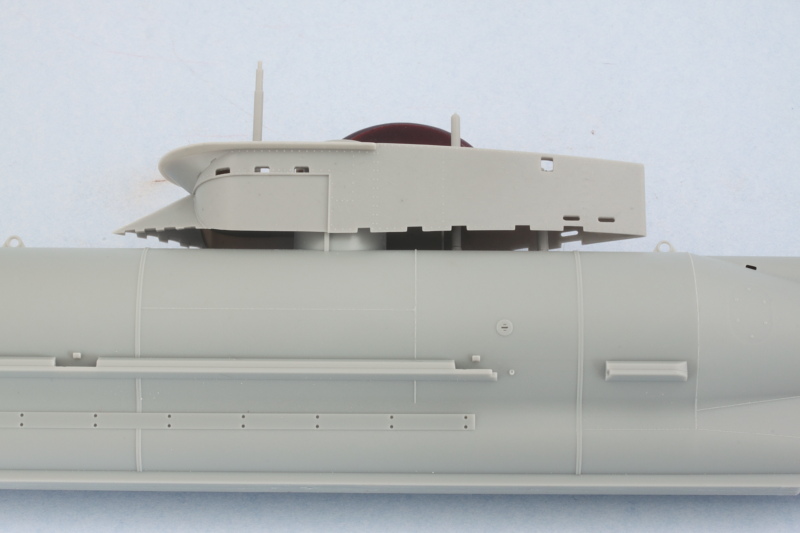
Despite that little quirk, the fit and alignment is pretty tight and Bronco did a great job in that area IMHO. The conning tower drum, part A3, had come loose off the sprue in my kit and had some small damage as a result on the top sides, so a little putty work was necessary to patch it up. I left off the clear 'bubble' for the hatch and will install that later after painting.
I still need to add some details to the lower hull including the torpedo mounts and the diving planes but should get this one into the painting stage here pretty quick.
I carefully glued the hull together starting at the bow and working my way back, using liquid glue and finger pressure to get a good join in sections at a time to avoid any slight misalignments. The finely detailed bow eyes were a little damaged from shifting around inside the box on mine on one side, so I had to carefully repair it using a brass clip and small amounts of liquid glue. Once the glue had set, some light sanding along the join eliminated the seam
The only place where there were some minor fit issues was at the stern where the prop shaft cone mates up with the 'fins' on the hull. I used a little bit of putty to correct it and careful sanding with a sanding twig to correct it.
I was careful with the glue around the rudder posts so that it could stay movable. This is helpful to not only ensure it lines up properly but also sits at the correct height relative to the prop. The prop was temporarily placed with some poster blue tack to make sure everything played nice here.
Step 4 adds all the top-side details as well as the side mounts for the torpedoes. The A9-A10-A-19-A21-A22 part combo (I don't know what the actual thing is called but looks like some kind of pressure valve/ballast device?) is the critical one to ensure the sail sits properly, so I cleaned up part A29 that's called out in Step 5 to make sure I didn't create any fit or alignment issues at this point.
The instruction diagrams and steps lead you to believe that you can slip the sail on/off over the conning tower and the periscopes after they are installed but this is not really the case if you also install the top hatch, A6 onto the conning tower as called out in Step 4. If A6 is installed, the sail cannot fit over the hinges at the front of the tower hatch while still lining up with the other components. My original intent had been to use the sail as a fitting guide and then paint the interior since some of it is visible after installation before it was permanently added. Of course, I discovered what I just noted above regarding the top hatch after I had already installed it onto the conning tower and it had set up...so that went out the window. The sail can still slide up a little to allow for some access from the underside, so I'll have to see what can be managed from a painting angle before permanently attaching it and doing the rest of the painting as part of the regular process.
Despite that little quirk, the fit and alignment is pretty tight and Bronco did a great job in that area IMHO. The conning tower drum, part A3, had come loose off the sprue in my kit and had some small damage as a result on the top sides, so a little putty work was necessary to patch it up. I left off the clear 'bubble' for the hatch and will install that later after painting.
I still need to add some details to the lower hull including the torpedo mounts and the diving planes but should get this one into the painting stage here pretty quick.
-
Bill Plunk
- Posts: 1245
- Joined: Wed Sep 28, 2022 10:18 pm
WIP 11-30-2014
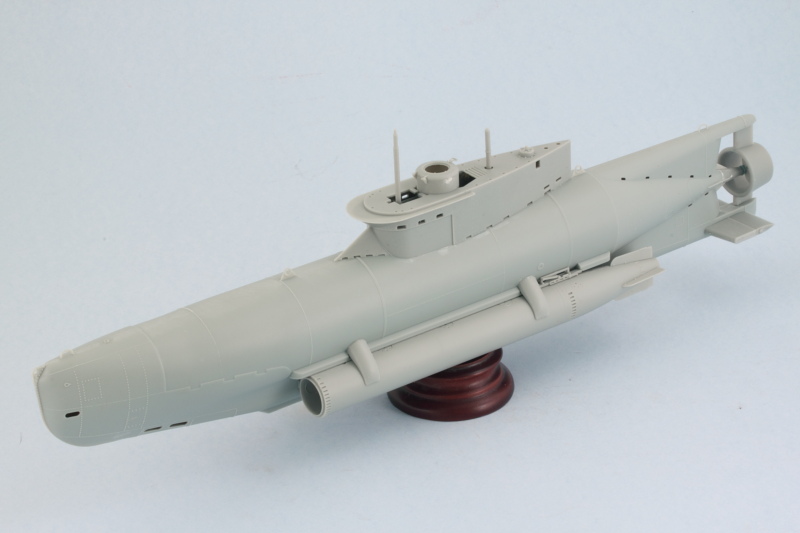
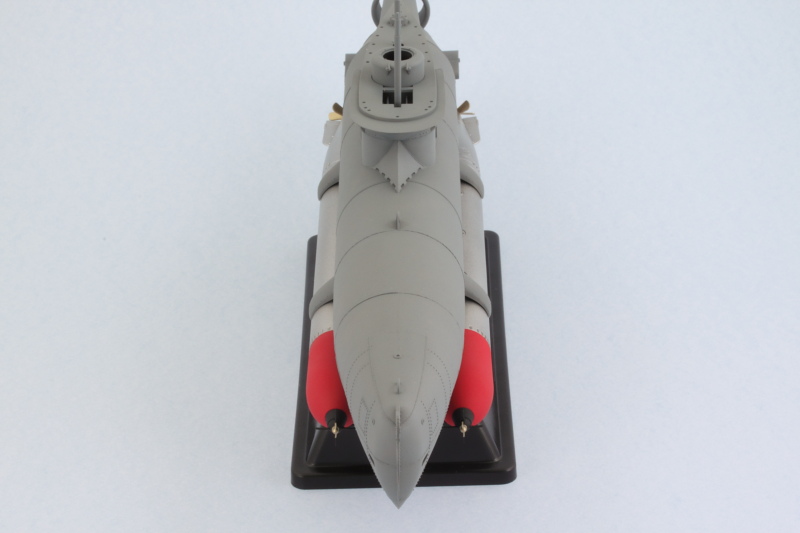
Finished up the construction steps on this little sub today. I secured the sail in place permanently after doing some paint work on the interior spaces as best I could. Then the torpedo mount arms and other various hull details were added as called out in Steps 4 and 5 including the dive planes at the stern.
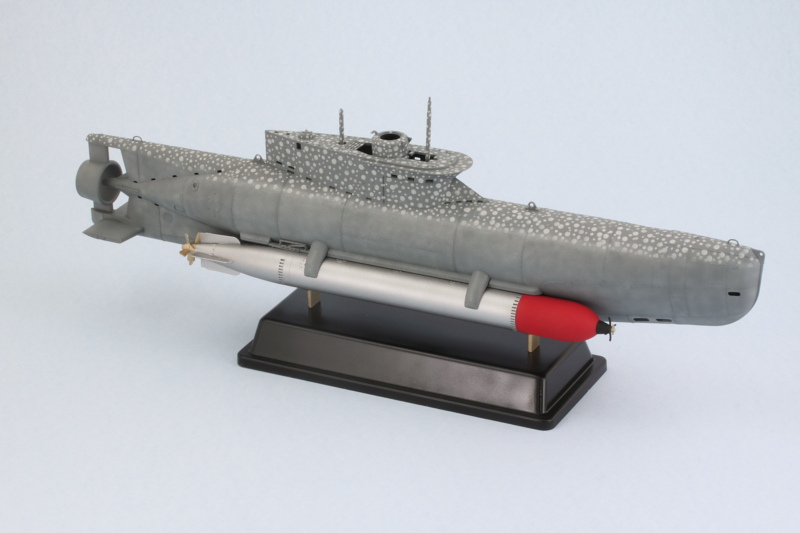
To ensure the torpedo arms set up in the right position, I used the torpedoes themselves to aid in that department. Plus it gives a pretty cool preview of how the whole thing will look once the fish are installed permanently.
Now it's time for the paint work to commence!
To ensure the torpedo arms set up in the right position, I used the torpedoes themselves to aid in that department. Plus it gives a pretty cool preview of how the whole thing will look once the fish are installed permanently.
Now it's time for the paint work to commence!
-
Bill Plunk
- Posts: 1245
- Joined: Wed Sep 28, 2022 10:18 pm
WIP 12-02-2014
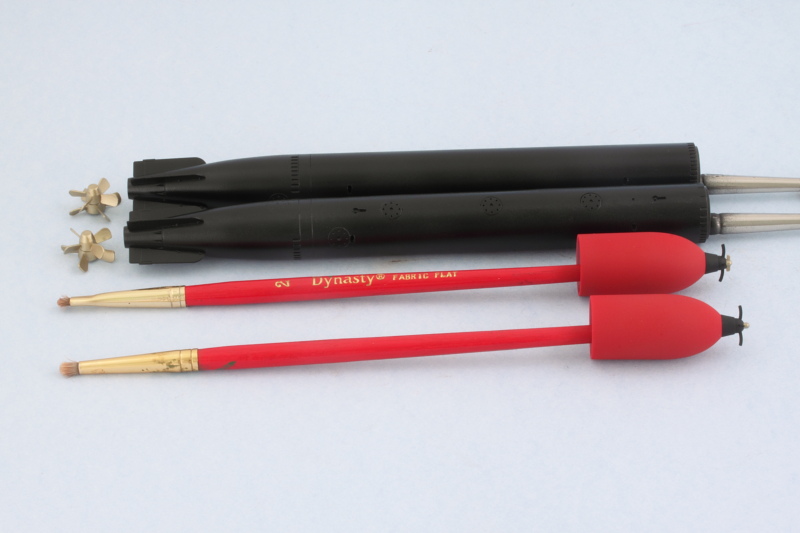
Spent a good deal of time with the airbrush today working on the Seehund. The torpedo bodies were given a base coat of MM enamel Gloss Black in preparation for their metallic finish. The warheads received a coat of MM enamel Insignia Red and the fuse caps were airbrushed MM enamel Flat Black. The main and arming propellers were airbrushed with MM non-buffing Metalizer Brass to round things out. I temporarily co-opted some paint brushes to use as handles by putting some large blobs of blue-tack poster putty on the ends and voila! Instant paint handles. The fuse caps and arming propellers were installed to the warheads to avoid potentially losing them between now and final installation.
Attention turned to the hull next. A pre-shade was applied by airbrushing MM enamel Flat black to all the weld and rivet lines. Since there's no interior detail whatsoever for the conning tower, a healthy dose of Flat Black was airbrushed there as well.
I originally was going to apply a lighter gray base coat to the hull in the form of MM enamel IJN Sky Gray since that's a color I've used for previous ship builds and had on hand. However once I started, I realized it was too light for what I was after as it was almost exactly the same color as the molded styrene so switched gears to a more medium gray. This was a custom mix of MM enamel Gunship Gray lightened with MM enamel Light Gray. I was much happier with this color choice even if it didn't preserve as much of the pre-shade due to the darker color.
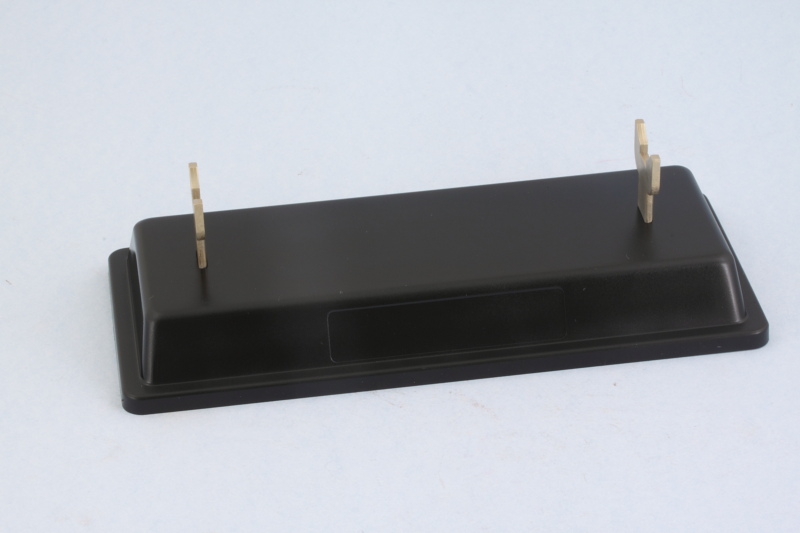
Since I was already airbrushing both the Gloss Black and the Brass, I also took advantage of the opportunity to paint the base and mount supports to round out the day's efforts.
Attention turned to the hull next. A pre-shade was applied by airbrushing MM enamel Flat black to all the weld and rivet lines. Since there's no interior detail whatsoever for the conning tower, a healthy dose of Flat Black was airbrushed there as well.
I originally was going to apply a lighter gray base coat to the hull in the form of MM enamel IJN Sky Gray since that's a color I've used for previous ship builds and had on hand. However once I started, I realized it was too light for what I was after as it was almost exactly the same color as the molded styrene so switched gears to a more medium gray. This was a custom mix of MM enamel Gunship Gray lightened with MM enamel Light Gray. I was much happier with this color choice even if it didn't preserve as much of the pre-shade due to the darker color.
Since I was already airbrushing both the Gloss Black and the Brass, I also took advantage of the opportunity to paint the base and mount supports to round out the day's efforts.
-
Bill Plunk
- Posts: 1245
- Joined: Wed Sep 28, 2022 10:18 pm
WIP 12-04-2014
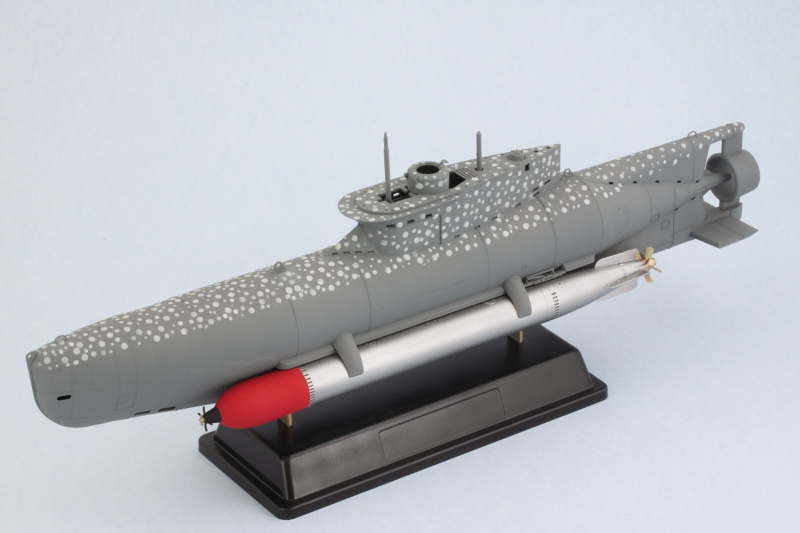
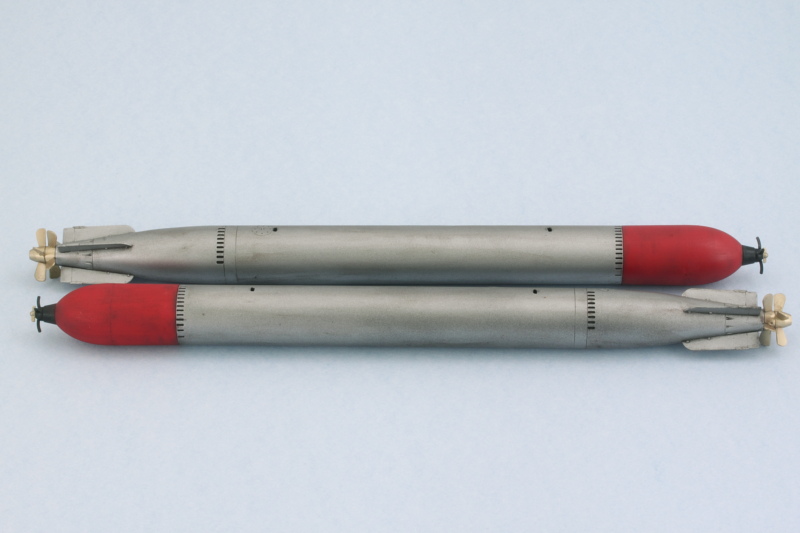
After letting the paint cure on the torpedoes, I airbrushed some MM non-buffing Metalizer Steel for their bodies. Once again the paintbrush 'handles' proved their worth both during and after the paint application. Since the warheads don't have any specific alignment tabs beyond just the support rim on the bodies, I opted to use the mount arms to hold them in place so I could get them lined up the way I wanted and matched to both sides. Same thing with their propellers. They will be installed permanently after I've done the hull weathering. So without further ado...we have One Fish...
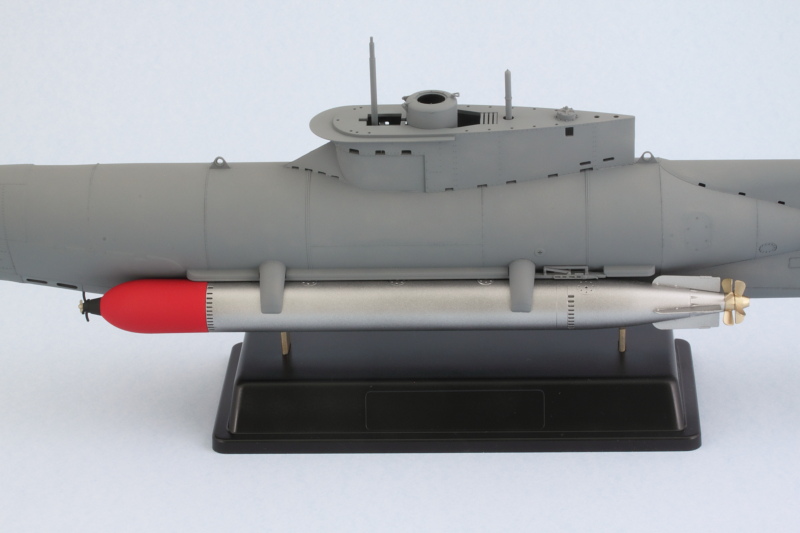
Two Fish...
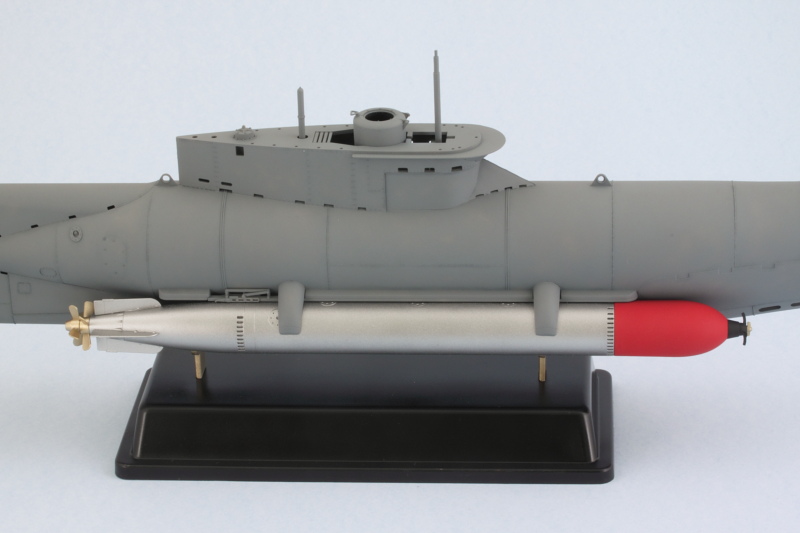
Red Fish, Red Fish! As you can see below, the Seehund was a pretty slim design with a double-barrel punch!
Two Fish...
Red Fish, Red Fish! As you can see below, the Seehund was a pretty slim design with a double-barrel punch!
-
Bill Plunk
- Posts: 1245
- Joined: Wed Sep 28, 2022 10:18 pm
WIP 12-05-2014
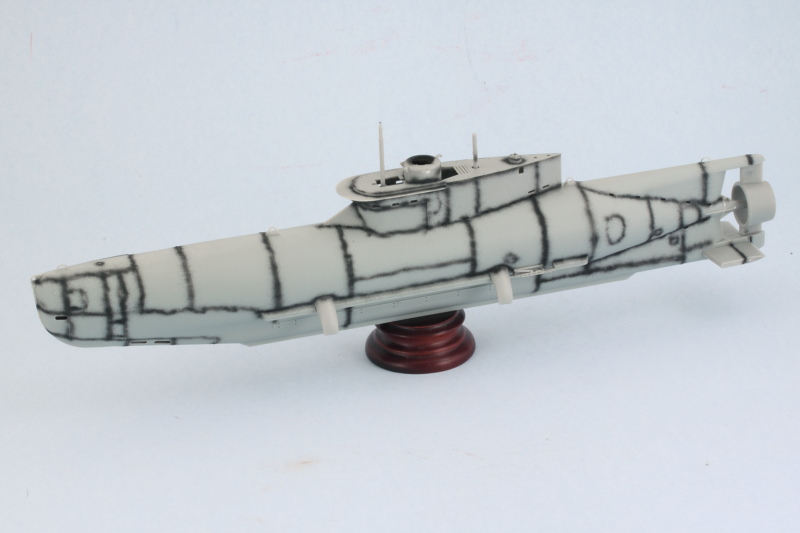
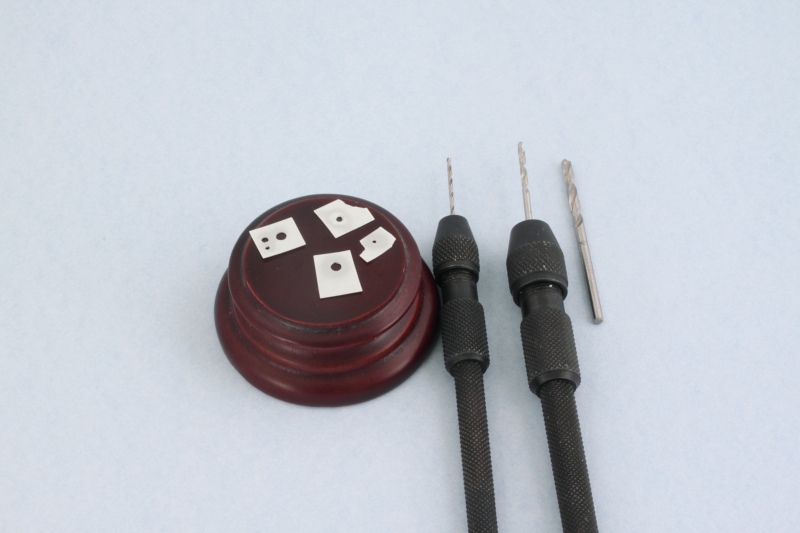
I decided to take the plunge and go for the spotted camo pattern that Bronco indicates was used on boats operating in the English Channel or off the Netherlands coast from Jan-May 1945. Rather than use a uniform dot size or try to do it freehand, I opted instead for a template approach. I created two different types of template, one that was a 'pattern' template incorporating three different sized dots that I could manipulate on the front part of the hull and individual templates of each of the dot sizes that I could use elsewhere to create the same type of effect. Some simple sheet styrene and drill bits did the trick to create the templates. Since I used very thin sheet styrene to provide some flexibility, if the template cracked or gave out during the painting process, I just made a new one using the previous one as a pattern and kept on trucking.
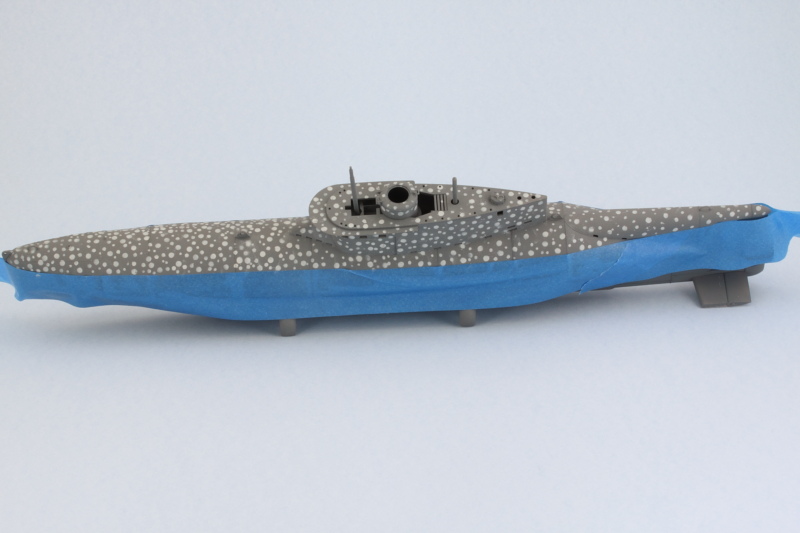
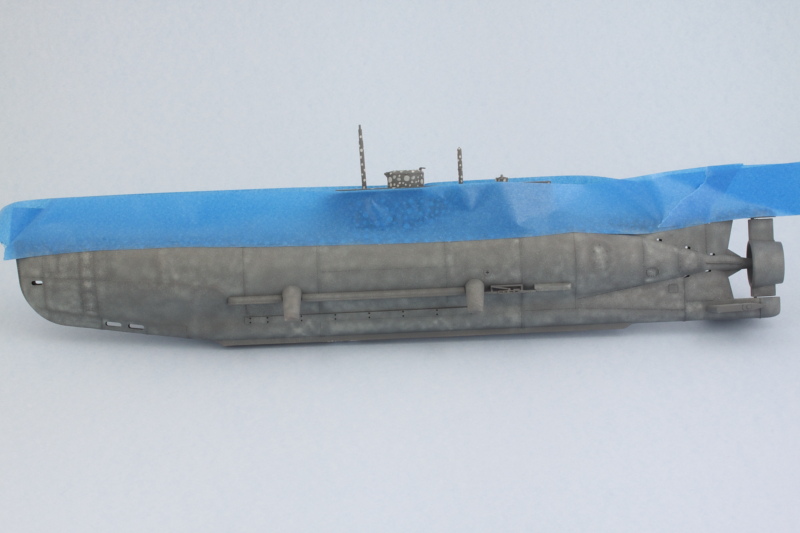
Although the instructions call for White for the dots, that seemed too stark for me so I used MM enamel flat Light Gray instead. I masked off the camo line with blue painter's tape so I had a guide to work with to avoid any drift as I moved bow to stern. After five hours of work with the airbrush, I'm definitely seeing spots!
Took the tape off and put the fish back on to see how things look at this stage.
Will keep working on the finish as I've got some shading ideas for the rest of the gray that I want to apply first before starting the weathering.
-
Bill Plunk
- Posts: 1245
- Joined: Wed Sep 28, 2022 10:18 pm
WIP 12-07-2014
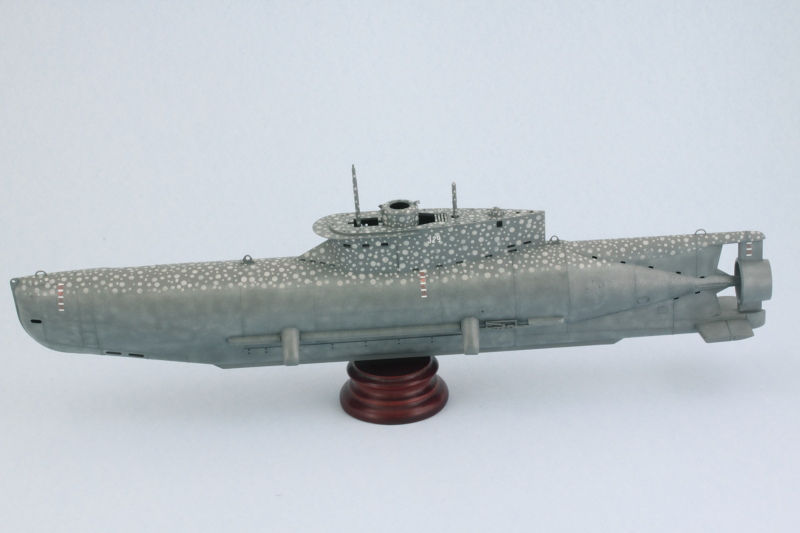
Made some more progress in the finishing department on the Seehund. The template/airbrush combo approach worked well but there were still some 'dead zones' where the template couldn't be used, so I used a small spotter brush to fill in those gaps and tighten up the pattern where needed.

I masked off the spots and applied some post-shading using MM enamel IJN Sky Gray to provide some tonal variation to the previous base coat.
I removed the masking tape and carefully used more of the IJN Sky Gray to blend in the edge of the spot patterns. Once happy with that, I airbrushed small amounts of the base coat gray back over the hull once more.
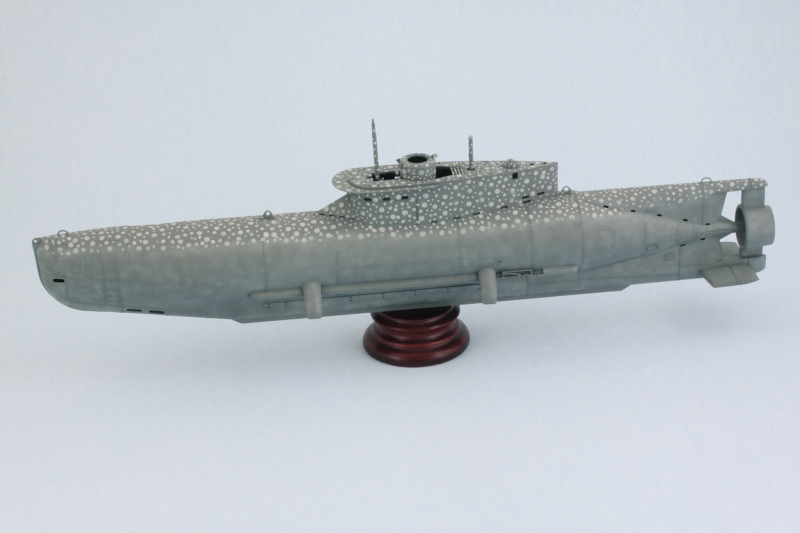
Using a very highly thinned mix of the base coat, I sprayed a mist coat from about 12 inches away over the entire hull to tie everything together and unify the finish.
This should provide just the right foundation for the final weathering steps that are up next.
I masked off the spots and applied some post-shading using MM enamel IJN Sky Gray to provide some tonal variation to the previous base coat.
I removed the masking tape and carefully used more of the IJN Sky Gray to blend in the edge of the spot patterns. Once happy with that, I airbrushed small amounts of the base coat gray back over the hull once more.
Using a very highly thinned mix of the base coat, I sprayed a mist coat from about 12 inches away over the entire hull to tie everything together and unify the finish.
This should provide just the right foundation for the final weathering steps that are up next.
-
Bill Plunk
- Posts: 1245
- Joined: Wed Sep 28, 2022 10:18 pm
WIP 12-09-2014
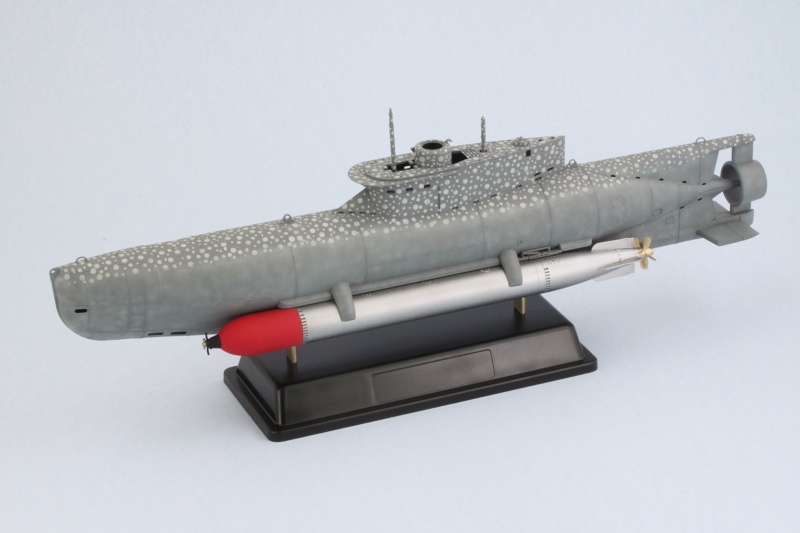
Not a huge update but an important one nonetheless. I airbrushed a coat of Future to seal up the hull and torpedoes and then added the minimal markings for my particular boat. These consisted of the numbers for the sail and the depth lines which were treated with Solvaset to ensure they didn't silver. After the decals were set, a 2nd coat of Future sealed everything in for the weathering steps to come.
I started in first on the torpedoes. I had read that since these were carried externally they were given a coat of grease to protect them from the salt water, so I applied an overall wash of thinned enamel MM Raw Umber to create that effect. The wash was adjusted with clean thinner where needed to get it into the crevices and panel lines as well so it could do double-duty on that score.
Next up will begin the work on the hull itself.
-
Bill Plunk
- Posts: 1245
- Joined: Wed Sep 28, 2022 10:18 pm
WIP 12-12-2014
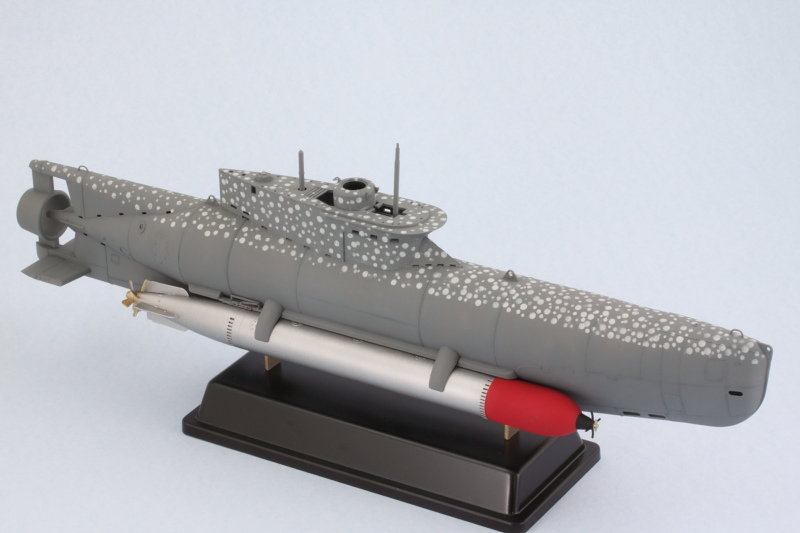
More progress on the weathering front! I added an overall wash using some highly thinned MM enamel Raw Umber as my weapon of choice. It inevitably darkens the finish but is meant to work in tandem with the following steps as opposed to being a stand-alone treatment.
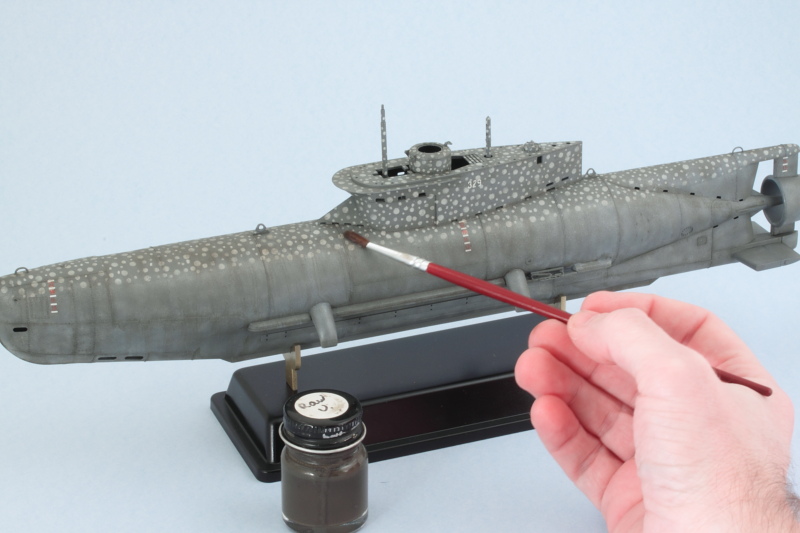
That next step is the application of a dot filter. I used small dots of enamel MM Panzer Schwarzgrau and MM Light Gray in combination with the Raw Umber to create another layer of color variation to the gray hull.
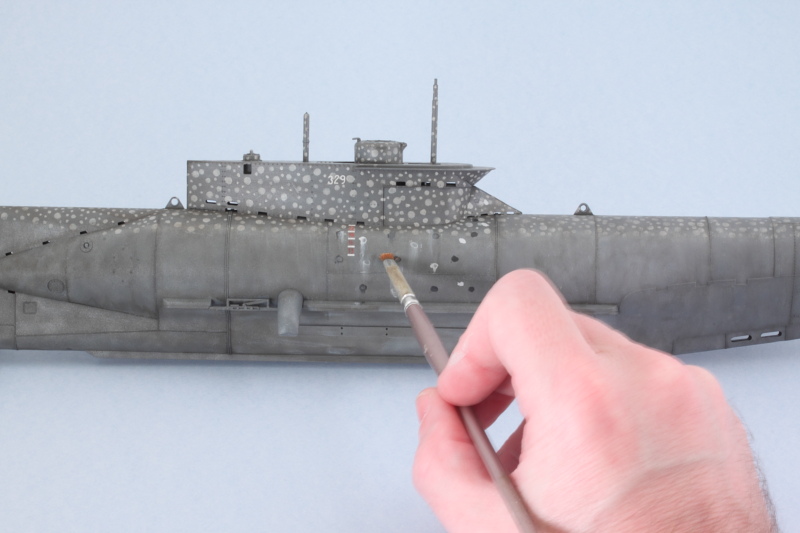
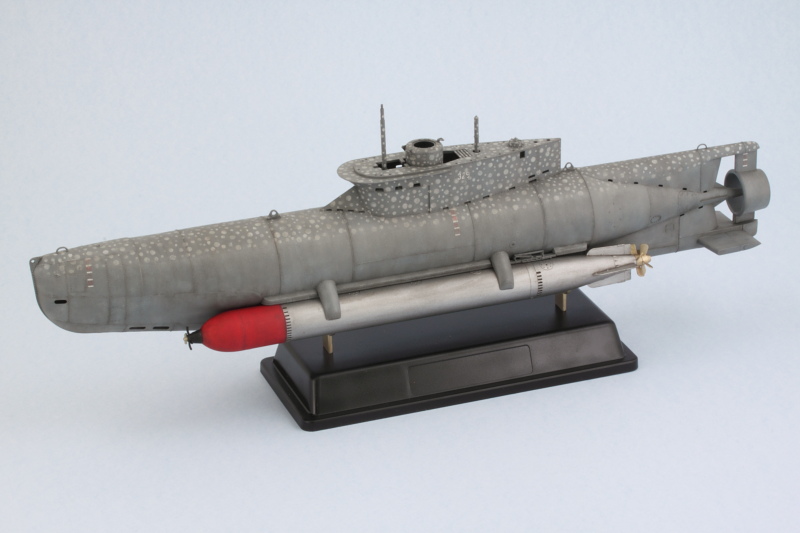
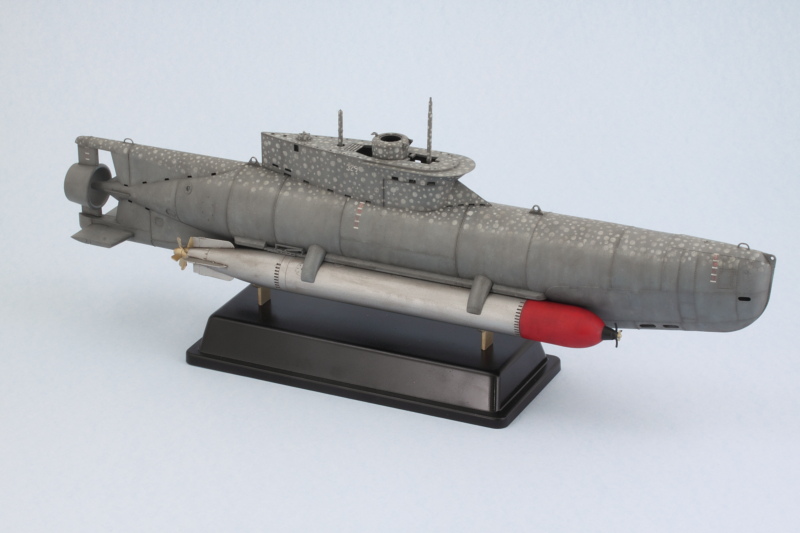
The dot filter process takes a while and requires working in small sections at a time but produces a nice result. Here's how things stand as of now including the already weathered torpedoes.
I'll let that sit so I can see it with fresh eyes and make any adjustments that might be needed before moving on to the final steps and sealing it all up.
That next step is the application of a dot filter. I used small dots of enamel MM Panzer Schwarzgrau and MM Light Gray in combination with the Raw Umber to create another layer of color variation to the gray hull.
The dot filter process takes a while and requires working in small sections at a time but produces a nice result. Here's how things stand as of now including the already weathered torpedoes.
I'll let that sit so I can see it with fresh eyes and make any adjustments that might be needed before moving on to the final steps and sealing it all up.