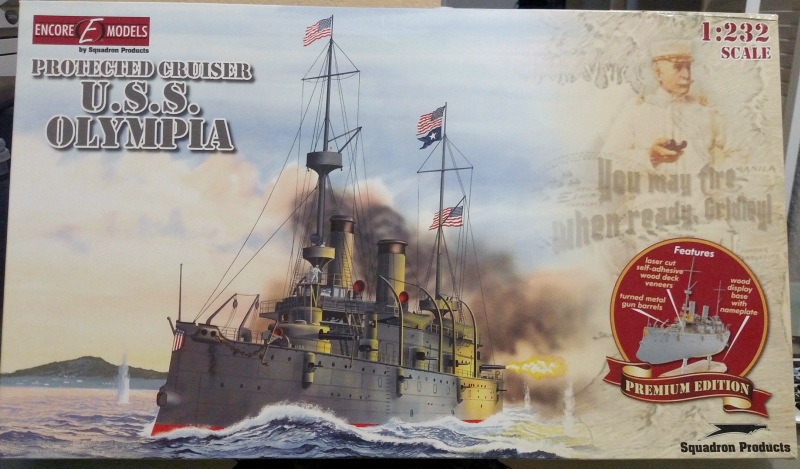
Encore 1/232 Protected Cruiser USS Olympia Premium Edition (2016)
-
Bill Plunk
- Posts: 1245
- Joined: Wed Sep 28, 2022 10:18 pm
Encore 1/232 Protected Cruiser USS Olympia Premium Edition (2016)
Build log for the Encore Models kit #85001 1/232 Protected Cruiser USS Olympia Premium Edition.
-
Bill Plunk
- Posts: 1245
- Joined: Wed Sep 28, 2022 10:18 pm
WIP 05-09-2016
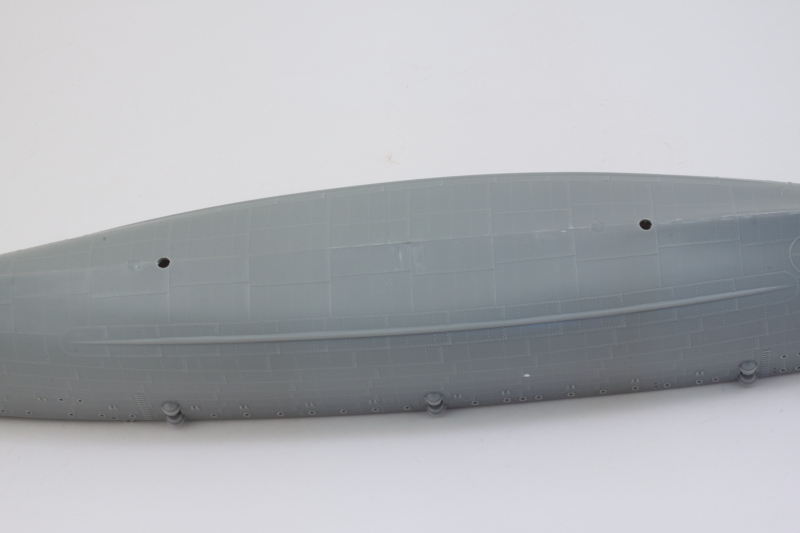
I started in on the hull halves today and there's a lot of work that has to be done to them before they can be joined. That includes the usual clean-up and flash removal (which there's a good bit of in various places due to the age of the molds) as well as removing a lot of molded on parts that are going to be replaced with either resin or PE components. I got one of the halves done today, removing all the railing stanchions that weren't needed, drilled out the portholes, and used a micro-chisel to carefully remove the bow torpedo tube and stern life ring cages. There were also a couple of sink-hole spots that needed some putty help and I also closed up the mounting hole for the access ladder since it wouldn't be needed.
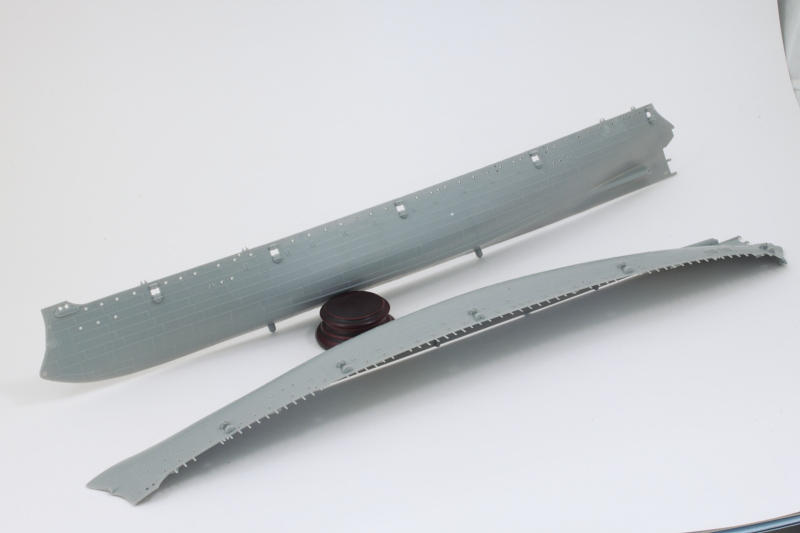
The total hull length is right at 18 inches, so it's a lot to work with. For the time being, I've left the plastic mount pegs that were originally meant to go into a plastic base as they will help glue the two halves together. One side done, one to go!
The total hull length is right at 18 inches, so it's a lot to work with. For the time being, I've left the plastic mount pegs that were originally meant to go into a plastic base as they will help glue the two halves together. One side done, one to go!
-
Bill Plunk
- Posts: 1245
- Joined: Wed Sep 28, 2022 10:18 pm
WIP 05-12-2016
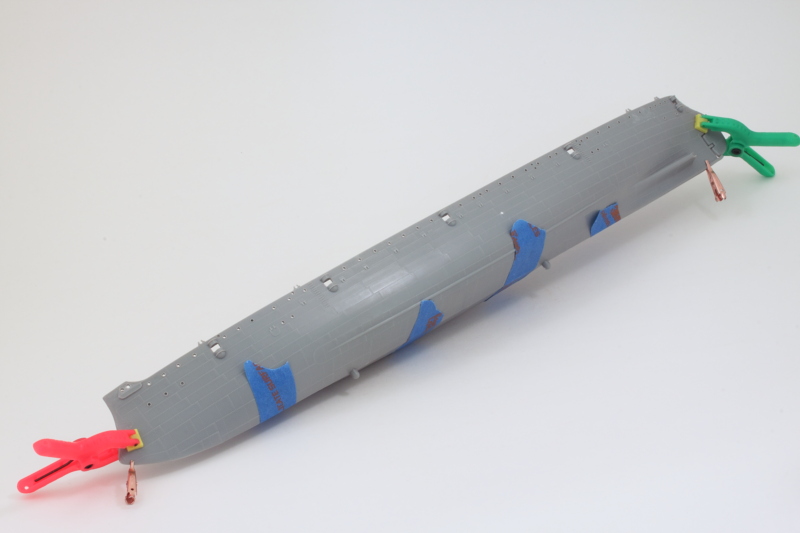
After another long session of prep work and clean-up, I got the second half of the hull ready to go. I did a quick test fit with the main deck portions to see if I was going to have any issues there later on before committing to gluing the halves together and nothing popped up. The joint surface along the bottom of the hull isn't that big, so I started at the bow first and used liquid glue applied from the inside to get it together. Once the glue had started to grab, I applied clamps and/or strips of masking tape to hold it together as I worked my way towards the stern. That way I didn't run the risk of glue getting under the tape and marring the exterior. A little tricky, but it worked out well. I was also careful with the rudder installation so that it would remain movable since that's key to being able to install the resin parts for that area for the stern torpedo tube.
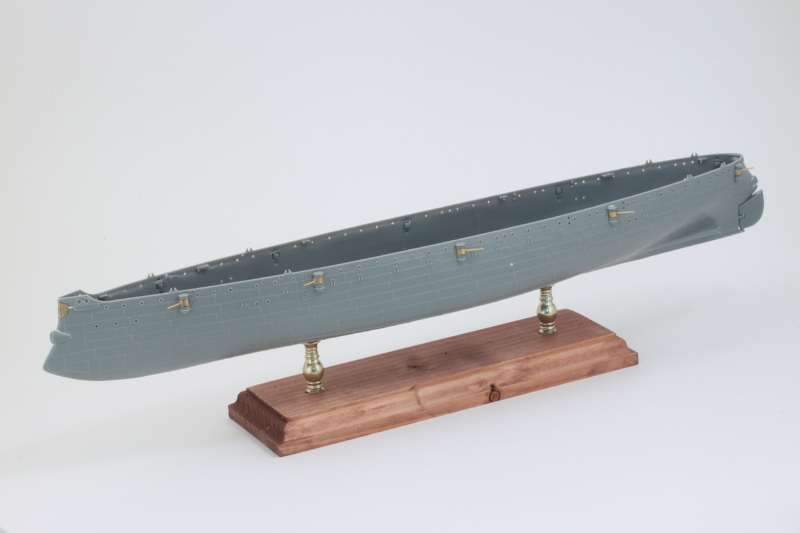
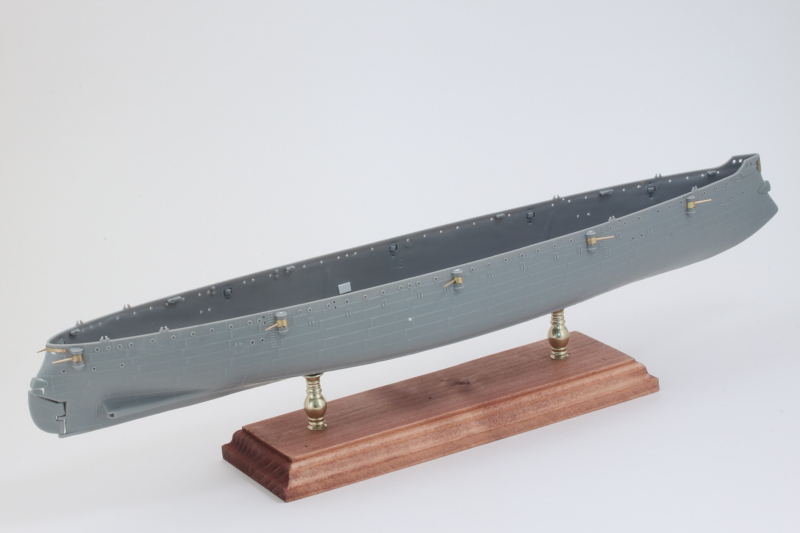
With the hull setting up, I worked on the 10 6-pounder quick-firing (57mm) guns that go into the lower hull sponsons. The kit includes the brass barrels to replace the kit parts, so the plastic barrels were snipped off and the mount holes drilled out with a #72 finger drill. CA secured the barrels in place. These snap into the sponsons and there's enough room to do that with the hull joined, so they will go in later on after I finish working on the other details that the hull still needs.
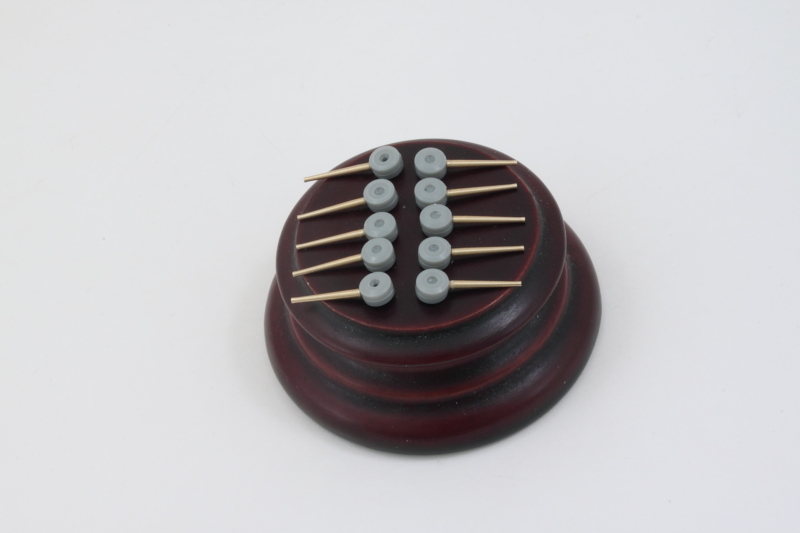
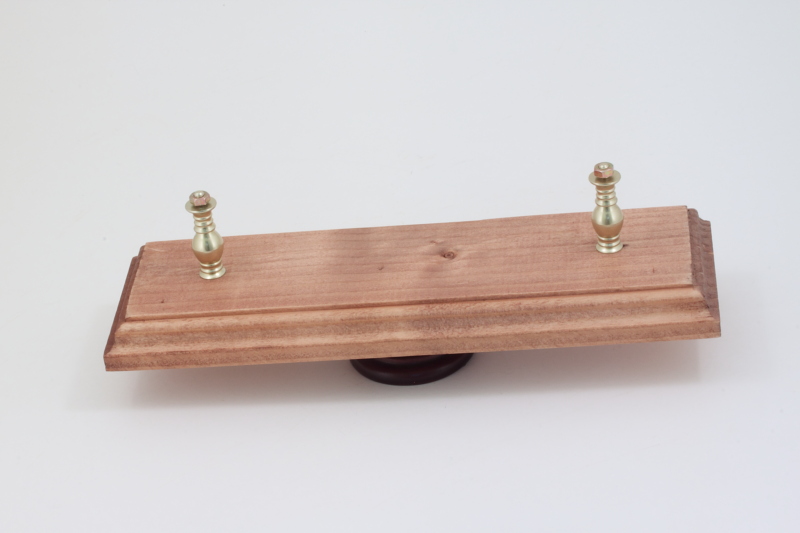
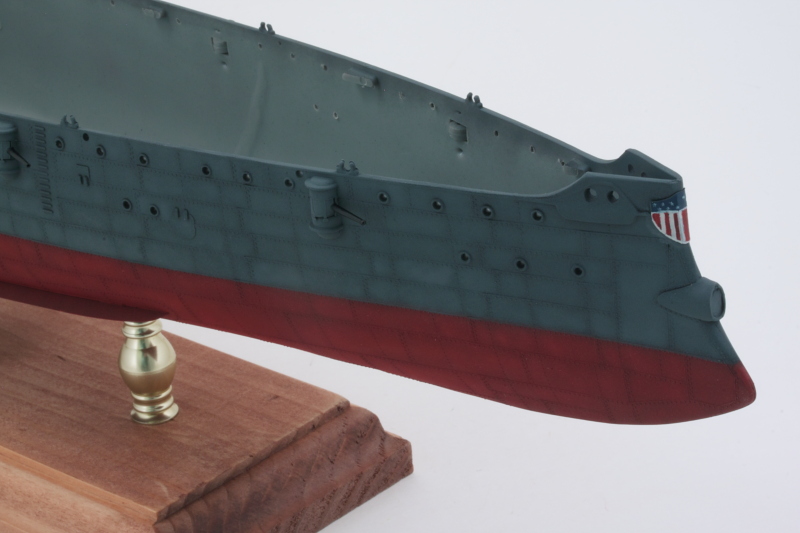
One of those details will involve drilling out holes for it to be able to mount onto the kit-supplied wood base. I stained the base and installed the brass mounting hardware, so it's ready to go once I have the holes drilled.
Plenty still to do with the hull before it's ready to take some paint.
With the hull setting up, I worked on the 10 6-pounder quick-firing (57mm) guns that go into the lower hull sponsons. The kit includes the brass barrels to replace the kit parts, so the plastic barrels were snipped off and the mount holes drilled out with a #72 finger drill. CA secured the barrels in place. These snap into the sponsons and there's enough room to do that with the hull joined, so they will go in later on after I finish working on the other details that the hull still needs.
One of those details will involve drilling out holes for it to be able to mount onto the kit-supplied wood base. I stained the base and installed the brass mounting hardware, so it's ready to go once I have the holes drilled.
Plenty still to do with the hull before it's ready to take some paint.
-
Bill Plunk
- Posts: 1245
- Joined: Wed Sep 28, 2022 10:18 pm
WIP 05-13-2016
After the hull had set up overnight, I removed the clamps and tape and cleaned up the joint where needed. I used a simple paper template and Sharpie to mark where the holes were needed on the inside of the hull and drilled out the holes with a Dremel and 5/8" drill bit. The plastic base pins were cut off with sprue cutters and the nubs removed with a #11 blade to complete the transformation.
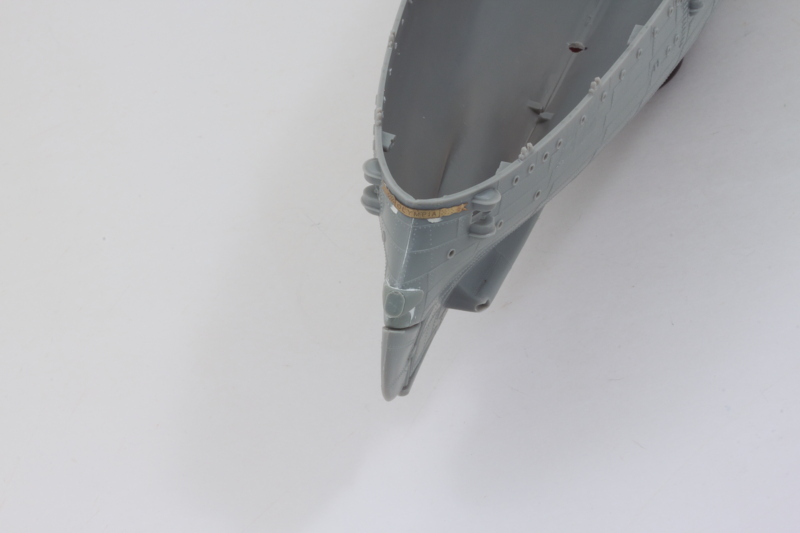
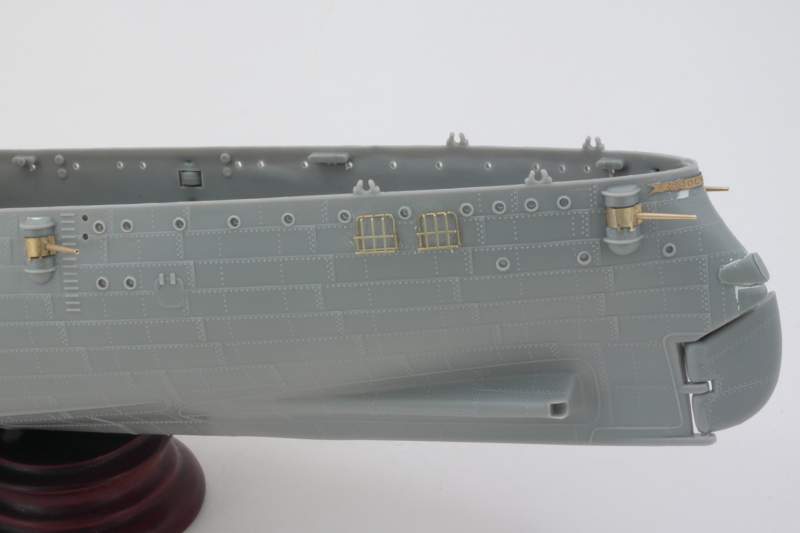
Next up were the resin details for the bow and stern torpedo tubes. The kit had included the bow tube as a simple round opening while the resin kit part has the correct oval shape and hinged door arrangement. I attached it with CA gel and filled the gap around its edge with Squadron White putty. The bow Union Shield crest was annealed and attached as well to round out the bow area. Some malformed detail that I had to remove next to the anchor chain opening was replaced with a flattened piece of styrene rod as well.

At the stern, the original kit didn't have anything for the stern torpedo tube. The rudder had been surgically altered to remove its incorrect top portion earlier and I added the kit's resin 'plug' for that area first with CA and sanded it to match the hull's contours. Then the resin stern tube was added and putty used where necessary for it as well. The PE 'Olympia' device was annealed and attached as well to complete the detail in this area.
Next up will be more fun with PE in terms of the life ring racks, the side keels, and all the 6-pounder gun mount shields. Then it will be time to paint the hull. Moving right ahead!
Next up were the resin details for the bow and stern torpedo tubes. The kit had included the bow tube as a simple round opening while the resin kit part has the correct oval shape and hinged door arrangement. I attached it with CA gel and filled the gap around its edge with Squadron White putty. The bow Union Shield crest was annealed and attached as well to round out the bow area. Some malformed detail that I had to remove next to the anchor chain opening was replaced with a flattened piece of styrene rod as well.
At the stern, the original kit didn't have anything for the stern torpedo tube. The rudder had been surgically altered to remove its incorrect top portion earlier and I added the kit's resin 'plug' for that area first with CA and sanded it to match the hull's contours. Then the resin stern tube was added and putty used where necessary for it as well. The PE 'Olympia' device was annealed and attached as well to complete the detail in this area.
Next up will be more fun with PE in terms of the life ring racks, the side keels, and all the 6-pounder gun mount shields. Then it will be time to paint the hull. Moving right ahead!
-
Bill Plunk
- Posts: 1245
- Joined: Wed Sep 28, 2022 10:18 pm
WIP 05-14-2016
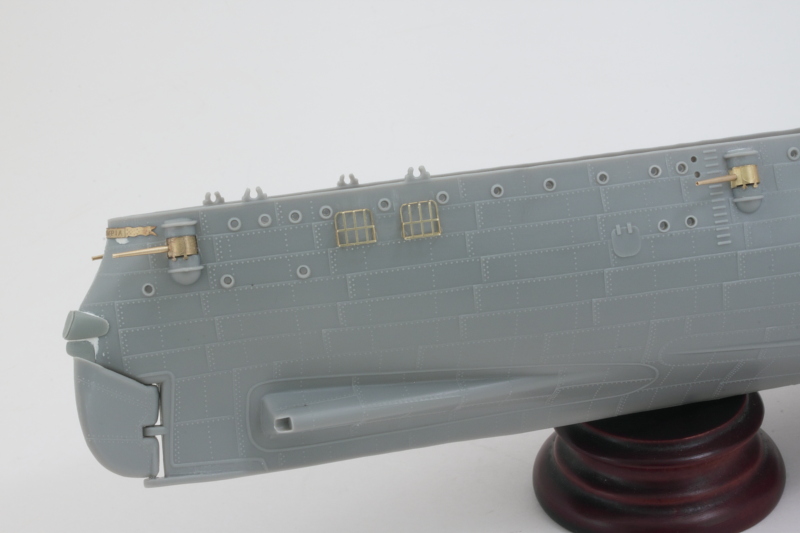
More progress on the hull details. Today's session focused on the 6-pounder anti-torpedo boat guns. These snap into the sponsons but their fit once in place is a little wobbly. The PE shutters for the exterior are two part and there's very little contact surface for them, so after annealing and shaping them with a mandrel one at a time, I worked one gun at a time to get everything in place. The instructions try to tell you that you need to use different parts depending on whether you're working on the fore or aft guns on either side but they used the same part numbers for both types...so I just had to figure it out on my own. Seeing all those guns sticking out at various angles just adds to the 'old school' look of this design IMHO!
Getting closer to time for paint!
Getting closer to time for paint!
-
Bill Plunk
- Posts: 1245
- Joined: Wed Sep 28, 2022 10:18 pm
WIP 05-15-2016
Got the rest of the hull PE details done today. The stern life-ring holders are all one piece which makes for some delicate folding to get them into the correct shape. A PE bending tool is a must, don't think I could've pulled it off with just pliers and tweezers. Two holders per side, the life-rings (actually large circular rafts, in the reference pics they look the size of large tires) themselves will get added later once the hull is painted.
Bilge keels were next, these are long pieces of PE on the fret so getting them off and avoiding them flexing or bending requires a little care. The starboard side keel matched up perfectly while the port side needed a little help in one spot to match up with the molded on keel on the hull. I used some small diameter styrene rod added behind the PE keel to fill in a slight gap that existed roughly in the middle of the keel since putty alone wouldn't have done the job.
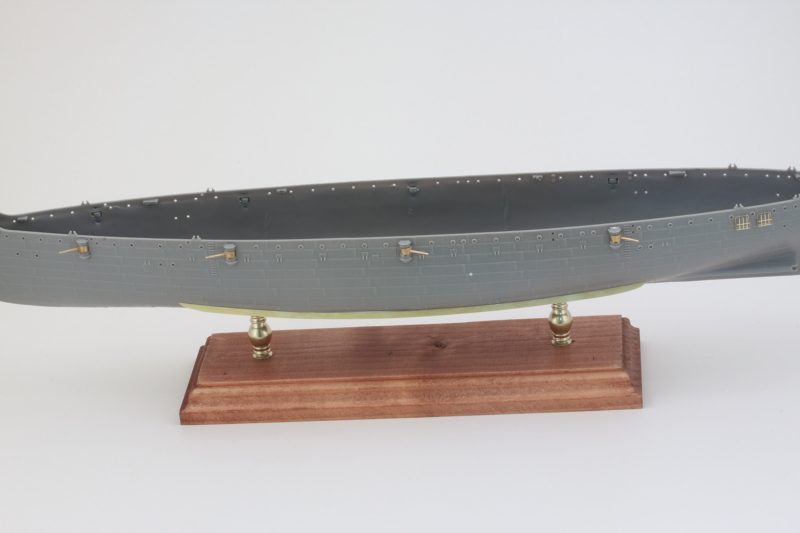
Next up will be priming the hull and getting ready to do the major paintwork there.
Bilge keels were next, these are long pieces of PE on the fret so getting them off and avoiding them flexing or bending requires a little care. The starboard side keel matched up perfectly while the port side needed a little help in one spot to match up with the molded on keel on the hull. I used some small diameter styrene rod added behind the PE keel to fill in a slight gap that existed roughly in the middle of the keel since putty alone wouldn't have done the job.
Next up will be priming the hull and getting ready to do the major paintwork there.
-
Bill Plunk
- Posts: 1245
- Joined: Wed Sep 28, 2022 10:18 pm
WIP 05-16-2016
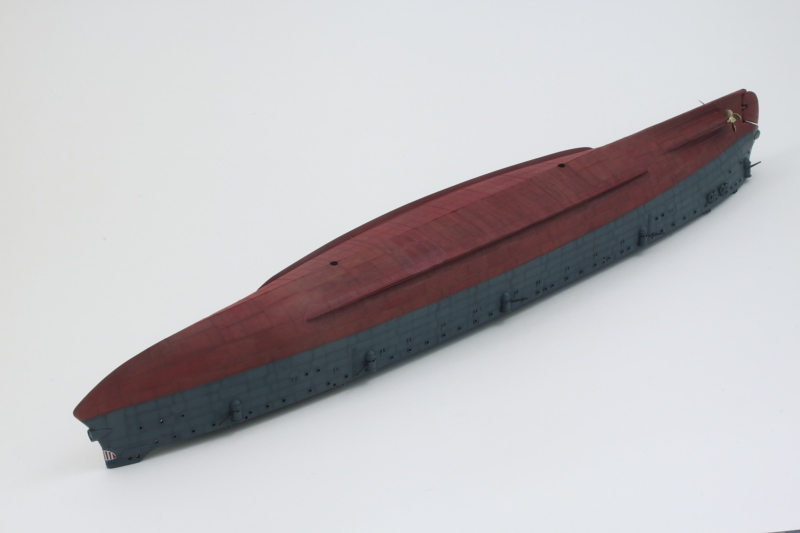
Started in on the main hull paintwork, the first order of business was a pre-shade/primer coat of MM enamel Flat Black.

I masked off the demarcation for the anti-fouling red and airbrushed MM enamel Insignia Red in thin coats to build it up slowly over the pre-shade and then went in close and worked on all the overlapping plates to bring out the rivet detail as much as possible. My trigger finger got quite a workout on the double-action for this stage but it's worth it given all that beautiful plate detail that was molded into the hull.

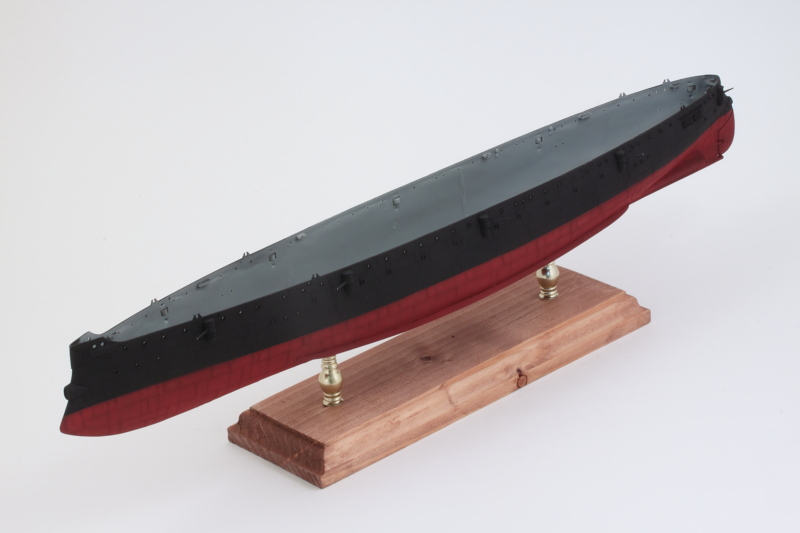
I'll let that set up overnight and then will mask it off so I can add the dark gray upper portion in a similar process. Olympia didn't have a boot stripe, so that will make life a little simpler as a result.
I masked off the demarcation for the anti-fouling red and airbrushed MM enamel Insignia Red in thin coats to build it up slowly over the pre-shade and then went in close and worked on all the overlapping plates to bring out the rivet detail as much as possible. My trigger finger got quite a workout on the double-action for this stage but it's worth it given all that beautiful plate detail that was molded into the hull.
I'll let that set up overnight and then will mask it off so I can add the dark gray upper portion in a similar process. Olympia didn't have a boot stripe, so that will make life a little simpler as a result.
-
Bill Plunk
- Posts: 1245
- Joined: Wed Sep 28, 2022 10:18 pm
WIP 05-17-2016
More progress in the hull department, this time it was the upper hull that got attention. The instructions include a color chip for the 'standard Navy Gray' that was used and recommends FS 36081, which in the MM enamel line is called European 1 Gray. This is pretty dark on its own, so I opted instead for the FS 36118 Gunship Gray as a lighter option over the Flat Black pre-shade coat. Masking tape protected the previous anti-fouling red work and I used the same process of thin coats to build up a uniform base color, then went in close with the airbrush and worked panel by panel to fill them in.
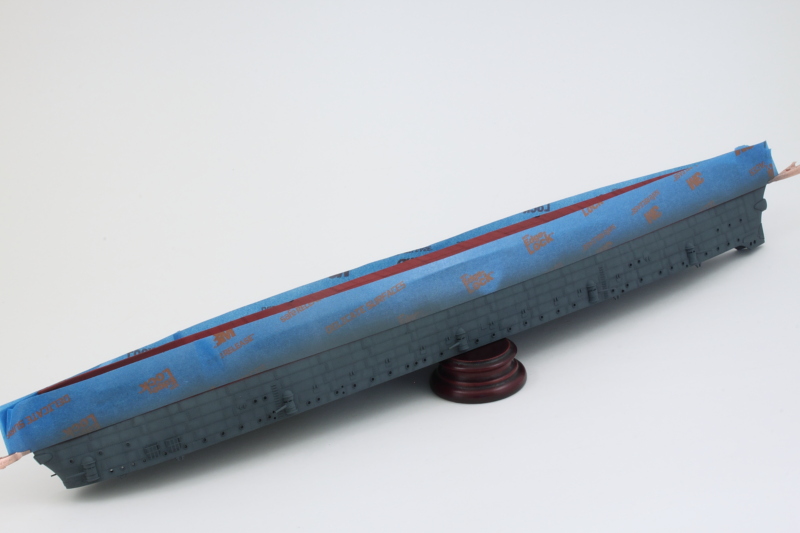
Masking tape came off and everything looks like it should!

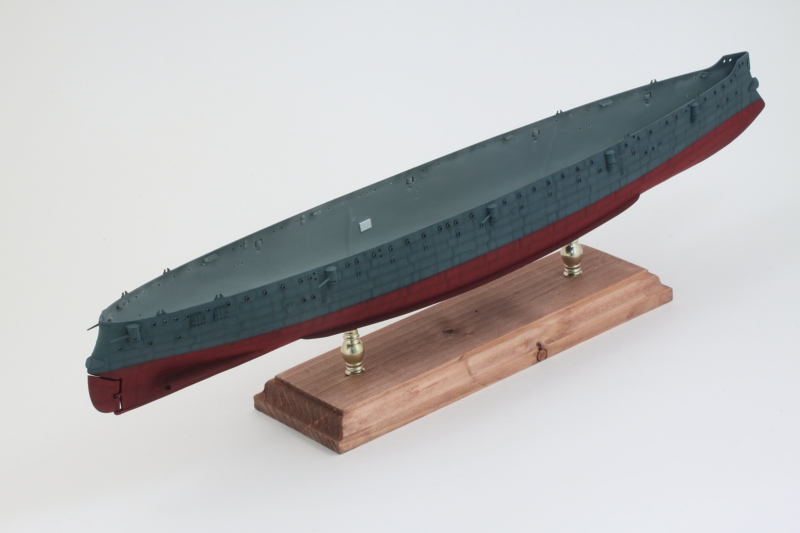
Next up will be working on the remaining details for the hull like the props, picking out the name and federal shield crests, etc. Believe it or not, I'm still on Step 1 of the instructions!
Masking tape came off and everything looks like it should!
Next up will be working on the remaining details for the hull like the props, picking out the name and federal shield crests, etc. Believe it or not, I'm still on Step 1 of the instructions!
-
Bill Plunk
- Posts: 1245
- Joined: Wed Sep 28, 2022 10:18 pm
WIP 05-18-2016
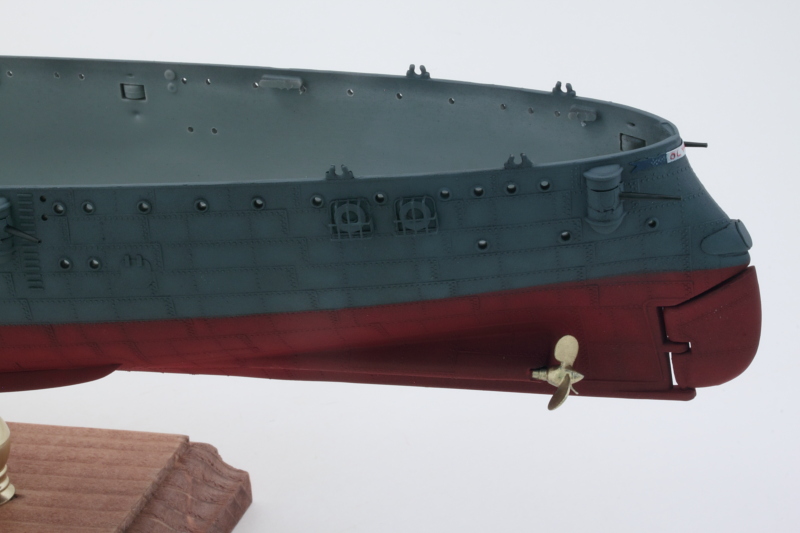
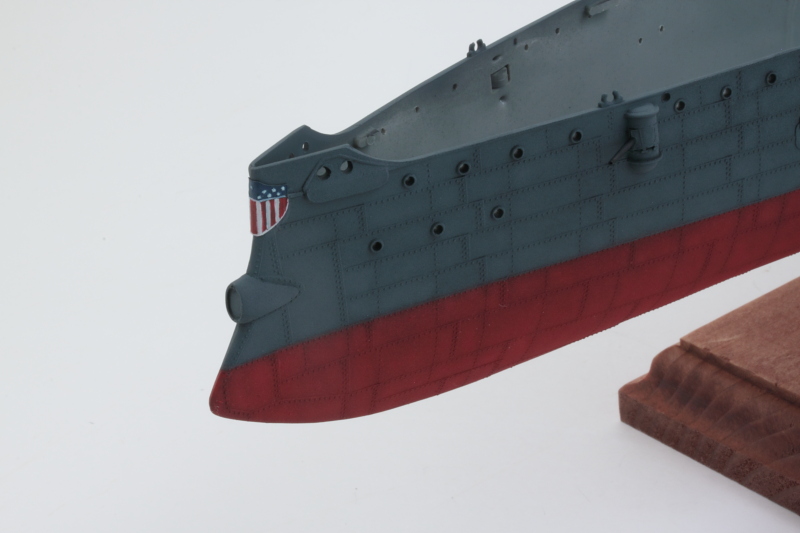
If the devil's in the details, then I spent the day dancing with him for sure! Optivisor got quite the workout today as I picked out both the bow and stern crests, applied Flat Black to the 6-pounder guns, installed the propellers, and added the life rings to their cages.
For the stern badge, I used Light Gray (instead of White), Flat Sea Blue, and Insignia Red in accordance with the instructions color guide in Step 17, the final step. Why they wait until then for the color call-outs is curious but I suppose they assume you wouldn't paint until everything was done on the construction.
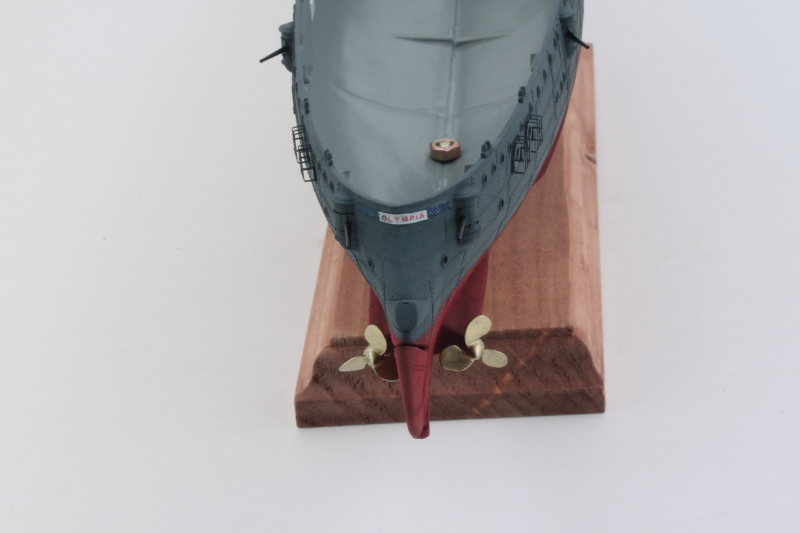
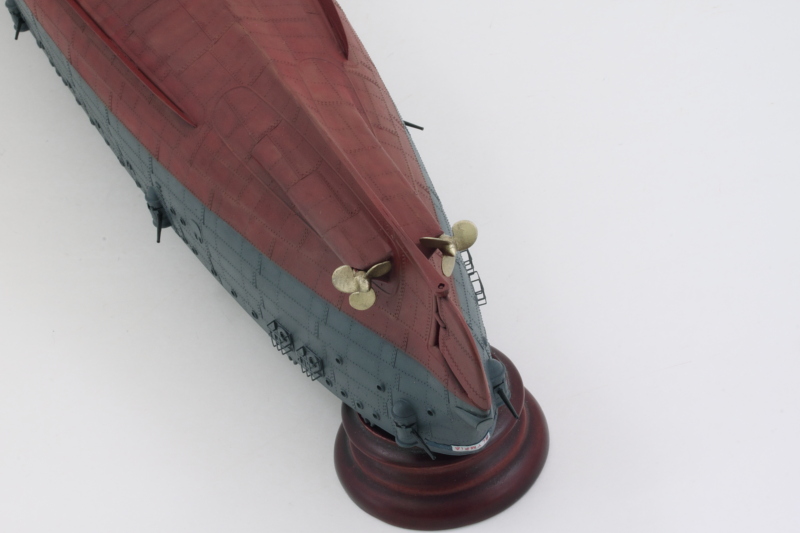
The propellers are resin replacements and had a lot of flash to clean up, but were still an improvement over the kit parts. They are handed so I had to be sure to avoid mixing them up while working on them. MM non-buffing Metalizer Brass did the trick for them. The left side propeller's shaft was cast short so I had to add some styrene rod to make the full shaft to match the opening in the hull sponson.
On the bow, the Federal shield took the most time to get it to look right. Toughest part was the demarcations between the red and white stripes. The PE helped but the edges between the sections were very fine, so lots of back and forth with careful touch-ups using an 18/0 pointed brush were called for. Definitely worth the effort as a decal here just wouldn't have the same 3-D look to it that the PE provides.
I can now say that I'm finally done with Step 1! I still need to seal up the hull and do some additional weathering to it before I can permanently attach it to the stand and move on to Step 2.
For the stern badge, I used Light Gray (instead of White), Flat Sea Blue, and Insignia Red in accordance with the instructions color guide in Step 17, the final step. Why they wait until then for the color call-outs is curious but I suppose they assume you wouldn't paint until everything was done on the construction.
The propellers are resin replacements and had a lot of flash to clean up, but were still an improvement over the kit parts. They are handed so I had to be sure to avoid mixing them up while working on them. MM non-buffing Metalizer Brass did the trick for them. The left side propeller's shaft was cast short so I had to add some styrene rod to make the full shaft to match the opening in the hull sponson.
On the bow, the Federal shield took the most time to get it to look right. Toughest part was the demarcations between the red and white stripes. The PE helped but the edges between the sections were very fine, so lots of back and forth with careful touch-ups using an 18/0 pointed brush were called for. Definitely worth the effort as a decal here just wouldn't have the same 3-D look to it that the PE provides.
I can now say that I'm finally done with Step 1!
-
Bill Plunk
- Posts: 1245
- Joined: Wed Sep 28, 2022 10:18 pm
WIP 05-22-2016
Made some more progress today on the main hull. I had airbrushed a protective coat of Future acrylic floor polish and let that set for a good 24 hours before I started on weathering the anti-fouling red areas. I used the dot filter approach here, applying small dots of enamel Flat Brown and MM enamel Leather and blending them together with a square tip brush lightly dampened with thinner. I worked in small sections at a time to avoid the dots drying and wore a breather mask due to the thinner fumes.
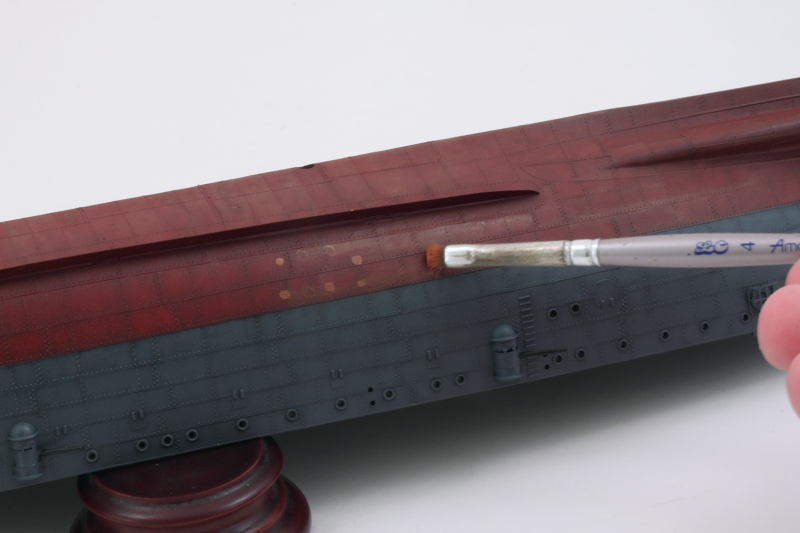
After a couple of hours, I had one side done. Then it was just a matter of rinse-and-repeat for the other half. The combination of the dot-filter and the previous pre-shading work did the trick in terms of providing the variation to the red I was after.
The propellers were also bronzed with a thin wash of MM enamel Burnt Umber over the previous Metalizer Brass base to round things out for the day.