Encore 1/232 Protected Cruiser USS Olympia Premium Edition (2016)

Bill Plunk
Posts: 1245
Joined: Wed Sep 28, 2022 10:18 pm

WIP 05-23-2016

Post by Bill Plunk »

I didn't have a big enough block of bench time available to continue with the hull weathering just yet but did have enough to work on one of the other important detail areas, the 5-inch gun batteries. There are 10 of these that install on the 2nd deck level and each had to be cleaned up and a slight mold shift seam issue dealt with first. Plastic barrels were removed and the breeches sanded square and holes drilled with a #70 finger drill to accept the mount pins on the brass barrels. Add a little bit of CA and voila! The makeover is complete.

Image

These guns install into barbettes that will all but obscure the breech portions so it's not a big deal that they are devoid of any real detail, they just need to look the part sticking out from the mounts. :)
Bill Plunk
Posts: 1245
Joined: Wed Sep 28, 2022 10:18 pm

WIP 05-24-2016

Post by Bill Plunk »

Started in on weathering the Navy Gray sections of the hull and got one side done before I had to call it quits for the next couple of days. I applied a dot filter using MM enamel IJN Sky Gray and Gunship Gray in a 2-1 ratio. The dots were blended horizontally first to get them onto their planking sections and then additional blending vertically with a smaller square tip brush since these were surfaces above the waterline and there would be the inevitable streaking/staining/fading from exposure to salt water.

Image

Image

Image

This isn't the final look for the hull, I'll come back and do some pin wash treatment to bring back out some of the raised hatch detail and portholes of course. The one side took about 2.5 hours to get it to this stage, so half way there! :)
Bill Plunk
Posts: 1245
Joined: Wed Sep 28, 2022 10:18 pm

WIP 05-25-2016

Post by Bill Plunk »

2nd verse, same as the first! :) Got the dot filter treatment on the opposite side of the hull dark gray.

Image

Image

Next up will be some long sessions with the pin wash treatment.
Bill Plunk
Posts: 1245
Joined: Wed Sep 28, 2022 10:18 pm

WIP 05-26-2016

Post by Bill Plunk »

More time spent today impersonating Darth Vader with the breather mask in order to continue the hull weathering process. Using a pointed 18/0 brush, i applied a pin wash of MM enamel Burnt Umber to the rivet lines and hull plates on the dark gray areas.

Image

This was tightened up using a small square tip 10/0 blender brush lightly dampened with clean thinner.

Image

3 hours later more or less and I had one hull side done.

Image

Image

Will rinse and repeat for the other side!
Bill Plunk
Posts: 1245
Joined: Wed Sep 28, 2022 10:18 pm

WIP 05-27-2016

Post by Bill Plunk »

More fun with the breather mask today meant I was able to get the rest of the pin wash work on the dark gray portion done on the port side.

Image


Image

That meant I could turn my attention back to the hull red areas. I mixed up a wash using roughly 90/10 thinner/Flat Brown (the little square bottle Testors enamel color) and applied it with the same 18/0 pointed brush used on the gray portions.

Image

Same drill in terms of tightening it up with the 10/0 square blender brush and now the starboard side is completely weathered.


Image

Image

Ran out of hours in the day, so tomorrow will get the port side red done and then I think it will be time to seal it all up and get it mounted permanently on the stand.
Bill Plunk
Posts: 1245
Joined: Wed Sep 28, 2022 10:18 pm

WIP 05-29-2016

Post by Bill Plunk »

Final round with the pin-wash treatment was completed today. After a total of about 12 hours for the full hull, I got the last section of the anti-fouling red done.

Image

Image

I'll give my eyes a break and look it over one more time tomorrow to see if it needs any tweaking before it all gets sealed up with the flat coat.

Image

I'm definitely looking forward to doing some non-thinner based work for a while, it started to feel like the breather mask had become permanently attached to my face. :)
Bill Plunk
Posts: 1245
Joined: Wed Sep 28, 2022 10:18 pm

WIP 05-30-2016

Post by Bill Plunk »

After spending 3 weeks working on the main hull, I can say that stage is now firmly done. I applied some MM Lusterless Flat via the spray can to seal in all the paint and weathering work done so far. It also knocked down some of the residual Future gloss and unified the hull in the process.

Image

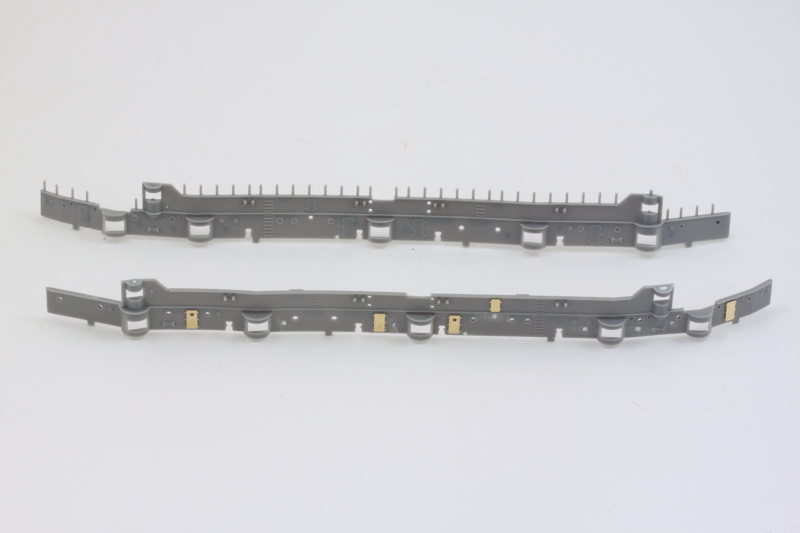
The main deck consists of 3 separate parts so I removed those from the sprue and cleaned them up so I could do a test fit with the main hull to be sure I wouldn't encounter any problems down the road after it was permanently installed on the stand.

Image

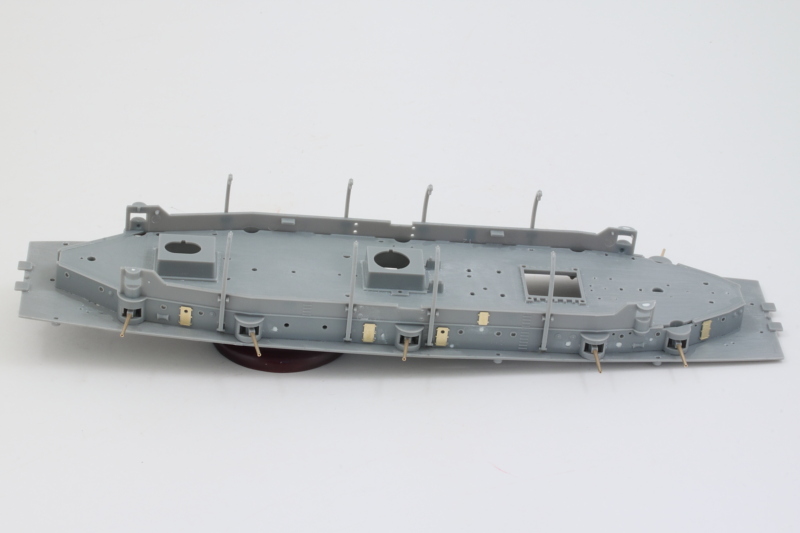
Everything plays nice with a snug fit into the hull, there will be some small gaps at the stern that I will need to address but nothing major. The wood decks will cover over the joins in the three sections so that's also not a concern.

Image

I mounted the hull onto the stand posts and added the locking nuts. These were gently tightened and CA added to the top of the threads to secure them in place. I added a drop of CA accelerator and another dose of CA to cap it all off. That meant I could finally move on to Step 2! :)

Image

Each of the deck portions has a raised planking pattern molded in place, so that had to go to allow the wood deck veneers a smooth and even surface to adhere to. This was sanded down with a sanding stick and the tighter spaces dealt with using a combination of smaller sanding sticks and the back edge of a #11 blade to gently scrape away the pattern.

Image

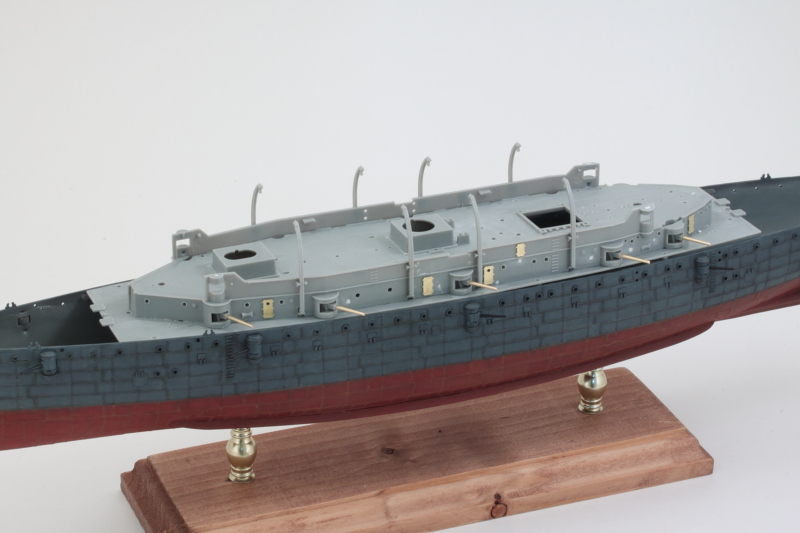
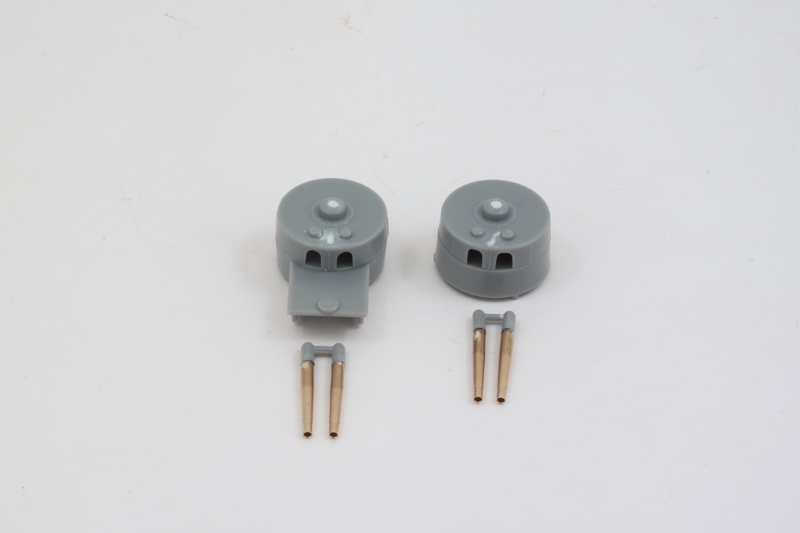
Once that was done, the ten 5-inch guns that I had assembled earlier were snapped into position in their casemates.

Image

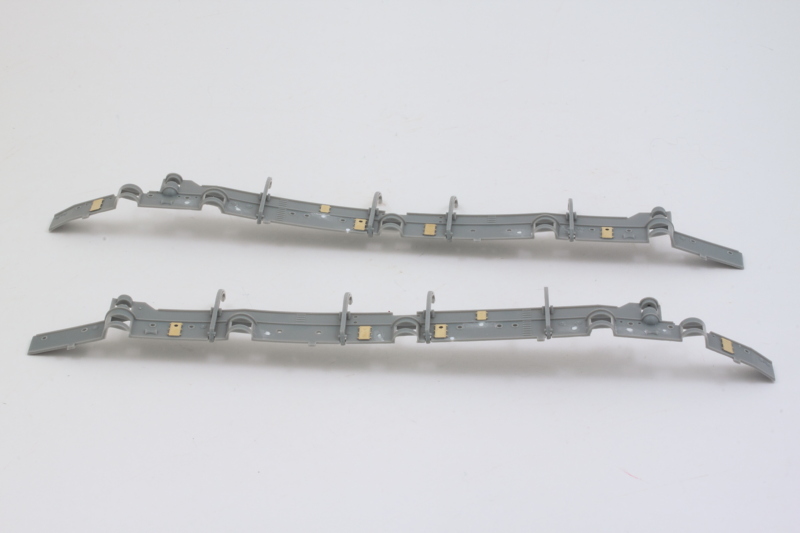
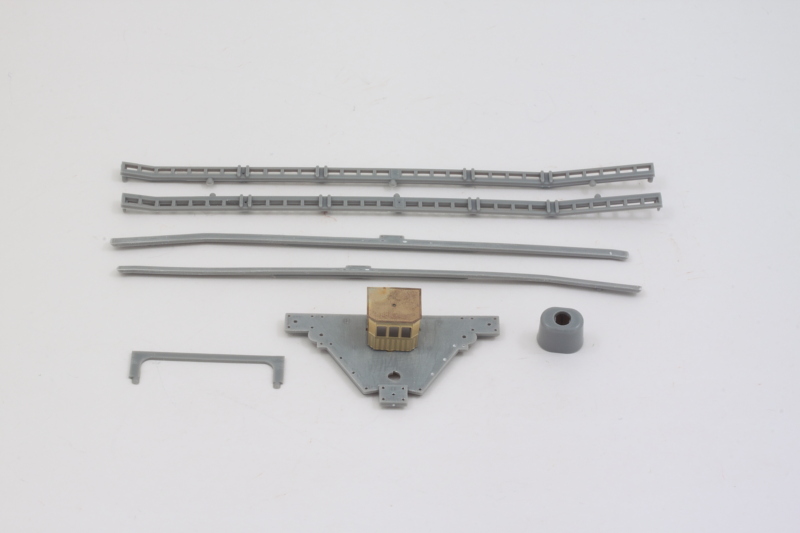
Still plenty to do in Step 2 in terms of getting the deck side plates cleaned-up and ready for installation and adding other details.
Bill Plunk
Posts: 1245
Joined: Wed Sep 28, 2022 10:18 pm

WIP 05-31-2016

Post by Bill Plunk »

I spent the day's effort working on getting the superstructure sides cleaned up and prepped for install. Turned out to be more work than I anticipated and managed to get one of the two sides done. I removed all the molded-on railing stanchions with sprue cutters and cleaned up their nubs. Some large ejector pin/mold stubs on the backside were also removed so that it would fit cleanly into the cutouts on the main deck. There were also some sunken spots that needed putty and I looked ahead in the instructions to see which mount holes were needed and which needed filling. For the two large holes meant to take a ladder that will be replaced with PE, I filled those using styrene rod and liquid glue instead of putty. The hatches received the set's PE details and I drilled out all the portholes. The instructions are a little vague on which hatches to use, the set provides both solid doors and ones with portholes included...but not enough of the porthole type to do all the hatches. I opted to use two with portholes in the spots where there were other portholes already for a little variety. One side down, one to go!

Image
Bill Plunk
Posts: 1245
Joined: Wed Sep 28, 2022 10:18 pm

WIP 06-02-2016

Post by Bill Plunk »

Managed to get the other side of the superstructure done and installed the 4 boat davits per side. The davits snap into the openings in the side and I left them unglued until after installation to the main deck so I could be sure they would all line up properly.

Image

As you can see in the previous photo, the sides have some flex/bowing action going on, so getting them to line up properly with the superstructure sides took some coaxing. I started at the bow and used liquid glue and finger pressure and worked my way down one side at a time. All of the surfaces are too thin/flexible for clamps, so there was no other real way to do it except the old fashioned way! :)

Image

The 5-inch guns remain movable inside their casemates and that will make painting them easier as well. Boat davits were squared up and glued into permanent position After the glue has fully set, I'll need to do a little bit of putty work in a couple of small spots but not a ton.

A quick test fit into the hull shows everything is still lining up as it should. Due to the way the wood decks are designed, those have to go on before the hammock frames can go in on either side but I did a test fit with them already to be sure that wasn't going to pose a problem later on.

Image

Upper works are starting to take shape!
Bill Plunk
Posts: 1245
Joined: Wed Sep 28, 2022 10:18 pm

WIP 06-04-2016

Post by Bill Plunk »

I always like to make the most of airbrush painting sessions so I decided to work on some of the superstructure elements that will go in after the wood decks are applied. There's a set of hammock frames that runs around the outer edge of the boat deck and these are also topped with a walkway that leads up to the bridge deck. The walkways had their raised planking sanded down as did the bridge deck.

The PE bridge itself was assembled with some carefully applied CA on the inside joints since it's an origami-like 6-sided structure that starts out as a single flat piece vs. the kit's square box panelled structure. The top of the bridge is it's own separate PE piece that had a slight curve to it once removed from the fret, so I annealed it and carefully flattened it so it would sit level. The PE bridge is removable to support painting and won't be permanently installed until after the wood deck is applied. Last but not least, the conning tower part was cleaned up and prepped along with the back support for the bridge deck.

Image

The two 8-inch turrets were cleaned up and prepped as well. The tops of the turrets are secured to the bases with a pin-and-cap arrangement and are meant to be able to rotate, so that will happen after painting to make life easier since the gun barrels are a separate color from the turret. The tops of the turrets had a couple of sunken spots that needed to be filled with putty and sanded down.

The guns themselves were cut down and the bases drilled out to accept the brass barrel replacements. I used an old trick of darkening the ends with a black Sharpie so I could be sure I had the drill bit centered as there's very little margin for error due to the size of the pins. Some CA and voila! both pairs of 8-inch guns were done.

Image

Next up will be airbrushing all the main deck components so I can get them installed and add the wood decks.
Post Reply