Encore 1/232 Protected Cruiser USS Olympia Premium Edition (2016)

Bill Plunk
Posts: 1245
Joined: Wed Sep 28, 2022 10:18 pm

WIP 06-05-2016

Post by Bill Plunk »

I did a quick check through the instructions to see if I needed to plug or adjust anything more on the main deck and sure enough, I found a couple of things I'd overlooked. One was the top caps for the two rear-most 5-inch guns called out in Step 3 so those were added and sanded down flush to the rest of the deck. The other was the four post holes in the large engine access hatch that is mentioned in Step 8. Those holes were filled with styrene rod and liquid glue since they were a little too deep for just putty.

Image

With that out of the way, I airbrushed a primer coat of MM enamel Flat Black where needed. For the decks, I only sprayed where there might be a little bit peeking out around the various fittings as a precaution. The wood decks seem to be a pretty tight fit to the kit parts but always better to be safe than sorry.

Image

2nd round of airbrushing added the MM enamel Gunship Gray base coat. Once that's had a chance to cure overnight a bit, I'll need to go back over the 5-inch guns and touch them up a bit but overall, they retained their Flat Black treatment for the most part as intended.

Image

I'm going to add the boat deck wood deck portion while the whole deck is still separate from the hull as that should make life a little easier both in adding the deck and allowing me to add the crew hammock racks and walkways. That way if I need to do any touchups afterwards, I can do that without risking the rest of the hull's finish in the process.
Bill Plunk
Posts: 1245
Joined: Wed Sep 28, 2022 10:18 pm

WIP 06-06-2016

Post by Bill Plunk »

One of the long-standing rules of thumb in ship building is to work your way from the bottom up and the inside out...and nowhere is that more true than on the boat deck of the Olympia. The wood deck mostly fit like it was supposed to for the first 2/3 or so of its length but there were some adjustments needed in spots to trim the openings around the aft funnel and the engine hatch in particular. I also had to trim down the rectangular tabs that are meant to serve as attachment points for the hammock frames in order for the wood deck to actually fit since it's designed to go under the hammock frames themselves. Once I had the deck in place, I added the hammock frames and installed their top walkways with liquid glue. After the glue had set, I lightly sanded the join edge so it would be flush with the hull edge. Then the walkway wood decks were added to round things out.

Image

Image

The wood deck portions for the main deck areas can't be added until after the deck sections are installed into the hull, so that will be the next task. In hindsight, I do wish I'd waited to secure the boat davits and instead allowed them to hinge in/out as that would've made life so much easier when adding the decks, but that's why it's 20/20! :D
Bill Plunk
Posts: 1245
Joined: Wed Sep 28, 2022 10:18 pm

WIP 06-09-2016

Post by Bill Plunk »

I've been working on the different fixtures for the boat deck level and one of those involves four of the 6-pounder guns. These guns are in 'exposed' mounts on the boat deck, two fore and two aft. The kit recreates these using a combination of brass barrels, white metal breaches, and PE pedestal stands. That, in turn, requires a good bit of time to get them all together between drilling out the white metal and shaping the pedestal PE to the right height and spacing with their octagonal leg arrangements.

Image

The guns have to contend with some tight spacing arrangements and the pedestals need adjustment to deal with that on a gun-by-gun basis. The two forward guns are the easier pair in this regard as there's only the one frame support for the bridge deck level above it.

Image

The aft guns are a little trickier due to the double supports for the walk-way level that sits over their area. That isn't dealt with until Step 11 in the instructions but I went ahead and cleaned up the platform and supports and assembled it so I could be sure there wouldn't be any interference there. This proved very helpful as the fit is pretty tight and most of the guns disappear in the process. The walkway structure will get a dose of paint and won't be installed for a while just yet, as you can see there's other stuff that has to into the mount holes in that area first.

Image

Speaking of the rest of the boat deck fittings, I cleaned up the components called out in Step 6 consisting of the water tank, vent box covers, and the skylights. The skylights got their PE enhancements as well while I was at it. I'm really glad I decided not to install the main deck into the hull, most of the mount holes have had to be slightly adjusted to one degree or another and handling that is much easier with the deck separate vs. installed.

Image

Next up will be dealing with the numerous funnels and the boat racks.
Bill Plunk
Posts: 1245
Joined: Wed Sep 28, 2022 10:18 pm

WIP 06-10-2016

Post by Bill Plunk »

Spent the day working on all the air funnels for the different areas on the deck. These are the parts that need the most clean-up out of the entire kit, so I knew it was going to be a fun session. I put a clean #11 blade into the knife handle and set to it, removing flash, adjusting mold shift seams, and generally getting them presentable. Murphy would approve, the ones with the most flash and worst shifts were the 8 smallest of the bunch. :)

Image

I also cleaned up the boat support frames and did a mock-up to see how things were going to look on the boat deck with the fittings I've assembled so far.

Image

I still need to assemble the intricate PE replacement for the main engine access hatch, that's a little kit all by itself, but will do that after I've got the current batch of stuff painted and dealt with.
Bill Plunk
Posts: 1245
Joined: Wed Sep 28, 2022 10:18 pm

WIP 06-11-2016

Post by Bill Plunk »

I decided to go ahead and work on the engine access hatch PE assembly so I can include it in the next round of airbrush work. It's a delicate assembly of 12 different pieces of PE. I bent up the base box shape first and hand-painted its interior with the Gunship Gray so that there wouldn't be any bare brass showing later. Then the top was added and the side bow frames for the canvas foul-weather cover installed. These frames have very small tabs that slot into the base box and tension is enough to hold them in place until the small side rails were glued in to lock them in position on either side. Definitely a test of the Optivisor and steady hands skill departments! :)

Image

This is how it will sit on the boat deck after it's painted and installed with the other fittings.

Image
Bill Plunk
Posts: 1245
Joined: Wed Sep 28, 2022 10:18 pm

WIP 06-15-2016

Post by Bill Plunk »

I've been working on getting the boat deck's fixtures painted prior to their installation. Everything received a primer coat of MM enamel Flat Black via the airbrush as a starting point. The funnels were next and I airbrushed some MM enamel Insignia Red to recreate their anti-fouling red mouths and interiors. I placed them face down on a strip of masking tape and then airbrushed the MM enamel Gunship Gray to complete their appearance.

Image

Skylights, the auxiliary steering wheels, bridge, and aft companionway hatch needed a mahogany finish, so I airbrushed a 50/50 custom mix of MM enamel Leather and Military Brown over the Flat Black to recreate that type of look.

Image

MM enamel Gunship Gray was airbrushed on the aft elevated platform deck, the spotlight platform stands, and the other fittings as needed. The spotlights themselves had their solid faces drilled out to up their detail vs. leaving them as-is.

Image

The four 6-pounder guns were also detailed after getting the Flat Black primer treatment. These were painted by hand under the optivisor with a 10/0 pointed brush.

Image

That means I can start adding all this stuff into position! :)
Bill Plunk
Posts: 1245
Joined: Wed Sep 28, 2022 10:18 pm

WIP 06-16-2016

Post by Bill Plunk »

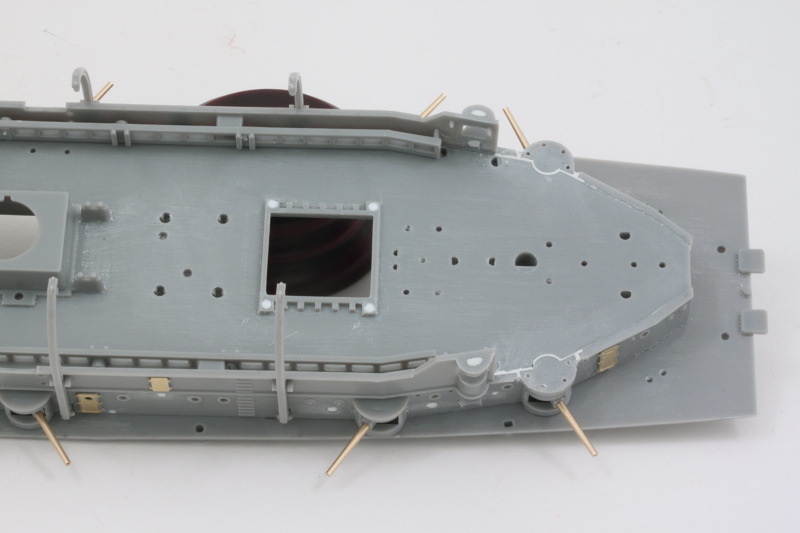
Big round of progress today in terms of getting all the different elements in place on the boat deck. First up, I added all of the wood decking to the searchlight platforms, the bridge deck, and the crossover walkway. The pilot house got it's deck as well and was installed after I removed the un-needed frame and deck on the kit's part. The instructions don't tell you to do this and the PE pilothouse is designed to slide over it, but the wood deck cutouts weren't big enough to fit, so rather than hassle with that, I just removed it. Easy solution!

Image

Regardless of whether I had removed the structure or not, there was still the problem of there not being a floor for the pilothouse itself. The kit just leaves this open but I took the cutout portion from the boat deck that was around the base of the engine access hatch and used it to 'patch' the hole and add a wood floor at the same time. Some CA was used to secure it and I left the clear backing on the wood itself so I could paint it to match the rest of the underside of the deck platform.

Image

After installing the pair of 6-pounder guns into position, I added the bridge deck. Clamps were needed to get it down on the sides and rear and join up solidly, something that would've been impossible had I installed the decks into the hull before this as the instructions would have it done.

Image

One the bridge deck was in place, I added the rest of the fixtures to the rear area first, then installed the raised crossover walkway level. Once that was in place, the remaining pair of 6-pounders were installed and the rest of the fittings added to the remaining sections.

Image

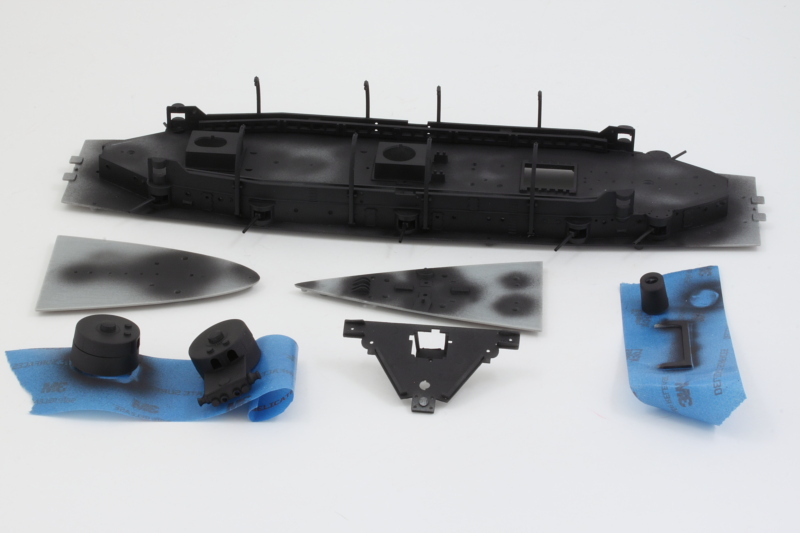
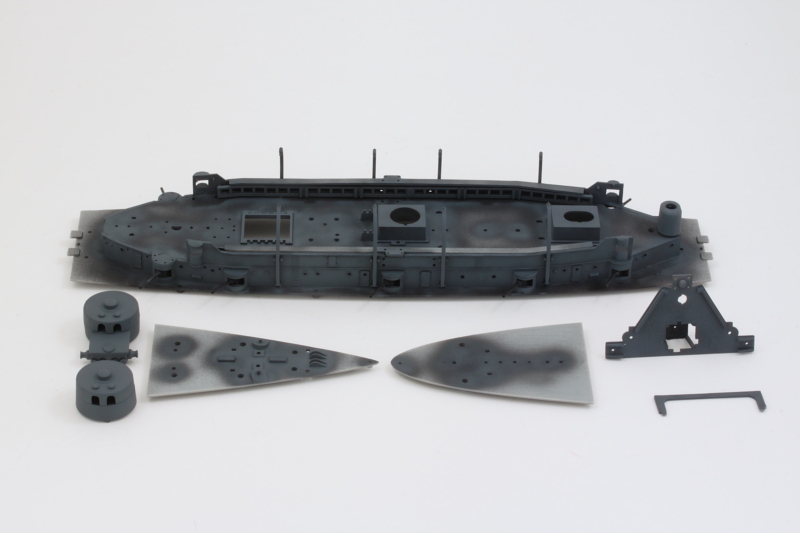
Because of how tight the space is around the searchlight platforms and the fact that the railing for the walkway is one long single piece, I'll hold off adding the searchlight platforms until after I have the deck in the hull and am ready to tackle the railings in general.

Image

Image

I did a test fit with both the masts and the smoke funnels to be sure they would play nice when it came time to install them, so it won't be necessary to add them now thankfully. Still plenty to do on this one but it's starting to look like a ship!
Bill Plunk
Posts: 1245
Joined: Wed Sep 28, 2022 10:18 pm

WIP 06-17-2016

Post by Bill Plunk »

Spent the day working on getting the main deck section weathered so it would match the hull. To that end, I airbrushed a coat of Future and then applied a dot filter using MM enamel IJN Sky Gray and MM enamel Gunship Gray. Once I was happy with that, I applied a pin wash with MM enamel Burnt Umber and a pointed 18/0 brush. The pin wash was tightened up with the same brush and clean thinner where needed.

Image


Image

Will let that sit so I can look it over with fresh eyes to see if there's anything else I need to adjust before it gets installed into the hull.
Bill Plunk
Posts: 1245
Joined: Wed Sep 28, 2022 10:18 pm

WIP 06-18-2016

Post by Bill Plunk »

The moment of truth arrived today, time to install the decks into the hull! After a quick once over and a couple more small adjustments, I sealed up the main deck section with a dose of MM Lusterless Flat in the rattle can. I started at the bow and added that deck plate section first, then the middle section, and finally the stern plate. The tight with the hull sides was pretty good, just liquid glue and some gentle finger pressure in a couple spots was all that was needed. The stern plate needed some putty help due to a slight mold deformation on the starboard side that I knew would be an issue way back when I joined the halves together. The gaps between the midsection and the bow and stern plates wasn't an issue since the wood deck overlays were going to literally paper over that in a bit.

Image

Fitting the wood decks themselves required a little strategic trimming and fitting in different spots. The whole deck area is covered in 4 separate pieces (bow, stern, two for the sides around the secondary battery casemates), so I began once more at the bow. This is where having the 5-inch guns remain movable in their casemates really helped as fitting the v-shaped section is pretty tight.

Image

The small mid-section pieces went on without issue and the stern section had similar issues with the bow but with more trimming needed as the pre-cut dimensions didn't quite match up as well here with the kit.

Image

All the wood deck areas are now in place, next up will be turning my attention to the smoke funnels and the masts.

Image
Bill Plunk
Posts: 1245
Joined: Wed Sep 28, 2022 10:18 pm

WIP 06-19-2016

Post by Bill Plunk »

I started work on the pair of smoke funnels and the first order of business was to remove all the molded-on details that would be replaced with PE parts. I did this while the funnel halves were still separate as that was the easiest way to get at the stuff that needed to go. The small platforms around the tops of the funnels were originally meant to mate up with the undersides of the funnel caps, but since they were removed, that caused varying degrees of issue between the two different arrangements. The forward funnel needed the most work in the form of some added styrene and putty to build back up the necessary area while the aft funnel just needed some careful sanding. The PE mesh screen inserts were also added for good measure at this stage.

Image

I airbrushed both funnels with a primer coat of MM enamel Flat Black. This would do double duty in terms of painting the funnel caps and also serving as the underlying coat for the Gunship Gray areas. The black caps were masked off and the gray airbrushed after some minor touch-ups to the previous putty and sanding work were done.

Image

The the real fun began. I added the PE platforms and access ladders using very small amounts of CA applied with the tip of a #11 blade. I found it easiest to install the ladders first and use them as the baseline to add the platform parts around them. The long runs of ladder on the funnels are actually 2 different parts that are joined together due to the fact that the funnels have a slight backward rake to them.

Image

I've handpainted the PE details to match and just need to do some slight airbrush touch-ups before these will be ready to install in place.
Post Reply