Trumpeter 1/350 USS Texas BB-35 (2015)
-
Bill Plunk
- Posts: 1245
- Joined: Wed Sep 28, 2022 10:18 pm
Trumpeter 1/350 USS Texas BB-35 (2015)
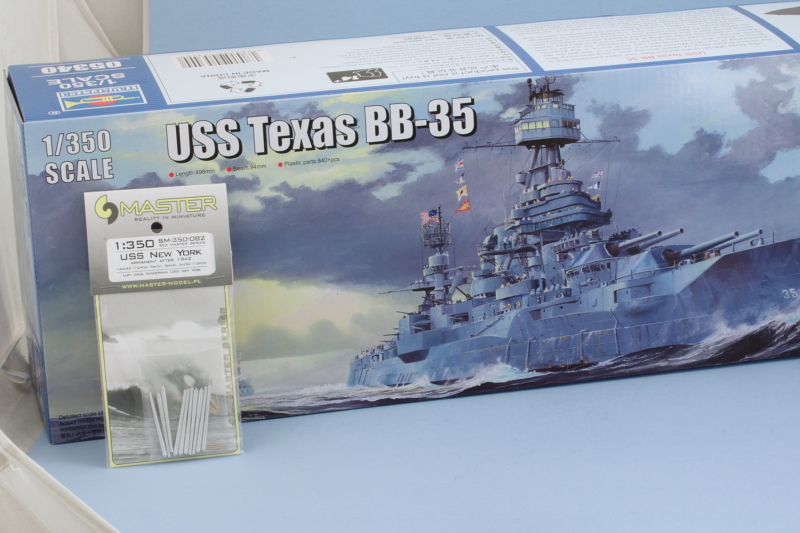
Build log for Trumpeter 1/350 kit #05340 USS Texas BB-35 in combination with a Master turned aluminum and brass barrel set.
-
Bill Plunk
- Posts: 1245
- Joined: Wed Sep 28, 2022 10:18 pm
Re: Trumpeter 1/350 USS Texas BB-35 (2015)
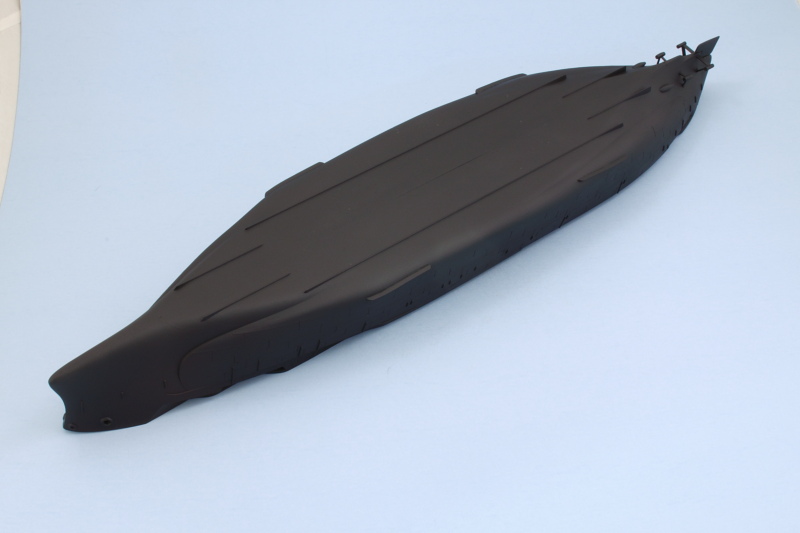
Got off to a start, of sorts, today with this project. I knew going into it that the hull was going to require a lot of work due to the massively over-scale weld lines that Trumpeter produced. No idea what they were thinking...1mm wide raised weld seams translates into 350mm wide welds on the real deal, so a lot of sanding and adjustment is called for. Got half way done on the port side before calling it a day. Lots more to go!
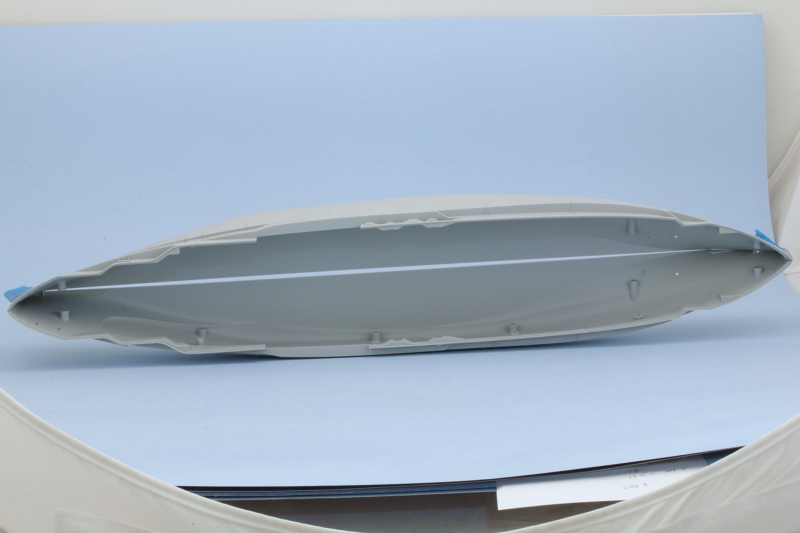
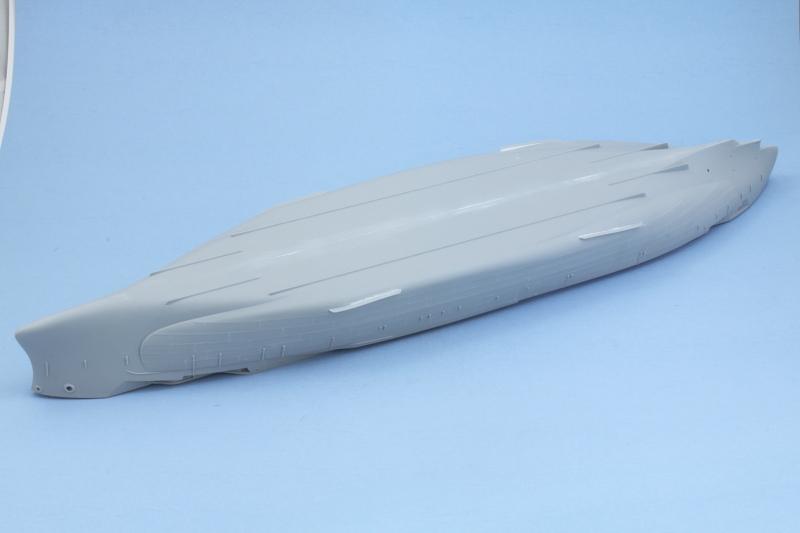
I also checked the hull fit alignment and there's potentially another nasty surprise waiting for me. See below...that's quite a gap but perhaps once the bulkheads are fitted it will help pull it all together.
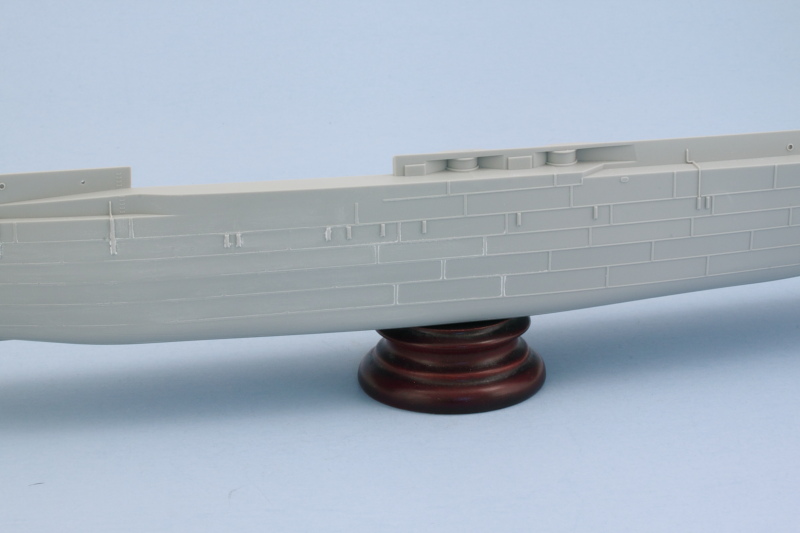
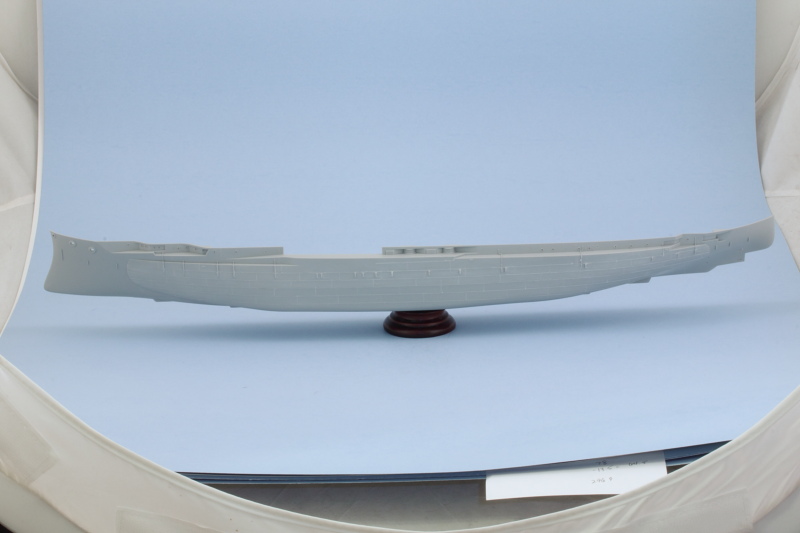
As you can see, Texas is a big girl! Barely fits inside the photo booth's light tent.
I also checked the hull fit alignment and there's potentially another nasty surprise waiting for me. See below...that's quite a gap but perhaps once the bulkheads are fitted it will help pull it all together.
As you can see, Texas is a big girl! Barely fits inside the photo booth's light tent.
-
Bill Plunk
- Posts: 1245
- Joined: Wed Sep 28, 2022 10:18 pm
WIP 09-12-2015
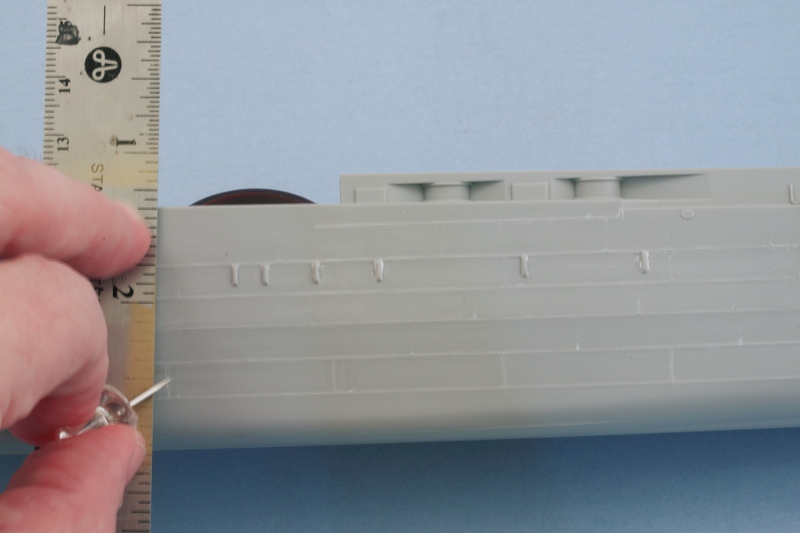
Managed to get the first hull half done today in terms of sanding down the waffle-iron weld seams. One of the casualties in the course of doing that though is the vertical plate lines/joins. After giving it some thought, I decided to scribe in some division lines. A metal ruler as a straight edge and a sharp new thumbtack did the job nicely. I had debated using some super-fine copper speaker wire to do the same thing as a raised pattern but I don't think it would survive all the masking and painting that I have to do on the hull to create the Measure 22 scheme. Better to err on the side of caution...besides, I can always add the wire after I've painted if I decide I don't like the look of the scribed dividers and the scribed lines will ensure I can at least faithfully recreate the pattern if I decide to go that route.
One half down, one to go!
One half down, one to go!
-
Bill Plunk
- Posts: 1245
- Joined: Wed Sep 28, 2022 10:18 pm
WIP 09-14-2015
After spending several hours over the last three days correcting the hull weld seams, I finally got a chance to glue some parts together on this project! 
Step 1 in the instructions calls for the hull halves to be joined together in combination with the bulkheads and deck supports. These fit somewhat loosely with a little bit of play which is a good thing considering the hull gap that I pointed out earlier. The hull fits snugly at both the bow and stern but needs a good deal of coercion to meet in the middle. I started by inserting the bulkheads in position and then used a couple of sliding clamps to bring the halves together in the middle. I did a quick test fit of the deck inserts to make sure they would sit properly later on and to ensure the bulkheads sat properly with their alignment. I had to place the clamps carefully so that they didn't cause the bulkheads to warp or buckle slightly at their top edges. Once that was sorted out, I applied some liquid glue to the bulkhead mount pins so they wouldn't shift again. Then it was time to glue the main hull join. For that task I opted to use a slightly thicker liquid glue produced by Mr. Hobby called Mr. Cement. This was run along the seam from the inside of the hull and then rubber bands added as I worked a section at a time from the bow to the stern to ensure everything played nice.
The Texas is now in traction and will stay that way overnight to ensure everything sets nice and tight before removing the bands and clamps.
-
Bill Plunk
- Posts: 1245
- Joined: Wed Sep 28, 2022 10:18 pm
WIP 09-15-2015
Removed the clamps and bands and everything held together as expected. Just a small amount of sanding and putty work here and there ensured a solid join all around. I also added the stabilizers as called for in Step 3. Step 2 calls for the main decks to be installed, but I'm not ready to do that just yet.
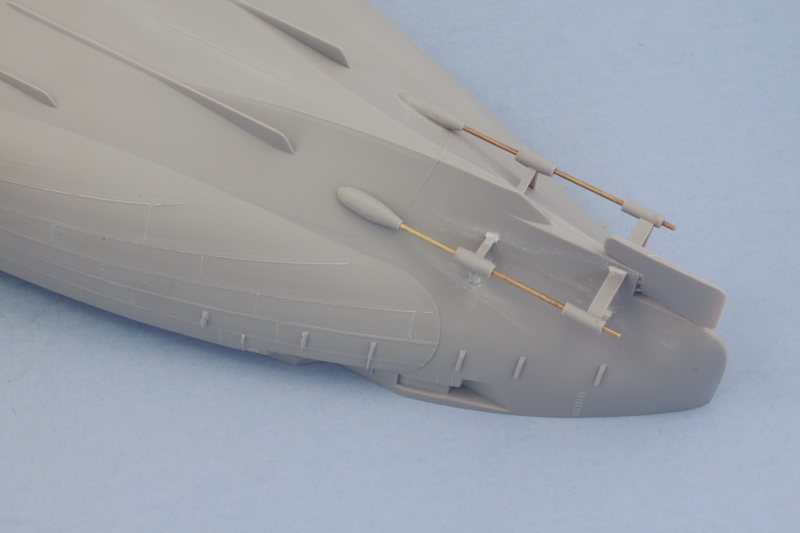
The rest of Step 3 deals with the installation of the prop shafts and the rudder. The base mount includes the long shaft but, unfortunately, the diameter fit with the shaft supports is a little too tight...and I ended up horribly mangling one shaft during the test fit attempts to slide the supports into place. Out came the brass rod for replacement. Clipped off the mangled rod, drilled out a hole in the base part before its install on the hull, and fed the rod through to the right length, then clipped it so there was enough to support the propellers later on. I didn't glue the shafts in place as that makes life just a touch easier for painting and detailing later on. The attachment points molded into the hull are larger than the parts themselves, so a little putty work was needed to correct that too.
Step 3 also calls for the assembly of a whole bunch of detail parts like the AA guns and ladders, but that will be tackled much later on. It's worth noting at this stage though that they repeated the diagram count from the USS New York for the 40mm guns and 10 are needed instead of the 8 called out.
Next up will be getting some paint on the hull!
-
Bill Plunk
- Posts: 1245
- Joined: Wed Sep 28, 2022 10:18 pm
WIP 09-17-2015
As I was checking whether or not I could add the little side sponsons that make up the elevated 5" gun mounts (parts E29 and E31 in Step 5) and attach to the hull before painting, I discovered 2 things. The first is no, I couldn't add them since the main decks have to be in place first. The second is that the top edges of the hull now that they are joined were just a little too narrow for the decks to slot in properly and needed to be spread slightly to avoid putting too much tension on the decks and causing fit problems. The solution to the 2nd problem is fairly straightforward, I needed to put in some braces at strategic points to spread the top edge just enough to eliminate the tension but not too much to create gap issues.
Fortunately, the sprue runner that held the hull halves had some sturdy lengths of sprue that would do the trick nicely. It also helped that the diameter of that sprue is larger than any of the others but is the same diameter as the ejector pins that were used on that mold. All but one of the places I needed to spread the top were at the ejector pin locations...a happy coincidence perhaps? Lengths were cut and sanded down to provide the right tension and voila! One spreader was needed for the bow half, three spreaders for the stern.
That meant I could proceed with the hull painting, so a trip into the spray booth and an airbrushed primer coat of MM Flat Black was laid down in short order. This will do triple duty...primer, pre-shade, and create the boot stripe without having to mask it individually.
The sanding work done earlier looks good under paint, just the right effect in my opinion, so that's a relief! After it's set, I'll work on the hull red section next.
-
Bill Plunk
- Posts: 1245
- Joined: Wed Sep 28, 2022 10:18 pm
WIP 09-18-2015
More time spent with the airbrush today, this time on the hull red portion. I used blue painter's tape to mask off the lower edge of the boot stripe and applied MM enamel Insignia Red in very light thin passes to build up the red and allow for some shading/variation to show through. Having the rudder attached makes it virtually impossible to set the hull on any kind of level surface, so it's being handled separately to avoid having problems with it as the build progresses.

The moment of truth...the tape was removed and did its job beautifully. No touchups required!
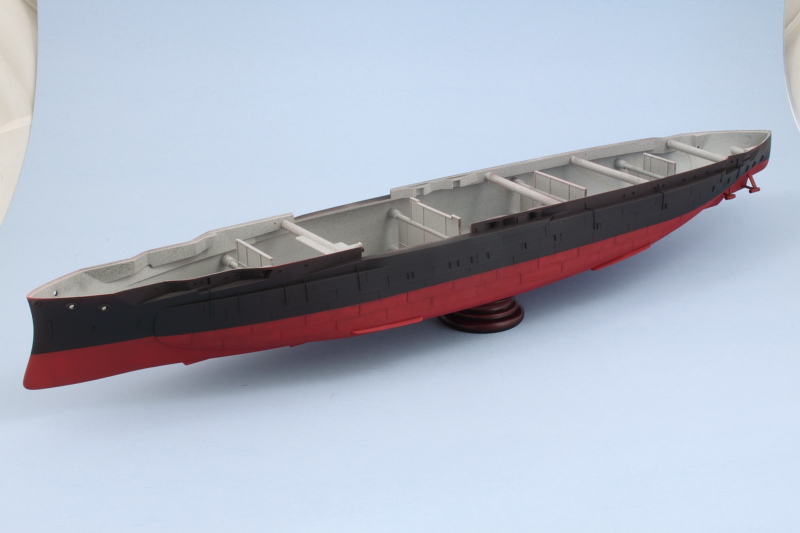
Next up will be masking the top edge of the stripe and adding the 5-N Navy Blue portion of the Measure 22 scheme.
The moment of truth...the tape was removed and did its job beautifully. No touchups required!
Next up will be masking the top edge of the stripe and adding the 5-N Navy Blue portion of the Measure 22 scheme.
-
Bill Plunk
- Posts: 1245
- Joined: Wed Sep 28, 2022 10:18 pm
WIP 09-19-2015
Round 2 in the masking and painting department is complete. This time, the top of the boot stripe was masked and an airbrushed coat of MM enamel 5-N Navy Blue applied. I went ahead and sprayed it over all the exposed areas even though some of it is going to be painted over with the 5-H Haze Gray for the final component of the Measure 22 scheme. It just makes life easier since there's going to be some complicated masking involved to add that final color.

After the paint had touch dried, the tape came off once more. Voila! Boot stripe.
One more round of masking and painting to go before the hull is done.
After the paint had touch dried, the tape came off once more. Voila! Boot stripe.
One more round of masking and painting to go before the hull is done.
-
Bill Plunk
- Posts: 1245
- Joined: Wed Sep 28, 2022 10:18 pm
WIP 09-20-2015
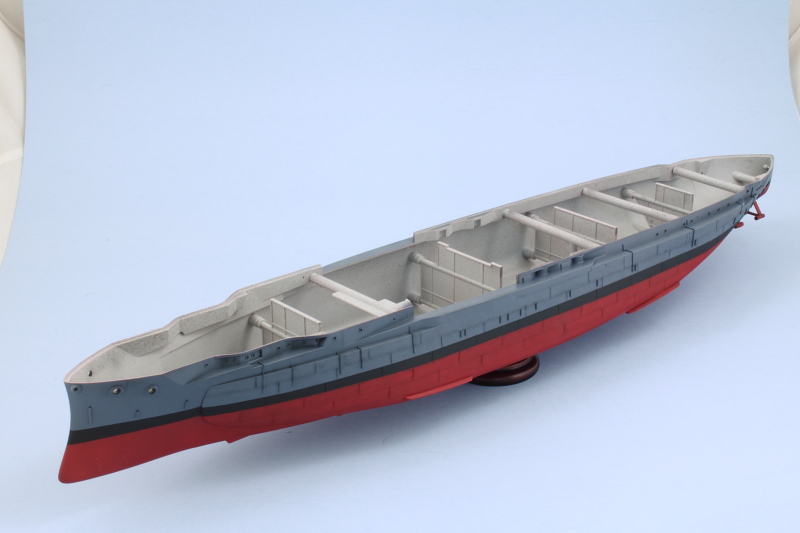
Got the final round of masking work done today. This time, I used thin cut strips of masking tape to create the demarcation line between the 5-N and 5-H. There are some complex curves/areas to deal with, so using the thinner strips helped a lot in that regard. Airbrushed MM enamel 5-H Haze Gray as the third color in the Measure 22 scheme.
I also airbrushed the side bulges that have to stay separate until the main decks are installed. These were airbrushed with the 5-H first then masked to line up with the rest of the hull and the 5-N airbrushed for the areas that overlap onto the lower hull. It's a little ironic in that the 5-H is almost an exact color match to the kit's bare plastic, so that will make things possibly more interesting as I start working on all the little details going forward. Masking tape was removed and voila! Measure 22 is in place.
Next up will be getting the 20-B Deck Blue on the main decks.
-
Bill Plunk
- Posts: 1245
- Joined: Wed Sep 28, 2022 10:18 pm
WIP 09-21-2015
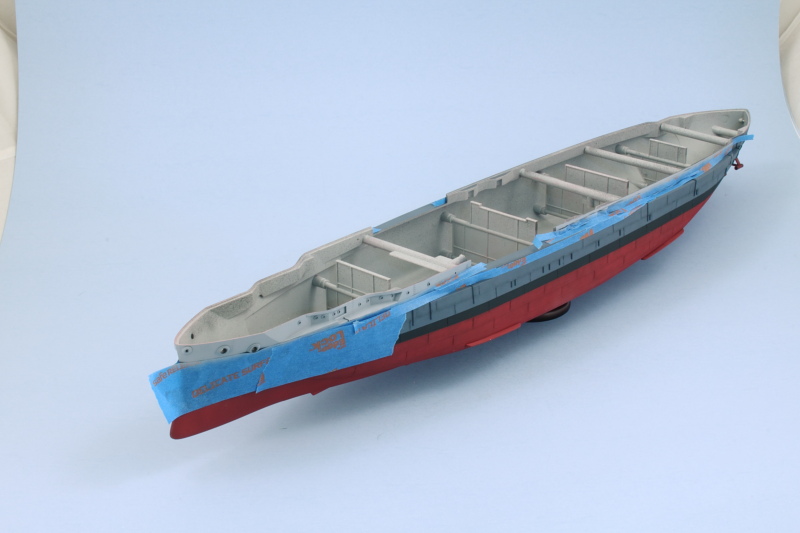
I was playing around in the photo booth today and decided to shoot the hull again on a white backdrop to see how much of a difference it would make with the color scheme. In the previous shots, the 5-N was showing more of a gray tone than blue...something I attribute to the light blue background, so here it is with the white. I'll probably stick with the white from here on out as it seems to be giving a much more accurate representation of the tonal variations achieved so far.
Speaking of tonal variations...more time with the airbrush got the 20-B Deck Blue sprayed on the main decks. All three of the MM enamels I've been using for the Measure 22 scheme are listed as semi-gloss, but the 20-B is probably the only one that's actually been behaving that way. It's much thinner straight out of the bottle vs the other two which makes it a little more challenging to spray consistently. It's also a grey-blue combination but darker than the 5-N. Once I get the details picked out, I might see about giving it a blue filter treatment similar to dealing with Panzer Gray to give it more of a nudge towards the blue side of the spectrum.
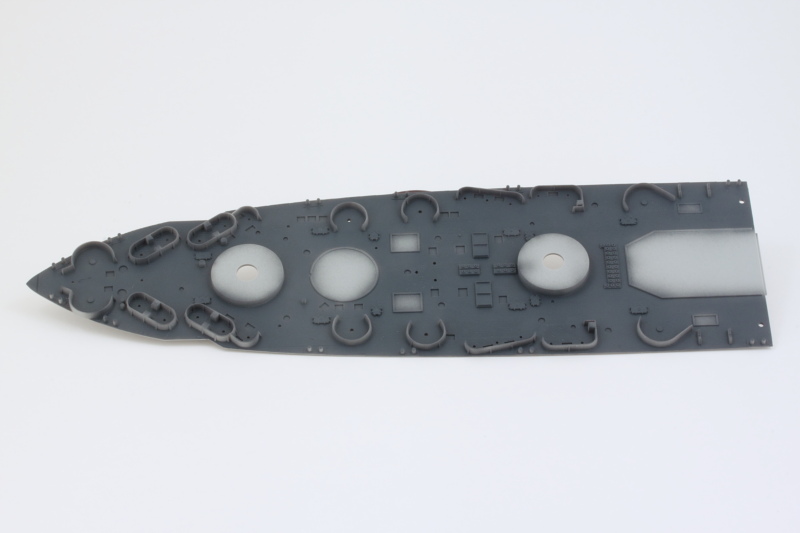
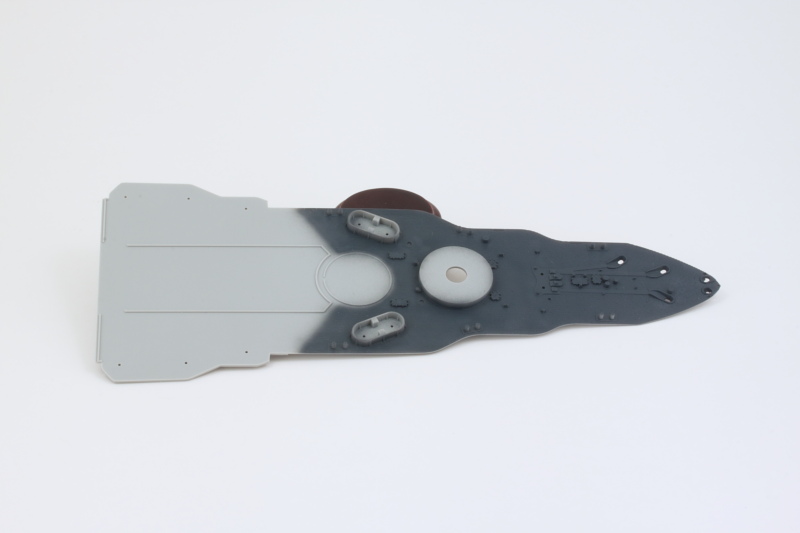
Next up will be doing a lot of hand painting on the details to restore the haze gray appearance to all those gun tubs and other features. In looking at the reference photos of Texas in this scheme, it's interesting that not all of the raised details were painted haze gray. Some were left in deck blue, others were given a combination treatment where the tops were deck blue and the vertical stuff haze gray, and others just all haze gray. Definitely going to make life fun and it's a much easier prospect to deal with that with the decks separate before they are installed.
Speaking of tonal variations...more time with the airbrush got the 20-B Deck Blue sprayed on the main decks. All three of the MM enamels I've been using for the Measure 22 scheme are listed as semi-gloss, but the 20-B is probably the only one that's actually been behaving that way. It's much thinner straight out of the bottle vs the other two which makes it a little more challenging to spray consistently. It's also a grey-blue combination but darker than the 5-N. Once I get the details picked out, I might see about giving it a blue filter treatment similar to dealing with Panzer Gray to give it more of a nudge towards the blue side of the spectrum.
Next up will be doing a lot of hand painting on the details to restore the haze gray appearance to all those gun tubs and other features. In looking at the reference photos of Texas in this scheme, it's interesting that not all of the raised details were painted haze gray. Some were left in deck blue, others were given a combination treatment where the tops were deck blue and the vertical stuff haze gray, and others just all haze gray. Definitely going to make life fun and it's a much easier prospect to deal with that with the decks separate before they are installed.