Trumpeter 1/350 German Pocket Battleship (Panzer Schiff) Admiral Graf Spee (2017)

Bill Plunk
Posts: 1245
Joined: Wed Sep 28, 2022 10:18 pm

WIP 07-01-2017

Post by Bill Plunk »

I originally set out today to get all of the turrets and decks painted in preparation for the deck installation but realized that I still hadn't taken care of the false bow wave on the hull, so that got priority instead. I used the kit-supplied painting guide and counted portholes to get an idea of where they should start and stop since there are two parts on each hull side needed to create the wave pattern. I masked off the boot stripe to preserve its straight edge and then used blue tack poster putty to create the wave pattern. I used a wooden toothpick to ensure the putty was seated firmly to avoid any feathering or soft edges and also add a little fine variation to the pattern in the process.

Image

I used MM enamel flat Light Gray and airbrushed the waves into the masked-off areas. I let that touch-dry and then carefully removed the blue tack masks to check the pattern. I had a couple of overspray areas due to my own carelessness in keeping the airbrush tight inside the masked areas and that was easily fixed with some airbrushed Medium Gray. Before I did that though, I installed the bow and stern anchors since I'd been waiting to do that until after I had the bow wave patterns on. The anchors were also airbrushed in place to match the rest of the hull.

Image

Image

Even sitting still, the Graf Spee now looks like she's at full speed ahead! :)
Bill Plunk
Posts: 1245
Joined: Wed Sep 28, 2022 10:18 pm

WIP 07-11-2014

Post by Bill Plunk »

Spent a good deal of time today working with the airbrush, first order of business involved laying down a primer coat of MM enamel Flat Black. All of the turrets got a full primer coat and the deck plates only where there would be potentially exposed areas once the wood decks are added. It does double-duty in the sense that it makes it easier to paint the details that stick up above the wood planks and also safeguards against any bare plastic showing through if the wood needs trimming for the rest of the stuff to play nice with it. It's a lesson I've learned the hard way on previous ship builds!

Image

Next I airbrushed some MM enamel Gunship Gray for the steel deck areas at the bow and for the anchor ports and hardware. The Pontos set also includes PE baseplates for the torpedo launchers, so those also got a dose of Gunship Gray. For all the other exposed elements and gun turrets, I airbrushed MM enamel Light Ghost Gray as their primary base color. Camo patterns will get added later once I have a good idea of what will end up where and can match it up with the superstructure components for consistency.

Image

A big moment had arrived, time to add the deck plates to the hull! The three main deck plates interact with each other so they all have to line up perfectly to avoid issues. I started with the stern plate and used regular glue to install it in place in the hull. Once the plate was set, I added the wood deck overlay since the 2nd main deck plate has the overhang that needs to line up with it. The torpedo launcher baseplates were added with some CA gel so I could be sure they lined up properly with the mount holes and have a little bit of work time before they grabbed onto the wood surface. I also permanently installed the stand components at this point using some CA to secure the screw threads to ensure they wouldn't come loose but still allow me to remove the base knobs for handling in the future should I need to do that.

Image

That cleared the way for the other two main deck plates. I used regular glue and added the 2nd plate first, checking the alignment with the bow plate to make sure nothing had slipped out in the process. Then the bow plate was glued in and a pair of rubber bands fitted to make sure the decks would sit nice and level once the glue had set.

Image

Next up will be getting the rest of the main deck wood portions installed.
Bill Plunk
Posts: 1245
Joined: Wed Sep 28, 2022 10:18 pm

WIP 07-13-2017

Post by Bill Plunk »

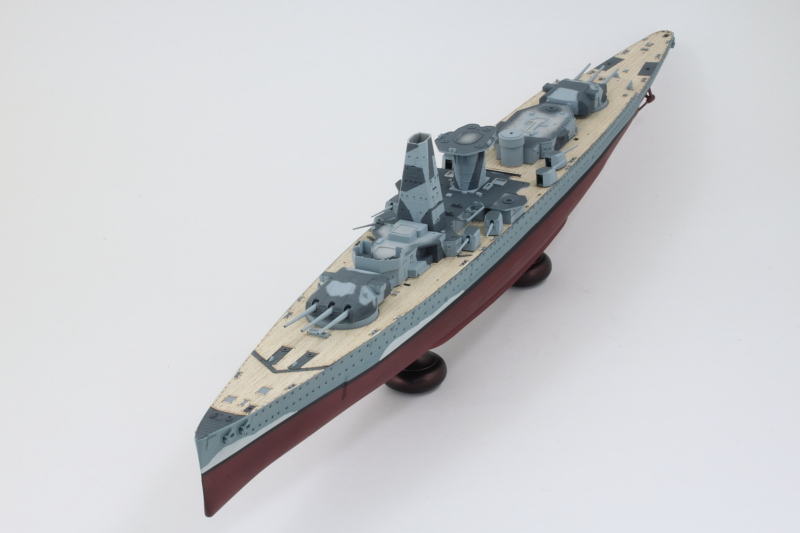
Another productive round of effort to report on the Graf Spee. The rest of the main deck sections from the Pontos set were added but not without a little adventure along the way. The main deck is divided into three different sections and I started at the stern and worked my way forward to the bow. The stern section started out with the cut-outs accurately aligned but some of the holes for the secondary battery turrets and the king posts for the cranes were slightly off. I got them as close as possible and then used a round needle file to open up the holes further as needed through the wood so that everything can install properly later on.

Image

The mid section went on without any major issues but did involve a lot more trimming around the outline for the main superstructure elements, so that took more careful work with the #11 blade to ensure I didn't accidentally cut too much or split some of the narrower sections away from each other. There's a slight gap where it doesn't match up with the stern deck section but that's not a real issue since that will be hidden away behind the AA gun platforms. I hadn't planned for those platform areas when I airbrushed the decks earlier, so a detail brush and some careful painting around the wood deck quickly corrected that problem.

Image

The bow section was the smallest of the three and involved creating the necessary cutout for the breakwater. I used the kit part to help gauge where that needed to be and everything lined up just as it should. I'll wait to install the breakwater until I'm ready to add the anchor chains since they pass underneath it and the slight added height of the wood deck makes it challenging to feed the chain through the openings vs. place the chain and then install the breakwater over it.

Image

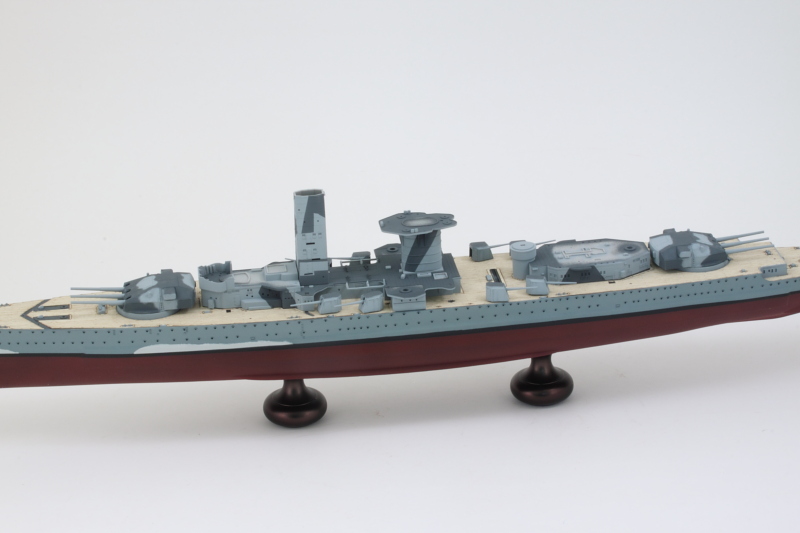
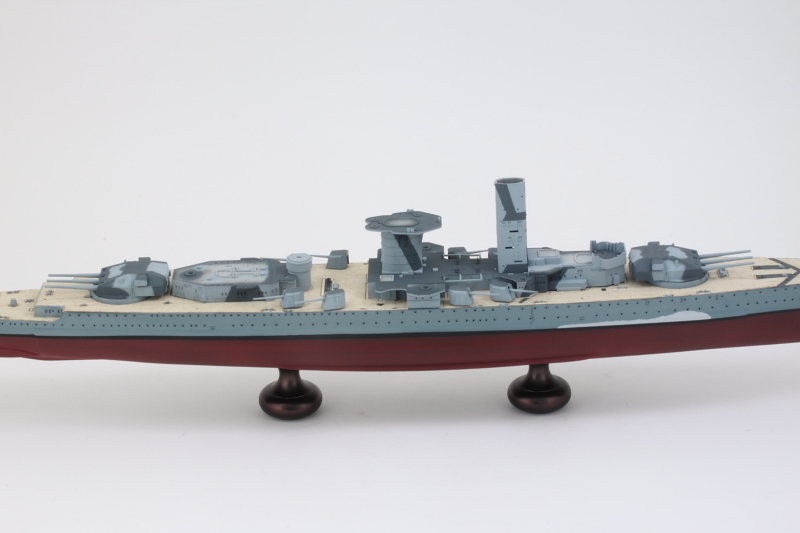
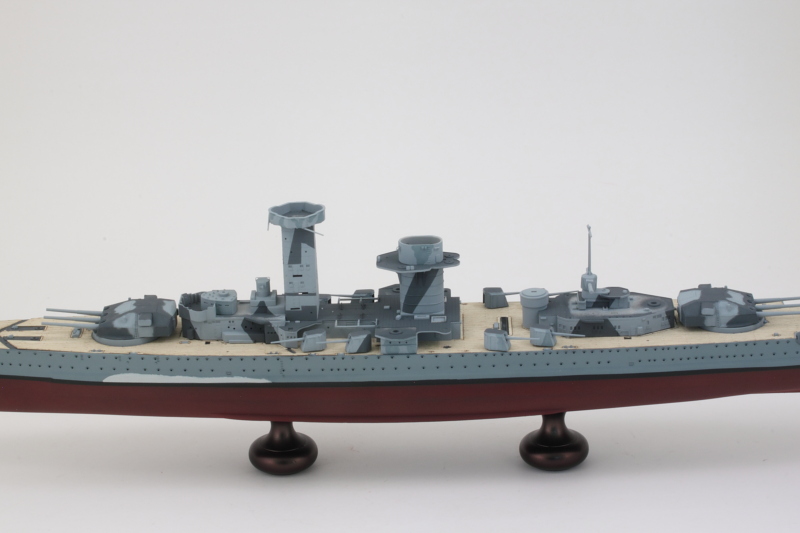
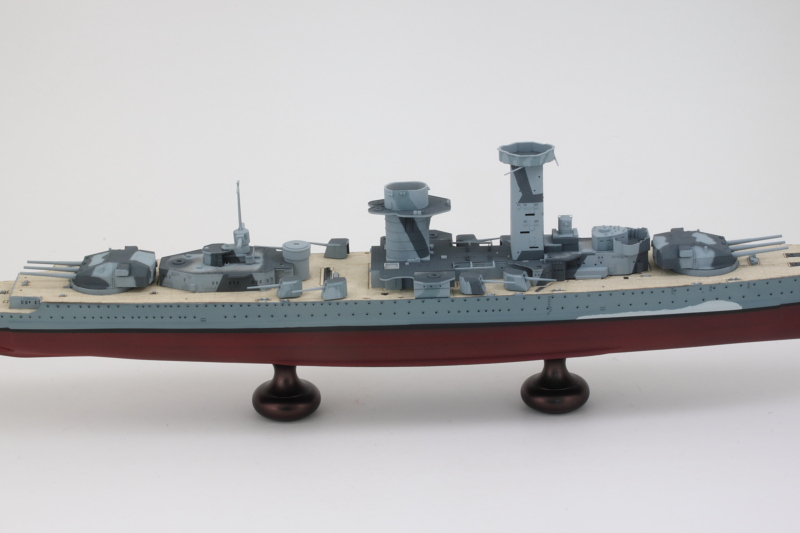
Getting the full deck on definitely changes the look of things! Nothing like real wood to create a wood effect IMHO.

Image

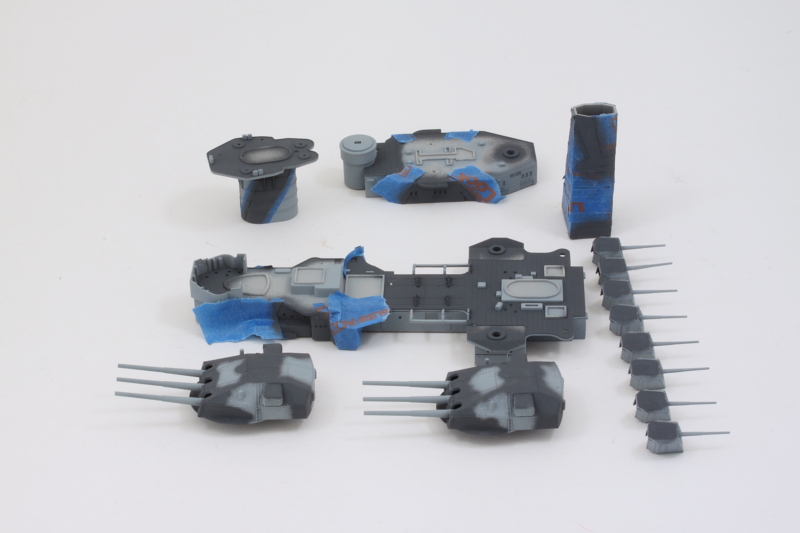
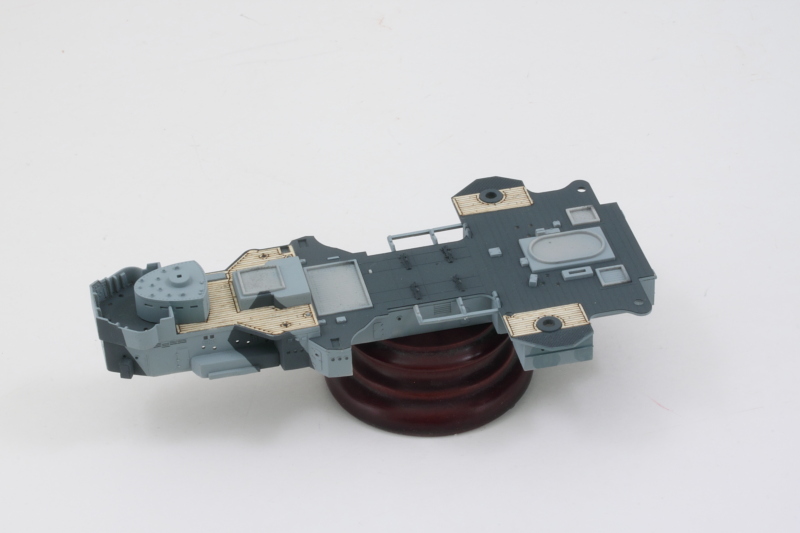
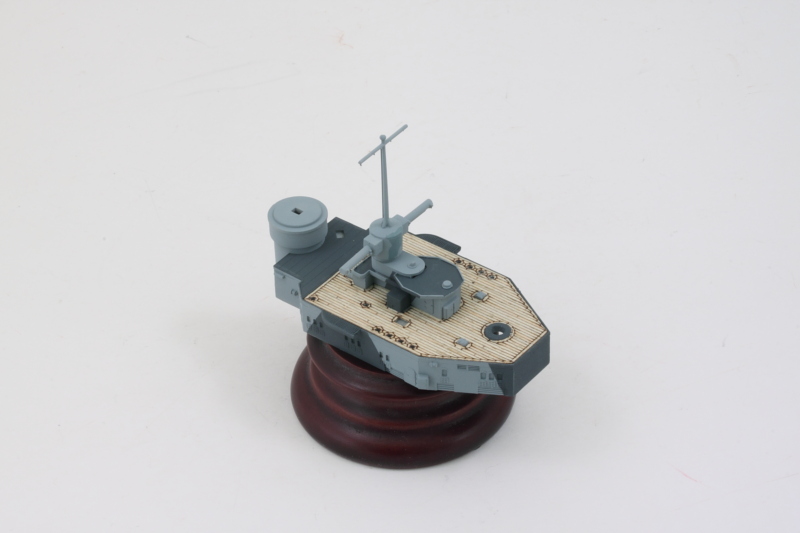
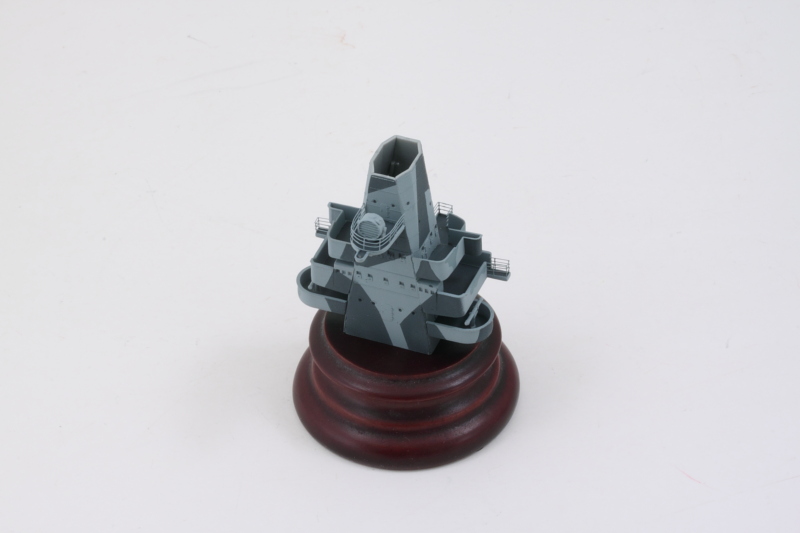
In the spirit of the ship-builders maxim of working from the 'bottom-up and inside-out', I turned to the main superstructure that the instructions deal with in Step 7. They must've had a consultant from IKEA helping out here as it's all 'flat-pack' panels that need to be cleaned up and assembled together to create the full structure. The Eduard set provided some added detail for the open bridge area and also some combat shutters for the larger windows. I also drilled out all the standard portholes with a #74 finger drill so they would match the detail level of the hull in that department. Putty filled in the notches for the kit ladders that will be replaced with Eduard PE items later on and I also used some white sheet styrene to blank off the molded opening left behind when I removed a molded-on access ladder on the forward bridge section.

Image

I used liquid glue and the support outlines on the deck bases to add the different panels one at a time, leaving the forward section last so it could be matched up with the elevated bridge section correctly.

Image

There's still more to be added to this superstructure module but it's together now as a solid foundation for more work to follow.
Bill Plunk
Posts: 1245
Joined: Wed Sep 28, 2022 10:18 pm

WIP 07-14-2017

Post by Bill Plunk »

As is often the case when dealing with superstructure components, little things can often absorb a considerable amount of time and attention to get them squared away. Such is the case with Step 8 in the instructions. This is compounded by the fact that it involves 28 parts designed to create the three independent direction finders, the conning tower, and the support box rooms that go under the AA gun mounts on the superstructure wings. Each of the direction finders gets another 4 pieces of PE detail parts so that brings it all to a grand total of 40 parts to get them together. I deliberately left off the direction finder that sits on top of the conning tower to avoid damaging it and will install that later after the tower itself is in position on the deck level.

Image

Image

The instructions would have you assemble the AA support boxes separately and then attach them to the main superstructure in Step 9 but that makes life far more complicated than it should be. Instead, I installed each of the panels directly to the superstructure support frame to create the two boxes as needed. The superstructure also received the wing extensions and some other details like ammo lockers to round out the basic details of the structure. Once again, a #74 finger drill was used to open up the portholes on the support boxes and wing extension panels where needed to increase their detail.

Image

There's a ton of little detail stuff that installs on this deck level but much of that will have to come later to allow for painting and masking to separate the steel deck areas around the boat deck portion from the wood bridge deck portion to be done first.
Bill Plunk
Posts: 1245
Joined: Wed Sep 28, 2022 10:18 pm

WIP 07-15-2017

Post by Bill Plunk »

More work done in the small details department, this time the focus was on the smokestack and main pyramid structure elements. The intent for these areas was to assemble as much as possible while still being able to keep things separate since I need to airbrush two different colors between the vertical elements and the horizontal decks.

Step 5 deals with the smokestack. I assembled the main halves of the stack along with the top deck. The kit large angle supports were replaced with Eduard PE items and this required filling in the mount tab slots with putty and adding the PE braces in place over them. The top portion of the stack was also assembled as a two-part affair while keeping the top plate separate for easier painting. The top plate had the exhaust and steam vent pipes molded solid, so these were opened up with a combination of drill bits and round needle file work. I deliberately held off adding the mast and support arms to the top plate and will include those later after the stack is all together.

Image

Step 6 is a monster step, it involves assembling the pyramid superstructure along with all of its side deck extensions. The structure itself is a collection of four flat panels that only have small support tabs to help support each other, so it was slow and go to get it together and not have it distort out of shape. Each panel was cleaned up and the portholes drilled out with the #74 finger drill before gluing. I used the top deck as well as the main bridge deck to check the alignment both top and bottom to make sure it stayed square while the glue set.

The top deck also received its spars and a couple of small PE access ladders. The direction finder and fire control room that installs into that top deck was assembled separately to allow for easier handling and painting for this area. The direction finder received some PE detail upgrades as well while the main radar antenna was left off for now as I want to assemble and attach it at the last possible moment to avoid any potential handling damage.

Last but not least, I cleaned up all the support decks for the pyramid structure so they would be ready for painting. Some PE details were added as needed and the one area that the Eduard set missed was on the little cabin extensions for the 2nd level deck areas. The Eduard parts were way too big to fit in the space called for so I went with the standard kit parts here instead.

Image

Next up I'll deal with the smaller aft superstructure module elements to get them together and ready for painting as well.
Bill Plunk
Posts: 1245
Joined: Wed Sep 28, 2022 10:18 pm

WIP 07-16-2015

Post by Bill Plunk »

Sometimes the little things on a build project like this can be deceptive in their ability to become a massive time-sink. Such was the case today in terms of working on the secondary superstructure module. What I thought would only take a little bit of time ended up using up the full day's session, but that's the way it goes!

Step 12 in the instructions deals with this module and once again the flat-pack panel design applies. The module assembles out of 6 side panels plus the top deck part to create the superstructure itself. As with the previous larger module, I found it best to use the top deck as the main attachment structure and added the panels to it individually instead of trying to get all 6 together as a frame first like the instructions call for. Once the module was together, I added the PE combat shutters for all the windows one at a time using a toothpick moistened with spit as a handy 'pick and place' tool since they are so tiny. There are 14 of them per side, so that was a lot of spit involved!

Image

This meant I could now check all of the placements of the superstructure elements with the wood decks and see what needed attention. I already knew that the cut-outs for the AA box platforms were out of alignment, so those were re-cut and strips spliced back into the position where needed. I also needed to add back some small sections in various places around both superstructure modules where the original cut-outs proved to be too wide. I used the left-over scraps that I had saved from the main panels and used that to fill in where needed. This is a handy trick since the entire wood sheet is treated with the adhesive backing, all I had to do was cut the small strips I needed and stick them down in position and voila!

Image

I still need to get some of the other components together for the secondary module's deck before I sling some paint but it's pretty close to time for another round with the airbrush.
Bill Plunk
Posts: 1245
Joined: Wed Sep 28, 2022 10:18 pm

WIP 07-17-2017

Post by Bill Plunk »

Got the rest of the major superstructure components done and ready for the first round of deck painting today. The rest of Step 12 deals with the aft fire control station and direction finder. Getting it together involves 14 separate parts plus another four PE detail items, so a lot going on for this one component for sure.

Image

I also needed to evaluate the best way to go about painting the large deck sections on both of the superstructure elements as they are a mix of steel and wood sections as well as having some molded in place details that need to be painted to match the superstructure base colors. The Pontos set includes large PE overlays to create the correct steel deck plate patterns and I cleaned it up to allow for a test fit around all the raised detail that it interacts with. Fits like a glove, so I'll paint it separate to make life easier. The PE mesh sections were installed around the AA gun mount platforms and the wood sections that go between them and the boat deck tested for fit as well. Last but not least, the wood section around the bridge deck was cleaned up and checked for fit. Everything is playing very nicely together, always a good thing!

Image

The aft superstructure decks are simpler but still split between a steel deck and wood deck design. The steel deck surrounds the base of the floatplane catapult station, so I added the base to the superstructure so it would be integrated for painting while still allowing the PE plate to slide in and out. The small PE screens were installed and the wood deck portion cleaned up and checked for fit as well.

Image

Next up will be getting the dark gray deck portions airbrushed and then it will be a masking marathon to protect those areas when the light gray gets applied.
Bill Plunk
Posts: 1245
Joined: Wed Sep 28, 2022 10:18 pm

WIP 07-18-2017

Post by Bill Plunk »

Today's effort focused on advancing the deck painting schemes so the first step involved airbrushing some MM enamel Gunship Gray on the horizontal surfaces and levels where needed. The PE deck overlays were also airbrushed at this stage in preparation for their upcoming installation. MM enamel Light Ghost Gray was airbrushed on all the main superstructure areas but not on the support decks just yet as they would need some serious masking before that could take place.

Image

Speaking of which, I used small 1-2mm wide strips of blue painter's tape cut to size and applied with tweezers to the interior spaces on all of the support decks. MM Light Ghost Gray was airbrushed to the vertical surfaces inside and out. I also took advantage of the painting session to get the main pyramid structure as well as the fire control and direction finders painted up and ready to go.

Image

I removed the masking and used a small 10/0 spotter brush to touch-up a couple of places here and there. I also hand-painted the horizontal deck on the aft fire control station since that one wasn't possible to do with the usual airbrush-masking combo. The PE overlays were also installed on both superstructure modules using CA gel to allow for some flexible work time and a cotton swab used to carefully press it down into position so as not to mar the paint in the process.

Image

Next up will be figuring out the best way to get the ship's disruptive camo scheme added since that's going to be easier with everything separate I think vs. trying to do it all assembled. Will mean a little bit of puzzle-piecing in the approach but should work out I hope!
Bill Plunk
Posts: 1245
Joined: Wed Sep 28, 2022 10:18 pm

WIP 07-19-2017

Post by Bill Plunk »

Getting the disruptive camo pattern on requires a good bit of thinking, checking reference photos, and then decide the right order to tackle it all. What makes it complicated is that there are two different shades of gray used over the standard light gray and the crew of Graf Spee changed her look more than once, so she doesn't always look exactly the same from one set of photos to another. I decided to go mostly with what is shown on the Trumpeter finishing guide but also altering it somewhat based on what I can see in the actual photos taken while Graf Spee was in Montevideo. For example, those photos show the turrets had the darkest gray applied to most of their surfaces so I ran with that instead of the middle gray that the Trumpeter guide calls for.

I also decided to tackle the scheme in terms of deck levels vs. trying to do it all in one shot. The pyramid structure in particular benefits from this approach I think as the support decks that attach to it all get different colors in varying amounts depending on where they attach and also on which side. Lots of masking was called for so I started that on the smokestack, pyramid, and two main deck levels of the superstructure modules. The 11-inch turrets were large enough that I decided to do them freehand instead of trying to mask their complex surfaces. The same was true for the tops of the 6-inch turrets as well. MM enamel Gunship Gray did the trick and was airbrushed at relatively low pressure (approximately 15 psi) and at very close distance to give maximum control.

Image

I tightened up the turret work and corrected some small overspray areas on the smokestack by dry-brushing the Light Ghost Gray with a square tip blender brush. A quick test fit of all the elements show the scheme is starting to come together.

Image

Image

Image

More work to come with the upper levels. The 2nd medium gray color needs to get added as well but some of that will inevitably have to be done by hand due to the small size of the different areas and the more curvy patterns involved.
Bill Plunk
Posts: 1245
Joined: Wed Sep 28, 2022 10:18 pm

WIP 07-20-2017

Post by Bill Plunk »

Continuing on from yesterday's initial efforts, I worked on getting the camo pattern added to the rest of the superstructure components and secondary battery turrets. This required more masking and more reference checking and I also caught a couple of places fore and aft on the first superstructure levels that I missed so those were addressed as well. Once I had all of the Gunship Gray airbrushed, I cracked open the Medium Gray that was used for the hull and hand painted the smaller patterns on the upper works and in various places as needed to complete the full pattern look. The Medium Gray isn't nearly as high contrast as the Gunship Gray so it appears a little more muted as a result but still in line with what the reference photos support. Those photos clearly show that a third gray was used on Graf Spee in various places although not as heavily as the darker gray.

Image

Image

Getting the scheme done cleared the way for me to add the remaining wood deck portions to both the superstructure modules. I added the conning tower to the main module and the aft fire control station to the secondary module. Both modules need a lot of little details installed but I'm going to wait to do that until I've shaped their railings to give me plenty of room to work since the railing sections are large single pieces for those areas.

Image

Image

I also made a lot of progress in getting the support decks added to the pyramid structure. PE railings were added to the small wing stands and for the searchlight platform. I still need to add some access ladders to the rear structure but that will have to wait just a bit.

Image

I'm going to see Dunkirk tomorrow so probably won't get that much done but will start in on the railings for the main superstructure levels in the constant quest to move onward and upward! :)
Post Reply