The first order of business was to apply an overall wash of enamel Raw Umber to the entire vehicle. This serves as the foundation for the filter steps and gets it out of the way now instead of trying to add it later.

Next up were the application of the dot filters. Since this is a three-tone scheme, I used Testors Model Master enamel Panzer Olivgrun, Panzer Dunkelgelb, Flat White, and Raw Sienna as my colors. The Olivegrun and Raw Sienna were applied only to the Khaki and Leather/Military Brown patches respectively while the Flat White and Panzer Dunkelgelb were applied to all three colors. The dots were blended together using a flat tipped #2 shader brush and clean thinner. I worked in small sections at a time to avoid the dots drying and staining the under coat and wore a breather mask the entire time due to the heavy use of thinner. The pic below is kind of a before/after, you can see on the left side of the hood where the filters have been applied while the right side is yet to be addressed.

Applying this treatment to the entire vehicle took most of the day on Saturday but was well worth the effort in the end. The vehicle sat overnight before moving on the next step.

That next step was the application of a pin wash using enamel Burnt Umber. The pin wash was applied with a pointed 10/0 brush and then fine-tuned using the same brush and clean thinner to remove excess wash and blooming where necessary.

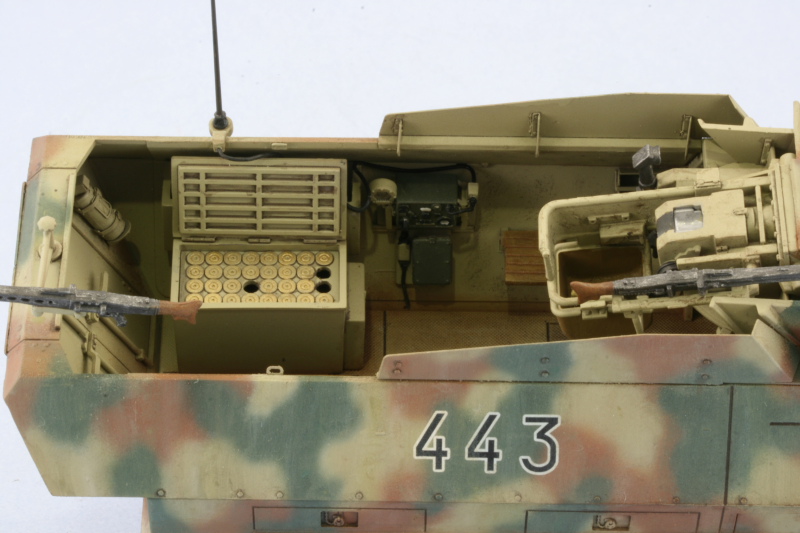
I also decided to add a little detail in the form of a spent shell casing in the catcher basket. The kit had supplied an extra round for the 7.5cm gun so I clipped off the round head with sprue cutters and then sanded it down. I even went so far as to drill out the neck but you can't really see that in the end. The casing was painted with non-buffing metalizer Brass and then carefully glued into position.

The entire vehicle was then given a coat of Testors Model Master Lusterless Flat in the spray can and allowed to dry thoroughly for an hour. I mixed up a combination of roughly 50/50 Mig Dark Mud and Europe Dust pigments as a dry powder. This was converted to a wet mixture by adding tap water with a touch of dish soap to break the surface tension and then applied with a round sable brush to the desired surfaces. The mixture was allowed to air dry for about an hour or so to get it to this stage.

Wearing a dust mask, I used a series of stiff bristled brushes to remove the excess pigment. The pigment was then further adjusted using a combination of wet and dry q-tip ends to remove and position the pigments as needed.

Last but not least, I installed the brass Armorscale 2m antenna using CA gel and let that set up. Once it had dried, it was painted with non-buffing metalizer Gunmetal and the build was finished!