Cyber Hobby Pzkpfw VI Ausf. E Sdkfz 181 Gruppe Fehrmann Tiger I (2016)

Bill Plunk
Posts: 1245
Joined: Wed Sep 28, 2022 10:18 pm

WIP 02-29-2016

Post by Bill Plunk »

Did the two-step process of airbrushing Future to set the foundation for the weathering stages. Decals were added to the turret as well with the aid of some Solvaset to get them to settle in properly into the zim pattern and other complex surfaces. The markings have the F and the 13 separate which makes life a lot easier in terms of getting them placed properly and avoiding a lot of clear film between them too. The kit markings include a set of crosses but I'm not really sure why, the reference photos don't show any indication that crosses were used on F13.

Image

Image

A 2nd coat of Future will seal the decals in and then it is on to the weathering phases!
Bill Plunk
Posts: 1245
Joined: Wed Sep 28, 2022 10:18 pm

WIP 03-04-2016

Post by Bill Plunk »

Weathering process for the hull and turret began today. I started with an overall application of Ammo Africa Korps Wash (who says you have to be bound by labels, right? :D ) using a round 00 brush to lay it on.

Image

I followed that up with the same brush and some clean thinner in various spots until I had it adjusted to where I wanted it. As expected, this darkens the finish and provides some nice depth particularly to the zimmed areas.

Image

Image

There are a couple of spots that the photos show (another advantage of taking pics) need further adjustment like the glacis plate where it's too heavy for what I'm after. I'll let this sit and look at it again with fresh eyes to make any further adjustments. Then another coat of Future will be added to preserve it before I apply some dot filters as another layer. Ordinarily, I wouldn't do that, but for this vehicle, I want to add more to it to enhance the 'April '45' feel to its appearance. ;)
Bill Plunk
Posts: 1245
Joined: Wed Sep 28, 2022 10:18 pm

WIP 03-06-2016

Post by Bill Plunk »

Made some progress on the tracks in the weathering department. I heavily dry-brushed some MM enamel Steel over the runs with a round sable brush first, paying particular attention to the contact areas on the wheel side and the individual link faces on the ground side. After that, an overall wash of MM enamel Raw Umber was applied to blend it together with the base coat and tone down the Steel effect a bit.

Image

These will get more weathering attention when I enter the pigment phase prior to their final installation but they are one step closer to completion now.
Bill Plunk
Posts: 1245
Joined: Wed Sep 28, 2022 10:18 pm

WIP 03-07-2016

Post by Bill Plunk »

Got the dot filters applied to the hull and turret today. On zimmed vehicles the approach has to be a little different due to all the ridges, so instead of working vertically, it's a more horizontal process. I used small dots of MM enamel Flat White, Raw Sienna, and my 50/50 DY/LG mix for the filters. First up was the hull.

Image

Then the turret got its turn.

Image

Image

Next up will be a pin wash treatment.
Bill Plunk
Posts: 1245
Joined: Wed Sep 28, 2022 10:18 pm

WIP 03-10-2016

Post by Bill Plunk »

Building on the previous weathering session, I applied a pin wash today using the Ammo Africa Korps Wash and a pointed detail brush. After the initial application, I tightened it up with the same brush and clean thinner where needed.


Image

Image

Image

Image

I'll let that sit overnight and take a look at both the model and the photos with 'fresh eyes' to see if there's anything more I need to do in this step. Then it will get sealed up with a dull coat and the pigment process will begin.
Bill Plunk
Posts: 1245
Joined: Wed Sep 28, 2022 10:18 pm

WIP 03-12-2016

Post by Bill Plunk »

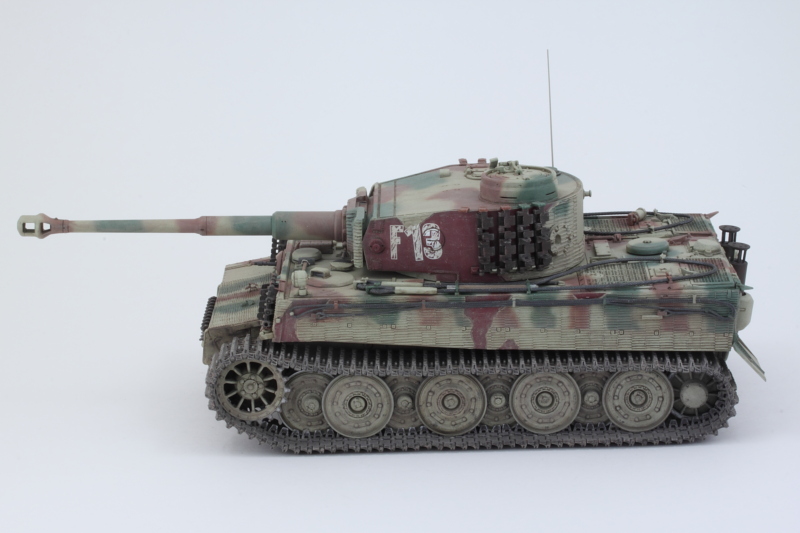
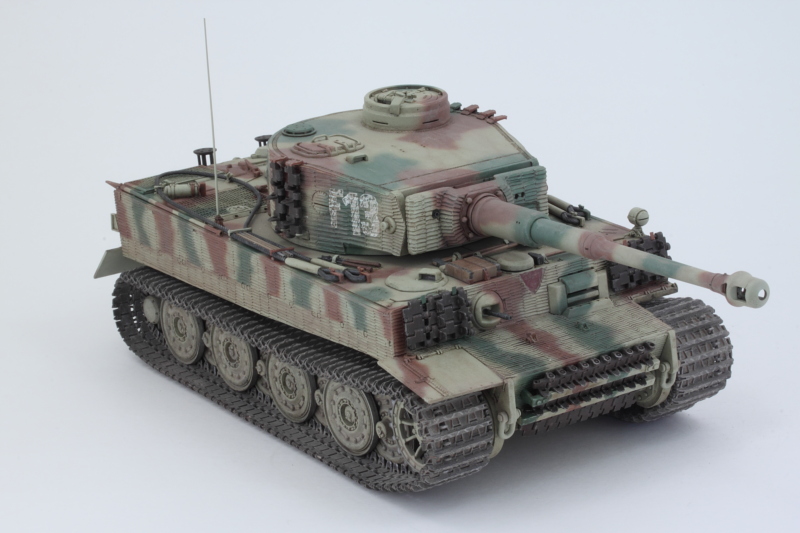
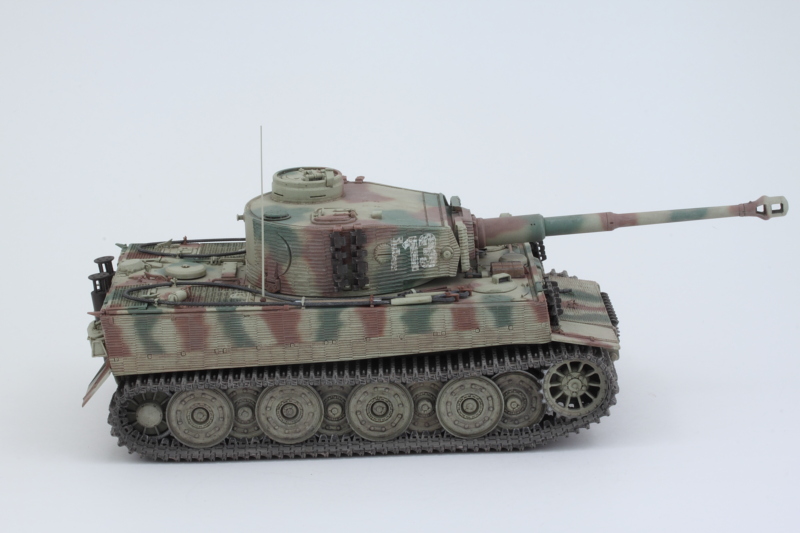
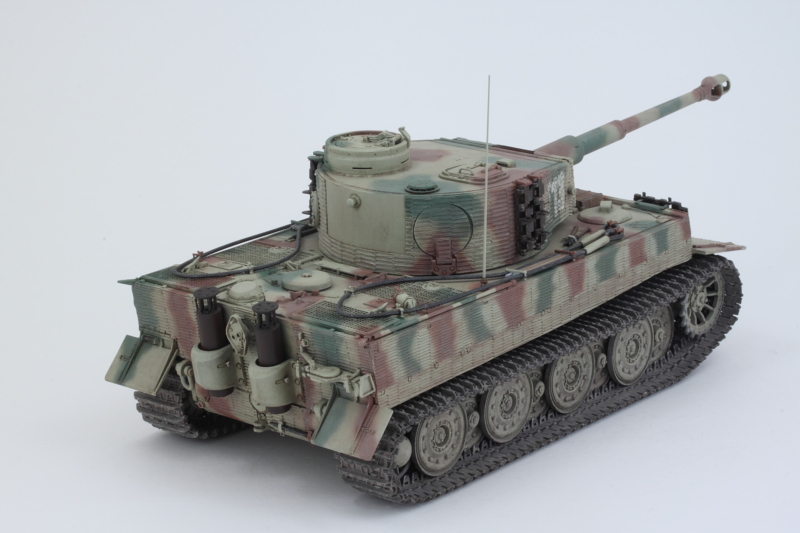
After a few minor tweaks in a couple of spots, I sealed up all the hull weathering with a coat of Model Master Lusterless Flat to set everything in place.

Image

My attention turned to the workable track runs next. I applied some MIG Dried Mud pigments as a wet mix. For this, I use ordinary tap water with a drop of dishwashing soap added to break the surface tension and apply it with a brush. It dries fairly quickly depending on the humidity but looks like a bit of a mess, but not to worry, it's just the first step!

Image

The excess pigment is removed using some stiff bristled brushes. Since this can kick up a lot of fine powder dust, I wear a sanding mask while doing this to protect my sinuses. I've learned the hard way that it can wreck havoc otherwise.

Image

I brought back some of the track face features by very lightly drybrushing some MM enamel steel over the pigments. I'm happy with the end result even if it did mean an entire afternoon spent hunched over my desk and adjusting each link one at a time. :) Given how prominent the tracks are as a feature on this vehicle with the fenders missing, it was important to get them looking the part.

Image

Next up will be getting the tracks installed and applying some additional pigment treatment to the wheels to integrate it together. Pretty close to the finish line on this one now, not a whole lot left to do.
Bill Plunk
Posts: 1245
Joined: Wed Sep 28, 2022 10:18 pm

WIP 03-13-2016

Post by Bill Plunk »

Got the tracks installed today. I added some glue to the sprockets but left the idlers movable to allow for tension adjustments as needed. I applied some dry MIG Dry Mud pigments lightly to the road wheels and to the track surfaces once they were connected up so they would match.

Image

Image

I'll let that set nice and solid and then will add the final remaining details to wrap this one up. Almost done!
Bill Plunk
Posts: 1245
Joined: Wed Sep 28, 2022 10:18 pm

Completion 03-14-2016

Post by Bill Plunk »

Got the finishing touches in on F13 today. On the rear hull, I added in the clear convoy light and detailed it with Tamiya Clear Smoke. The little reflector also got some Tamiya Clear red. Last but not least, I drilled out the antenna base to accept an RB Models 2m brass antenna aerial. This was hand painted and installed as the last little bit.

Image

That meant it was now time for the walk-arounds!


Image

Image

Image

Image

Image

Image
Bill Plunk
Posts: 1245
Joined: Wed Sep 28, 2022 10:18 pm

Publication January 2018

Post by Bill Plunk »

This project has also been featured in the January 2018 issue of FineScale Magazine.

Image


Image
Post Reply