Meng German A7V Tank (Krupp) (2018)

Bill Plunk
Posts: 1245
Joined: Wed Sep 28, 2022 10:18 pm

WIP 07-04-2018

Post by Bill Plunk »

In honor of the 4th of July holiday, I spent some time with the airbrush since I've reached the point where I can't do anything more until the hull sides are attached and the tracks installed.

I used Model Master enamel Italian Dark Brown as a primer/shading coat mostly because it covers well and also is dark enough to ensure I can easily spot any bare plastic areas before committing to the overall paint colors as the case may be. There are a lot of nooks and crannies in the suspension and hull undersides, so this comes in particularly handy on this vehicle. This is going to get an overall dark green coat as called out in the color plate illustrations and much of the suspension gets hidden away by the side armor plates, but there's still stuff visible from various angles, so always better to be safe than sorry when it's too late to do much about it!

Image

With that same thought in mind, I also airbrushed the inside portions of the side plates that overhang the suspension. I used blue painter's tape to temporarily place the access hatches so they would get coverage but without compromising their contact surfaces for gluing later on.

The workable track runs also got some attention in the form of an airbrushed coat of Model Master enamel Burnt Umber as their base color. There's still a good bit more to do with them before they are mounted, but the process has started at least.

Image

Now I'm off to do the usual celebration for the holiday in the form of grilling meat for the family unit. ;)
Bill Plunk
Posts: 1245
Joined: Wed Sep 28, 2022 10:18 pm

WIP 07-06-2018

Post by Bill Plunk »

More progress in the painting and detailing department. First up, a change from brown to green! I airbrushed a coat of Model Master enamel Italian Olive Green over the lower hull plates and the suspension to provide the required color as called out in the three-tone color plate scheme that goes with the markings.

Image

Image

I also spent some time on the tracks. I applied a heavy dry-brushing of Model Master enamel Steel to create the metallic tones and then followed that with a wash of MM enamel Raw Umber. The process creates a nice layered look/foundation for pigment weathering later on once they are mounted. The fact that the runs are workable helps a lot with this of course.

Image

Next up will be getting the tracks in place along with the hull box.
Bill Plunk
Posts: 1245
Joined: Wed Sep 28, 2022 10:18 pm

WIP 07-07-2018

Post by Bill Plunk »

I followed up the work on the tracks yesterday with another wash application, this time using MM enamel Leather, to deepen the look a bit more and add another layer to the tones. It's a subtle effect that's more evident up close with the added bonus of slightly darkening the overall finish but not taking it all the way back to the Burnt Umber that I started with.

Image

That meant it was time to install the tracks. They are a tight fit around the sprocket with just barely enough clearance with the fender surface, so I had to be careful there when feeding the run into position. I found it easiest to feed most of it through on the idler end and only running enough around the sprocket to meet up with the other end under the first set of road wheels. To get the links to connect up together I had to pull the runs together pretty snugly, almost as if they were a live-track, but it all worked out. A7V now has both shoes on!

Image

Image

That allowed me to resume with the instruction order of things and deal with Step 20. This installs all of the MGs into their respective positions on the hull side and rear plates. Everything fits pretty well here, but I did notice that due to the heavier brass barrels on the MGs, it's a lot easier for the side-mounted guns to slip off their swivel pins that support them on the interior side. I may end up fixing them in position before I attach the hull roof later on to avoid that happening in the future and being stuck with them pointing off at crazy angles unpredictably by accident.

Image

Now came the big moment of truth! Steps 21 and 22 basically assemble the hull box and the angled front and rear plates that complete the whole arrangement. The side plates use small notches in the fighting compartment floor to help hold them in place, a nice design touch IMHO that if it wasn't there would mean you would need extra hands to get all the panels together. Careful use of liquid glue and finger pressure at the joins was all that was required to get the hull box together.

Image

Next up will be adding the exterior hull details and then on to the driver's compartment box.
Bill Plunk
Posts: 1245
Joined: Wed Sep 28, 2022 10:18 pm

WIP 07-08-2018

Post by Bill Plunk »

Picking up from yesterday, I moved on to adding most of the exterior details that are called for in Steps 23 to 26. Step 23 presents you with the option of showing the towing hook covers in the raised or lowered position for both the front and rear. I chose the lowered option but it's worth noting that on the rear set the covers overlap with the angled access hatches that aren't installed until Step 26. It's a good idea to hold off adding them until after those angled hatches are in place to avoid any issues.

As mentioned previously, I'm posing all of the hatches closed so these were added to the sides and front as called for without issue. PE parts were added using careful application of liquid glue since they all use molded on small pins or rivets to help support them in place.

The only details I left off out of these steps were the exhaust pipes and their support mounts. These connect up together in a three-part arrangement (including hollow ends) that will be a lot easier to paint/detail off the vehicle and then install as a single piece after I've completed the exterior painting. I did test fit the pipes to make sure they would fit smoothly through the holes in the access hatches and mate up with the exhausts now hidden away behind them as a precaution.

I also went ahead and fixed the side-mounted MGs in position with some careful liquid glue applied to the swivel points on the interior posts. As I thought, it was way too easy to knock them off through regular handling and there's a lot more of that to come with the remaining work, so they are now fixed to avoid that problem popping up again.

Image

Image

Now it's on to the roof and box compartment for the driver as the last remaining structural piece.
Bill Plunk
Posts: 1245
Joined: Wed Sep 28, 2022 10:18 pm

WIP 07-09-2018

Post by Bill Plunk »

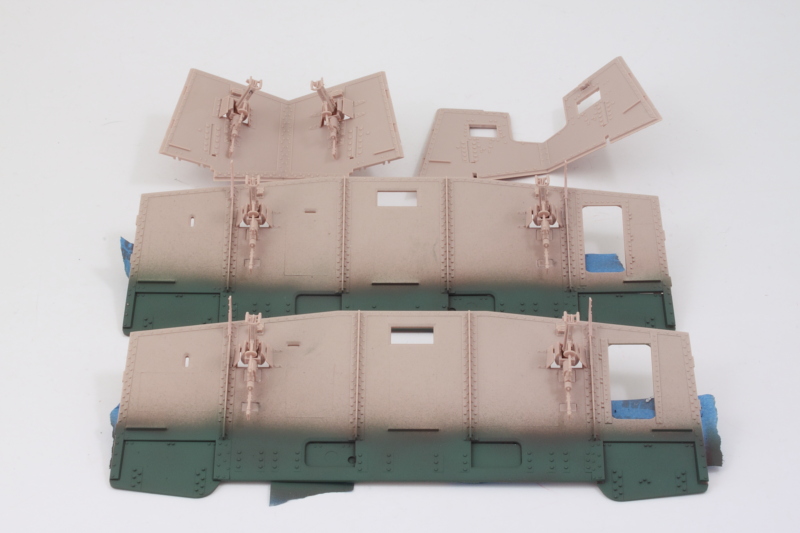
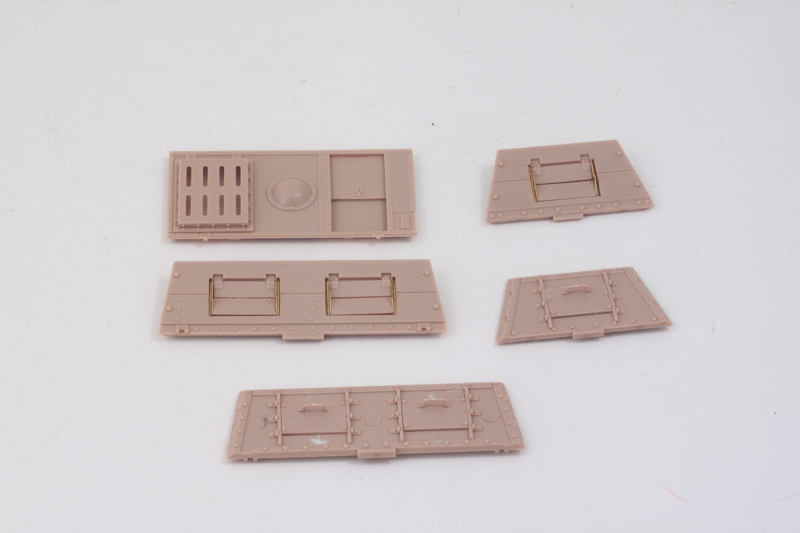
Sometimes things that at first glance seem like they will go together quickly can be deceptive in the amount of time needed in reality. Such is the case with the driver's compartment box that is covered under Steps 27-31. What ended up taking the most time was fitting the shutters to all the viewports since there are parts that need to install both inside and out on all four panels that make up the box. Included in those parts are small PE parts that create the support frames for the exterior that allow the covers to be posed either fully closed, half-open, or fully open. No matter which option is chosen, all of the parts are needed to make them work. The instructions include helpful diagrams that show how both the interior and exterior parts should be positioned and it's worth noting that these also apply for the side and front even though the diagrams are only shown once on the step for the rear plate's assembly.

I used an Etchmate to bend the two small PE parts that go in on each side of the outside to hold the folding covers for each port. A bending tool of some kind is certainly necessary as the parts are small but do fit precisely in place with just a touch of liquid glue needed to hold them in place permanently.

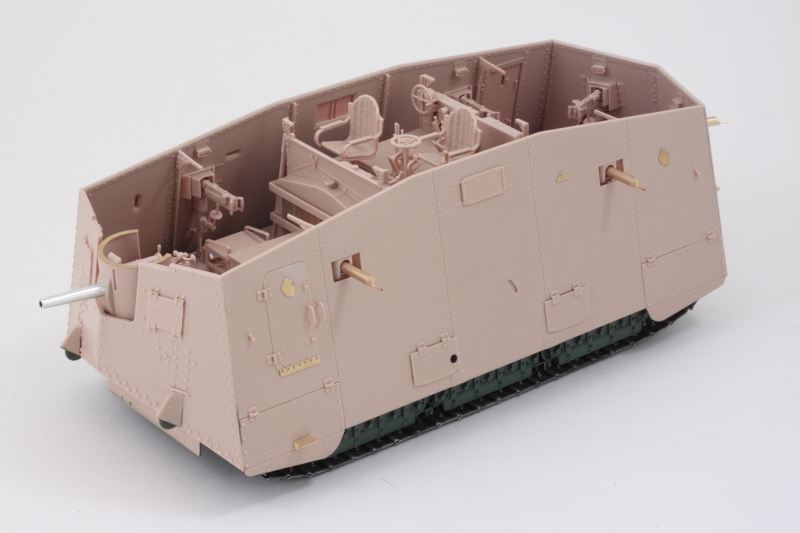
Step 30 deals with the roof plate for the box and has an interesting feature in the form of a sliding panel hatch for the commander that is designed to remain slidable if you're careful with the glue and assembly.

Image

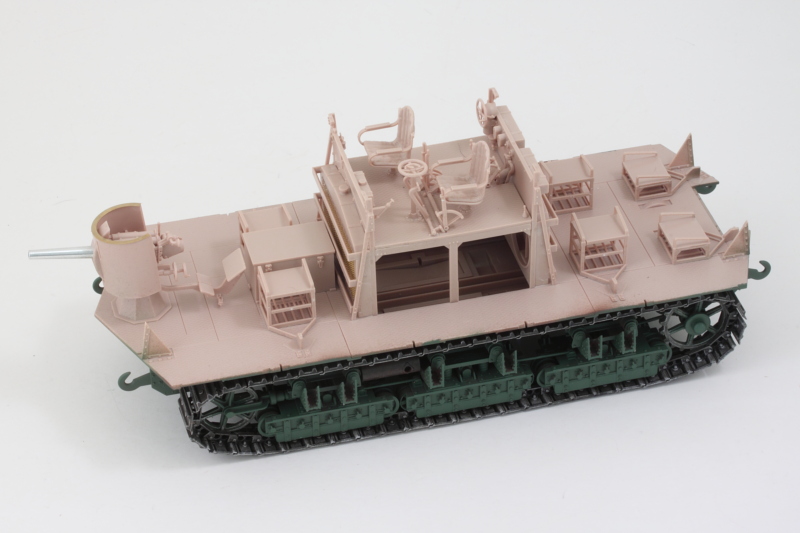
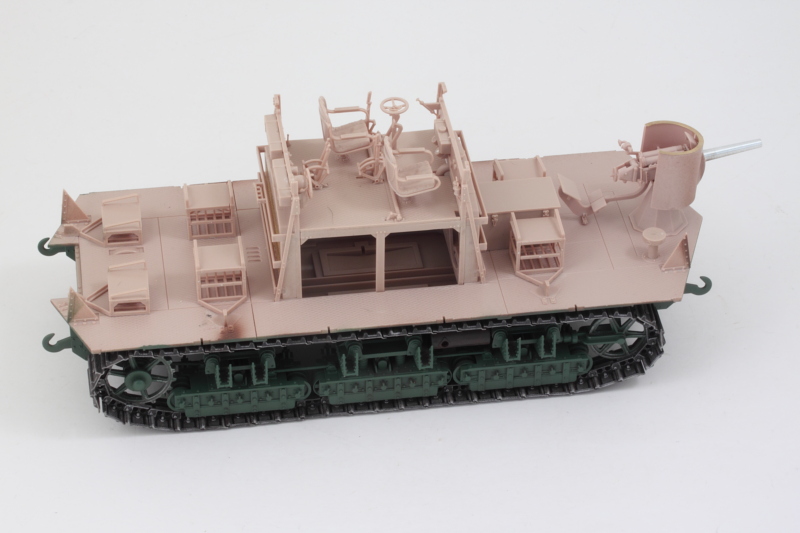
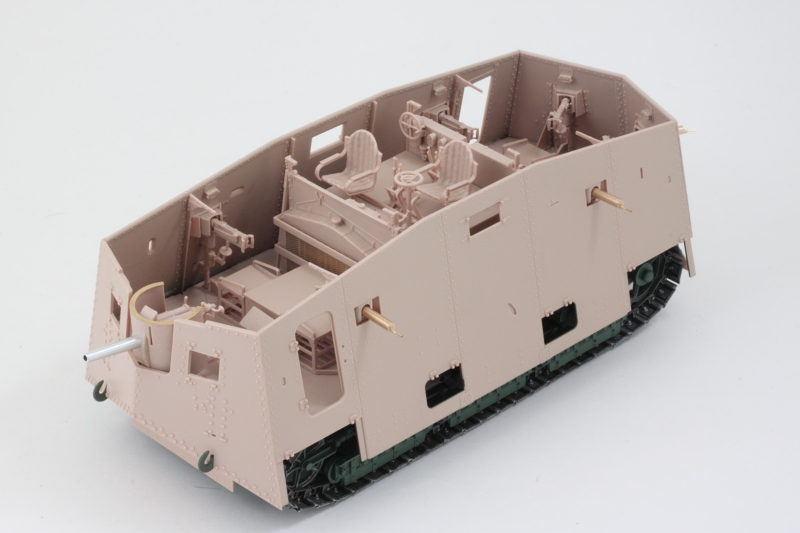
Step 31 assembles the box out of the 5 panels. My first instinct was to do this using the hull top to help pull it all together but I did a quick test fit of the roof to the vehicle and realized that the instructions have the box added later for a reason. The hull roof is molded with a slight angle/flex to it and this is useful for ensuring that it mates up properly with the hull before the compartment box is added. If you add the box, you lose some of that flex, making the job harder than it needs to be. With that said, I assembled the box as directed using regular glue to help hold the panels together until I had them positioned properly. Some liquid glue applied to the insides of the joins helped pull it all together nice and square along with the roof panel.

Image

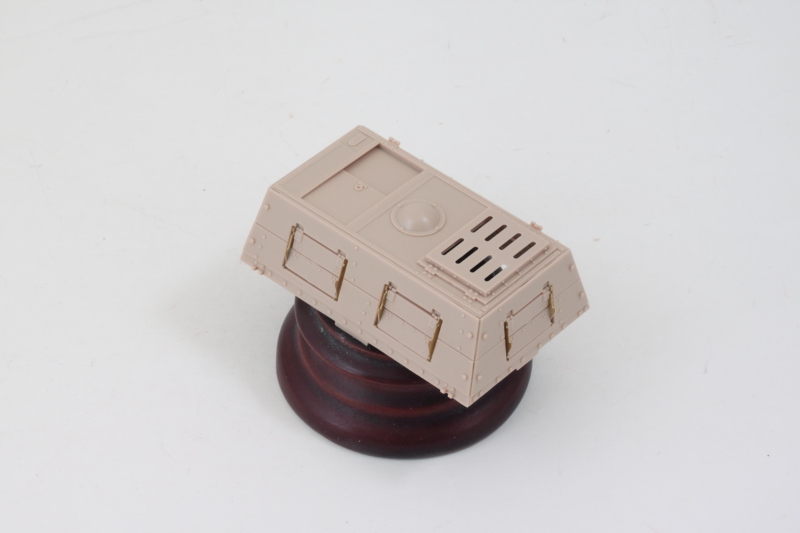
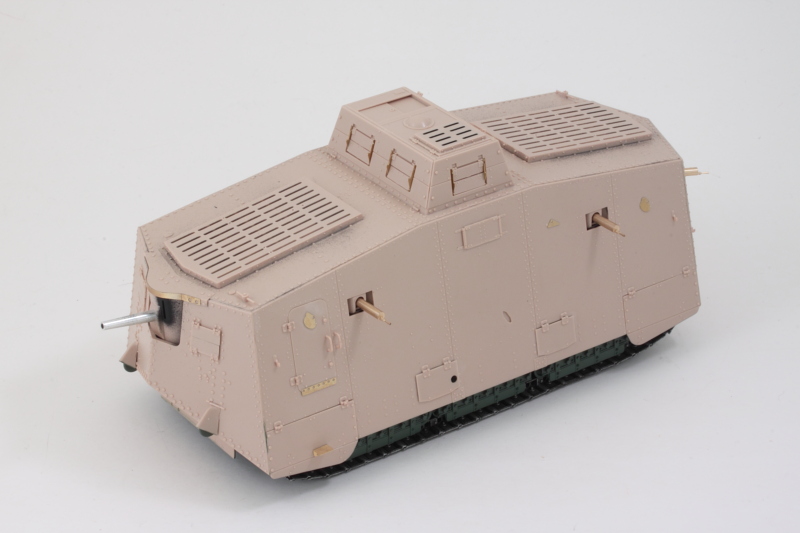
Just to make sure that I had it all lined up correctly, I did a dry-fit with the hull roof. Fits beautifully and I'll leave it like that until the glue fully sets up to avoid any complications.

Image

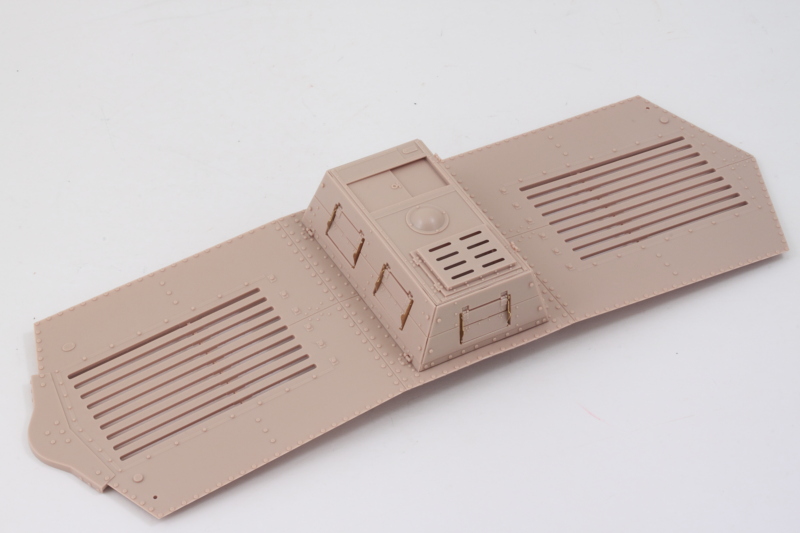
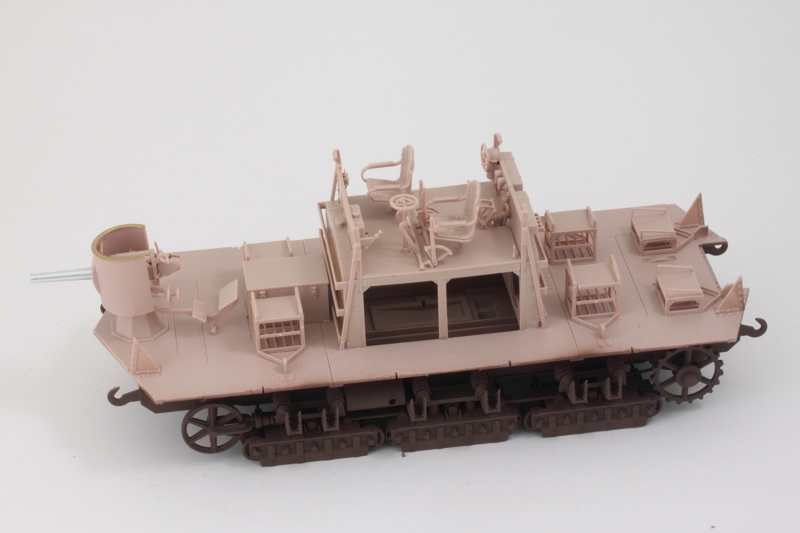
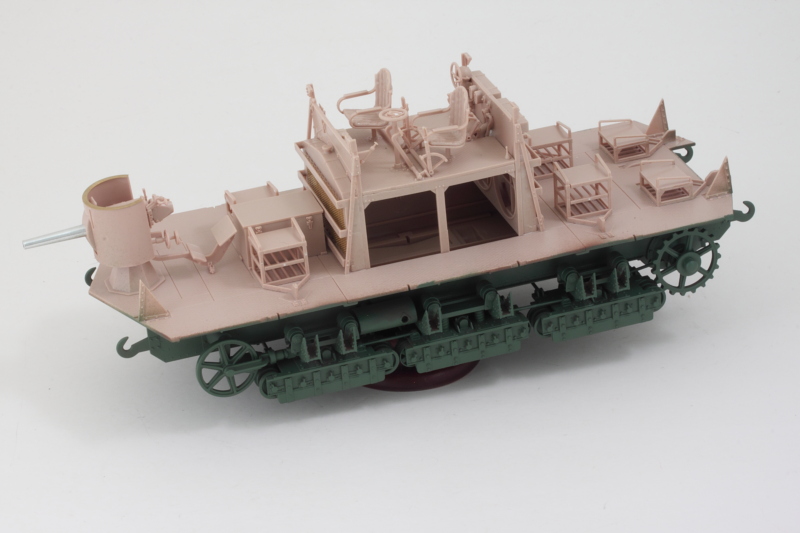
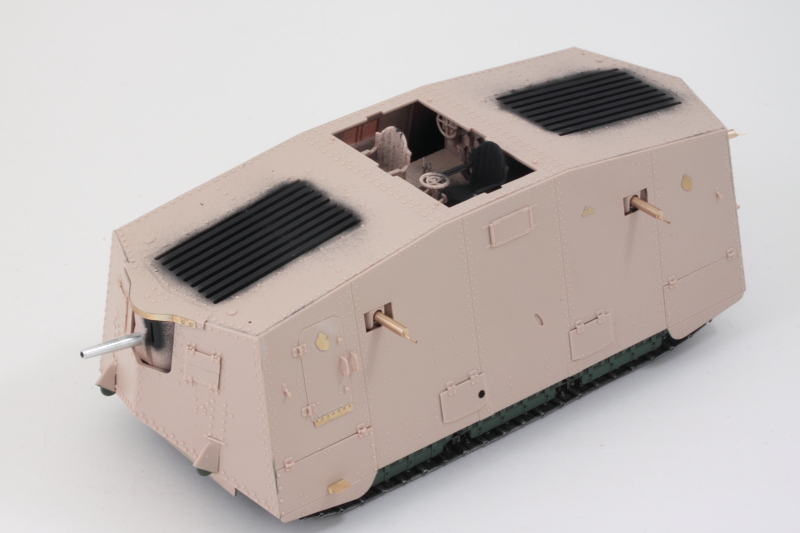
Doing a quick test fit with the hull showed that I will need to spray some Flat Black under the large grate panels in the fighting compartment and under the driver's hatch to avoid any bare plastic being visible from the interior. Once that's taken care of, I can add the roof and compartment as the final elements before starting the exterior paint work.
Bill Plunk
Posts: 1245
Joined: Wed Sep 28, 2022 10:18 pm

WIP 07-10-2018

Post by Bill Plunk »

Following on from yesterday, I broke out the Flat Black to cover off the exposed areas inside the fighting compartment, driver's area, and the armored cover boxes for the ventilation grates. I had to pay particular attention around the main gun and MGs as a precaution as well before I cross the point of no return with the roof in place.

Image

Time for the final steps! Step 32 wants you to add the ventilation grate covers to the roof before adding it in the final Step 33, but I found it better to wait so I could apply finger pressure where needed to get a solid join. I started at the front and used liquid glue and a small pointed brush to avoid over-applying it to the narrow join seams. Working my way back to the middle, I took advantage of the flex I mentioned earlier to ensure everything lined up like it should.

Image

I used a #68 finger drill to open up the mount holes for the tow cable clamps as directed in Step 32 but left the clamps themselves off. That's because the markings call for very large iron cross decals over these grates, so those need to go on first and the clamps and tow cable added after. The covers and the driver's compartment box were added with liquid glue as well to round things out.

Image

Now it's on to the exterior painting and finishing stage!
Bill Plunk
Posts: 1245
Joined: Wed Sep 28, 2022 10:18 pm

WIP 07-13-2018

Post by Bill Plunk »

I've been working on getting the bulk of the exterior paint done over the last few days since there's a lot of surface area involved to get that accomplished. First order of business was an overall airbrushed coat of Model Master enamel Italian Dark Brown to serve as a primer/shade coat. It also had the advantage of providing a temporary stand-in for one of the camo colors as I developed the pattern.

Image

I used the color plates in the instruction finishing guide as a rough template for creating a three-tone scheme and started with the lightest color first. I used a custom mix of Model Master Panzer Dunkelgelb and Light Gray in a 50-50 ratio and sketched the outlines of the shapes first before committing to filling them in completely. This allowed for some small adjustments/corrections as the pattern developed, very handy!

Image

With that done, I added the green next using MM enamel Italian Olive Green. This is where the primer color helped as a temporary stand-in as I could clearly see how the 3-tone scheme was developing without having actually applied the third color yet.

Image

Last but not least, the red-brown was airbrushed using a custom mix of 50-50 MM enamel Military Brown and Leather.

Image

Image

This represents a little over 5 hours of work all totaled, so a major hurdle cleared. There's still some clean-up that I need to do with some accidental overspray in a couple of spots and then apply an overall mist-coat to tie it all together before I can move on to the markings.
Bill Plunk
Posts: 1245
Joined: Wed Sep 28, 2022 10:18 pm

WIP 07-14-2018

Post by Bill Plunk »

Following on from yesterday's marathon airbrush session, I dry-brushed some of the Panzer Dunkelgelb/Light Gray mix where needed to remove the overspray in some of the tighter spots where the patterns intersected. Once that was done, one more round with the airbrush involved applying a mist coat of highly thinned Panzer Dunkelgelb/Light Gray (roughly 90% thinner-to-paint) over the entire model to tie the scheme together. I masked off the suspension and tracks during this stage with blue painter's tape as a quick-and-dirty approach to protecting them during handling.

Image

Next order of business was to pick out the 6 machine guns and add the exhaust pipes to either side of the hull. For the machine guns, I used Model Master Non-buffing Metalizer Gunmetal and a detail brush to carefully pick out the cooling barrels. For the exhaust pipes, I applied a basecoat of the same metalizer Gunmetal and then followed it with a heavy dry-brushing of MM enamel Leather. The pipes were installed and their separate clamps painted to match the camo pattern with the hull by hand.

Image

Image

Image

Next up will be working on the markings!
Bill Plunk
Posts: 1245
Joined: Wed Sep 28, 2022 10:18 pm

WIP 07-16-2018

Post by Bill Plunk »

I spent a good bit of time over the weekend working on the markings. I applied an airbrushed coat of Future over the paintwork to protect it and provide a uniform surface for the markings as a first step. The kit decals are very nice with virtually no carrier film around the edges, especially on the iron crosses. I used Walther's Solvaset to treat the decals once they were placed so they would conform over the raised details. This was particularly helpful at the nose and rear since they go right over the angled plates and rivet lines. For the large roof markings, I applied the Solvasest and let the decals sink into the grate depressions then used a sharp #11 blade point to gently slice them in the middle followed by more Solvaset so they could then conform down into the openings. I also used wooden toothpicks to gently shape the curves inside the grates where needed. It took some patience and multiple applications but it paid off with the end result. After the decals had thoroughly dried and conformed, I airbrushed the 2nd coat of Future to seal them in.

Image

Image

Now it's on to the weathering process!
Bill Plunk
Posts: 1245
Joined: Wed Sep 28, 2022 10:18 pm

WIP 07-21-2018

Post by Bill Plunk »

One of the challenges in weathering this particular vehicle is that there's a lot of surface area to work with! I had a couple of objectives in mind with the weathering process, to dirty it up but also color-shift the lightest of the three-tone colors more to a yellow-ochre color. As a first step, I applied an overall wash of thinned MM enamel Raw Umber to the whole vehicle. After that, I applied a dot-filter process using MM enamel Flat White, Panzer Dunkelgelb, and Deep Yellow in varying amounts with the Deep Yellow added only to the light areas. This process involves using a square blender brush lightly dampened with thinner to blend and draw the dots together, which means it's both time-consuming and fume-heavy, so I worked in stages using the breather mask over a couple of days to get all the different surfaces done.

Image

After that was complete, I realized that I'd achieved most of what I was after but it didn't have quite the consistency I was looking for overall, so I used the same square-tip brush to lightly dry-brush some of the Deep Yellow in the panels. This was followed by another dry-brush round of the Panzer Dunkelgelb in spots to tone it back down and avoid it being too bright in the yellow department.

Image

Image

That approach does mean that I'll need to apply another sealing coat before I tackle the last step, a pin wash to pop out the detail, but it's much closer to being done that it was previously.
Post Reply