Hobby Boss Sdkfz 222 Leichter Panzwerspahwagen 2cm (2015)

Bill Plunk
Posts: 1245
Joined: Wed Sep 28, 2022 10:18 pm

WIP 04-26-2015

Post by Bill Plunk »

Continuing on from yesterday's fun, I added some missing details to the wheels and the turret mesh cage using some 0.5 mm white styrene rod. The wheel hubs don't include the tire stems, so I painted a good length of the styrene rod with MM enamel Gunmetal, glued it into place inside the hub, then cut off the rod to the desired length. Rinse and repeat 4x and voil�! For the turret cages I sanded a 45 degree angle to the ends of the bracing rods that hold the cage in the open position and then glued them in place with CA. The rods are positioned roughly in the middle of the hinges on the real vehicle so I counted in five of the mesh squares from the end as a guide to keep it consistent.

Image

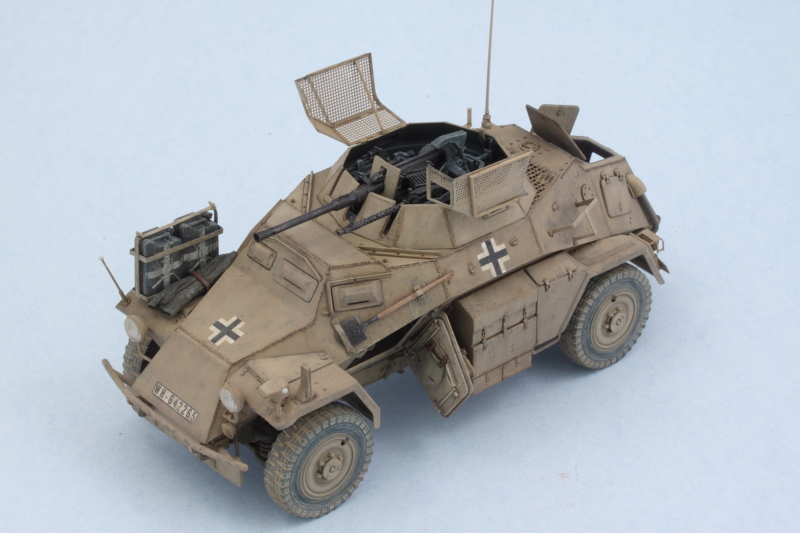
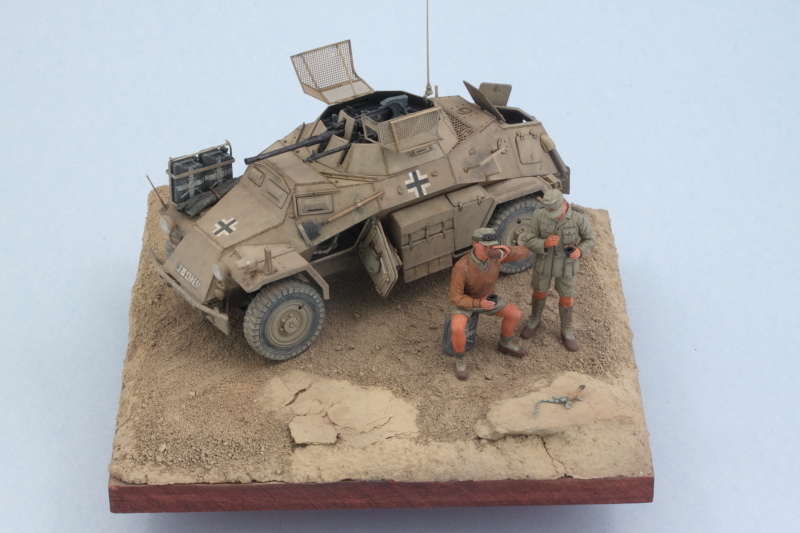
It was time to mount the wheels to the vehicle so I hauled out the base and made sure that the tires sat properly and didn't 'float' since the base's surface isn't perfectly level and some small adjustments were needed to the different tires since the suspension doesn't articulate. I let the vehicle sit on the base for a good couple of hours to ensure they wouldn't shift and allow the glue to really grab hold.

Image

Image

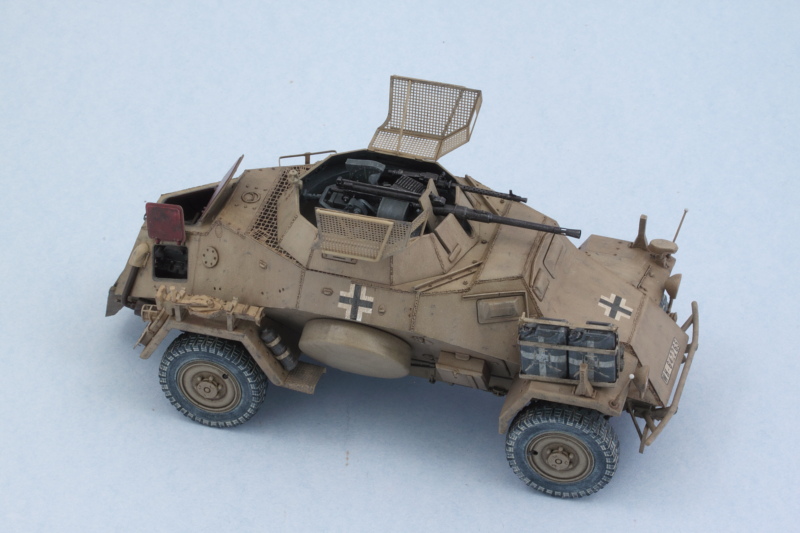
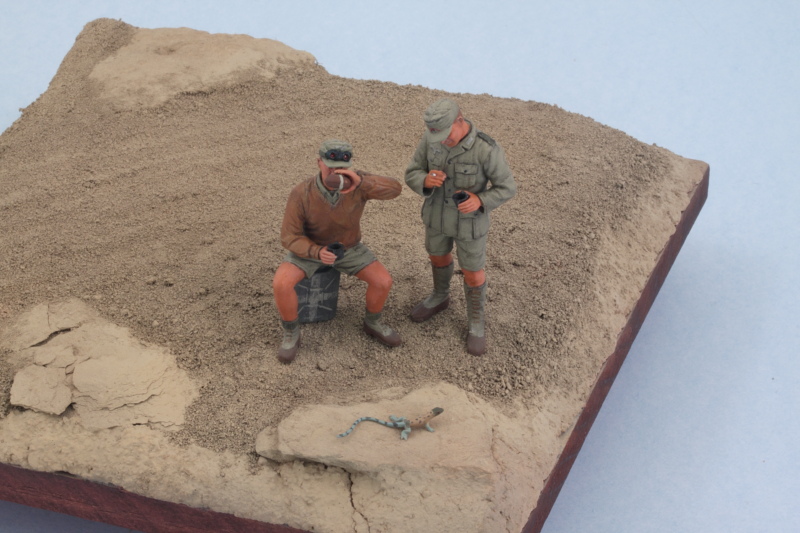
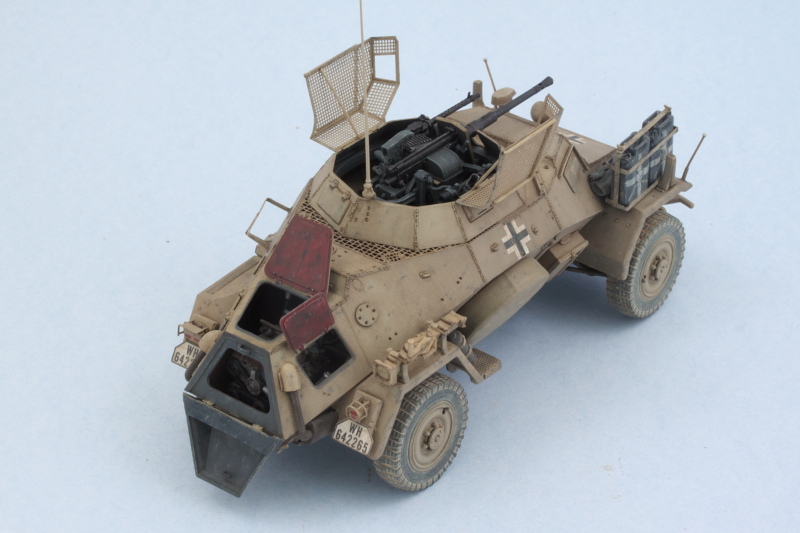
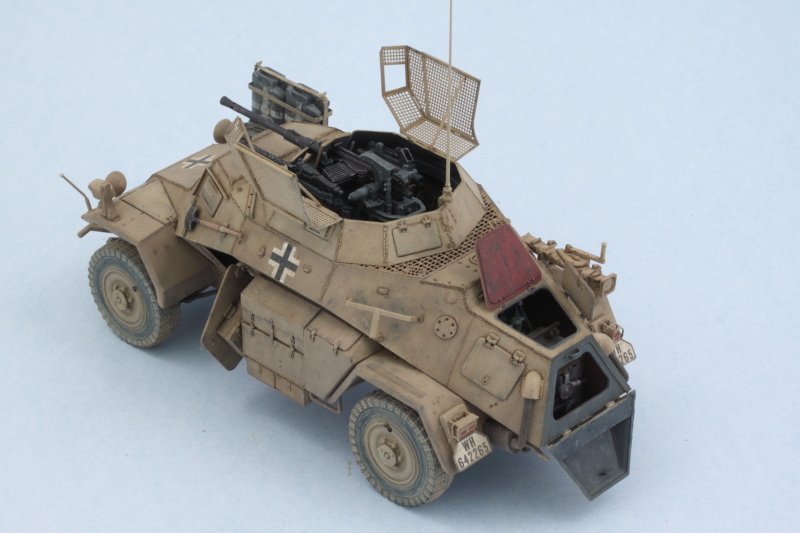
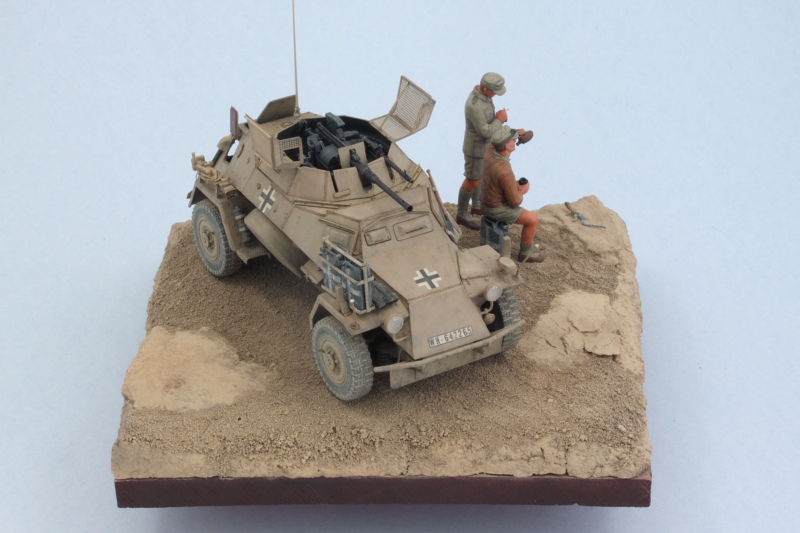
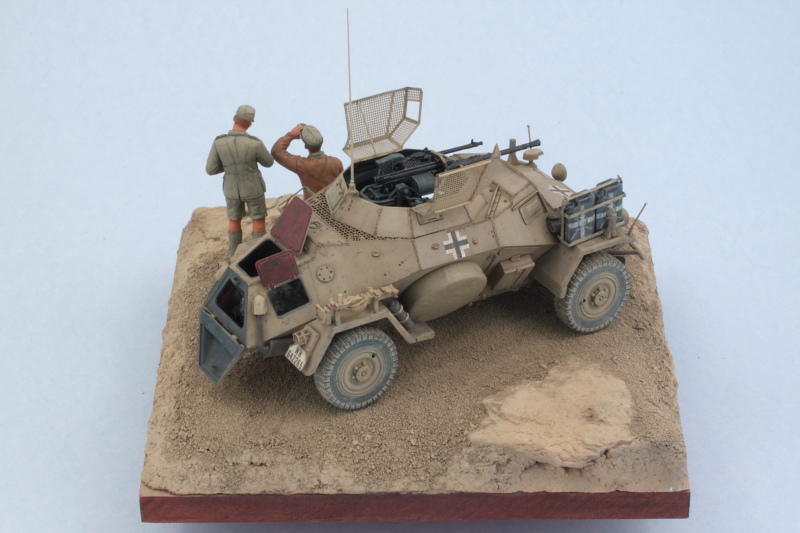
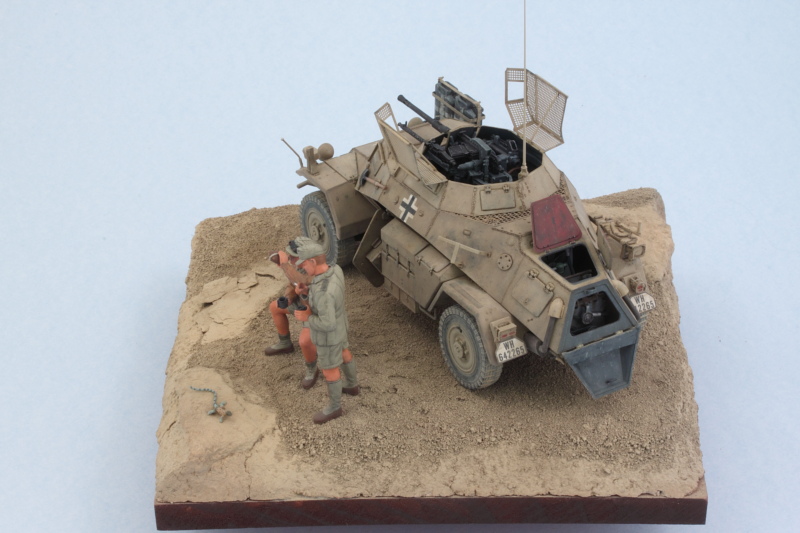
With the wheels firmly on, next up was adding the screens to the turret. I used regular CA for this and held them in position with tweezers until the glue caught and held them. The angled support rod I added earlier also helped with this by providing a little extra contact/bracing to hold them at the right level. Then I added the open hatches for the driver and the engine compartment to round things out. I also did a quick check with the base and figure placement for the one crew member who's inspecting the engine and everything still plays nice together, always a plus!

Image

Image

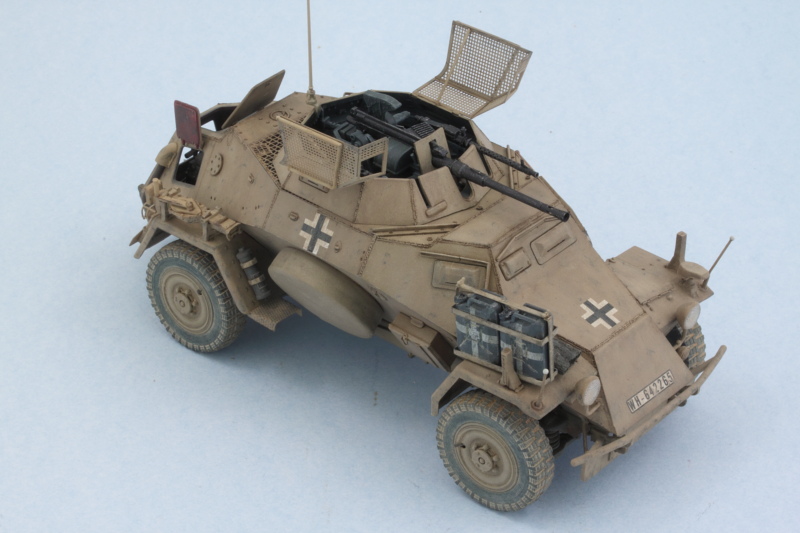
Just about ready to seal this one up for the markings and the rest of the weathering phases.
Bill Plunk
Posts: 1245
Joined: Wed Sep 28, 2022 10:18 pm

WIP 04-29-2015

Post by Bill Plunk »

Not a huge update to report this time around but an essential one nonetheless. After adding a couple of touches here and there in terms of some light chipping/wear to the jack with some stippled Burnt Umber and a light application of MIG AMMO Interiors Wash to the exposed engine bay hatches and doors, it was time to seal it all up. I airbrushed Future to seal and protect the paint work from the weathering stages to come and to prevent any silvering with the decals. The kit-supplied markings were used along with a treatment of Walther's Solvaset to ensure they snugged down tight. After letting that sit overnight, I airbrushed some additional Future over the decals to seal them in as well.

Image


Image

Next up will be doing an overall wash, some dot filtering, etc. to complete the weathering on this little guy.
Bill Plunk
Posts: 1245
Joined: Wed Sep 28, 2022 10:18 pm

WIP 04-30-2015

Post by Bill Plunk »

Started in with the overall weathering process today. The first step was to try out something new, MIG AMMO's Africa Korps Wash. Since it's an enamel-based wash, I applied it after the Future coats had a chance to thoroughly cure to avoid any chance of paint lifting. I used a 000 round sable brush to apply it over the whole vehicle. I'm impressed with the fine grain on the pigment in the wash and it's got a kind of brown-olive tint to it as opposed to a straight raw umber or burnt umber tone. Of course it also darkens the finish so the earlier lightening steps were essential, otherwise it would be very dark after the wash treatment.

Image

Image

Next I applied a dot filter using small amounts of MM enamel Light Gray, Raw Sienna, and the 50-50 lightened mix I airbrushed earlier. Using a square-tipped brush lightly dampened with thinner, the dots were blended together along with the previous wash treatment. I wear a breather mask due to the thinner fumes and work in small sections at a time to avoid the enamel dots hardening up too quickly.

Image

One thing I had to be careful of in this process is snagging on things like the turret screens and the open hatches. This was even tougher as there aren't a whole lot of places to easily handle the vehicle now!

Image

Image

Next up will be a pin wash to pop out the details a bit and then it will be on to the pigment weathering.
Bill Plunk
Posts: 1245
Joined: Wed Sep 28, 2022 10:18 pm

WIP 05-01-2015

Post by Bill Plunk »

Building on yesterday's efforts, I added a wash of MIG AMMO's North Africa Dust to the tires, jerry cans, and the rolled up tarp on the fender. Pigments are going to be applied over this as an additional layer to get it to match up with the base but I wanted to give this element of the weather set a try to see how it would work on its own first.

Image

After letting it dry, I made some small adjustments with a thinner-dampened Q-tip to get the look where I wanted it to be.

Image

Next it was time to bring out the details with a pin wash. I used the Africa Korps Wash and a pointed 10/0 brush to apply it to all the different detail areas. After the wash had dried, I used the same brush and some clean thinner to adjust it where needed.

Image

Image

Will let that sit overnight and check it again with 'fresh eyes' to see if it needs anything else before sealing it up and then moving on to the final stage with the pigments before it heads home to the base!
Bill Plunk
Posts: 1245
Joined: Wed Sep 28, 2022 10:18 pm

WIP 05-04-2015

Post by Bill Plunk »

Spent some time working on blending the overall finish on the vehicle to match the base. I sealed in all the previous work with a coat of Testors Model Master Lusterless Flat to knock down the remaining gloss and provide some tooth for the pigment process. I used some dry MIG Gulf War Sand pigment and added it to the wheels, chassis, and fenders on top of the previous weathering. I used various round and square bristled brushes to work the pigment into the areas as needed.

Image

Image

I'm seriously considering dropping the 3rd guy (pith helmet, Bending Guy) that I had planned for this one. In the course of creating the base I neglected to take into account the added width that the fender creates and if I position him looking into the rear side hatch as planned, he's kind of hanging off that corner in terms of footing and looks a little odd as a result.

Just a couple small details to finish off on this one in terms of the headlights and radio antenna, then it will be time to place the figures and wrap this one up!
Bill Plunk
Posts: 1245
Joined: Wed Sep 28, 2022 10:18 pm

Completion 05-05-2015

Post by Bill Plunk »

Heading into the final lap on this project, I used some CA gel and added some brass mount pins to the feet of my two crewmen and into the base of the jerry can 'seat' for Sitting Guy. Once the pins were solid, I applied some small amounts of Gator Grip glue to the contact surfaces and pushed the figures into place on the base and let that set up nice and solid. Last but not least some pigment dust was added to their shoes/boots to tie them into the base. The lizard also took his place on the rock so that Standing Guy finally has something to look at. ;)

Image

Rounding out the last few little details, I added the clear lenses for the headlights. The kit parts have some very nice molded in detail so after the lenses were set, these were lightly dusted with pigments as well to match the rest of the vehicle.

Image

Last but not least, I installed the 2m brass antenna into the base with some CA gel.

Image

And here's where things are at with the whole vehicle prior to installation on the base:

Image

Image

Image

Image

Image

Image

The 222 was attached to the base with some Gator Grip glue on the bottoms of the tires to keep it from sliding around. I would've preferred to use pins in the tires but the suspension isn't strong enough to take the amount of force necessary to push pins into the base's surface like I could with the figures. I'll just have to be careful about handling it and moving it around from now on. After the glue had dried, the whole base/scene was off to the photo booth for the walk-around shots!

Image

Image

Image

Image
Bill Plunk
Posts: 1245
Joined: Wed Sep 28, 2022 10:18 pm

Publication June 2019

Post by Bill Plunk »

This build is featured in the Kalmbach Publishing and Finescale Modeler special edition Modeling World War II in Europe released in June 2019.

Image

Image
Post Reply