Dragon Jagdpanzer IV L/70(V) (2015)

Bill Plunk
Posts: 1245
Joined: Wed Sep 28, 2022 10:18 pm

WIP 08-10-2015

Post by Bill Plunk »

The weathering process continued this time with a little different twist from the ordinary. I decided to add some variation to the lower hull in the form of some dot filters for that area to create more visual interest vs. the normal straight pigment application. The colors chosen were of the earth tone variety with Raw Sienna as the dominant color in combination with Raw Umber and a 50/50 mix of MM enamel Leather and Military Brown. It would've been a lot easier to do this if the return rollers and road wheels weren't already installed, but I hadn't planned to do this at the time. Definitely something to remember for the future!

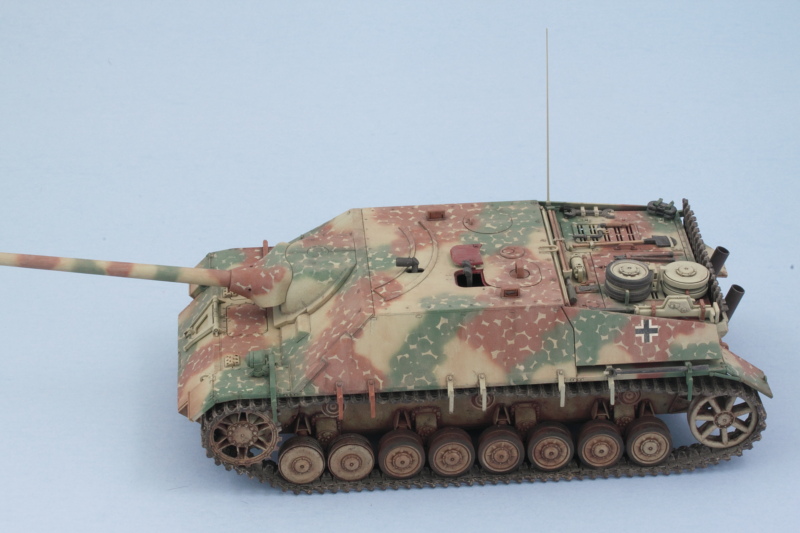
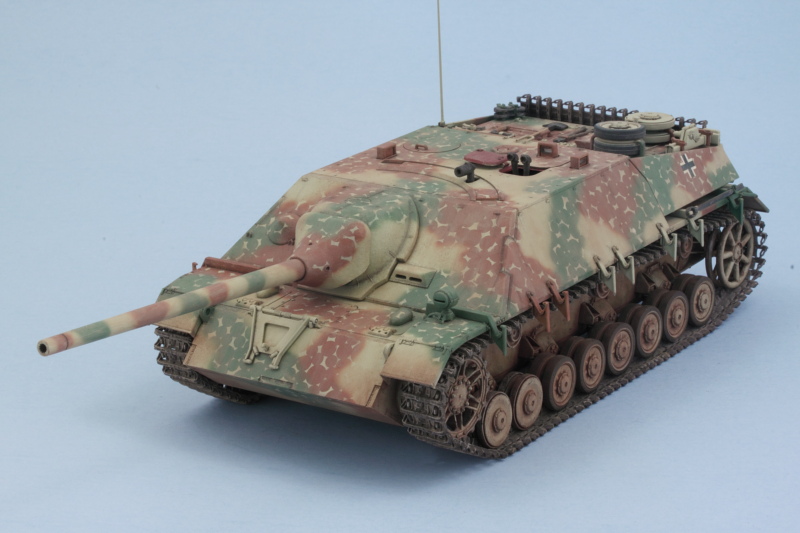
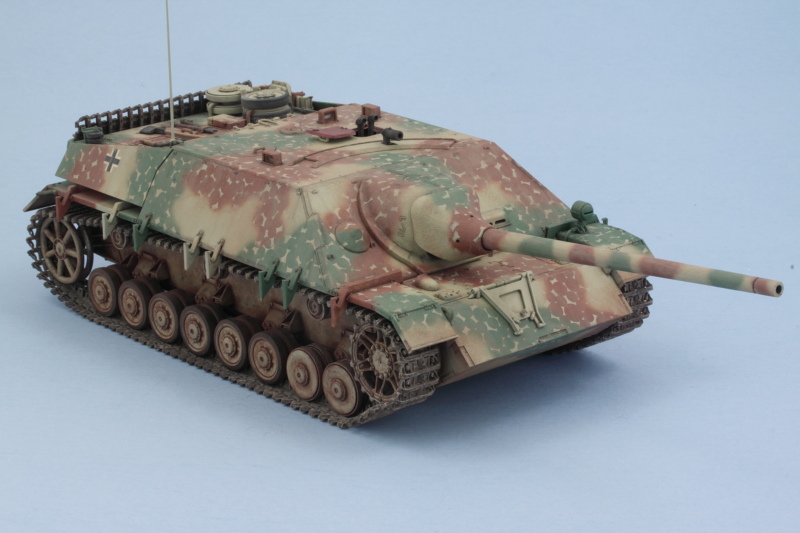
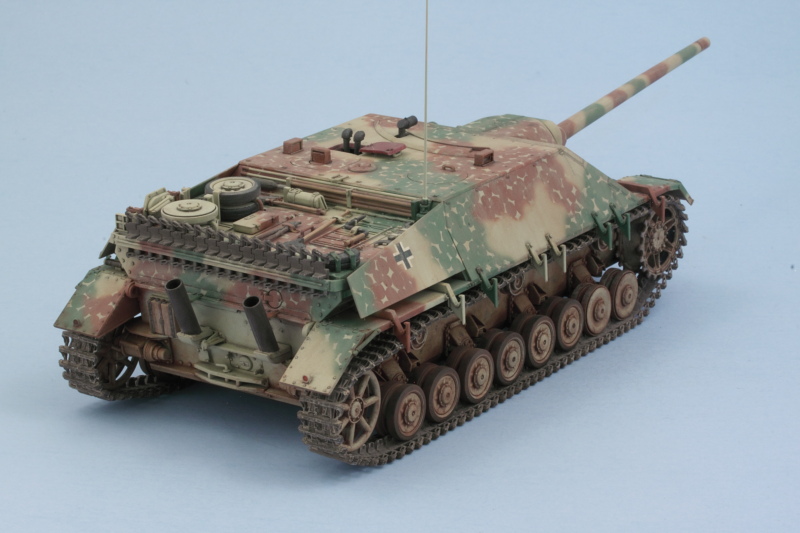
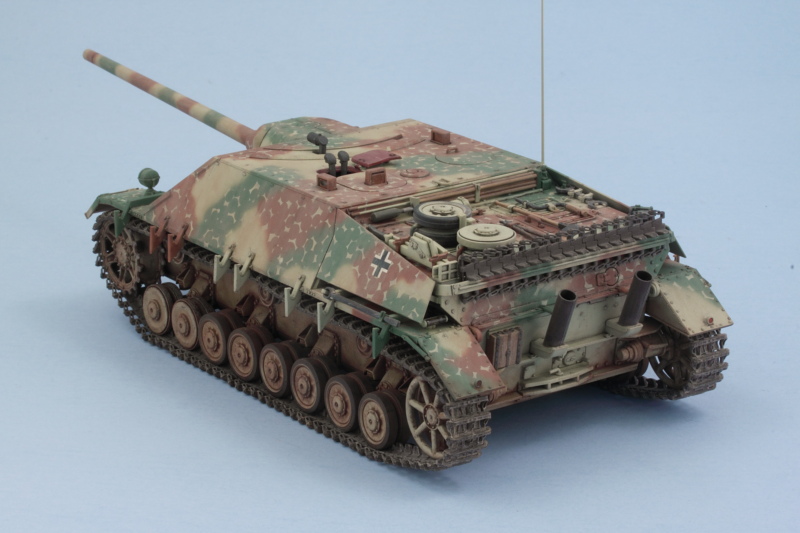
After I was done with the dot filters, I also gave the suspension and various details the Burnt Umber pin wash to create shadows and pop out the details.

Image

After completing this for both sides, the next step was to seal it all up with a dose of Testors Lusterless Flat in the spray can. Once that had dried, I removed the bits of blue tack poster putty that had been protecting the periscopes and touched them up where needed. The clear styrene rear Notek convoy light was detailed with some Tamiya Clear Smoke and installed into the holder on the left rear fender to round things out.

Image

Image

All that's left now is to get the tracks weathered up and ready for install and make the final push for the pigment weathering to the running gear.
Bill Plunk
Posts: 1245
Joined: Wed Sep 28, 2022 10:18 pm

WIP 08-15-2015

Post by Bill Plunk »

I've been working on the pigment side of things for this project. First up were the tracks. I used Mig Dried Mud and applied it wet using ordinary tap water with a small drop of liquid dishwashing soap added to break its surface tension. This was 'painted' onto the tracks and allowed to air dry. Once dry, I worked on it with some stiff bristled brushes to remove pigment and get the look I was after.

Image

The lower hull also got some attention. Using the same wet approach, I used som Mig Dark Mud pigment around the suspension elements and the road wheels.

Image

Tracks will go on next and then just a couple of small things left to wrap this one up!
Bill Plunk
Posts: 1245
Joined: Wed Sep 28, 2022 10:18 pm

WIP 08-16-2015

Post by Bill Plunk »

Finished up with the pigment work and got the tracks installed on both sides. I used a little bit of the Dry Mud pigment as 'dust' for things like the spare road wheel, tracks, tools, etc. to give them a little more blended look while I was at it.

Sprockets were permanently installed along with the MK workable tracks and the idlers tweaked a bit here and there where needed to get the desired sag.

Image

Image

Just about done! ;)
Bill Plunk
Posts: 1245
Joined: Wed Sep 28, 2022 10:18 pm

Completion 08-18-2015

Post by Bill Plunk »

Time to put the final nails in this one, the last remaining detail was the addition of an RB Models 2m brass antenna. A small dose of CA glue and then painted in place and the JP IV sailed across the finish line!

Image

Then it was time for the walk-arounds.

Image

Image

Image

Image
Bill Plunk
Posts: 1245
Joined: Wed Sep 28, 2022 10:18 pm

Publication December 2019

Post by Bill Plunk »

Post Reply